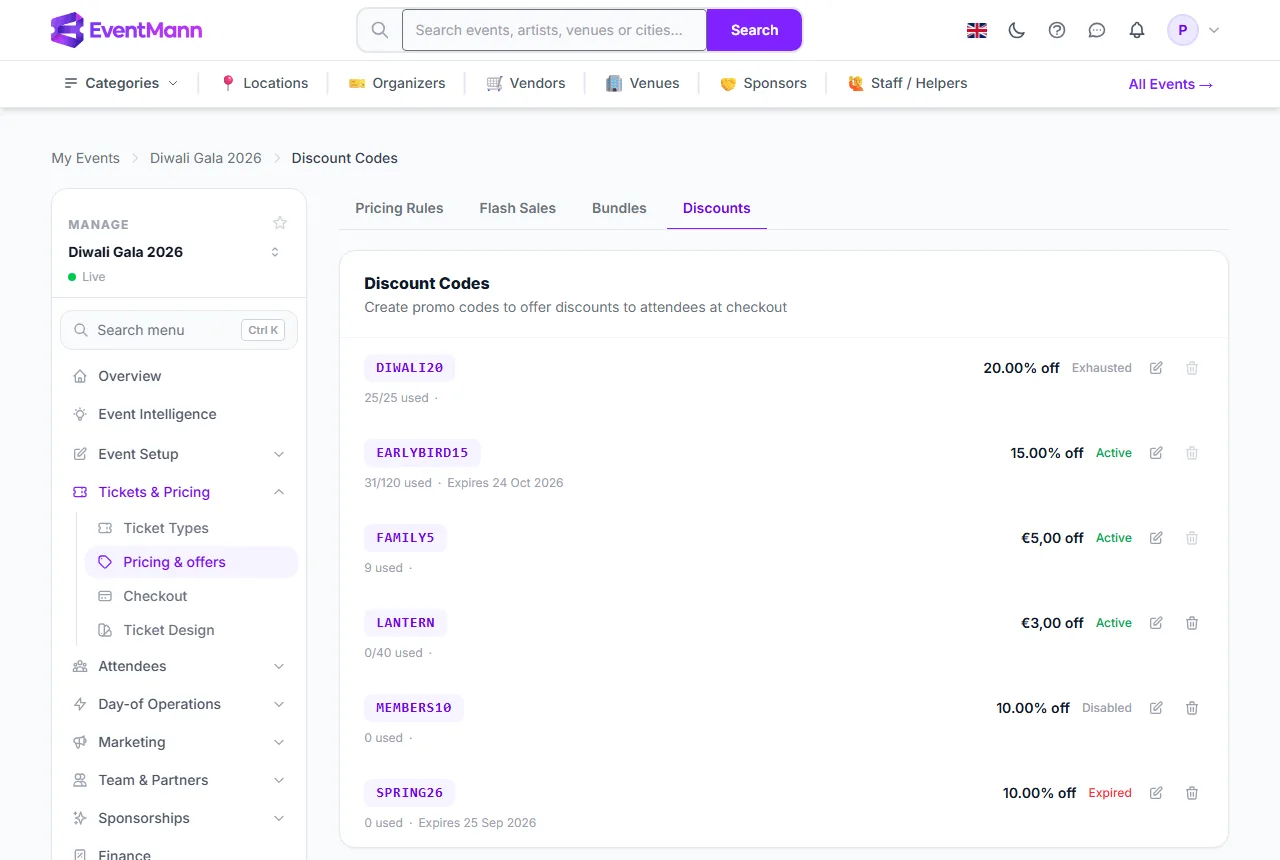
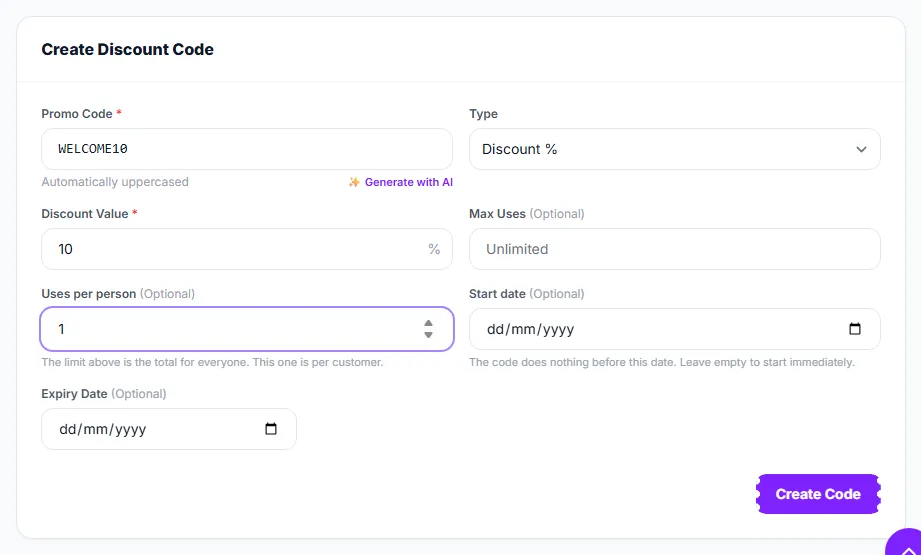
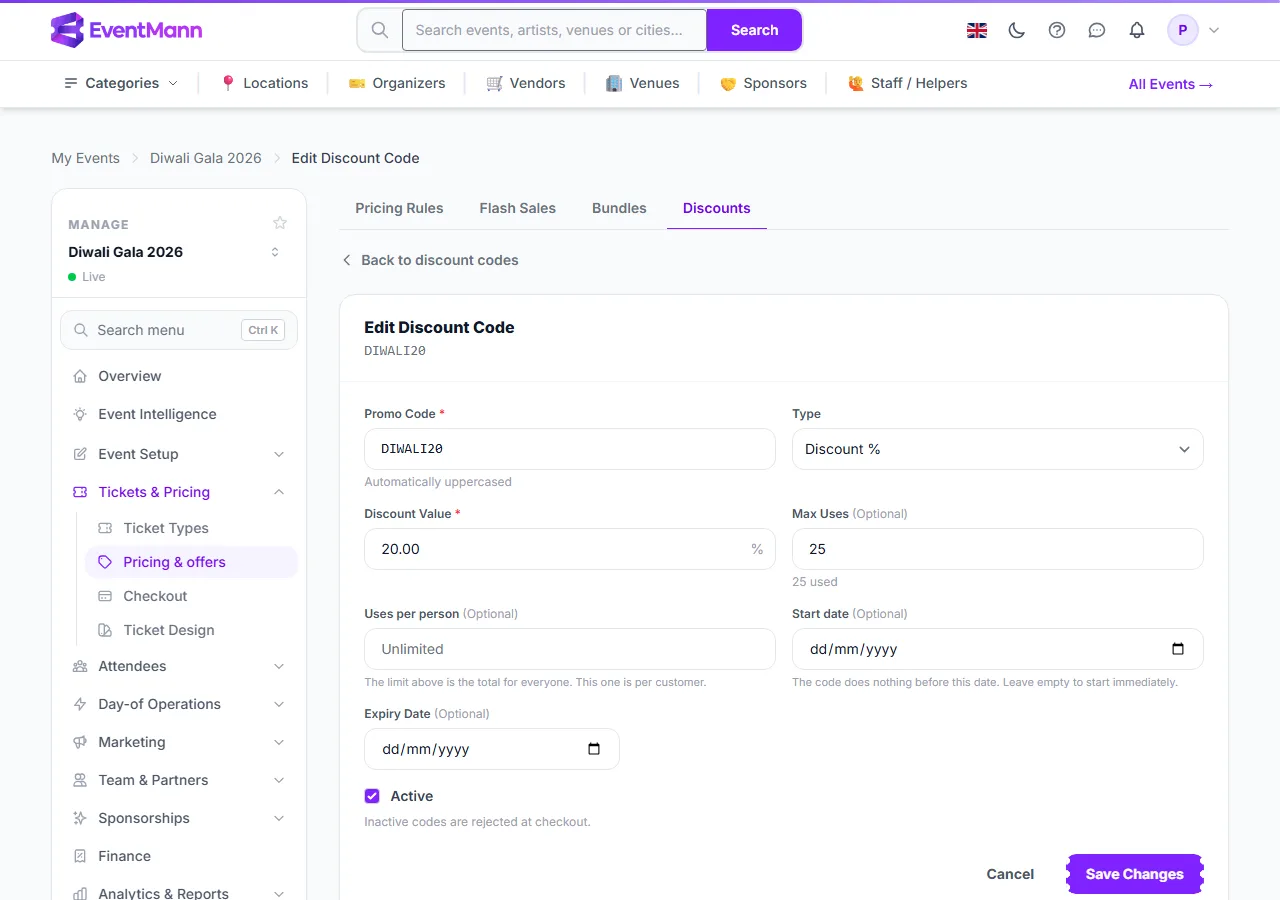
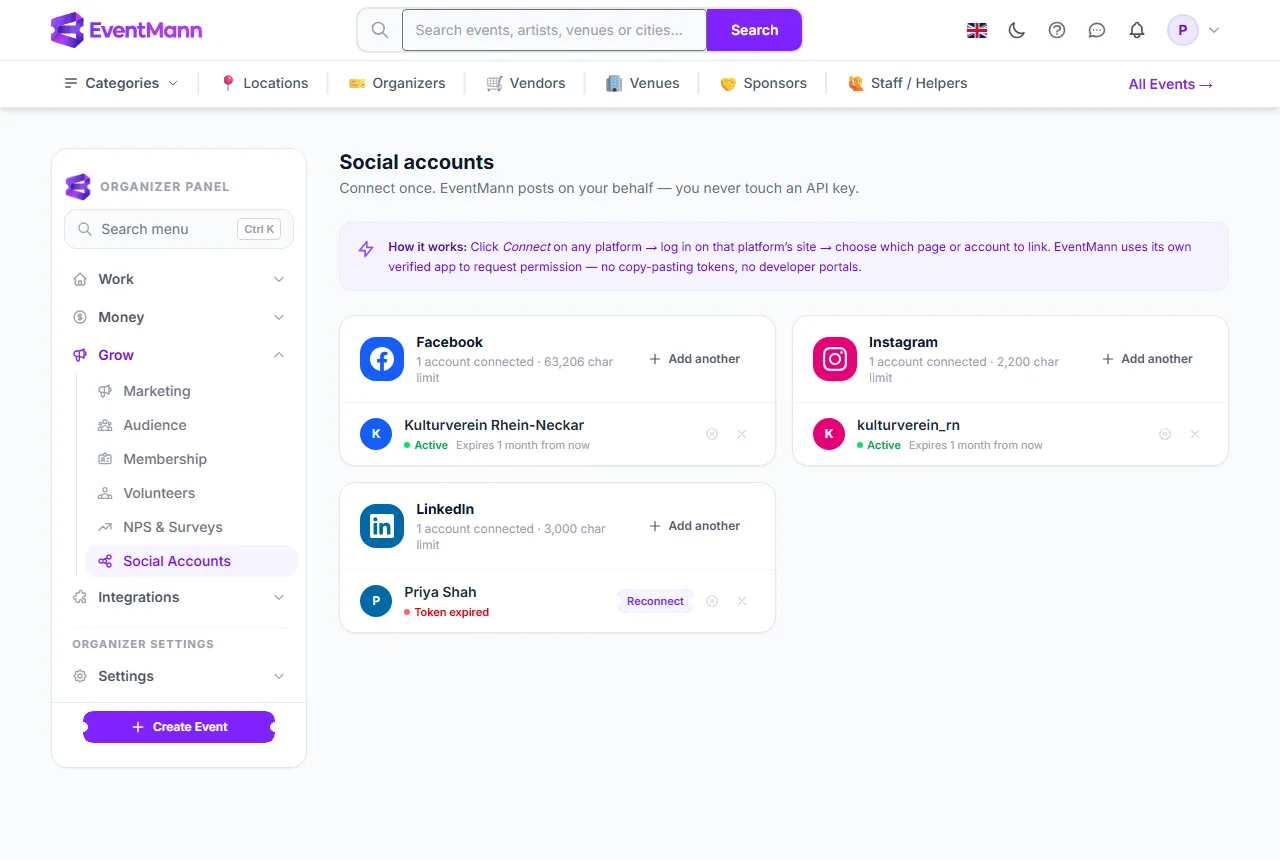
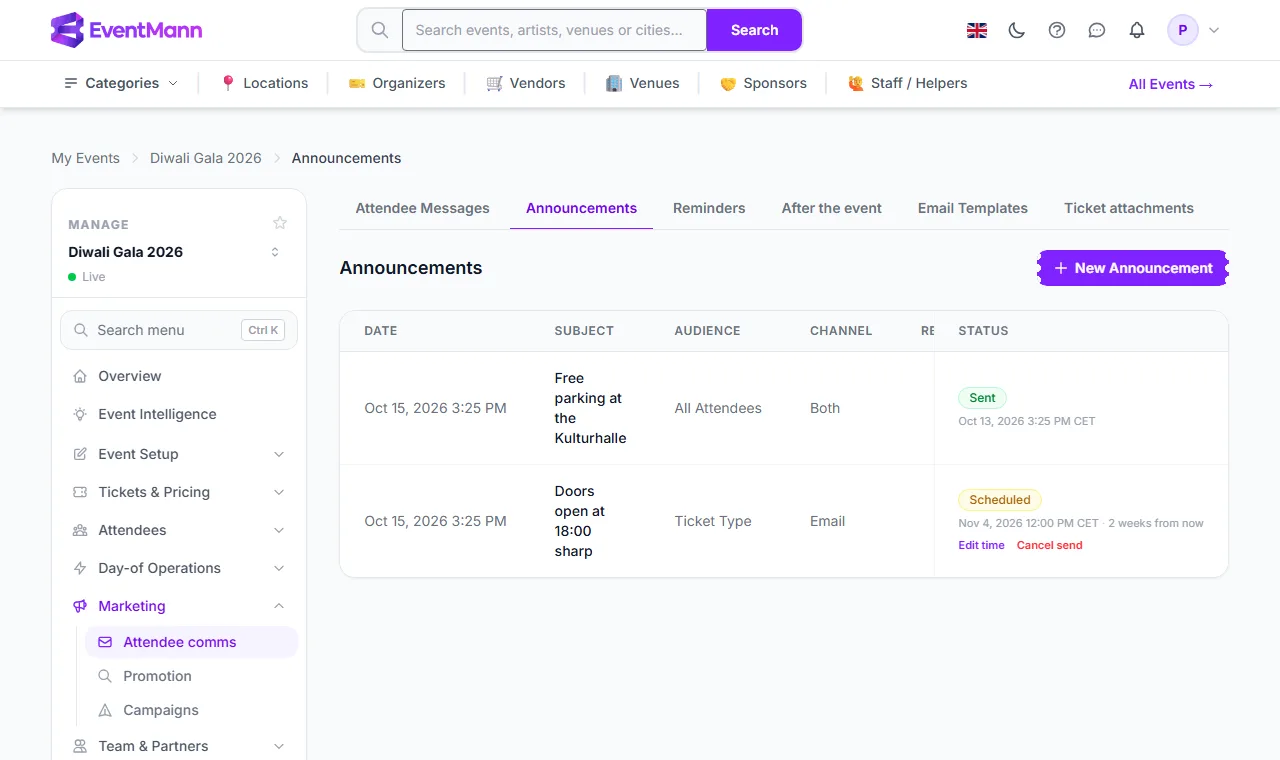
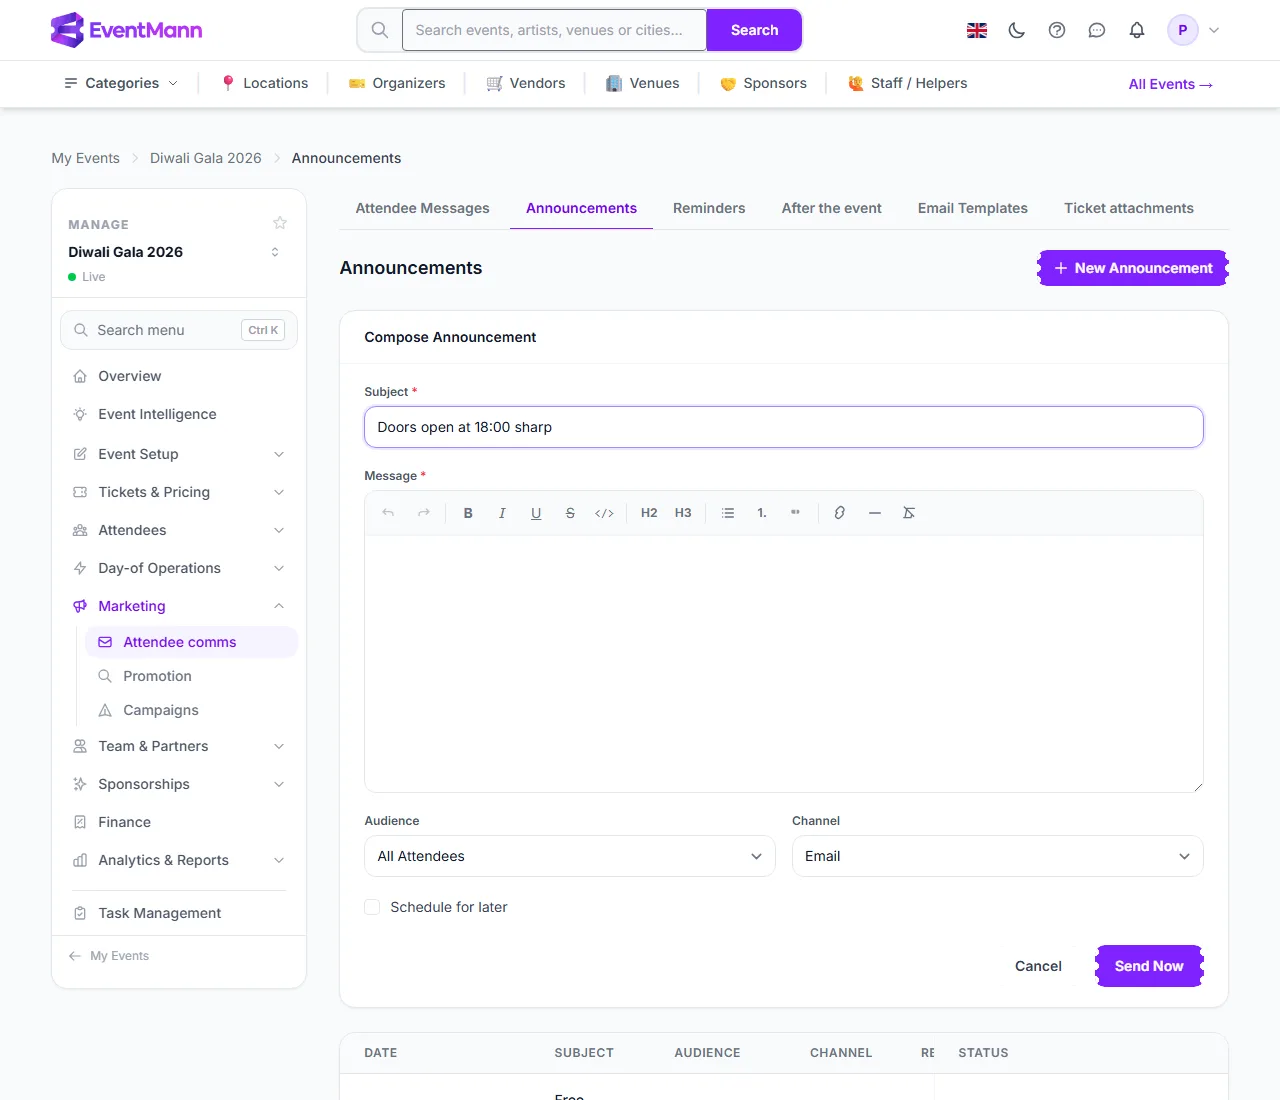
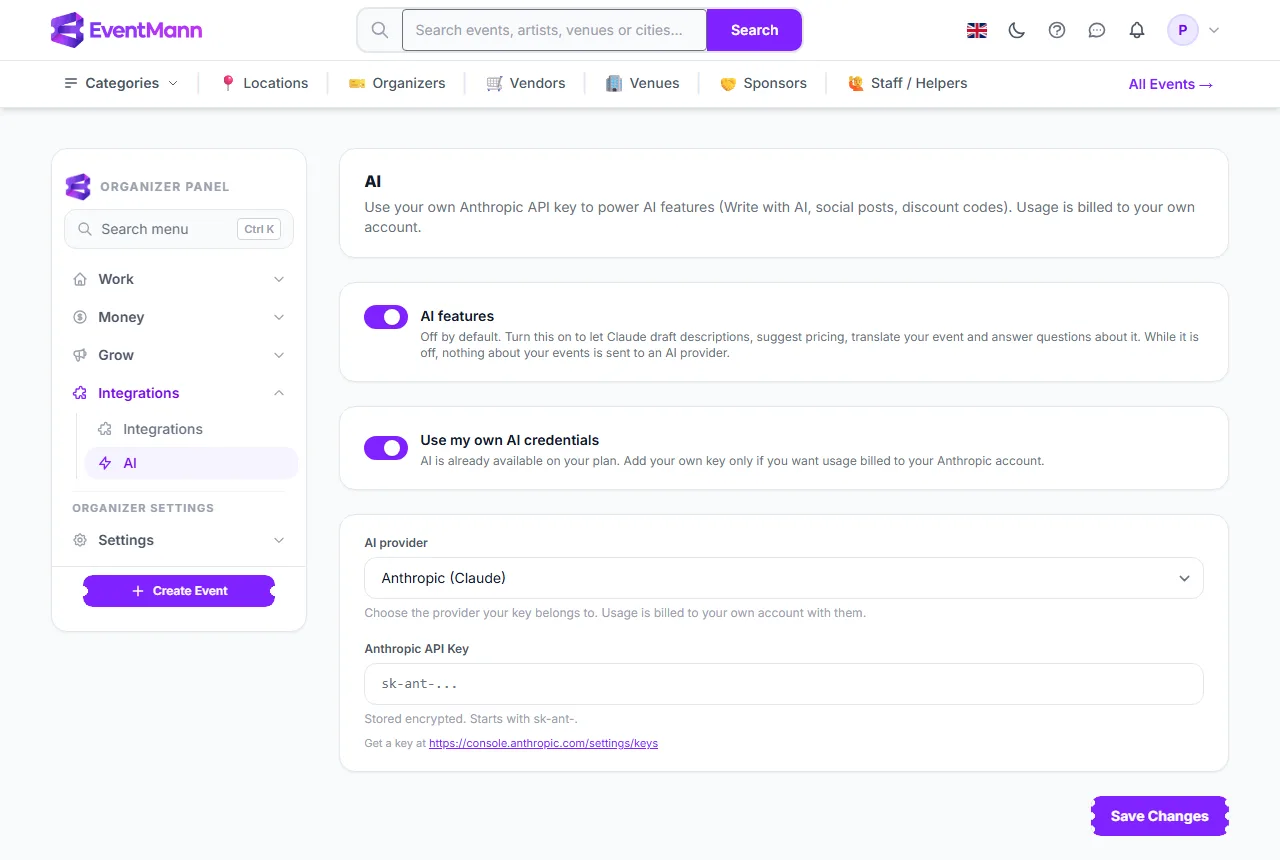
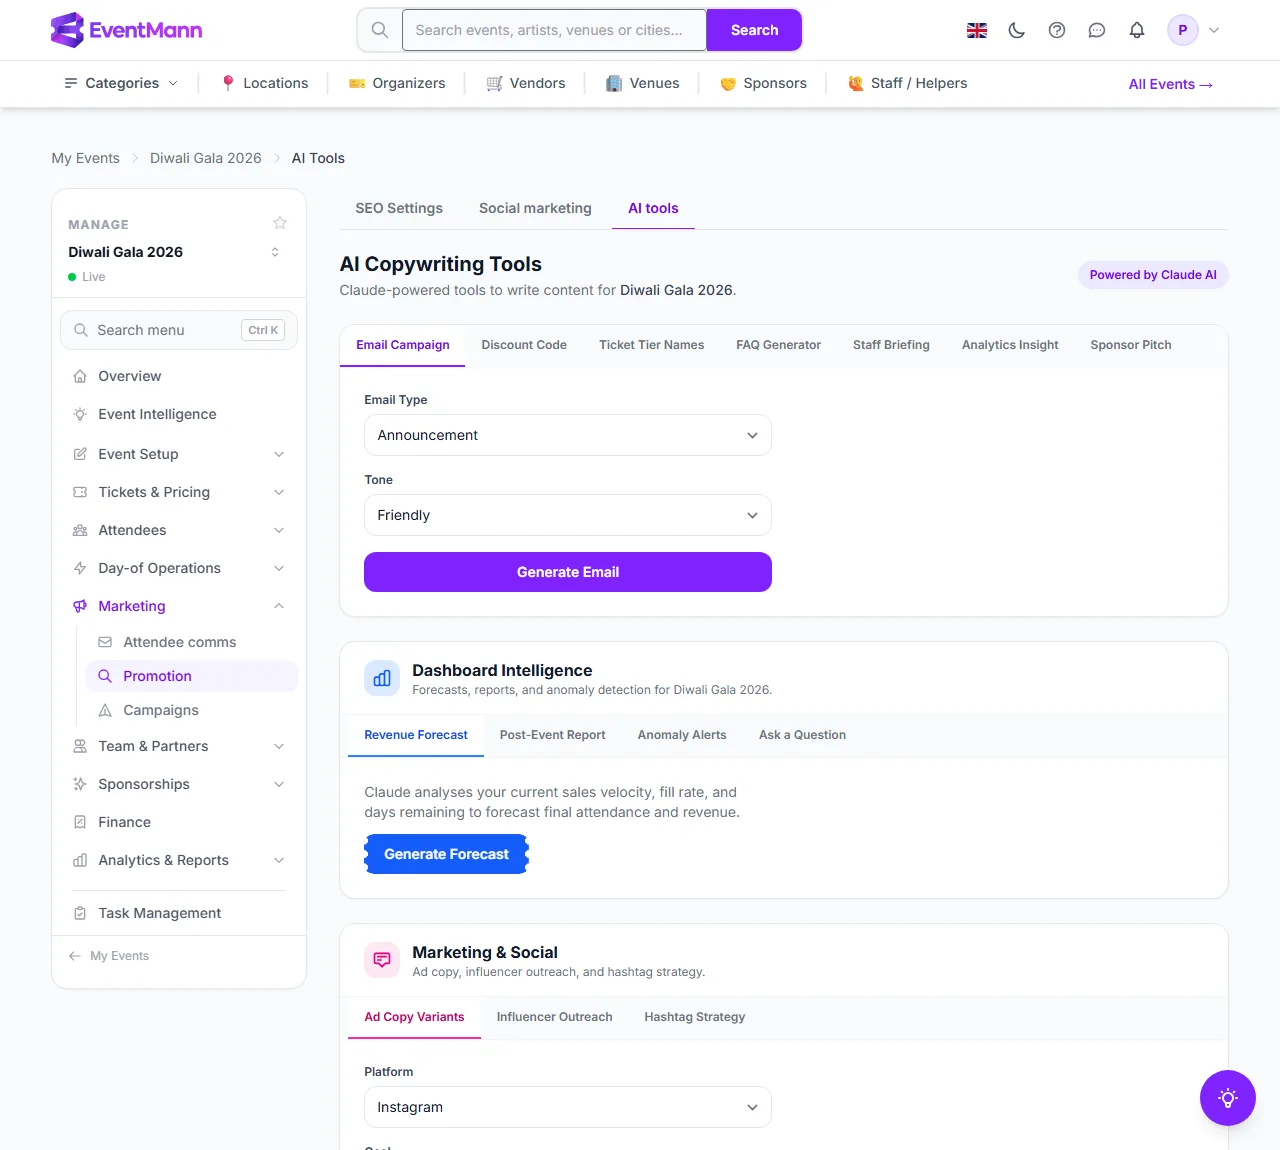
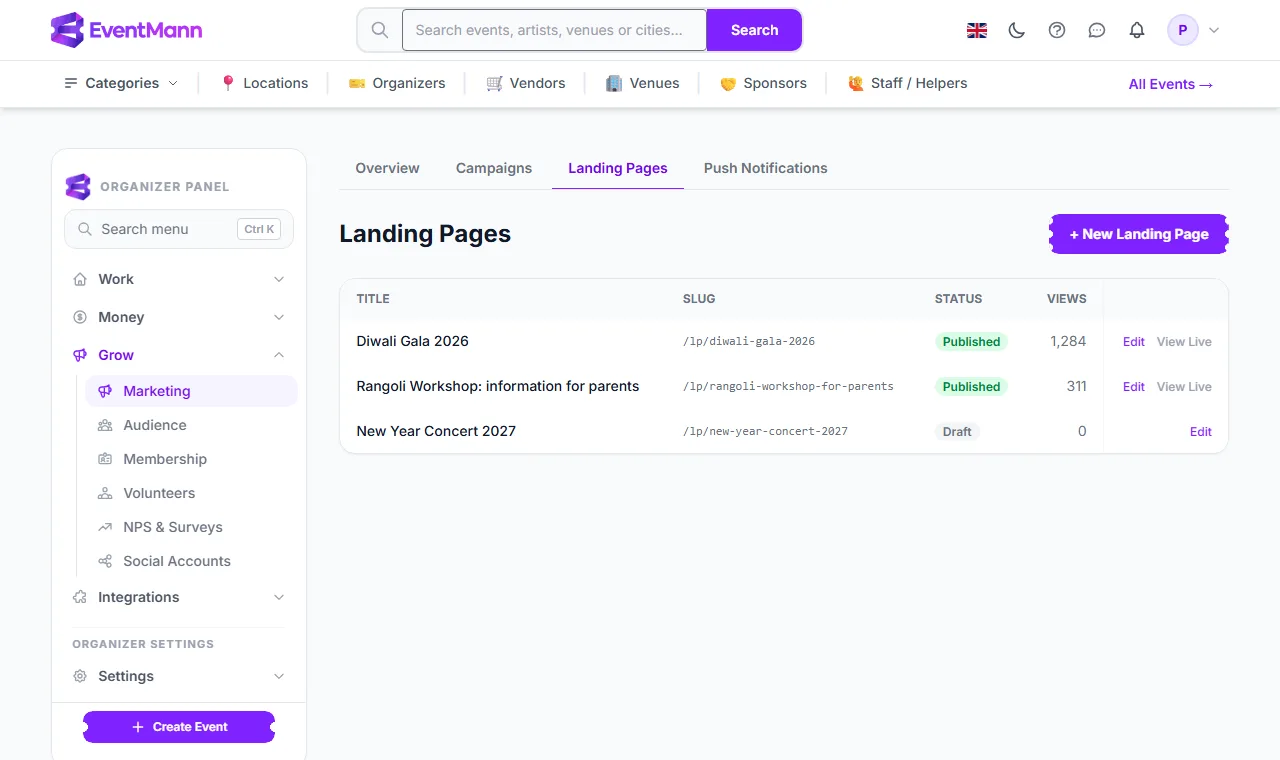
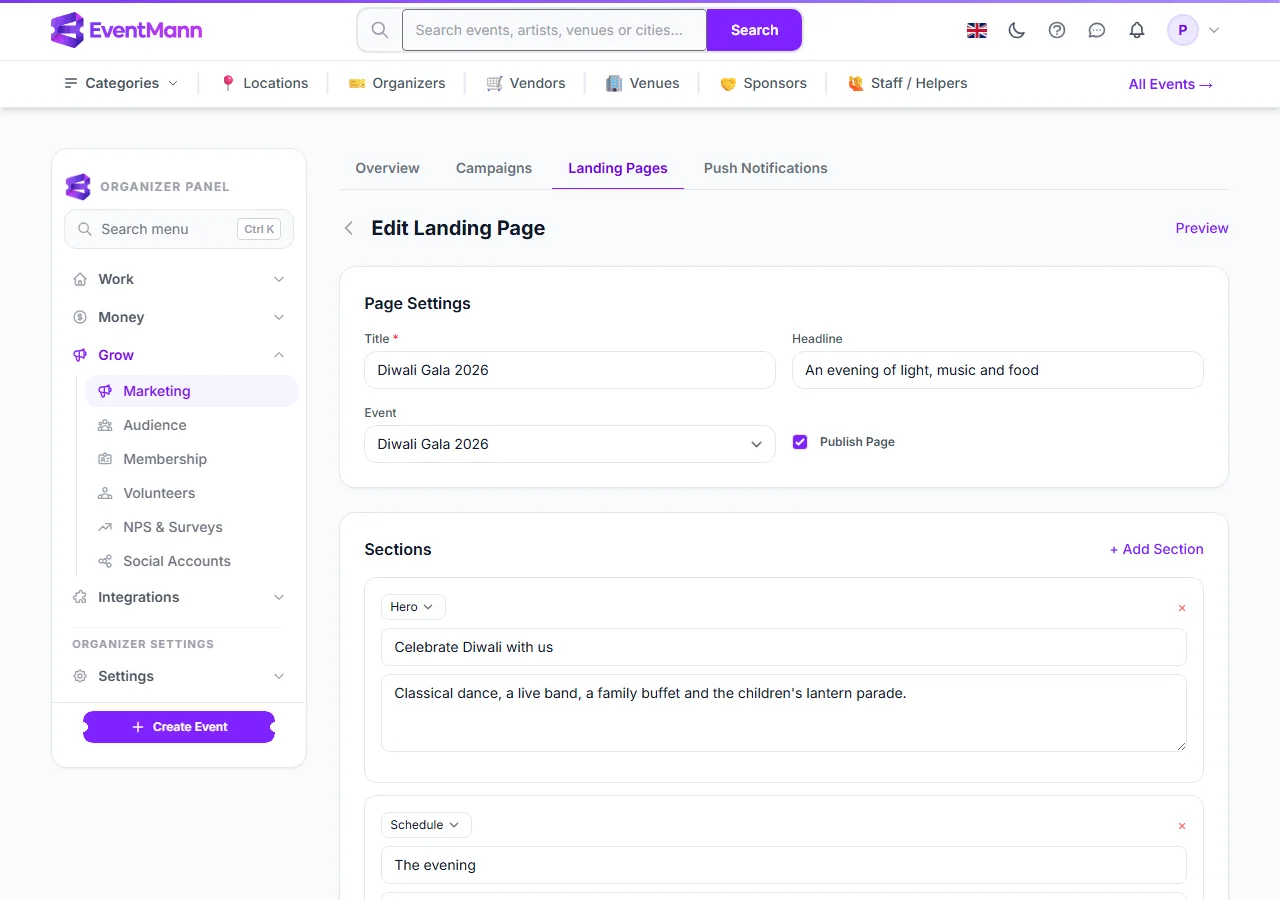
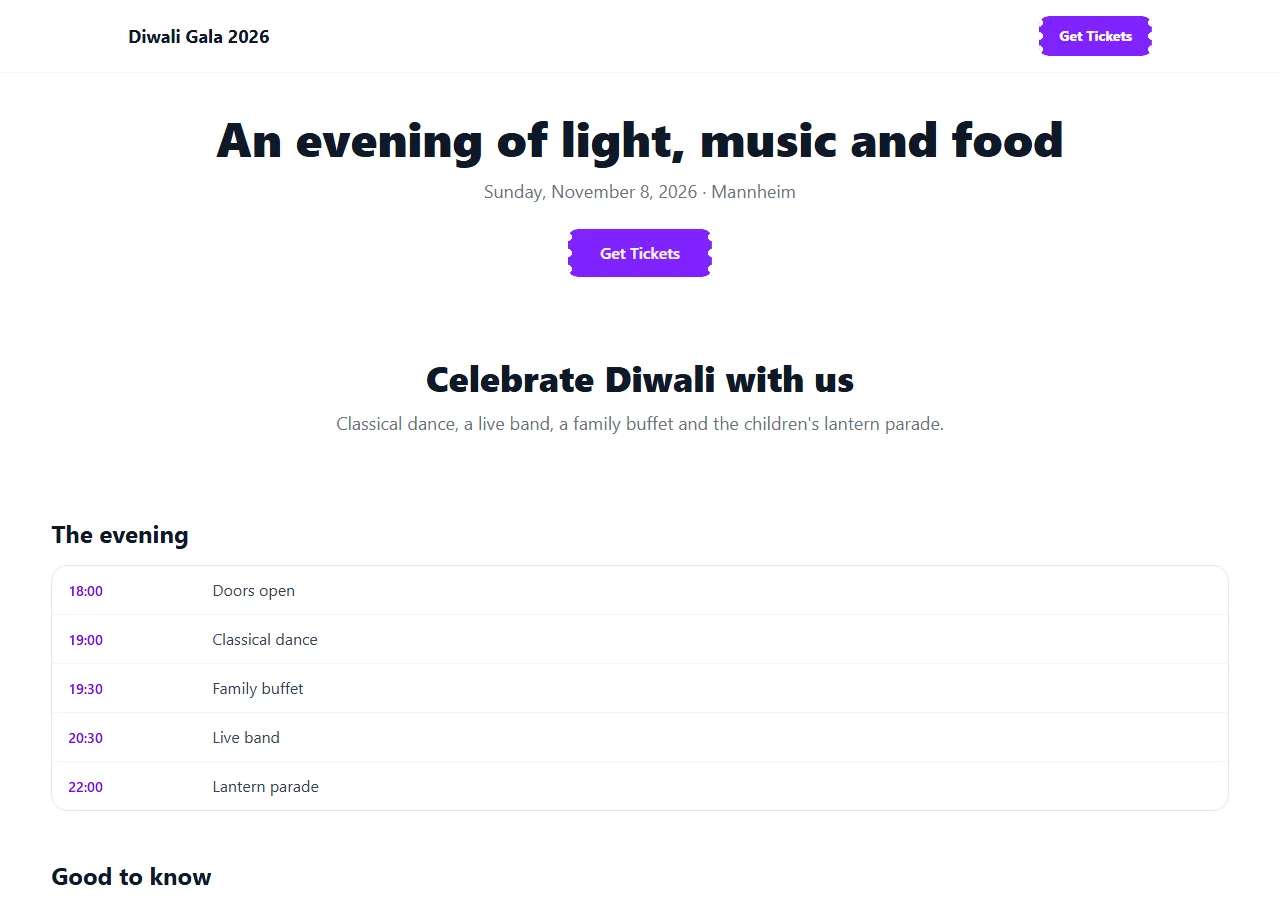
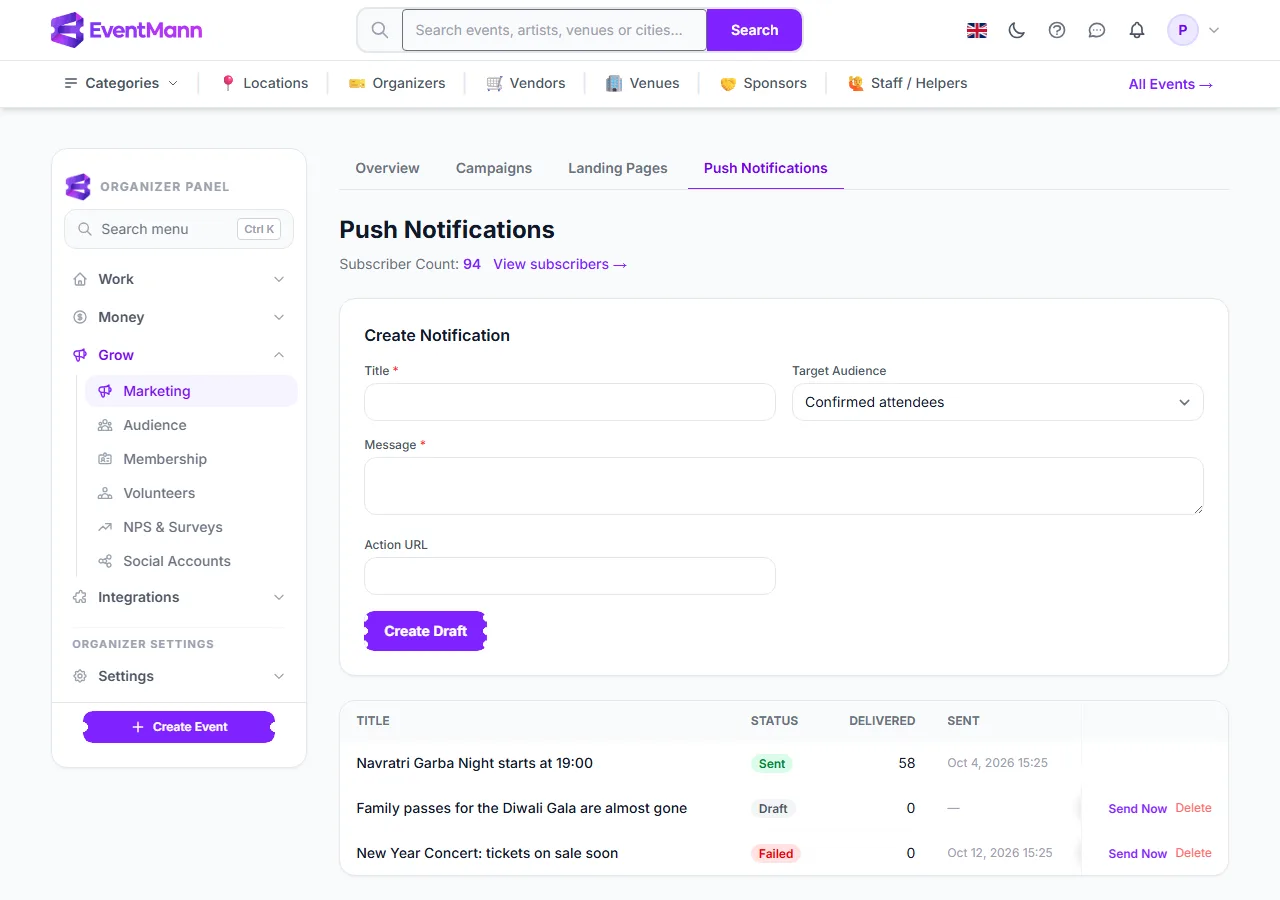
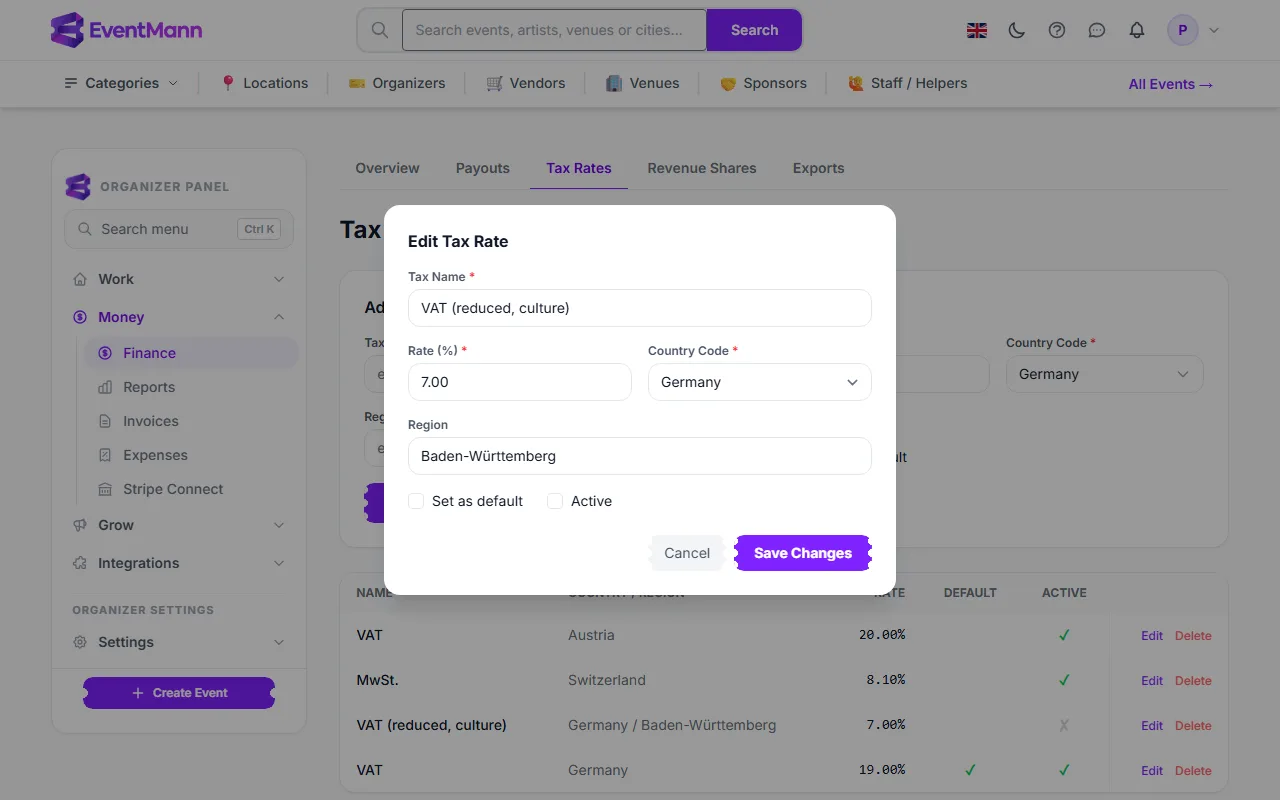
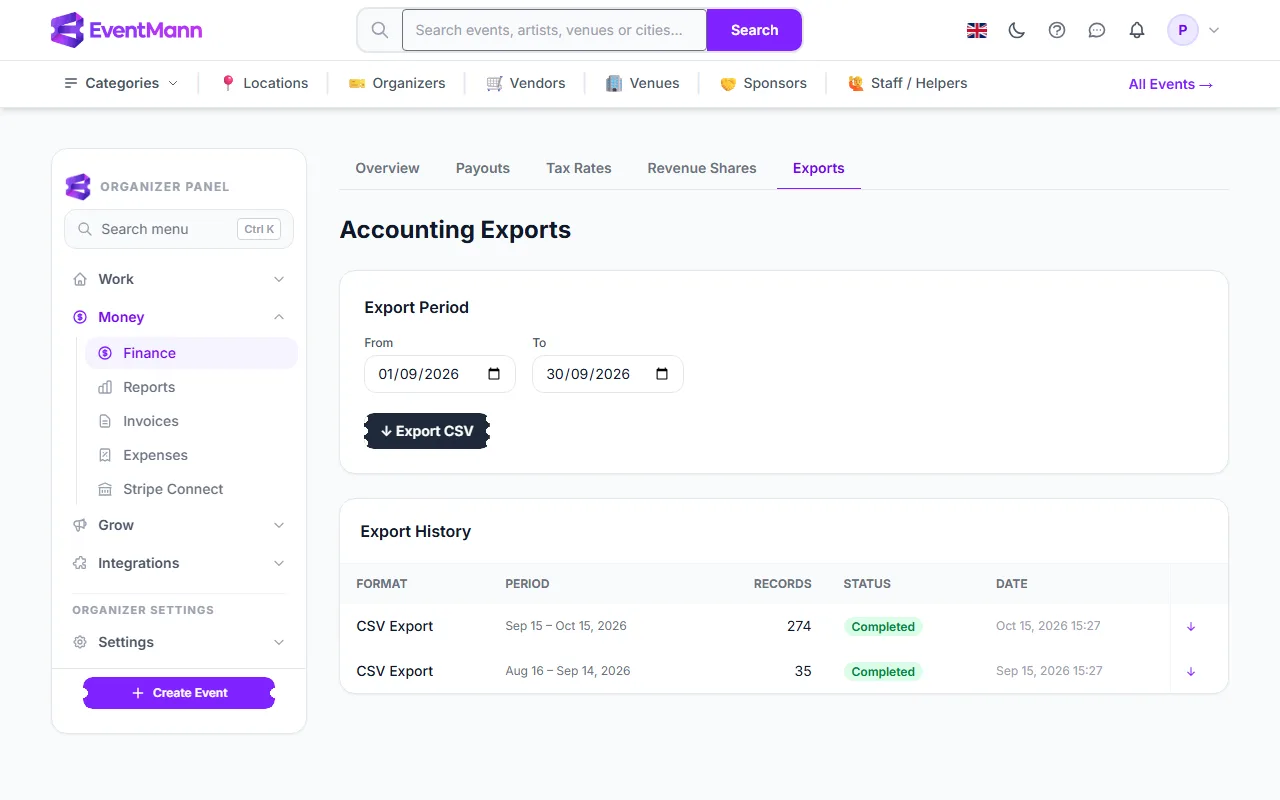
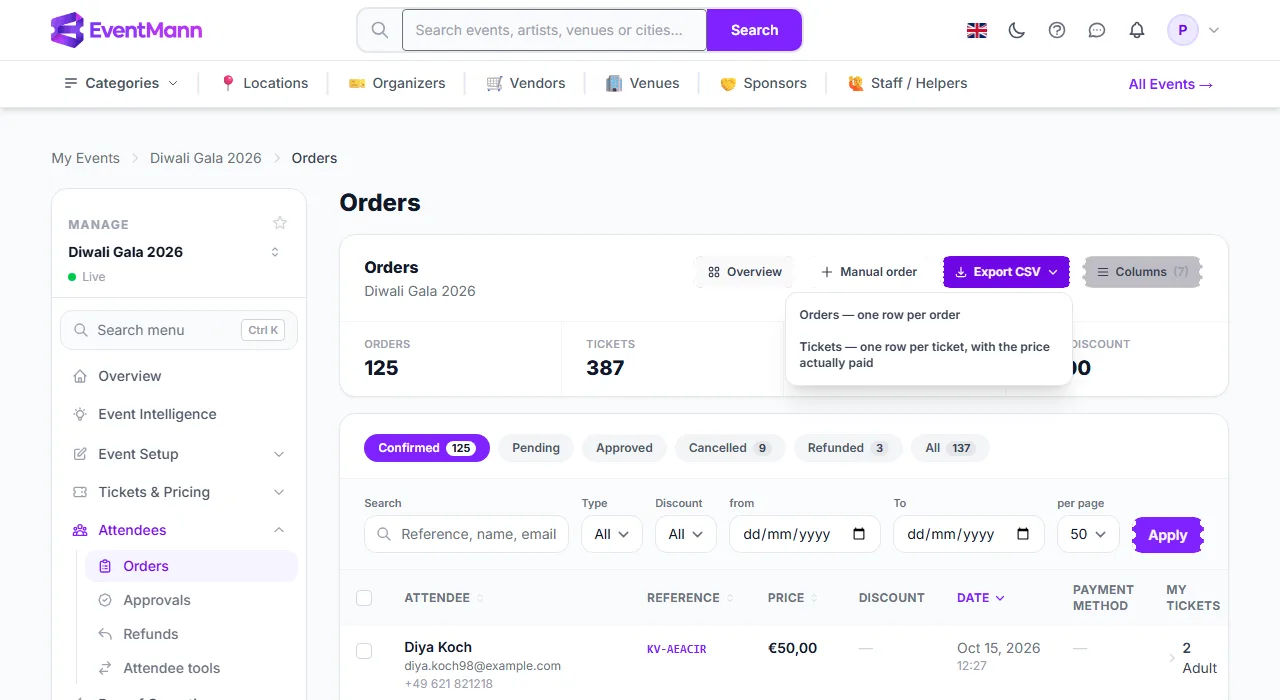
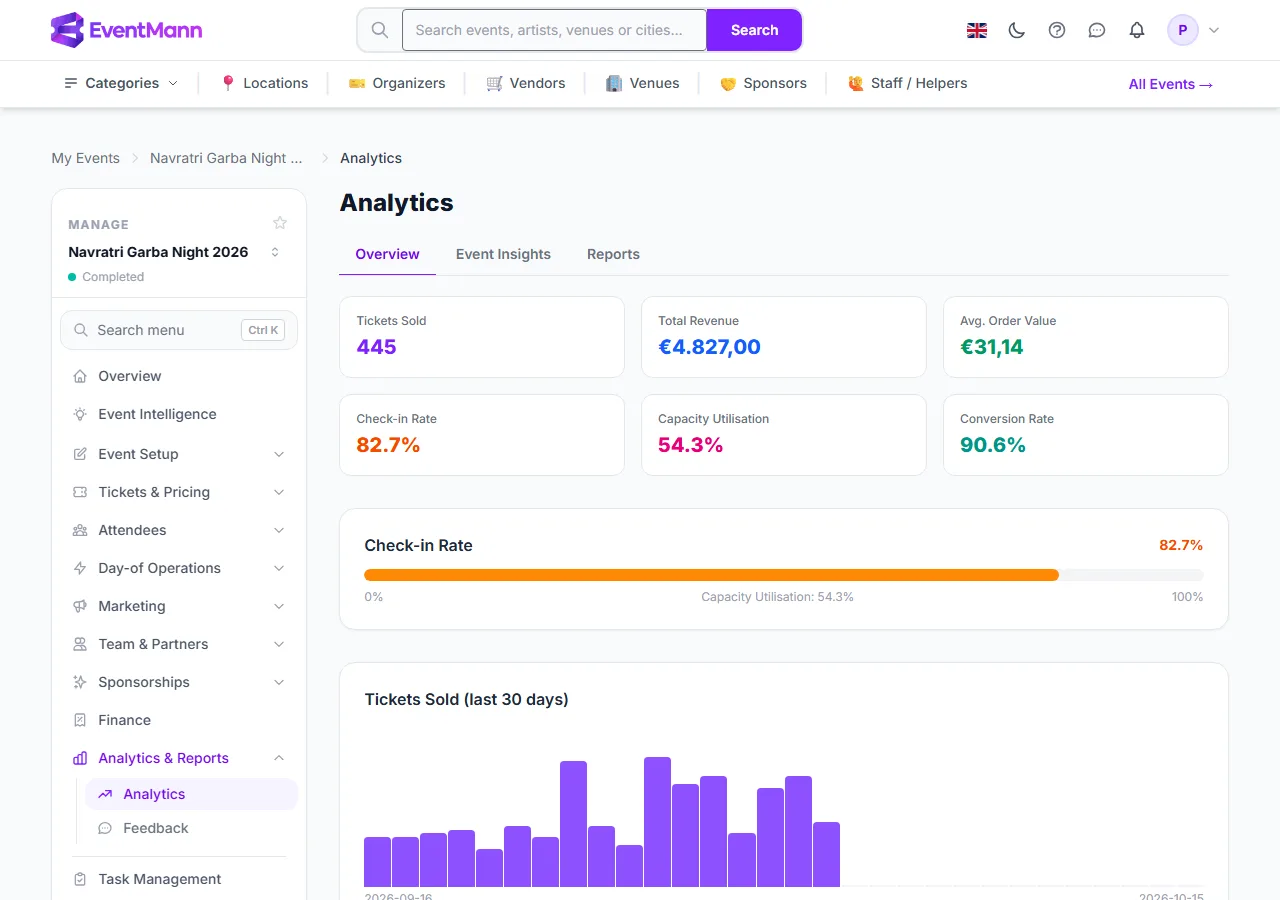
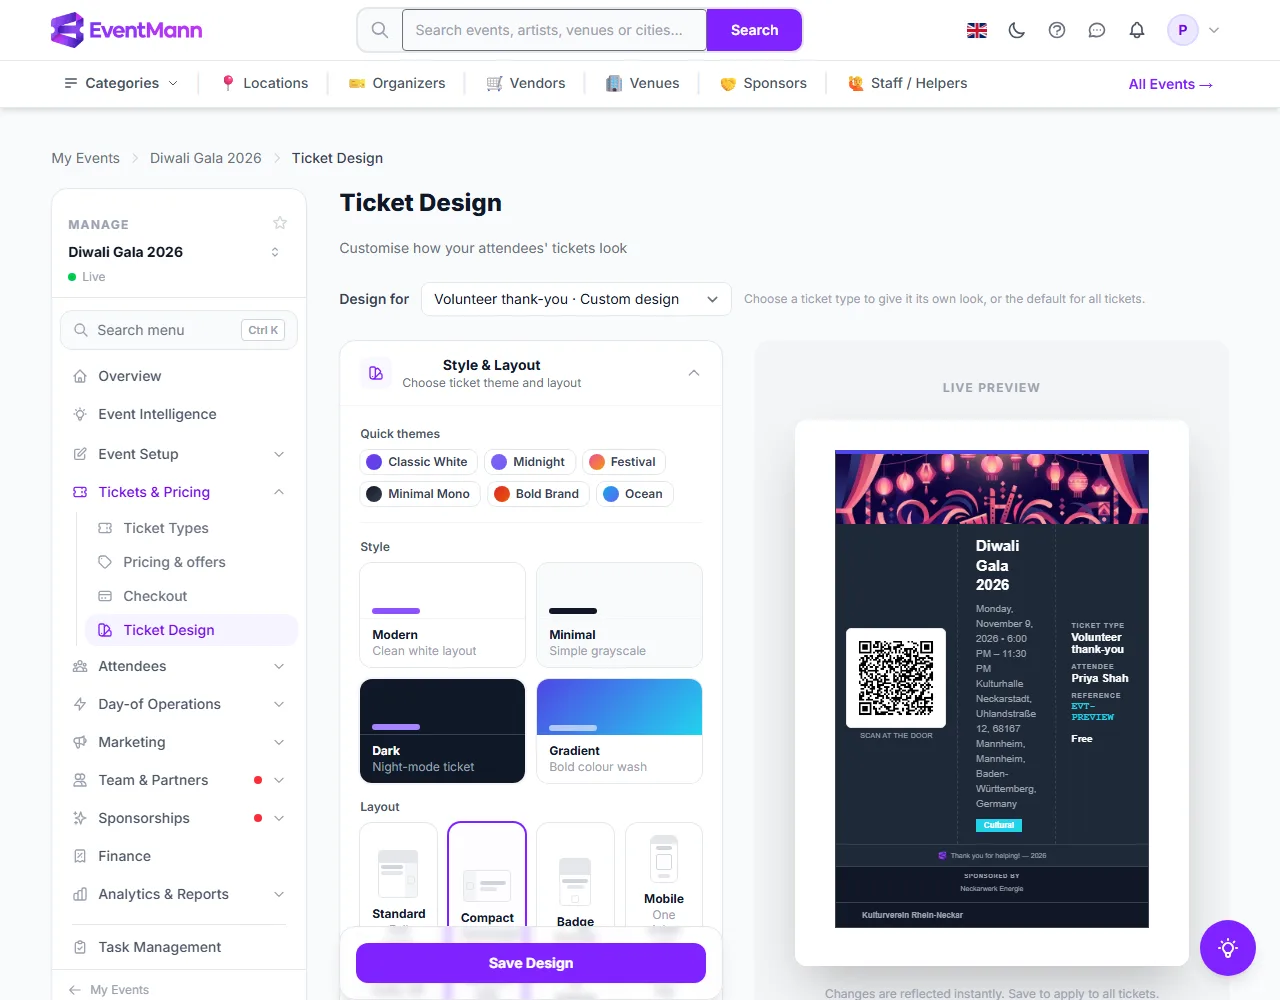
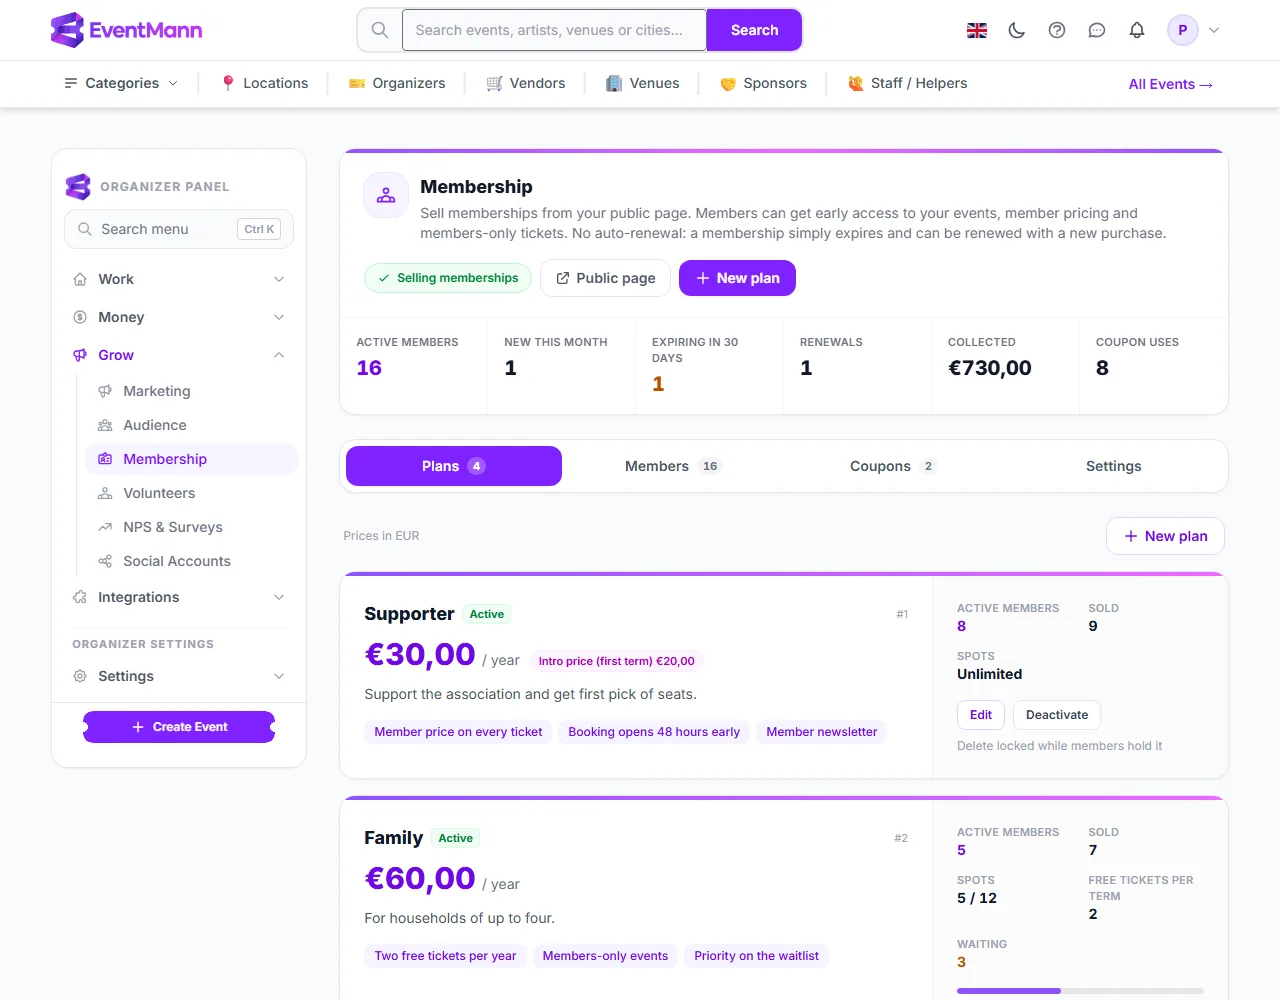
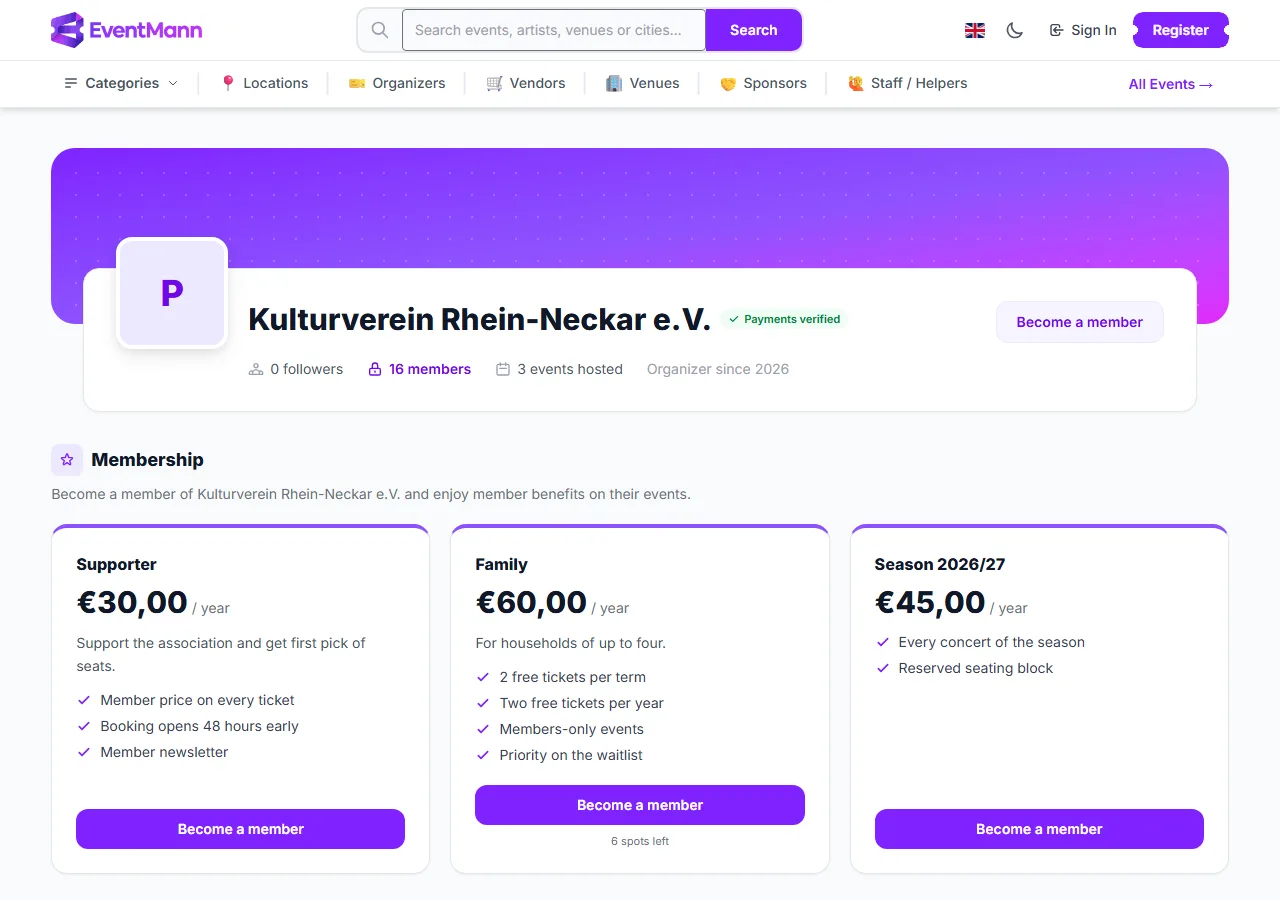
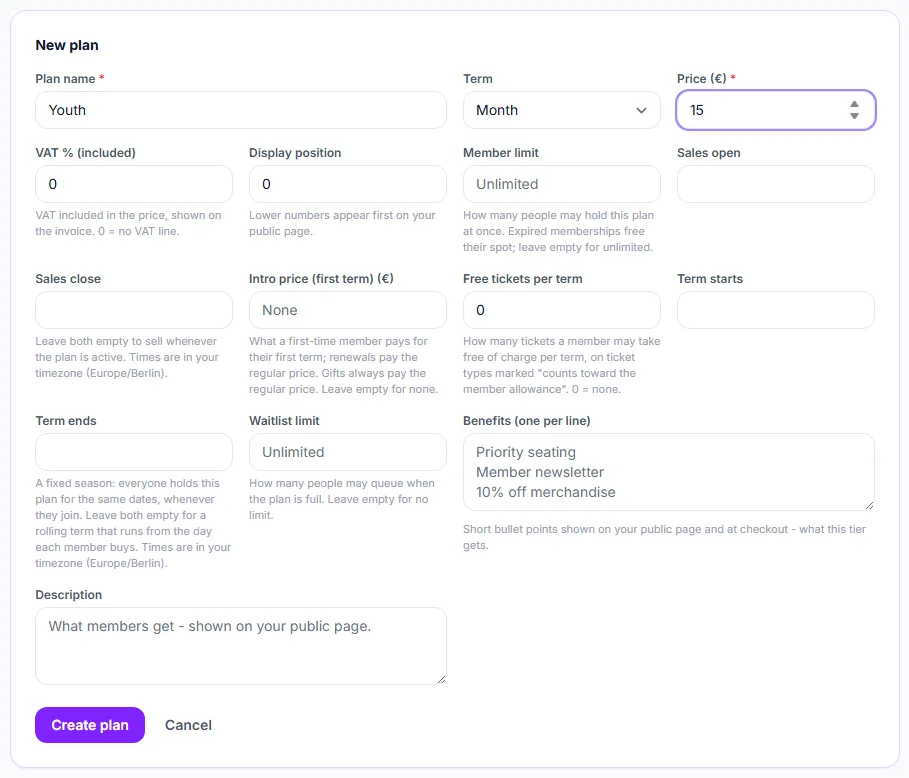
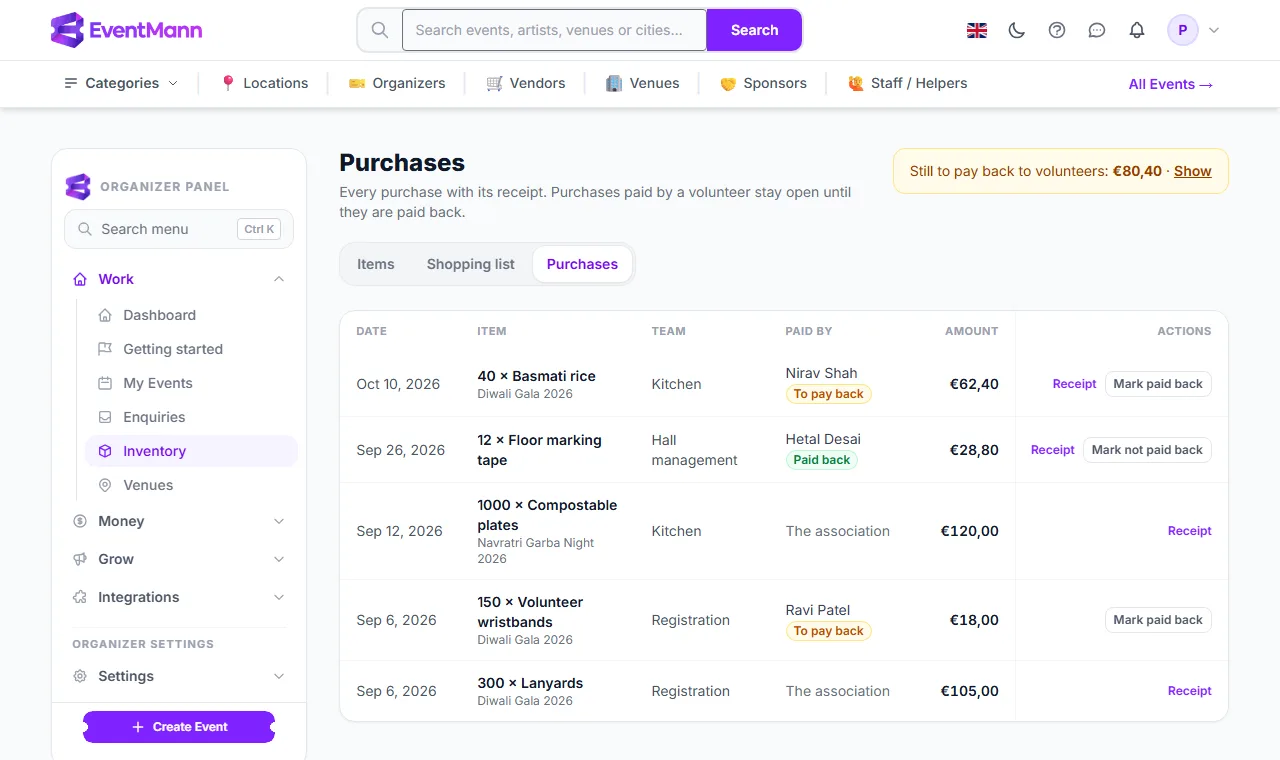
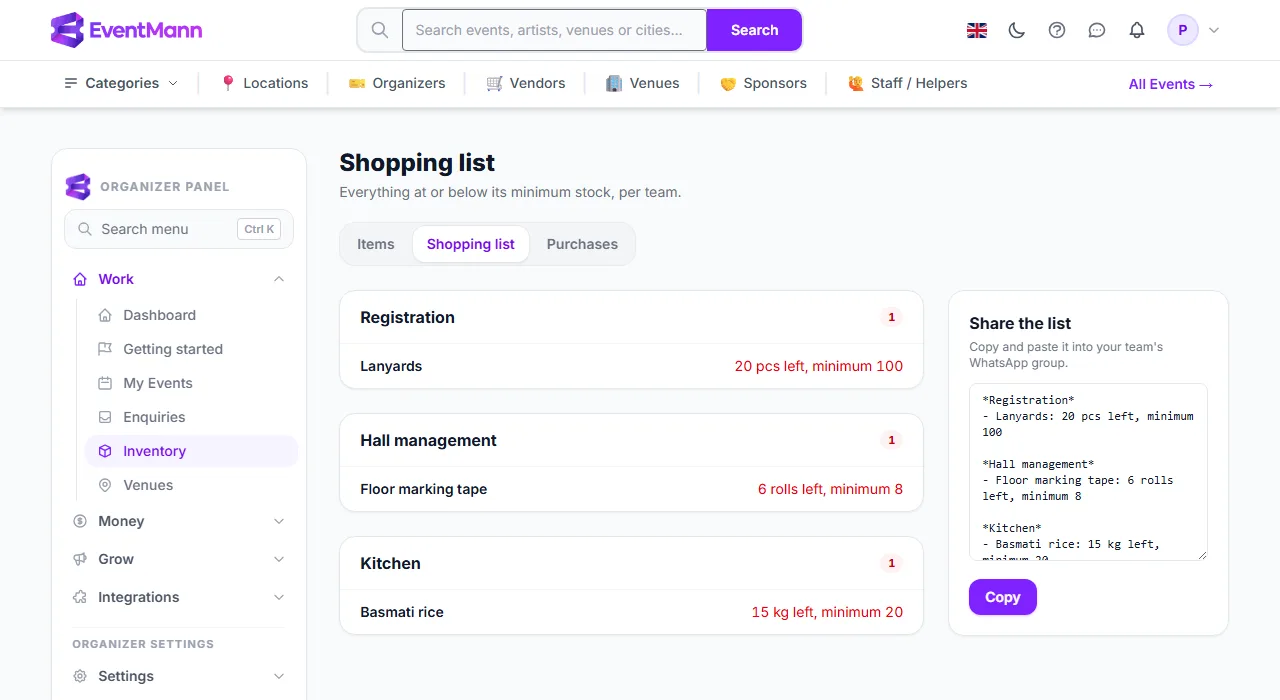
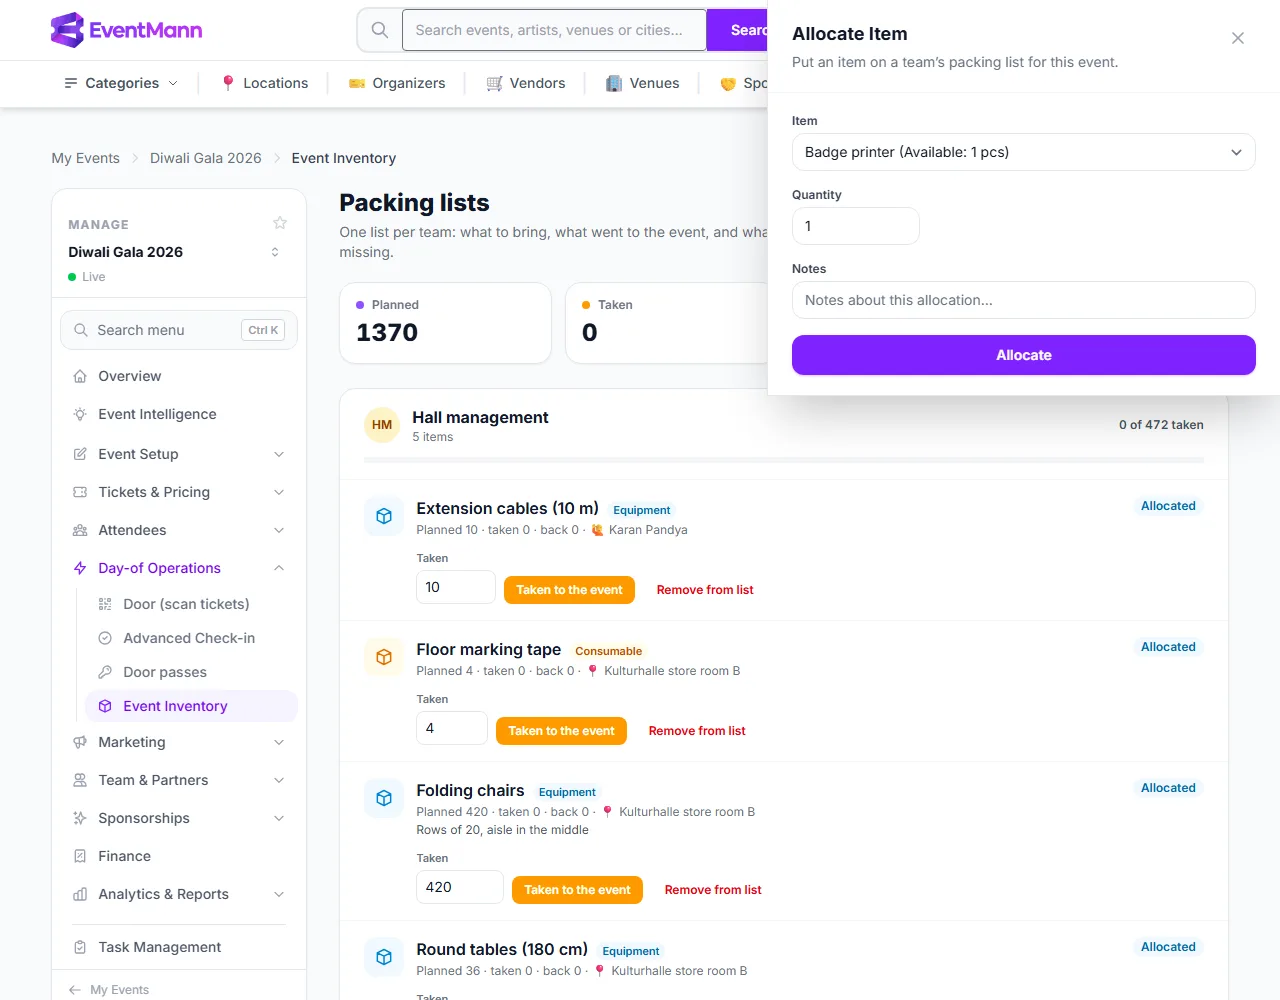
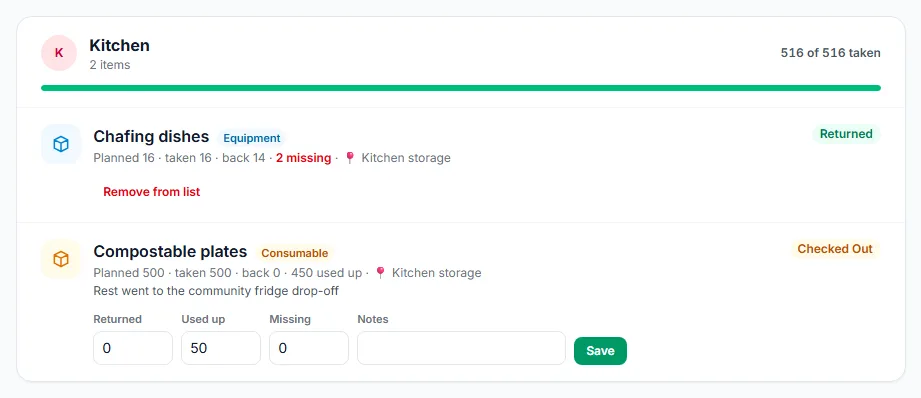
Everything an organizer does on EventMann, from the first event to the last report: events and tickets, orders, marketing, money, your team and your volunteers.
Edition of October 18, 2026
The latest version of every chapter is in the Help Centre: https://eventmann.com/help
Chapter 1
Getting started
1.1 Organizer Dashboard
The dashboard is the first page you see after signing in as an organizer: a quick read on how your events are doing and what is waiting for you. Open it from the sidebar under Work → Dashboard. The number badge beside Dashboard in the sidebar is the total of everything in the “Needs attention” card.
What you can do here
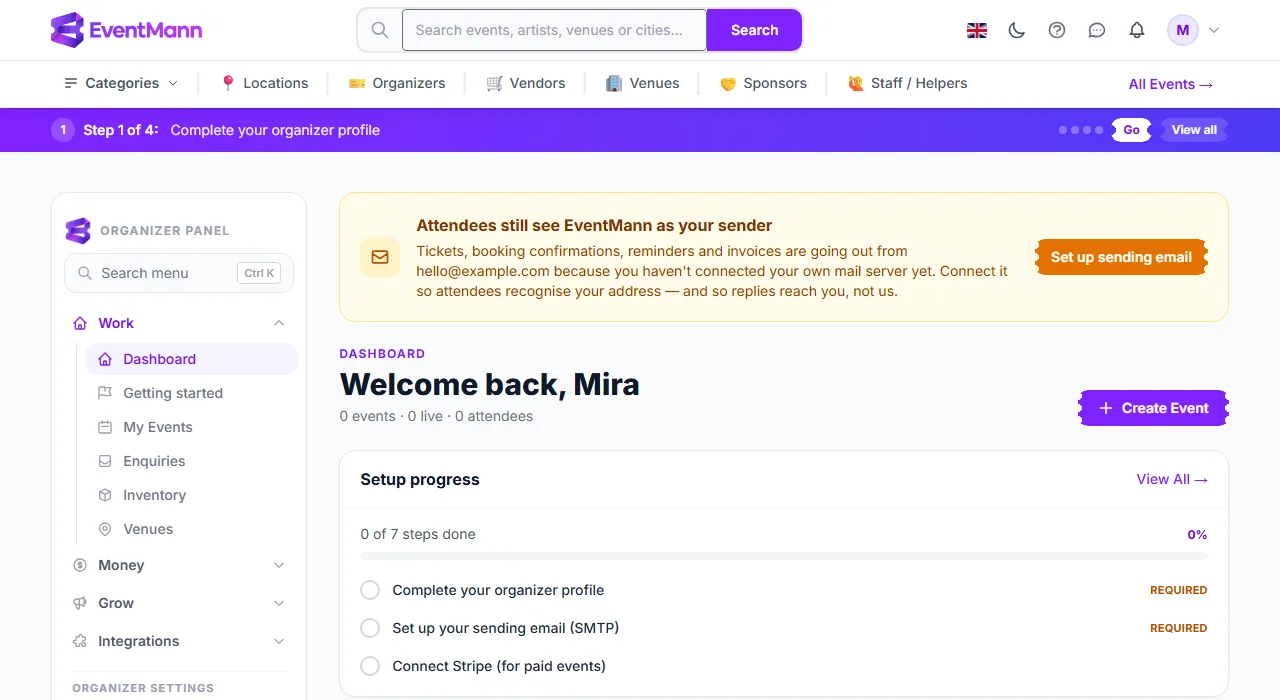
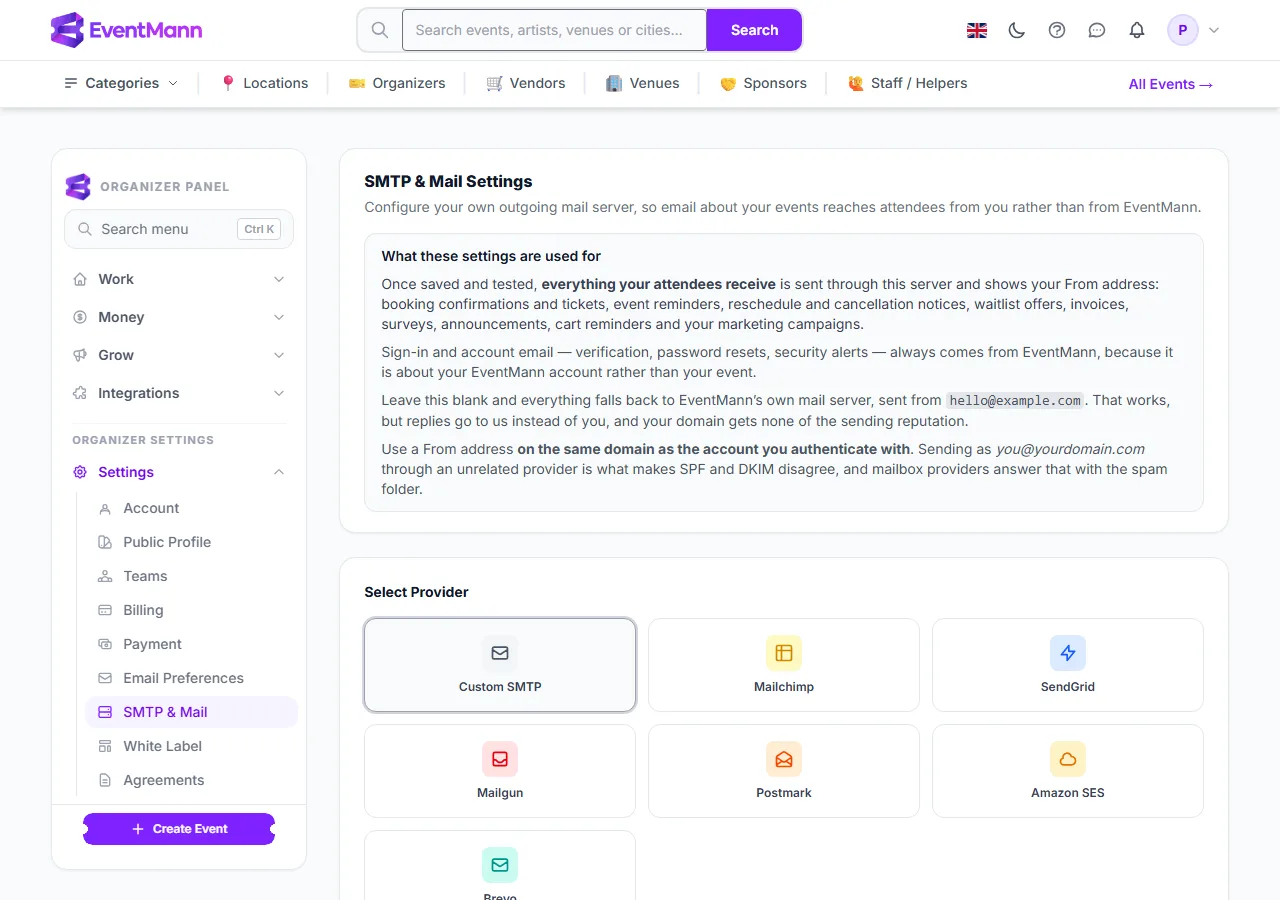
If the amber banner ① is showing, attendees still receive your tickets and reminders from the EventMann address. Click Set up sending email to connect your own mail server; the banner disappears as soon as an active connection is saved. See Who your emails are sent from.
Read Needs attention ② first. Each row is one thing waiting for you on one event — approval requests, refund requests, unread attendee messages, waitlist entries, shift swaps, sponsor applications, and messages sent through your public contact form. The red figure is how many are waiting; click the row to open that queue. The card only appears when something is waiting, and it reads the same counts as the sidebar badge, so the two cannot disagree.
Check the four figures ③: Total Revenue, Tickets Sold, Avg. Order Value and Refund Rate.
1234The organizer dashboard: sender banner, Needs attention, the four figures and the Create Event button
The figures explained
Total Revenue — the total of your confirmed orders, as charged: refunds are not subtracted here (the Finance screens show the net figure). If your events are priced in more than one currency you see one line per currency, never a blended total; the average order value then shows “mixed currencies” instead of a number.
Tickets Sold — tickets on confirmed orders across all your events.
Avg. Order Value — the average total of a confirmed order.
Refund Rate — the share of paid orders that have had a refund, full or partial.
The line under your name (“9 events · 4 live · 301 attendees”) counts every event you own, the ones that are live, and confirmed orders.
Events, revenue and pipeline
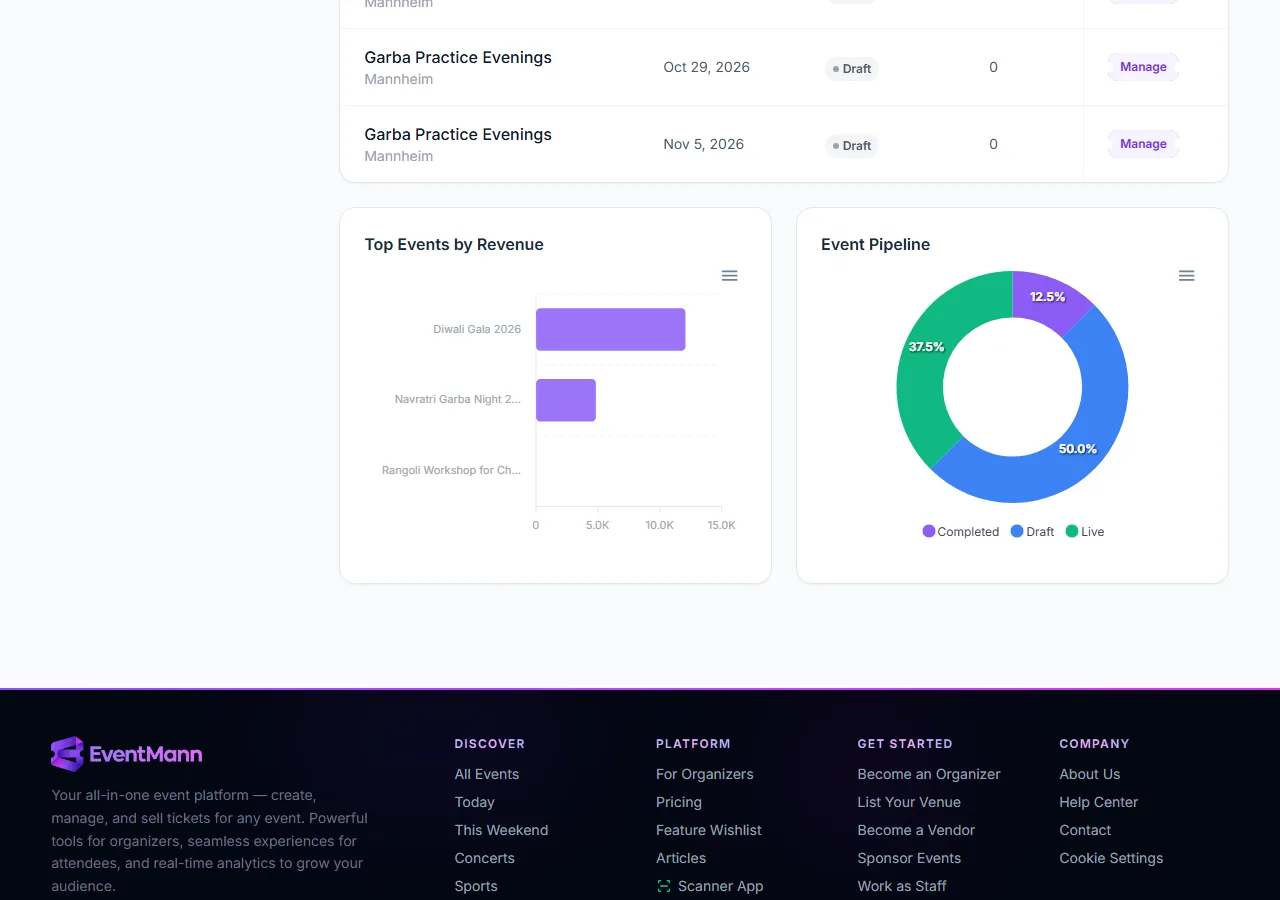
Below the figures, My Events lists a preview of your events with date, status, number of orders and a Manage button. Two charts follow: Top Events by Revenue and Event Pipeline (how many events are Draft, Scheduled, Live, Paused, Completed or Cancelled). Each chart can be downloaded as an image or CSV.
The My Events table ① shows five events — it is a preview, in no particular order. Use View All for the complete, searchable list.
Top Events by Revenue ② ranks your best five events.
Event Pipeline ③ splits your events by lifecycle status.
123My Events preview, Top Events by Revenue and Event Pipeline
Good to know
The status badge in the table is the real lifecycle status (Draft, Scheduled, Live, Paused, Completed, Cancelled). An event waiting in the platform’s review queue shows the review state beneath it.
An event title links to the public page while the event is Live, and to a private preview in every other status, so your own link never ends in a “not found”.
A new account also sees a Setup progress card here until the checklist is finished or dismissed — see Getting Started.
Troubleshooting
Revenue looks lower than what I have sold — only confirmed orders count. An order still in checkout, or one that was cancelled, is left out on purpose.
An event is missing from the table — the table only shows five. Use View All.
The amber banner will not go away — it clears only once a working mail connection is saved under Settings → SMTP & Mail.
The Needs attention number differs from a queue page — the card is cached for about 30 seconds; reload after acting on a queue.
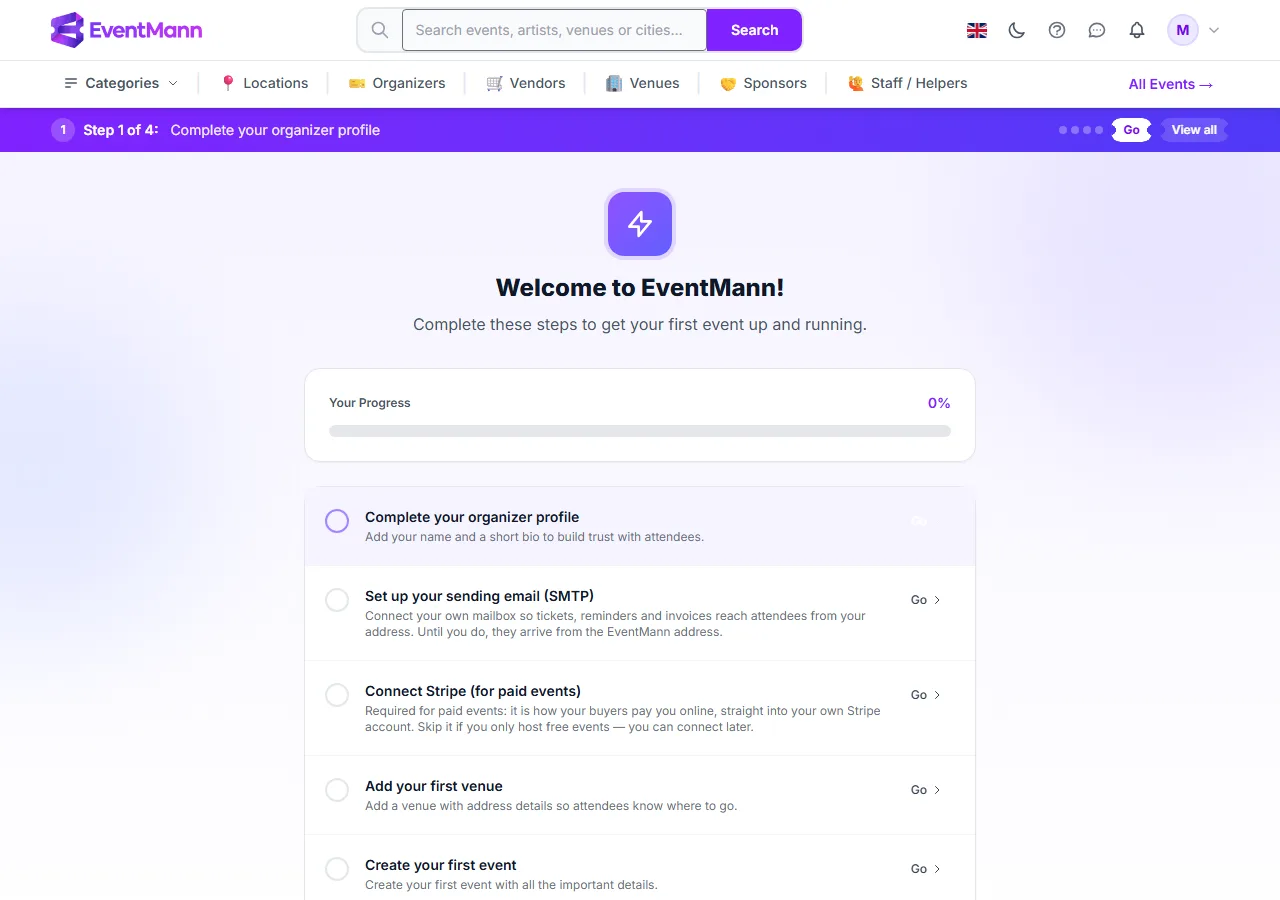
Getting Started is the checklist that walks a new organizer account from signed-up to selling tickets. It is under Work → Getting started in the organizer sidebar, and its summary also appears as a purple bar across the top of every page and as a Setup progress card on your dashboard until you are done.
The steps
Complete your organizer profile ② — required. Your name and a short bio must both be filled in (the bio is edited on your account page, Settings → Account).
Set up your sending email (SMTP) — required. Connect your own mailbox so tickets, reminders and invoices reach attendees from your address. See Who your emails are sent from.
Connect Stripe (for paid events) — optional. Needed only if you sell paid tickets; skip it if every event is free. See Setting Up Stripe Connect.
Add your first venue — optional.
Create your first event ③ — required, through the event wizard.
Add ticket types — required. It ticks off once any one of your events has at least one ticket type.
Publish your first event — optional, but nothing sells until you do. Any one of your events being Live is enough.
1234The Getting Started checklist of a brand-new organizer account
Each unfinished step shows a tip and a Go button that takes you to the right screen. Steps tick themselves off as soon as the matching data exists — there is nothing to tick by hand. Re-check my progress at the bottom runs the check again without reloading the page.
Dismissing the checklist
Use Dismiss Checklist ④ on the checklist page once every required step is done; the bar and the card then go away. Before that, the button does nothing. Skip to Dashboard simply leaves the page and keeps the checklist.
The purple bar and the dashboard card
Until the four required steps are done, the purple bar ① shows the step you are on (“Step 1 of 4”), a Go button for that step and View all, which opens this page. The dashboard shows the same progress as a card.
12The purple bar and the Setup progress card on a new organizer’s dashboard
The purple bar ① stays on every page while a required step is open.
The Setup progress card ② lists the next three open steps with a Required label where it applies. Click View All for the full list.
Good to know
A required step can come undone. If your mail connection stops working, “Set up your sending email” unticks, and a checklist you had dismissed comes back — your attendees would otherwise be receiving mail from the platform address without you noticing.
“Set up your sending email” is the SMTP & Mail screen, not Email Preferences, which only controls which notifications you receive.
Below the steps the page explains how your attendees pay (Stripe offers each buyer the methods available in their country and you never have to configure that) and lists the countries where organizers, vendors, venues, sponsors and staff can sign up. Attendees can buy from anywhere.
Publishing has its own conditions — a verified email address, a connected Stripe account for paid events and any platform agreements that are waiting. See Event status: publishing, pausing, cancelling.
Troubleshooting
I finished a step but it still shows open — the profile step needs a name and a bio; a name alone is not enough. The tickets step needs a ticket type actually attached to one of your events.
I cannot dismiss the checklist — a required step is still open. The bar tells you which one.
The purple bar came back — a required step has regressed, usually the mail connection. Open the step with Go.
Everything about your organizer account that is not tied to one event lives under Settings in the organizer sidebar (the group at the bottom, labelled “Organizer settings”). On any settings page the group is open and lists nine screens; this article says what each one is for and where to read more.
What you can do here
Screen
What it is for
Account ①
Your personal login: name, email, phone, bio, preferred timezone, language, password and two-factor authentication. It is the same page for every role you hold on EventMann. The timezone is how event dates and times are shown to you; the language is used for the emails we send you and as the site language unless you pick another with the language flag.
Public Profile ②
What attendees see about your organization: logo, name, public address, tagline and bio. See Public Profile.
One more settings screen sits in the Integrations group: AI Settings. AI features are off by default; while they are off nothing about your events is sent to an AI provider. Turn them on there, and optionally enter your own API key so usage is billed to your own account with that provider.
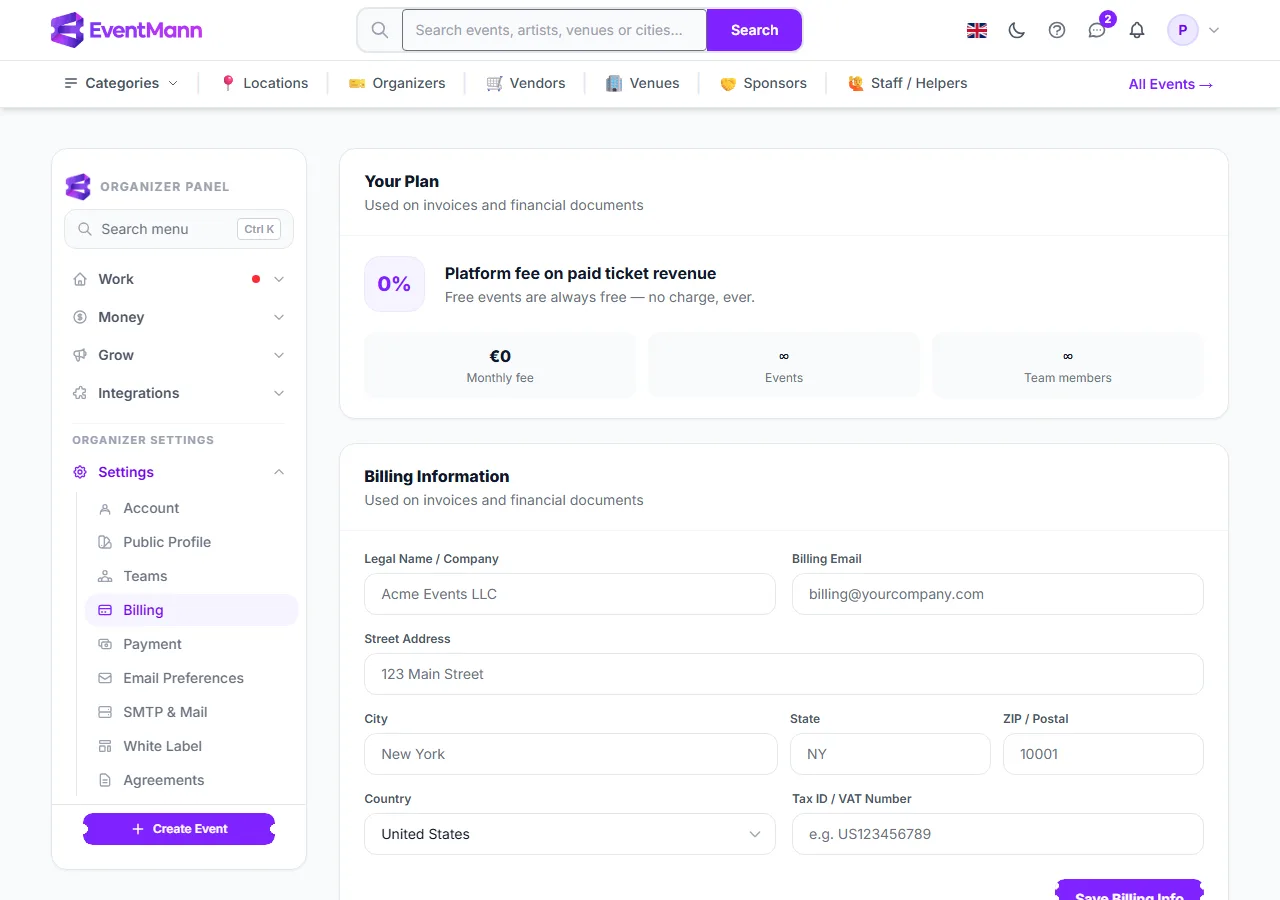
Billing
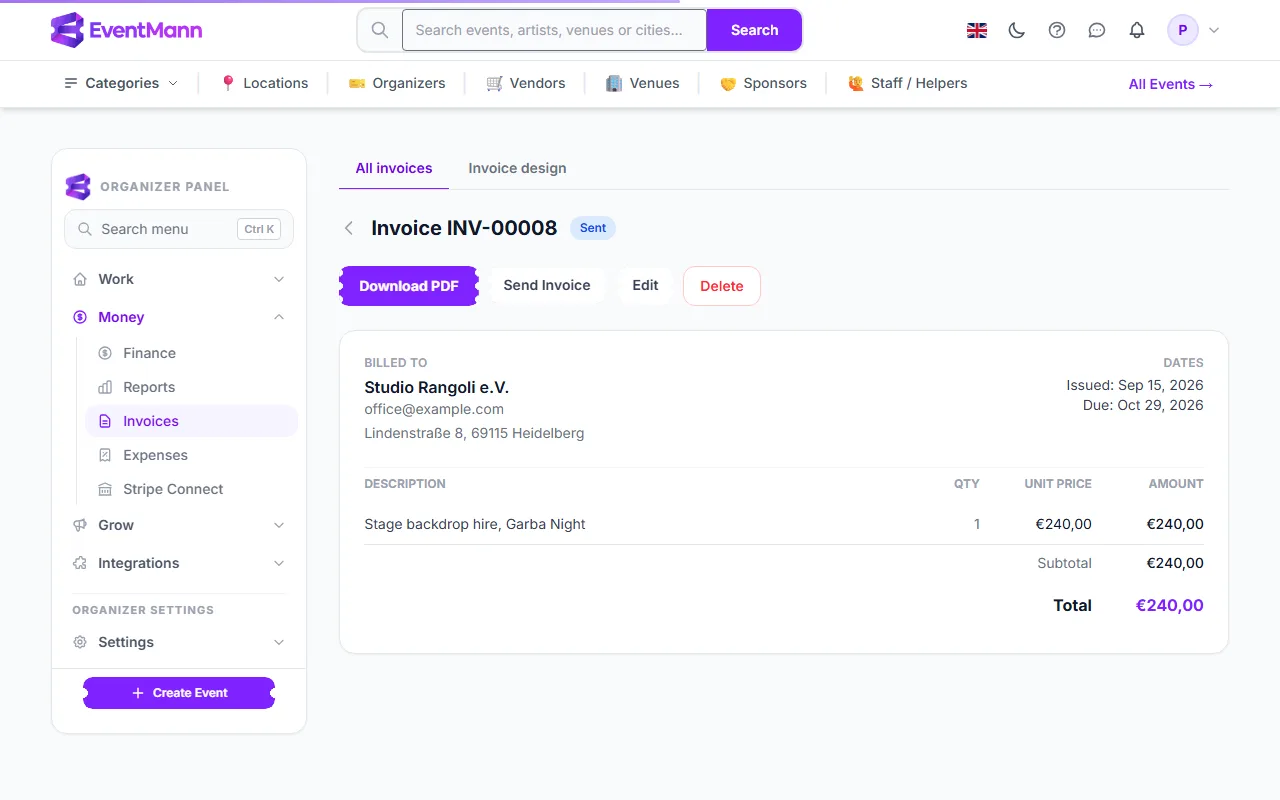
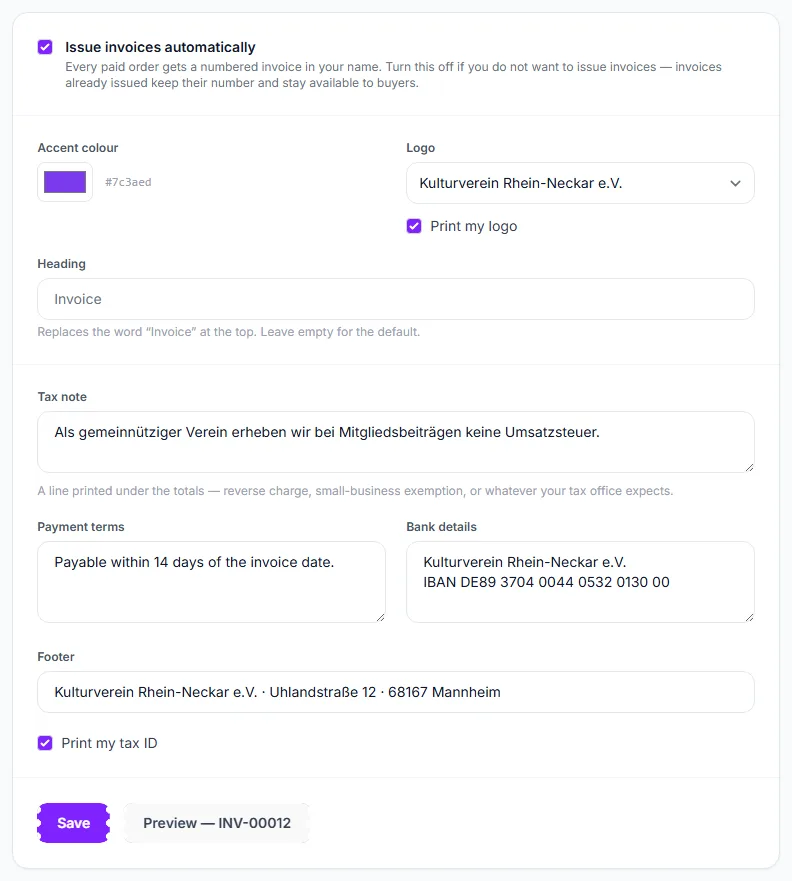
The billing form (legal name, billing email, address, tax ID or VAT number) holds your company details. The address and the tax ID or VAT number are printed in the seller block of the invoices your buyers receive (the tax ID can be switched off in the invoice design, under Finance → Invoices); invoice numbering and wording are set there too. The same screen shows your plan terms and a history of invoices addressed to you.
The Billing screen with plan terms, billing details and invoice history
Email Preferences
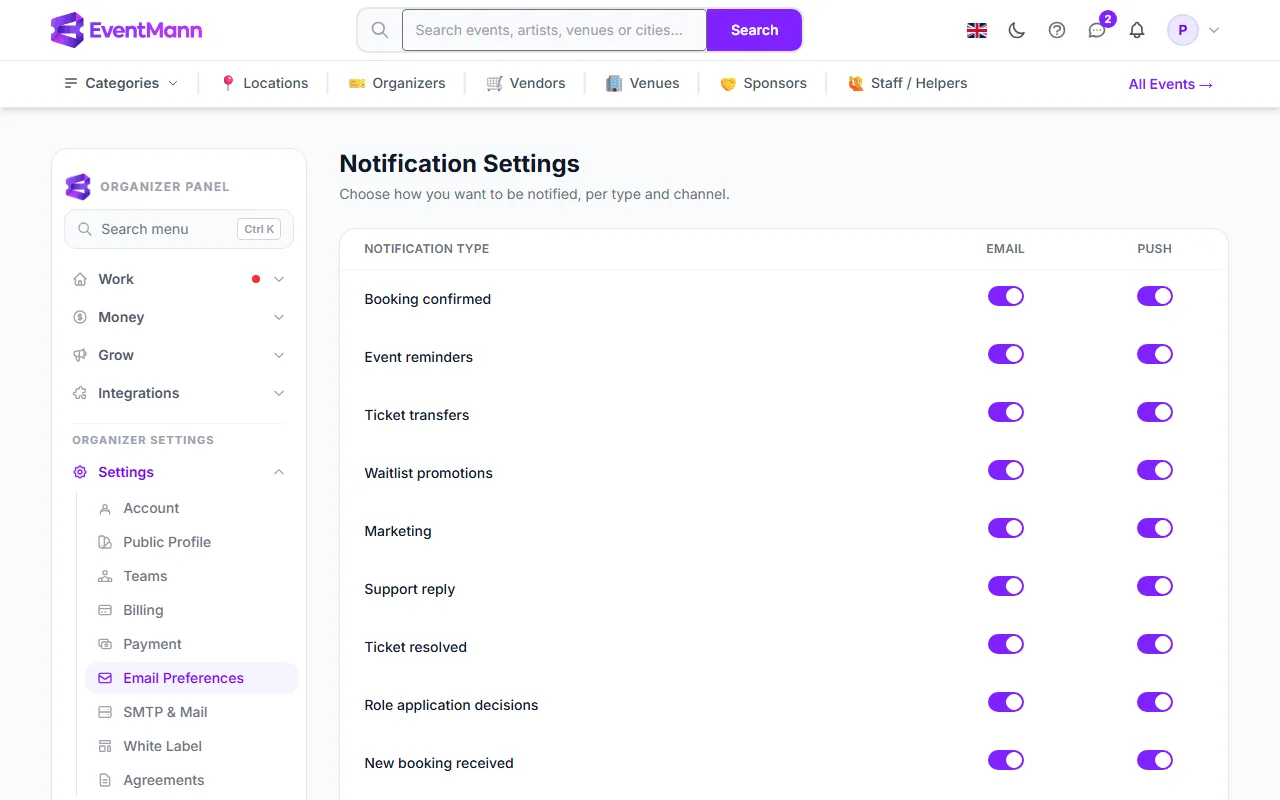
A table of notification types with an Email and a Push switch for each: bookings, cancellations and refunds, waitlist activity, event status changes and approvals, capacity and low-stock alerts, revenue milestones, Stripe and payout alerts, disputes, weekly and daily summaries, team and volunteer news, and more. A dash means that channel does not exist for that notification.
Email Preferences: one row per notification type, with Email and Push switches
Good to know
Your session signs itself out after a period of inactivity, and connecting or disconnecting a Stripe account emails you straight away with the IP address — the two protections on the screens that touch money.
Password, login email and two-factor authentication live only on the Account page. There is no organizer-only copy.
The public page URL (“handle”) and the logo belong to Public Profile, not Account.
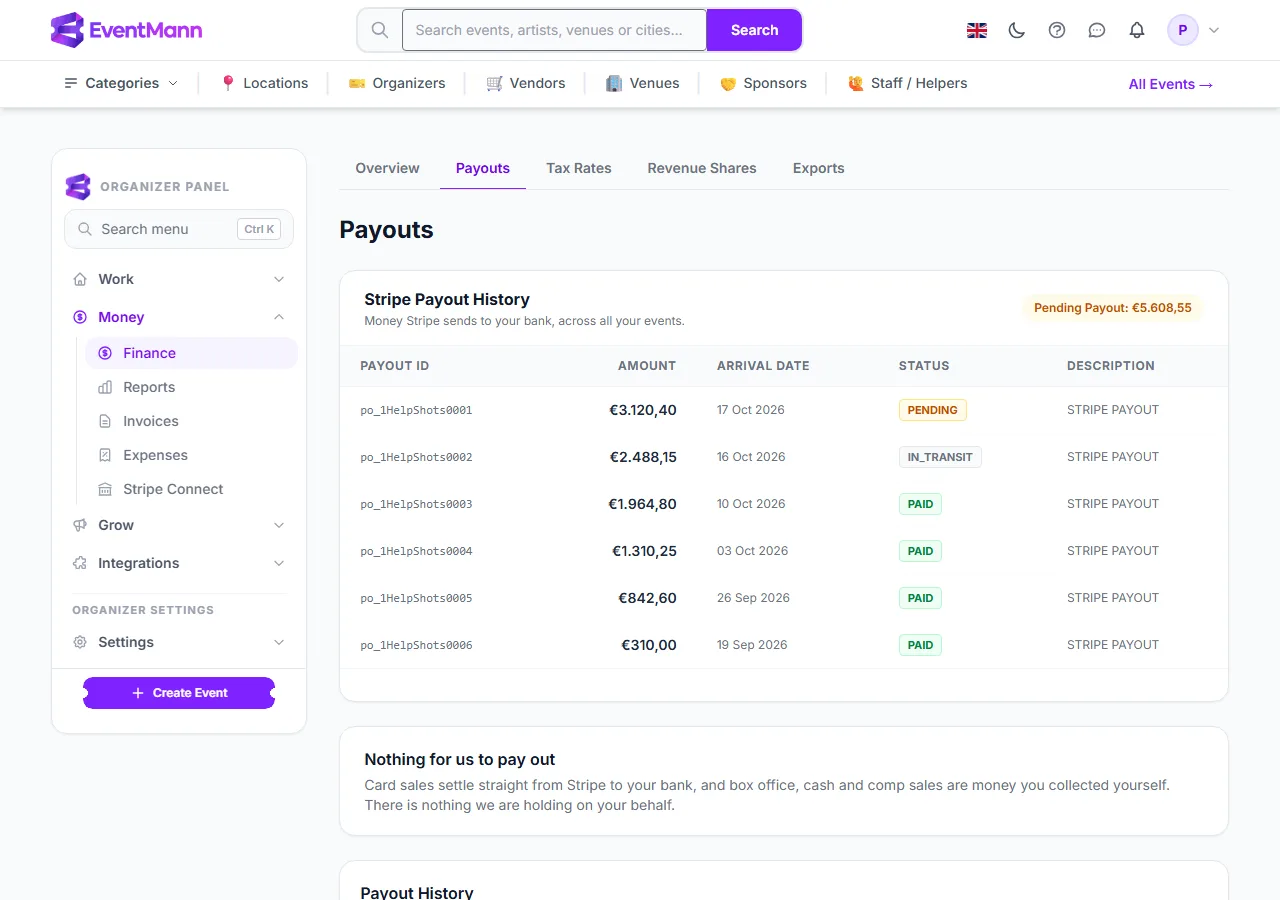
Payment settings do not move money: EventMann does not hold or release your funds. Stripe pays you out on the schedule set in your own Stripe account.
Troubleshooting
I cannot find where to change my password — Settings → Account, in the Change Password card.
The sidebar shows only the group names — click a group (Work, Money, Grow, Integrations, Settings) to open it; the group of the page you are on opens by itself.
I do not get an email I expect — check its row in Email Preferences first.
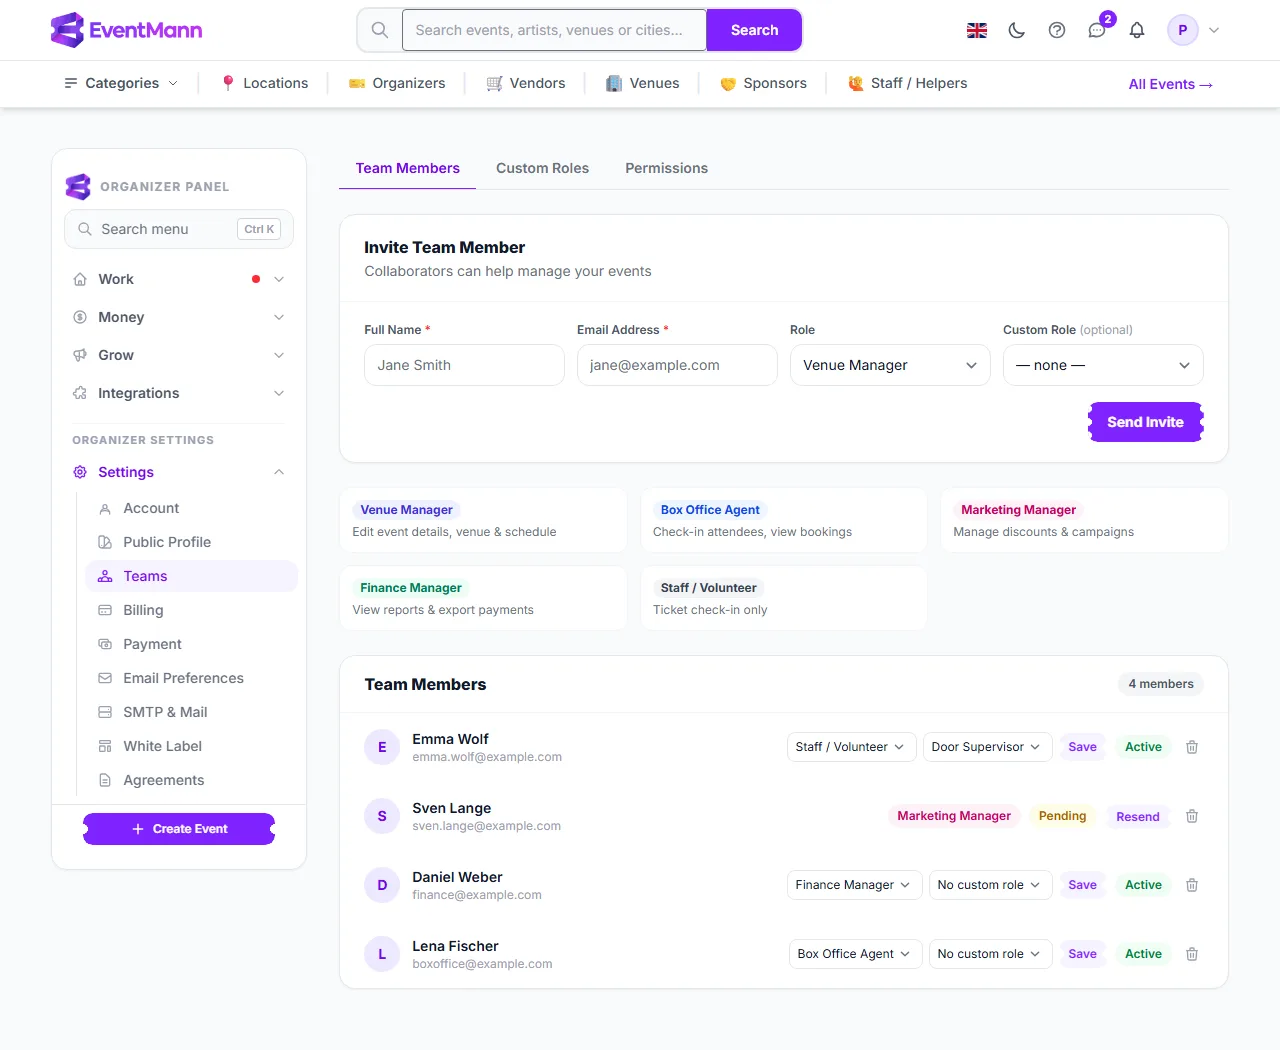
Invite people to help run your events without sharing your own login. Open Settings → Teams; the page has three tabs — Team Members, Custom Roles and Permissions — and this article covers the first. A person’s access comes from one of five built-in roles, or from a custom role you build yourself.
What you can do here
Fill in the invite form ①: Full Name, Email Address and a Role ②. Once you have created a custom role, a Custom Role (optional) list appears beside it.
Click Send Invite. The person gets an email with an invitation link that is valid for 7 days, and appears in the list as Pending.
To change an active member’s access, pick a different role or custom role in their row ③ and click Save.
If an invitation never arrived, click Resend ④ — it issues a new link and a new 7-day expiry. The button only exists while a member is pending.
Use the bin icon to remove a member, pending or active. Their access ends immediately.
Open the Permissions tab ⑤ to see what everyone can do in one grid — see Permissions grid.
12345Team Members: the invite form, the five roles and the current team
The five built-in roles
Role
Meant for
Venue Manager
Editing event details, the venue and the schedule; also sees tickets, bookings and reports, and can process refunds.
Box Office Agent
Checking people in, seeing bookings, selling at the door and answering attendee messages.
Marketing Manager
Discounts and campaigns, plus reports.
Finance Manager
Reports and exports, bookings, the refund queue and the payout breakdown.
Staff / Volunteer
Ticket check-in only.
The exact list of permissions behind each role is shown on the Permissions tab, and you can start a custom role from any of them.
How invitations work
The invitation link is valid for 7 days. Anyone may follow it, but it can only be accepted once.
If the person has no EventMann account yet, accepting creates one for them (an ordinary attendee account) and signs them in after they choose a password.
If they already have an account under that email address, they must be signed in as themselves to accept. A forwarded link cannot be used to take over somebody else’s account.
Box Office and Staff / Volunteer members are sent to the Scanner app after accepting, because check-in and door sales happen there. Everyone else lands on their profile page.
You get a notification when somebody accepts.
Good to know
A role is granted per organizer, not per event: one invitation gives the person the same role on every event you run, now and in the future.
Accepting an invitation does not change the person’s platform role. A box-office agent stays an attendee account that also has team access; their work area is reachable from the role menu in the top bar.
Inviting somebody who is already an active member is refused — change their role in the list instead. Typing an existing member’s address into the form never demotes them.
Your plan can limit how many team members you may have. Pending invitations count against the limit, because the seat is already promised; the standard plan has no limit.
Volunteers are a separate thing: unpaid helpers you recruit for a single event live under Manage → Volunteers and are not invited here. See Volunteers.
Troubleshooting
The invitation email never arrived — check the address for typos, then use Resend instead of inviting again.
There is no Resend button — the person has already accepted; there is nothing left to resend.
“This invitation is invalid or has expired” — after 7 days the link stops working. Resend it.
A member cannot do something their role should allow — check whether a custom role is attached; it replaces the built-in role completely.
The team limit message appears — remove a member or a pending invitation, or contact us about your plan.
The five built-in roles cover most teams, but not always exactly. A custom role lets you tick the exact permissions a person needs. Open Settings → Teams → Custom Roles.
What you can do here
Create a role — a name and a set of permissions, up to 80 characters for the name.
Start from a preset — one click fills the boxes from a built-in role. The number beside each preset is how many permissions it holds.
Edit or delete a role in the Your Custom Roles list below the form (it shows how many members use each).
Assign it to a member from the invite form or from the member’s row on the Team Members tab.
Build a role
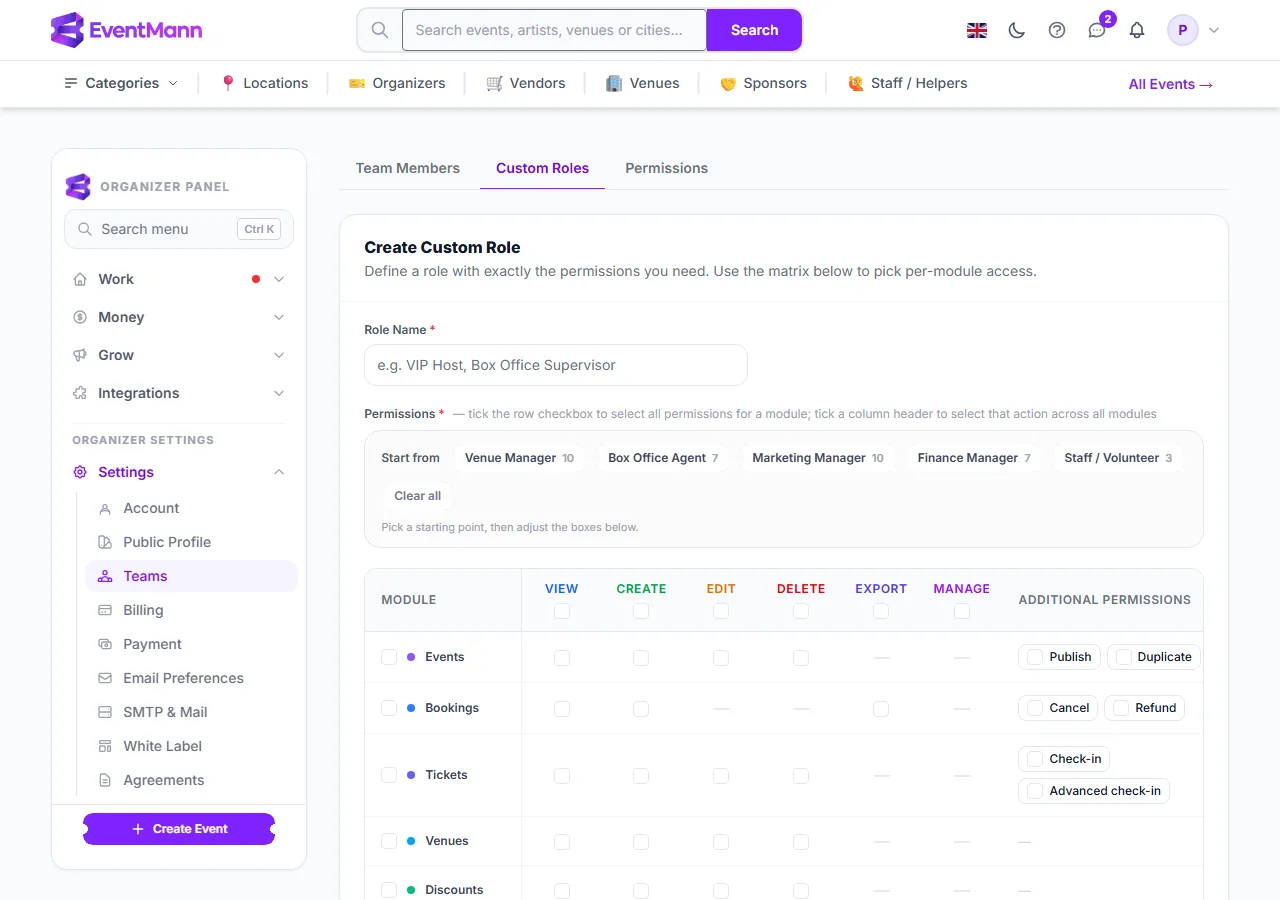
Type a Role Name ①, for example “Door Supervisor” or “VIP Host”.
Optionally click a preset ② such as Box Office Agent. It ticks that role’s boxes once; you then adjust them. Clear all empties the matrix.
Tick boxes in the matrix. A row tick selects every standard action for a module; a column header tick ③ selects one action (View, Create, Edit, Delete, Export, Manage) across all modules.
Some modules add extras in the last column — for example Events adds Publish ④ and Duplicate, Bookings adds Cancel and Refund, Tickets adds Check-in and Advanced check-in, Finance adds payouts, invoices and refunds, and Volunteers adds a team-lead permission for the team a person leads.
Click Create Role. At least one permission is required.
Assign the role: choose it in the Custom Role (optional) list when inviting, or in the member’s row afterwards.
1234The Create Custom Role form with presets and the permission matrix
Good to know
A custom role is a plain, explicit list. It does not keep tracking a preset: if a built-in role changes later, roles you copied from it stay as they were.
A custom role replaces the member’s built-in role. The built-in role is still stored and becomes the fallback again the moment the custom role is removed.
Deleting a custom role does not remove anyone from your team; those members fall back to the built-in role chosen for them.
Roles belong to your organizer account, so the same role works across all your events, present and future.
Team members work in the Manage area of your events. Your own organizer panel — settings, billing, your Stripe connection and this team list — stays with you.
Troubleshooting
The form will not save — a name and at least one ticked permission are required.
A member lost access after I deleted a role — expected; they fall back to their built-in role, which is usually narrower. Recreate the role or assign another.
I changed a role but nothing changed for the member — check the Permissions tab for that member and confirm the custom role is actually assigned to them.
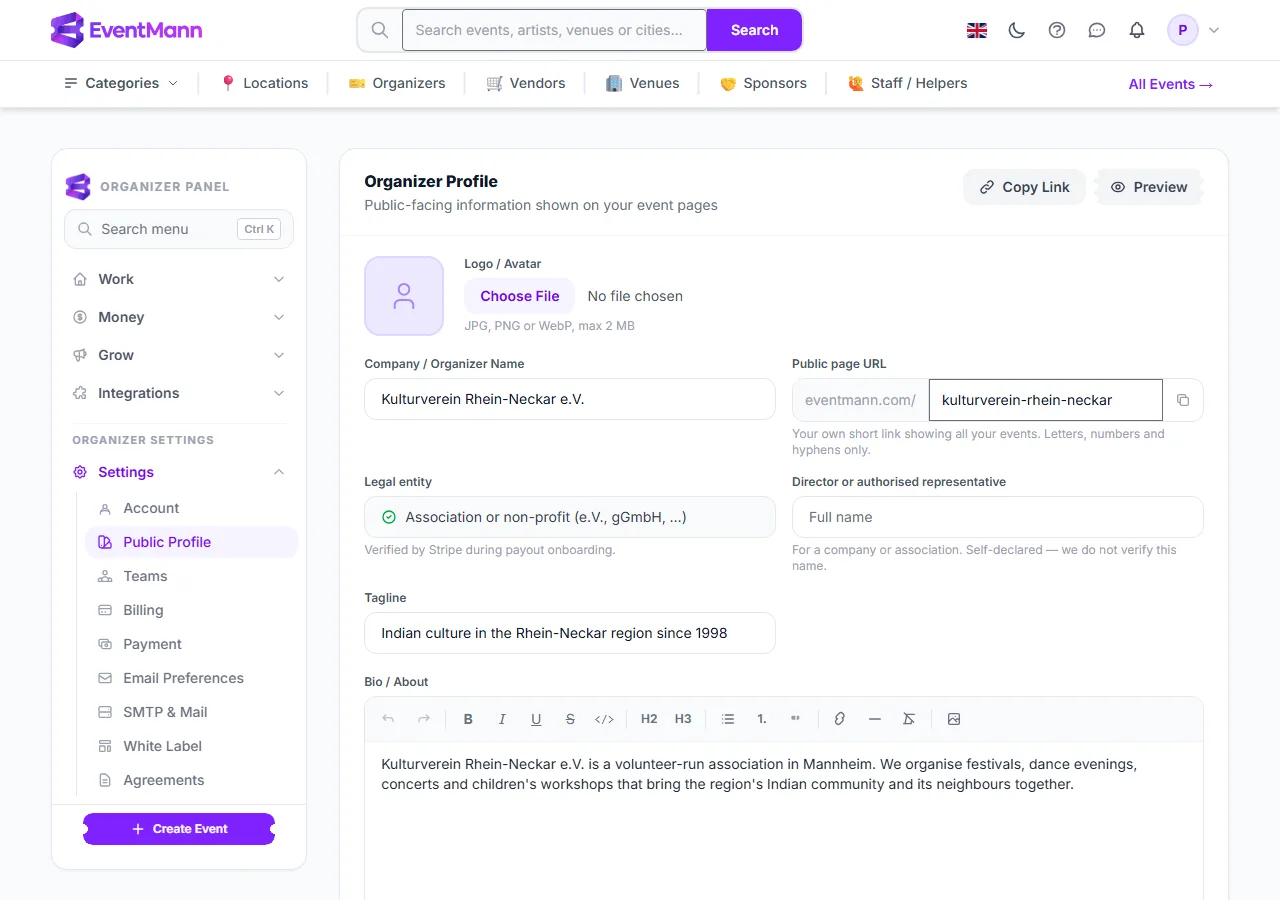
Your public profile is the page that shows attendees who you are: your name or organization, a logo, a tagline, a bio, links, and all your upcoming events in one place. Edit it under Settings → Public Profile. The same name and logo appear as “Organized by” on every one of your event pages.
What you can do here
Upload a Logo / Avatar (JPG, PNG or WebP, up to 2 MB). It is shrunk automatically, because it appears at avatar size on every page.
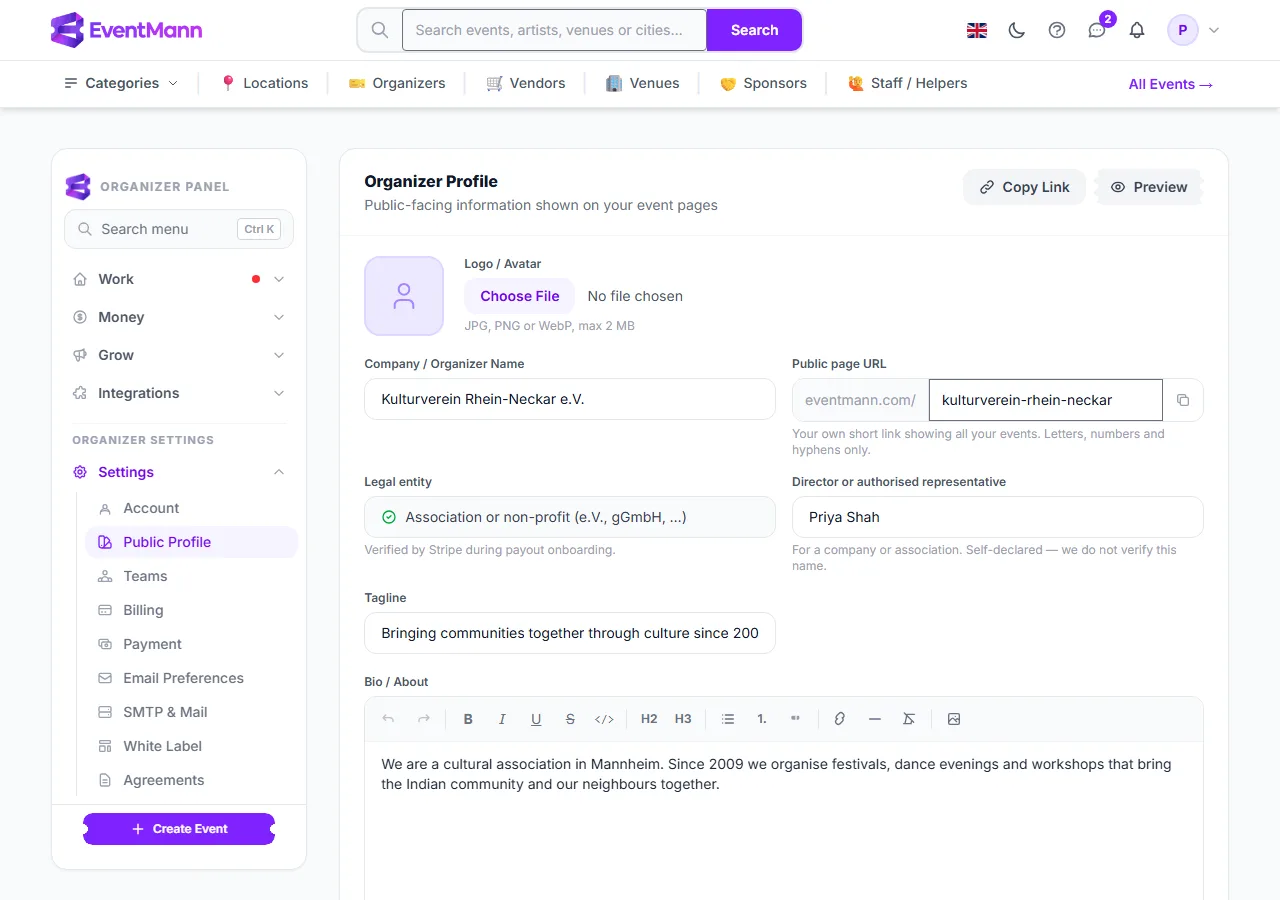
Choose your Public page URL ① — the short link to your page, for example eventmann.com/kulturverein-rhein-neckar. Use Copy Link at the top to copy it and Preview to see the page.
Enter your Company / Organizer Name ②. It is the name attendees see on events, tickets, emails and invoices. If you leave it blank, your personal account name is used instead.
Check Legal entity ③. Once a Stripe account is connected this field shows what Stripe verified during onboarding (for example “Association or non-profit”) and cannot be edited; before that you may declare it yourself.
Optionally enter the Director or authorised representative. For a company or association this is a self-declared name that we do not verify.
Add a Tagline (up to 160 characters) and a Bio / About text with basic formatting, then your Website and social links (Facebook, X, Instagram).
Public page URL — typed as anything; it is saved in lowercase with only letters, numbers and hyphens, 3 to 50 characters, starting and ending with a letter or number. A handful of reserved words are refused and every handle must be unique on the platform. Leave it blank for no personal URL.
Bio — formatted text; unsafe HTML is stripped when you save.
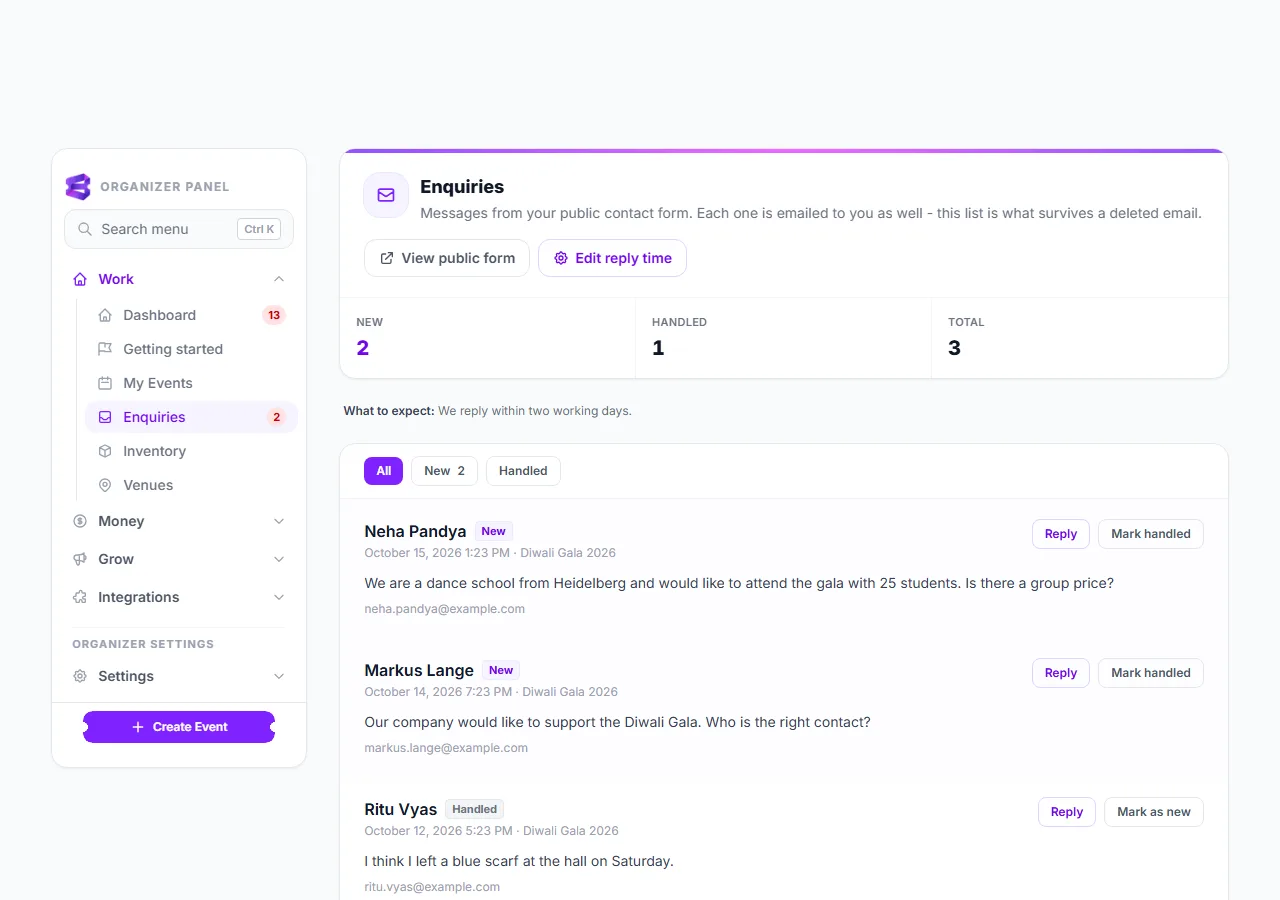
Contact form — your page offers a contact form instead of showing an email address; your own reply-time promise and the on/off switch live on your Enquiries page (the link on this screen takes you there). See Enquiries.
Good to know
Your email address is never shown on a public page. Visitors write to you through the contact form and you answer from Enquiries.
Changing the handle changes the link you may already have shared; the old one stops working.
Your personal name, phone, timezone and password are on the Account page, not here. If you have switched on White Label, your own brand also shows on your event pages.
Troubleshooting
“The handle has already been taken” — pick another; handles are unique across all organizers.
The handle I typed was changed — capitals, spaces and special characters are removed on purpose.
The logo will not upload — use JPG, PNG or WebP under 2 MB; SVG files are not accepted.
I cannot change the legal entity — it is locked to what Stripe verified once your account is connected.
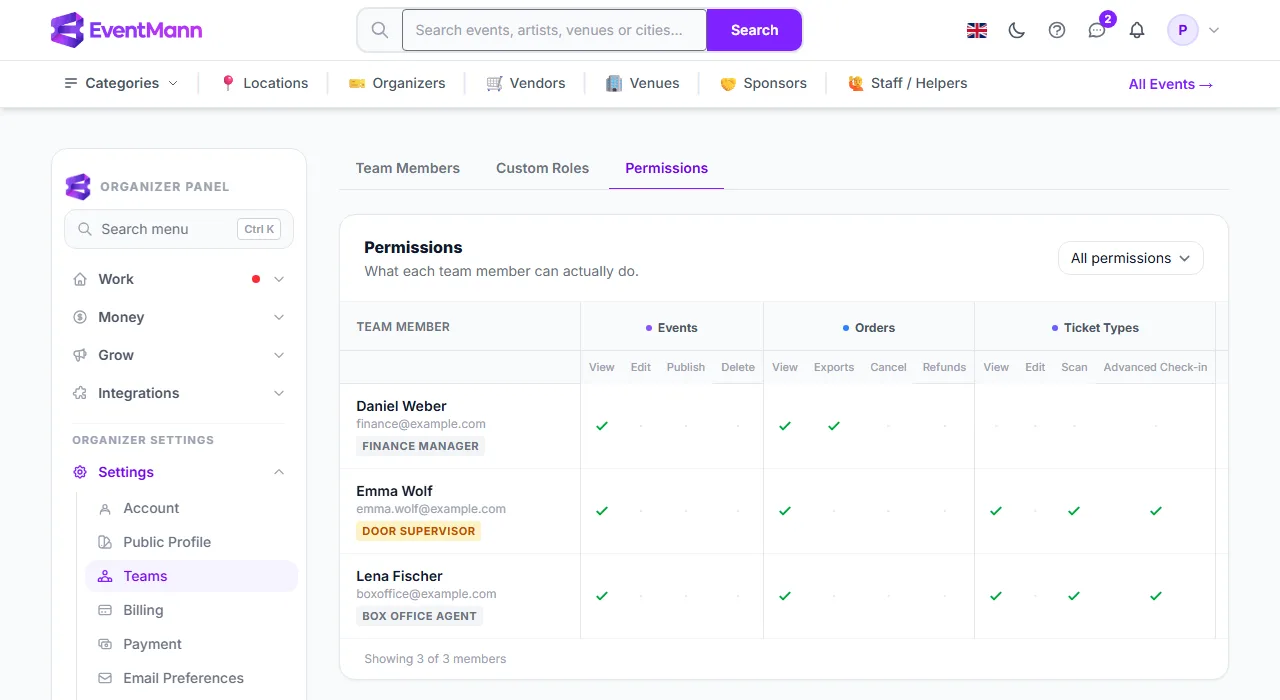
The Permissions grid answers the question “who on my team can do what?” in one table, instead of opening every member. Find it under Settings → Teams → Permissions. Each row is an active team member; each column is something they may or may not do.
What you can do here
Read down a member’s row ②. The badge under their name is the role in force: a built-in role (for example Finance Manager) or, when you assigned one, the name of their custom role (Door Supervisor).
Read across to a group of columns ③ — Events (View, Edit, Publish, Delete), Orders (View, Exports, Cancel, Refunds), Ticket Types (View, Edit, Scan, Advanced Check-in), Discounts, Analytics and Manage Staff. A green tick means the member holds that permission; a dot means they do not.
To find out who can do one thing, choose it in the Filter by permission list ① (for example Orders · Refunds). The grid then shows only members who hold it, and the footer reads “Showing 1 of 3 members”.
The grid shows the effective permissions: a custom role replaces the built-in role, exactly as it does when your team works in an event.
Only active members appear. Somebody with a pending invitation has no access yet and is not listed.
You, the owner, are not a row: the owner can do everything on their own events.
The grid is read-only. Change a member’s role on the Team Members tab and the grid updates.
Access is granted per organizer, so one row covers all your events.
Troubleshooting
A member is missing — they have not accepted their invitation yet, or they were removed.
Everything shows a dot for a member — their custom role holds only permissions outside these columns, or none of the shown ones. Open Custom Roles to check it.
The grid is wider than the screen — scroll it sideways; the member names stay in view.
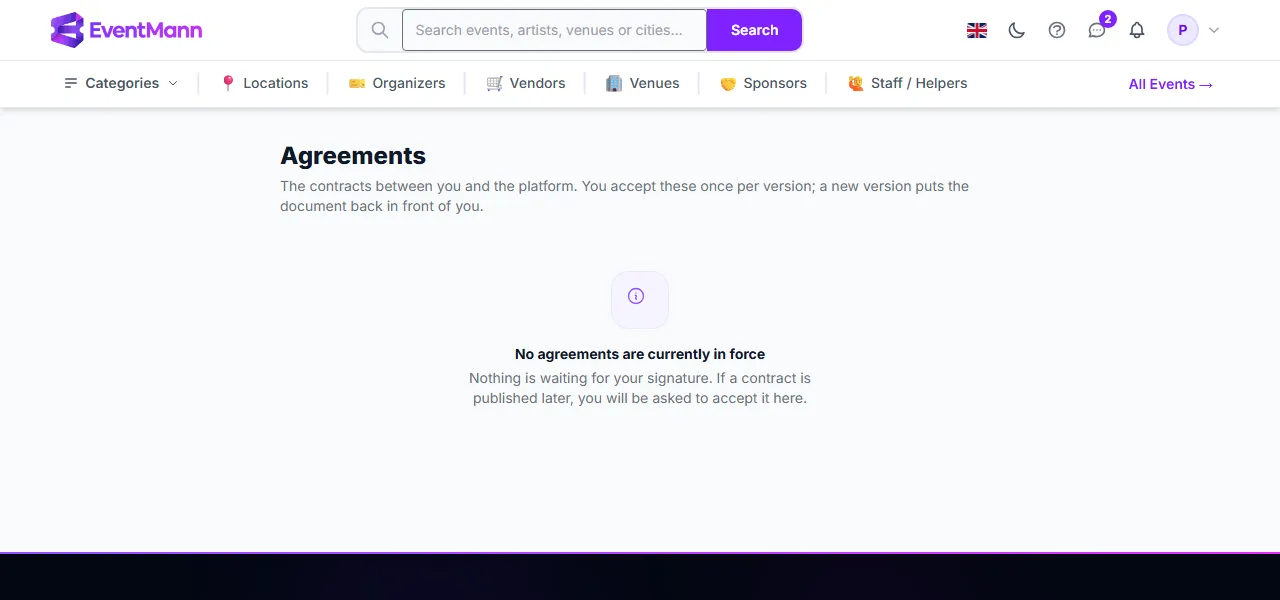
Agreements are the contracts between you and the platform — for example the organizer agreement and the data processing terms that apply once attendee names and email addresses reach you. You read and accept them once per version under Settings → Agreements. A new version of a document puts it back in front of you.
What you can do here
Open Settings → Agreements ①. A line at the top tells you how many agreements are waiting for your acceptance.
Each document is a card with a badge: Pending or Accepted. A pending document opens by itself so that you can read it; an accepted one is collapsed — use Read to open it again.
Read the text (the contract is shown in one language for everyone, whatever your interface language).
Tick the confirmation box and click the accept button. Ticking is required: opening the page is not acceptance.
When nothing is in force, the page says so (“No agreements are currently in force”) and nothing is waiting for you. That is the state in the picture.
Why it matters for publishing
While an agreement is outstanding, none of your events can go live. Going live, scheduling a go-live time and creating an event as Live from the wizard are all refused; the scheduled-publish job holds the event as Scheduled instead of publishing it. The refusal message sends you to this page. See Event status: publishing, pausing, cancelling.
If you work in a team and are not the owner, the message tells you that the event owner has to accept; only the account that owns the events can sign.
Good to know
Your acceptance is recorded with the date, time and IP address, and the screen stays available after you accept, so you can always re-read what you signed and when.
Accepting does not depend on the language you use: switching the interface language does not ask you to sign again.
Events that are already Live keep selling while a new version is waiting; the requirement applies to publishing.
Troubleshooting
“Accept the organizer agreement and data processing terms before publishing” — open this page, read each pending document and accept it.
The accept button does nothing — the confirmation box must be ticked first.
I cannot see an agreement my colleague mentions — only documents currently in force are listed.
1.9 Finding your way around: search, pins and shortcuts
Once you run several events, three tools save clicks: the search bar (Ctrl K) that jumps to any page, the event switcher that moves between events, and pins that keep your working events at the top. Keyboard shortcuts tie them together. They work in the organizer panel and in an event’s Manage area.
The search bar (Ctrl K)
Press Ctrl K (⌘ K on a Mac), or / when no text box is focused, or click Search menu at the top of the sidebar.
The search bar open with the word “ticket” typed
Start typing. Results are grouped: Recent pages you opened, Actions (for example Add an order, Message attendees, Preview event page), Pages (every row and tab of the sidebar, such as Ticket Types or Reschedule Event) and Records (your events and, if you may view bookings, placed orders and buyers).
Move with the arrow keys and press Enter to open; Esc closes the bar.
The bar only offers places you are allowed to open. A team member sees fewer entries than the owner, because the list is filtered by the same permissions as the sidebar. Orders are searchable only if you may view bookings, and only real, placed orders appear.
The event switcher and pins
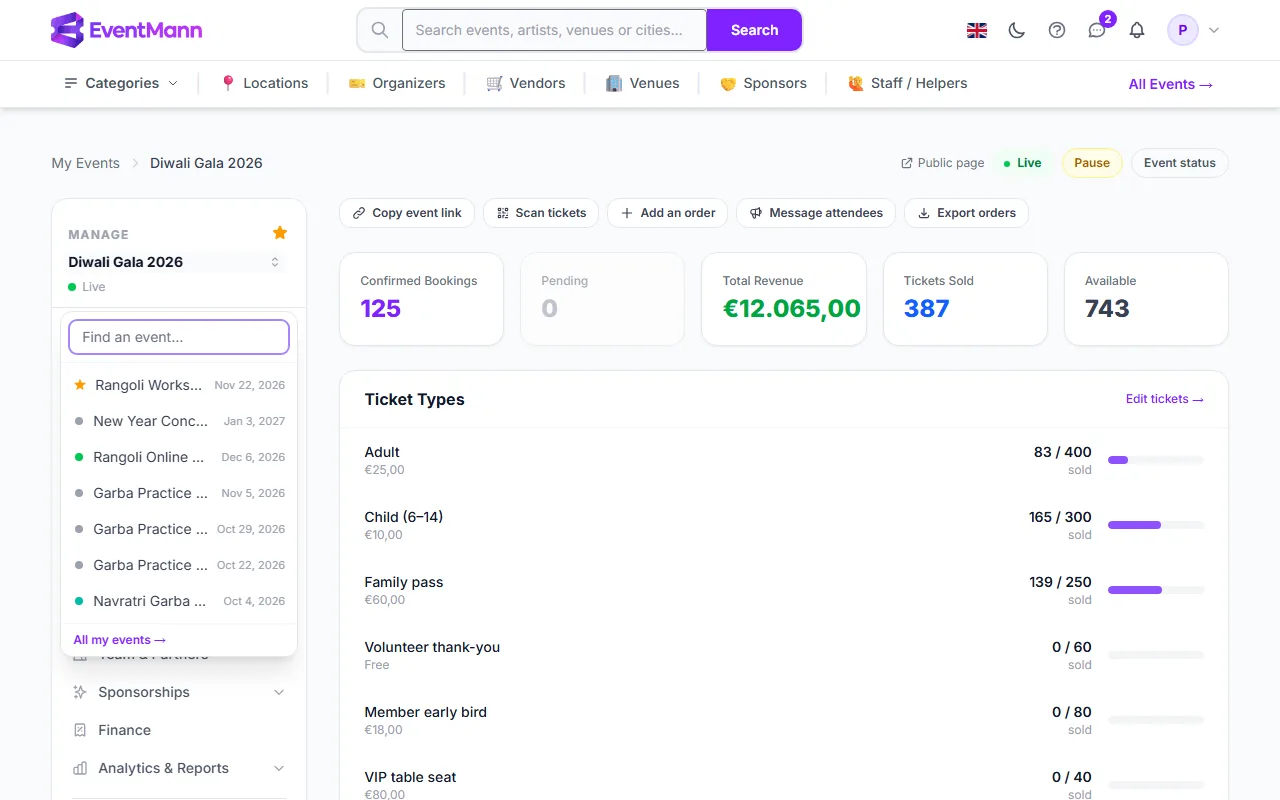
The header of the Manage sidebar shows the event you are working on. Click its name to open the switcher; type to filter. Pinned events lead the list.
Click the star ① beside Manage to pin or unpin the event. A filled star means pinned.
Click the event name ② to open the switcher, then type in Find an event… or pick an event from the list. All my events at the bottom opens My Events.
12The event switcher open, with a pinned event at the top
When you switch between two events of the same organizer, you land on the same page of the other event (for example Ticket Types stays Ticket Types), as long as that page needs nothing but the event. Otherwise you land on its Overview.
The switcher lists up to 40 events other than the current one.
Pins are personal: your pins are not shown to your team. You can also pin from the star in the My Events list, where pinned events are listed first.
Keyboard shortcuts
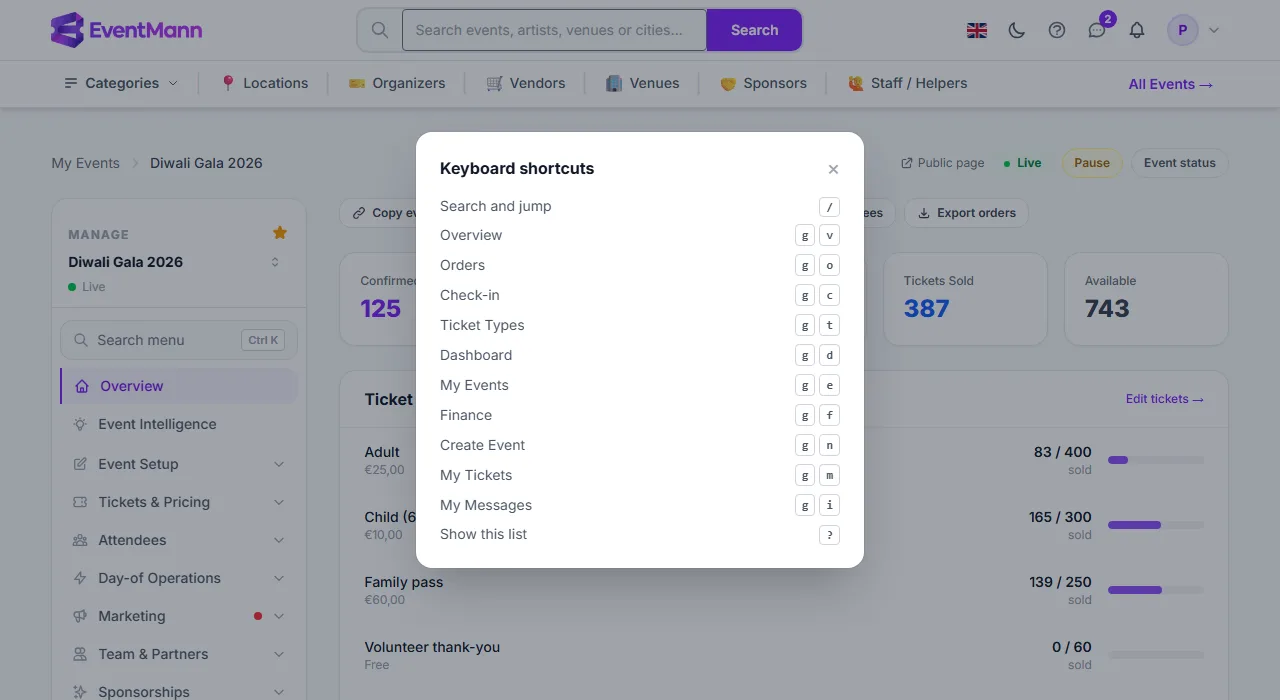
Press ? (when no text box is focused) to list the shortcuts that apply to the page you are on. A shortcut is two keys pressed one after the other: g, then a letter.
The keyboard shortcuts list on an event’s Overview
Keys
Goes to
g d
Organizer dashboard
g e
My Events
g n
Create Event
g f
Finance
g v
Event Overview (inside an event)
g o
Orders (inside an event)
g c
Check-in (inside an event)
g t
Ticket Types (inside an event)
g m
My tickets
g i
My messages
The event shortcuts only appear when you are inside an event and are allowed to open that page. Shortcuts never fire while you type in a field or hold Ctrl, Alt or ⌘.
Good to know
“Recent” is remembered in your browser only; it is not shared with your team and is lost if you clear site data.
Every sidebar row is also a link on the page, so nothing is reachable only through the search bar.
Some sidebar rows are groups with tabs (for example Details & dates has Information, Event Schedule, Reschedule Event, Virtual Event and Event status). The search bar lists those tabs as separate pages.
Troubleshooting
Ctrl K does nothing — some browsers use Ctrl K for their own search; click Search menu instead, or use /.
A page I expect is not offered — your role does not include it. Ask the owner to check your role on the Permissions tab.
The switcher is empty — you have no other event to switch to.
The shortcut list is short — event shortcuts appear only inside an event.
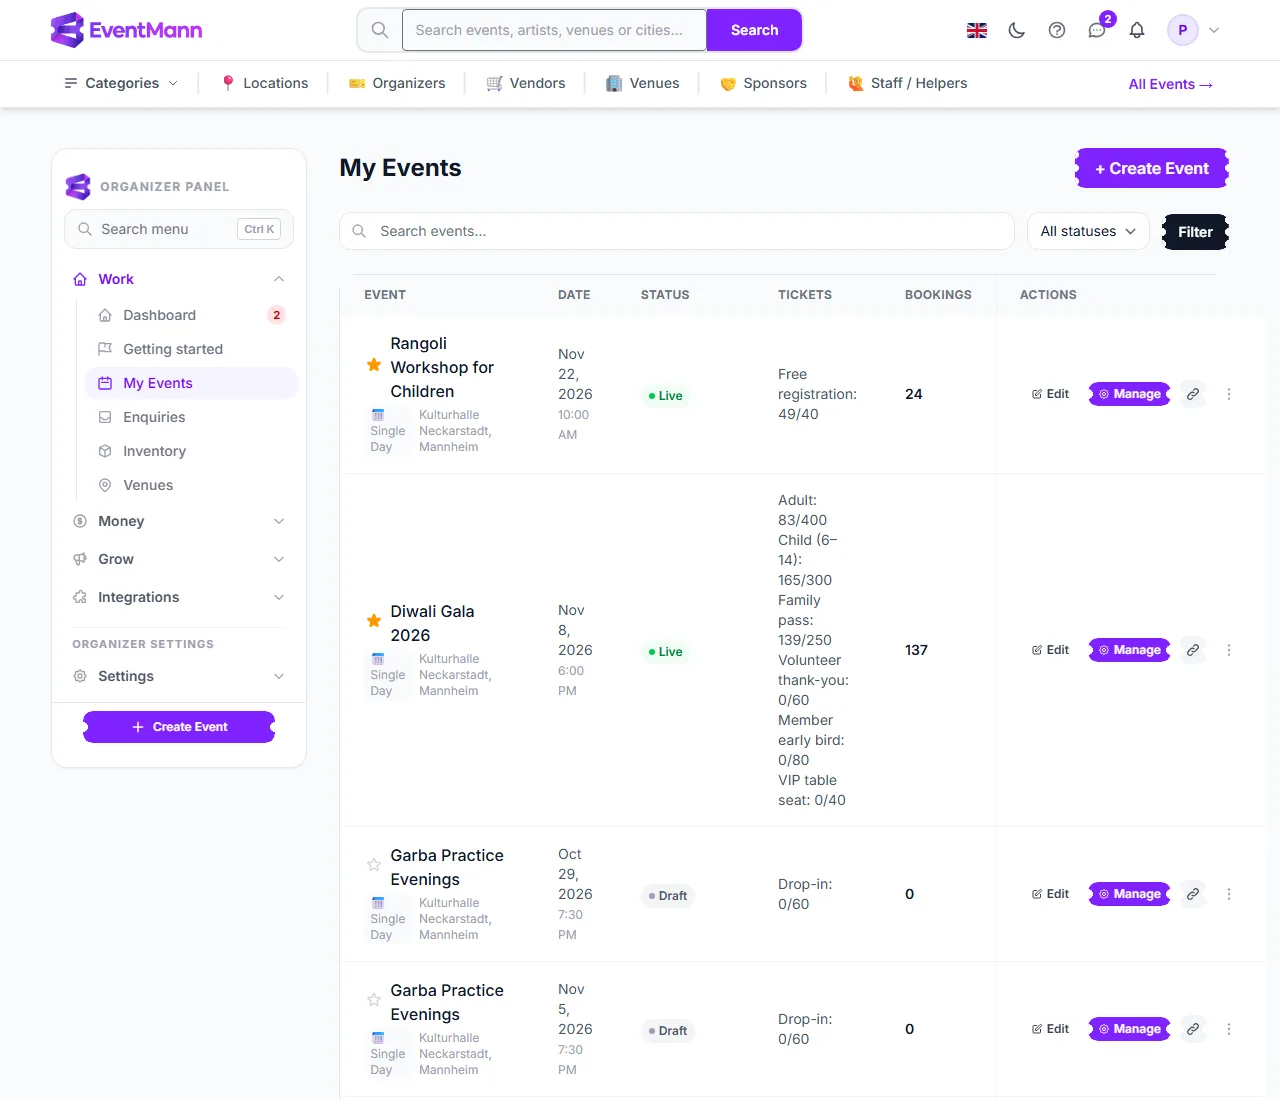
My Events lists every event you created, with quick links into each one. Open it from the sidebar under Work → My Events, or press g then e. It is also where you land after duplicating an event.
What you can do here
Type in Search events… ① to match a title, venue or city, and choose a lifecycle status in the list ② (Draft, Scheduled, Live, Paused, Cancelled, Completed). Click Filter to apply and Clear to reset.
Click the star ③ beside a title to pin the event. Pinned events are listed first and also lead the event switcher in the Manage area. Click again to unpin.
Click Manage ④ to open the event’s Overview. Edit opens Details & dates (the Information tab).
Click the link icon to copy the event’s public URL to the clipboard. It only appears once the event has a URL.
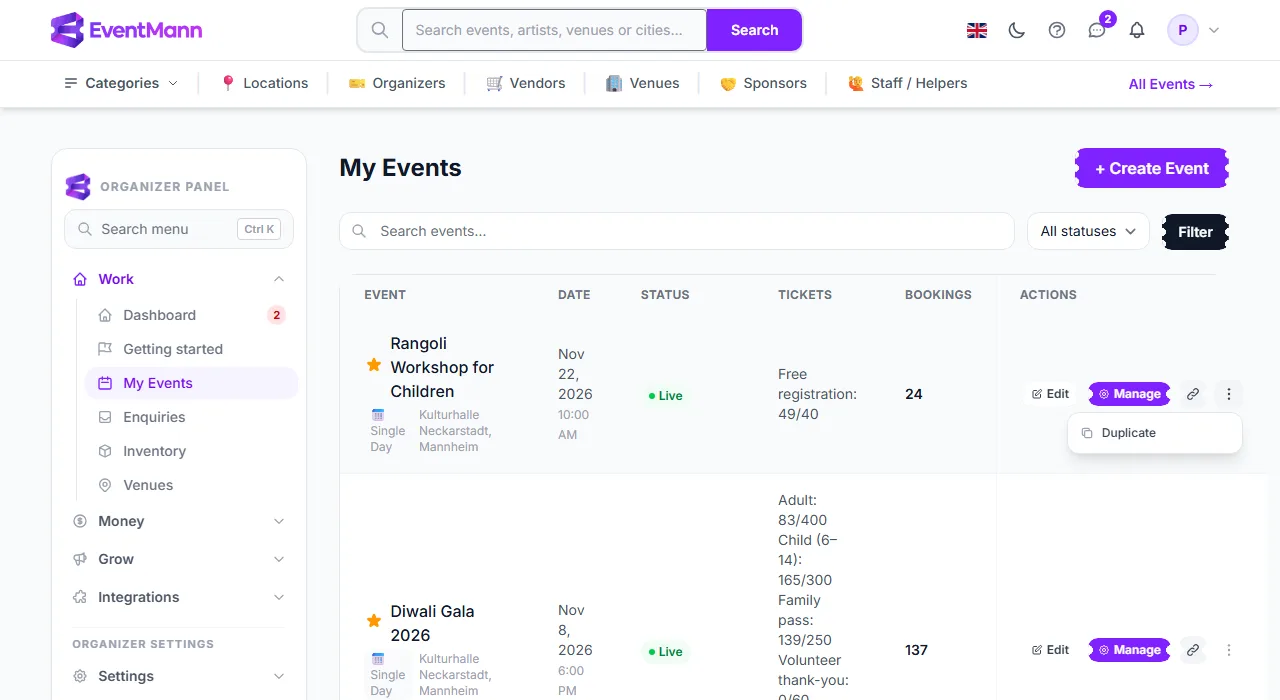
Open the ••• menu ⑤ and choose Duplicate to copy the event. The menu only appears if you hold the duplicate permission for that event.
Event — the title, the event type (Single Day, Multi-Day, Recurring, Series or Hybrid) and the venue and city.
Date — start date and time in the event’s own timezone.
Status — the lifecycle badge. A Scheduled event also shows its go-live time. An event waiting for the platform’s review shows the review state (pending, changes requested or rejected) under the badge.
Tickets — one line per ticket type: sold / capacity.
Bookings — the number of real orders. An abandoned checkout, such as a declined card, is not an order and is not counted.
The list shows the events you own, newest first (pinned ones above them), 10 per page. Events of another organizer that you help run as a team member are reached through your Manage work area, not through this list.
A recurring series lists its first date and every generated date as separate events — see Recurring events.
Your plan may limit the number of events; the limit is checked when you press Create Event. The standard plan has none.
An event that has orders, or that is Live, cannot be deleted — pause it, or cancel it so that attendees are told and refunded.
Troubleshooting
Duplicate is missing from the menu — you or your team role lack the duplicate permission for that event.
An event I help run is not listed — only events you own appear here.
Create Event sends me back with an error — your plan’s maximum number of events has been reached.
The ticket column is very long — every ticket type is listed; an event with many types makes a tall row.
The event wizard creates a new event in one page: the basics, dates, location, tickets, checkout rules, cancellation terms and how it is published. Open it with Create Event in the sidebar, on the dashboard or in My Events (shortcut: g then n). Everything on the page has a sensible default, so you can fill in only what matters and change the rest later under Manage.
Before you start
If your plan limits the number of events and you have reached it, you are sent back to My Events with a message instead of the form. The standard plan has no limit.
If you saved an event as a template, a row Start from a template: appears at the top with one button per template. Choosing one ① fills the form with that event’s details, ticket types, custom fields and settings. See Duplicate an event and save templates.
1The top of the wizard with a saved template to start from
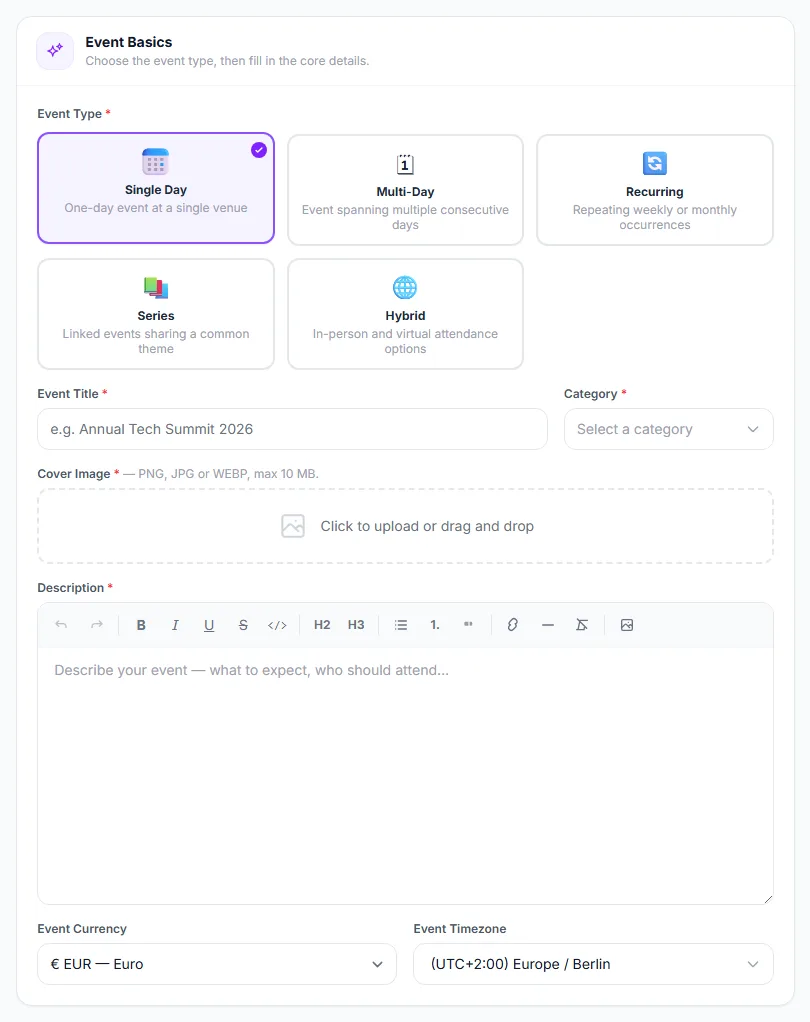
1. Event Basics
Choose the Event Type ①: Single Day, Multi-Day, Recurring, Series or Hybrid. The type changes what the rest of the form asks for: Multi-Day lets you set a start and end time for each day (Times per day), Recurring adds a recurrence pattern and no location, and Hybrid requires a stream or meeting URL.
Enter the Event Title ② and pick a Category ③.
Upload a Cover Image ④ — required (PNG, JPG or WebP, up to 10 MB). The picker crops it to 16:9, the shape every listing card and the event page use. An image that is not 16:9 is refused.
Write the Description with the rich-text editor. If AI features are switched on for you, a Write with AI button drafts a description from a few notes.
Check the Event Currency ⑤ and Event Timezone. They default to your payment currency and your account timezone, and they are the event’s own for the rest of its life: all its dates are wall-clock times in that timezone.
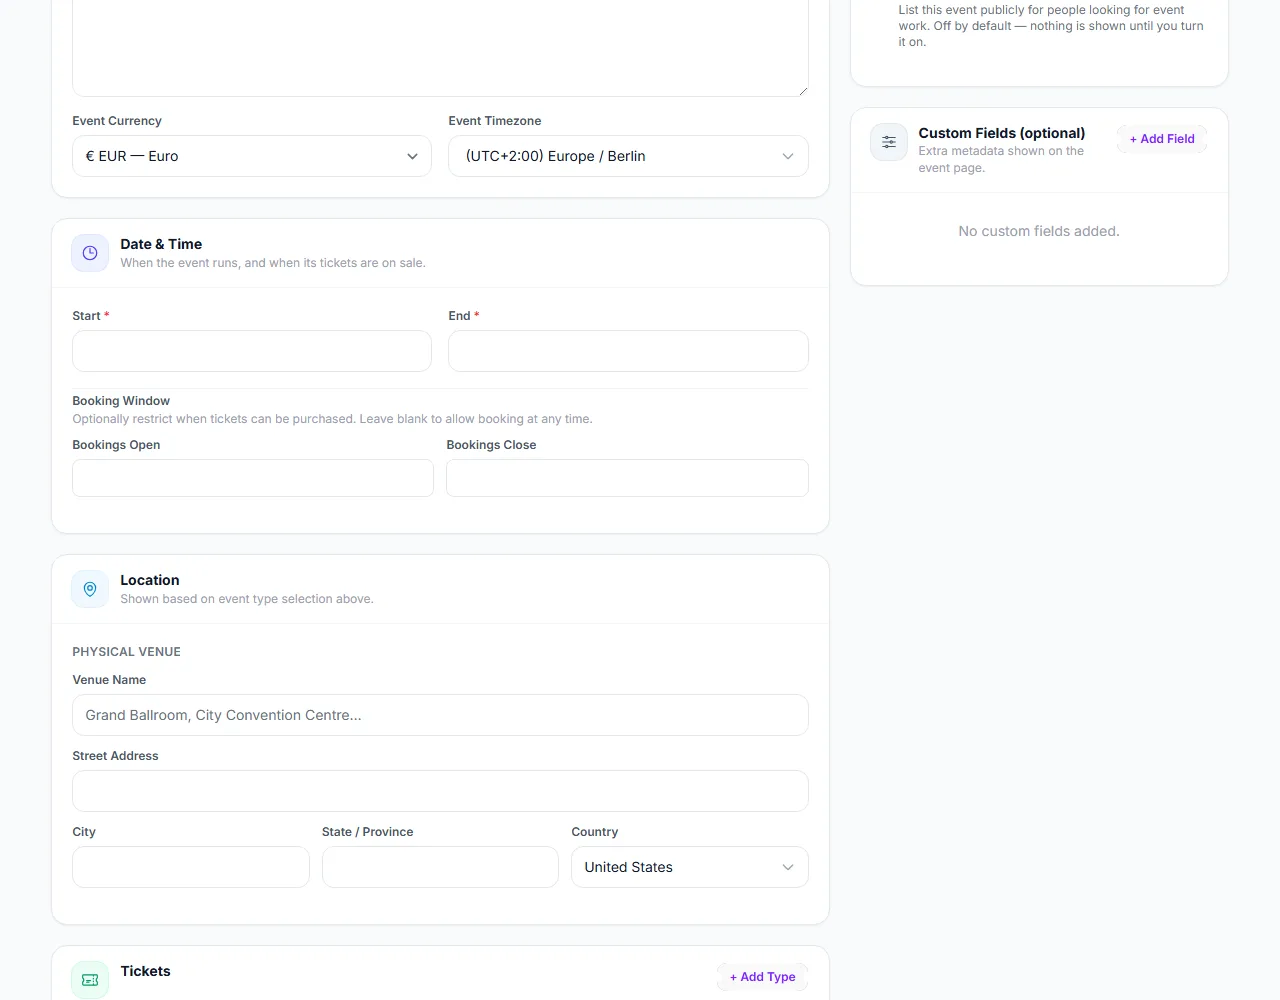
Enter the Start ① and End. The start must be in the future and the end after the start.
Optionally set the Booking Window ②: Bookings Open and Bookings Close. Leave both blank to sell at any time. Early-bird sales normally open months before the doors and close before them.
For an in-person event fill in Venue Name ③, Street Address, City, State / Province and Country ④.
See Recurring events for what is created. A Hybrid event asks for the physical venue and for a Stream / Meeting URL, which is required.
3. Tickets
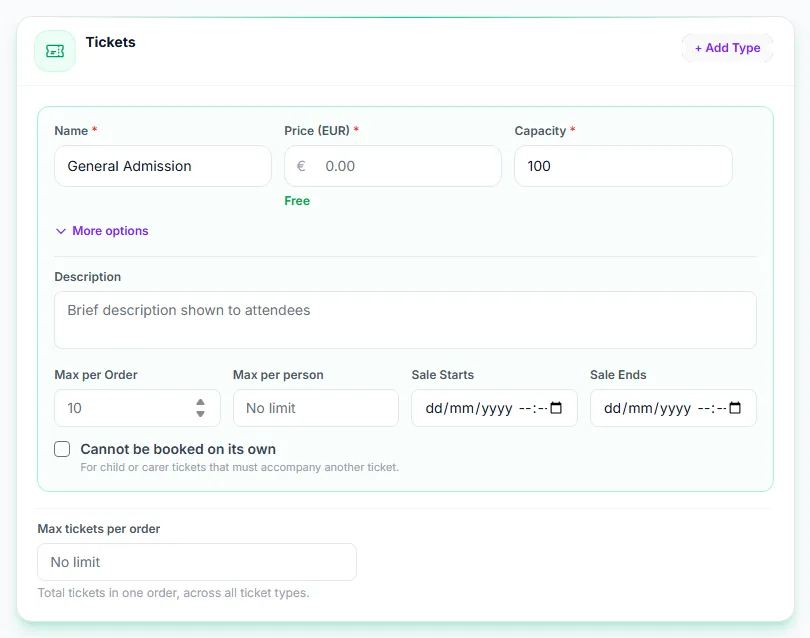
Give the first ticket type a Name ①, a Price ② (0 means free) and a Capacity ③.
Click + Add Type ④ for more types. If your plan caps ticket types per event, the button disappears at the limit.
Open More options ⑤ for a description, Max per Order (default 10), Max per person, a sale start and end for that type, and Cannot be booked on its own for child or carer tickets.
Below the types, Max tickets per order caps the whole basket across all types. Without it, 10 adults plus 10 children is a legal 20-ticket order.
Member prices, members-only tickets, volunteer tickets and the ticket tier are added later on the Ticket Types page. See Ticket Types.
4. Event configuration
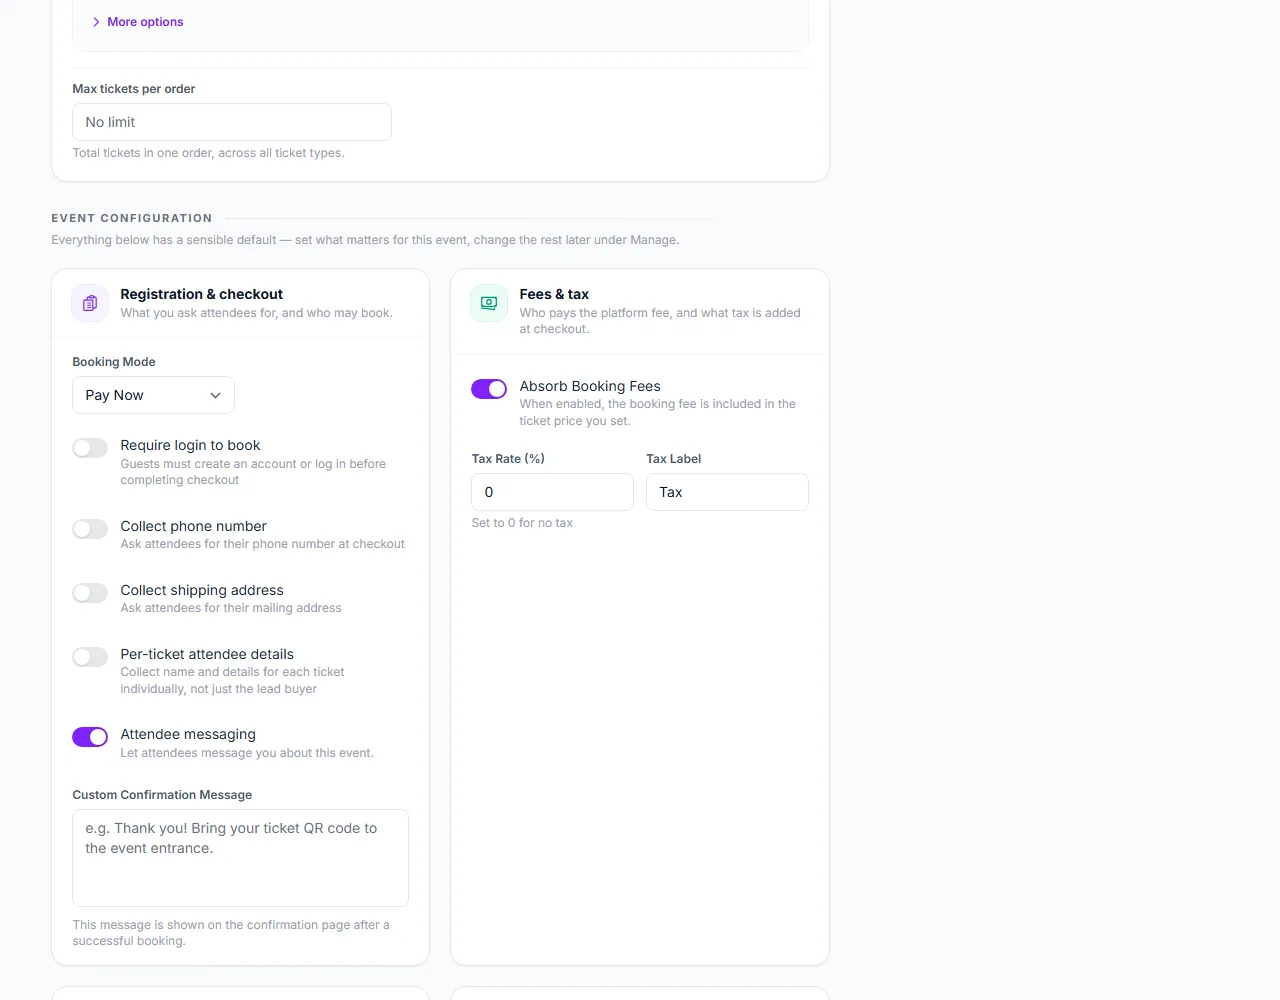
The cards under Event configuration are the same options as under Manage; they are offered here because a first event should not go on sale on the platform’s assumptions. Anything you leave alone keeps the platform default, and a default changed later still reaches the event.
Booking Mode ① — Pay Now or Request & Approve. See Booking Modes.
Require login to book ②, Collect phone number, Collect shipping address, Per-ticket attendee details, Attendee messaging and a Custom Confirmation Message for the confirmation page.
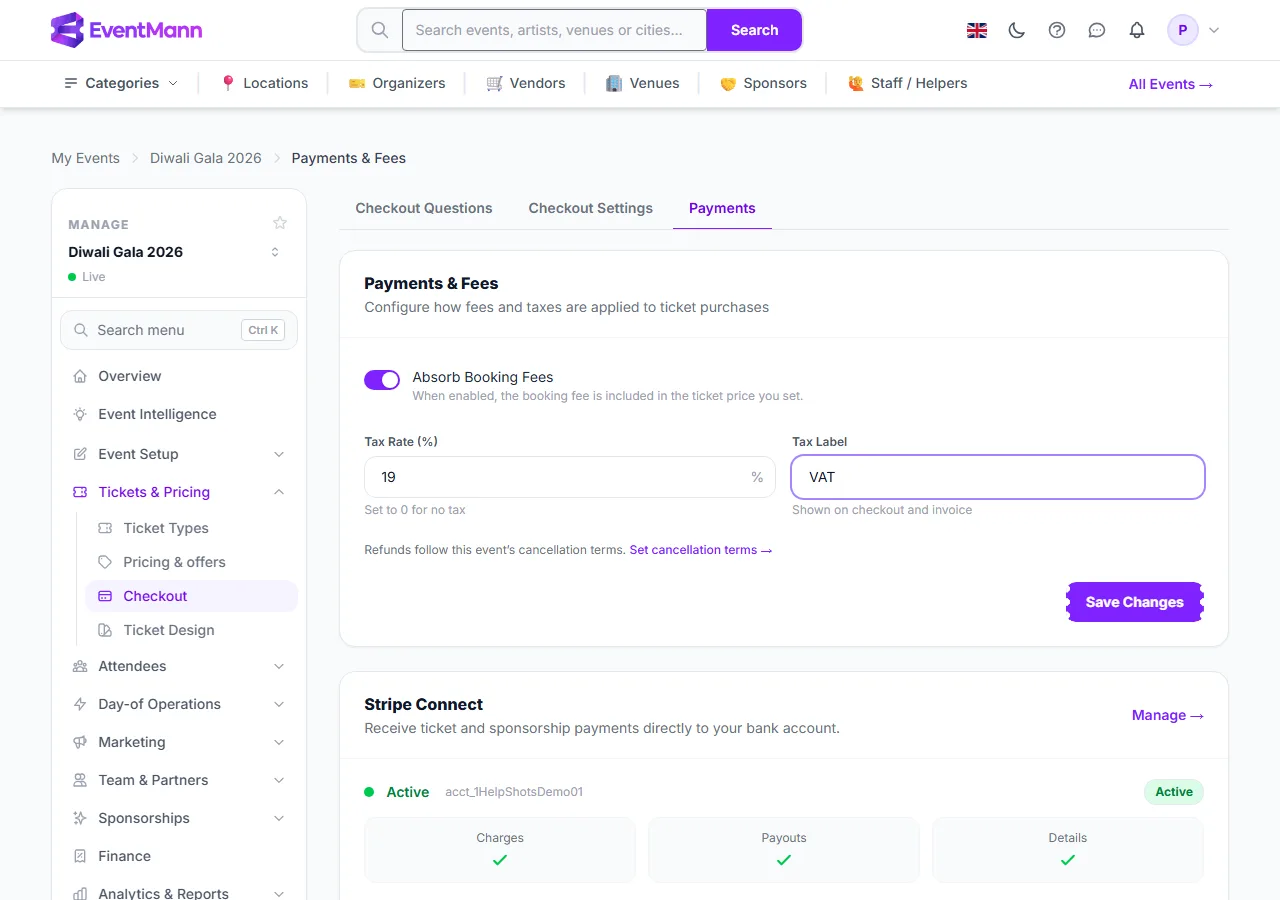
Absorb Booking Fees ③ — include the booking fee in the ticket price you set instead of adding it for the buyer. See Understanding fees.
Tax Rate (%) ④ and Tax Label — 0 for no tax. See Tax rates.
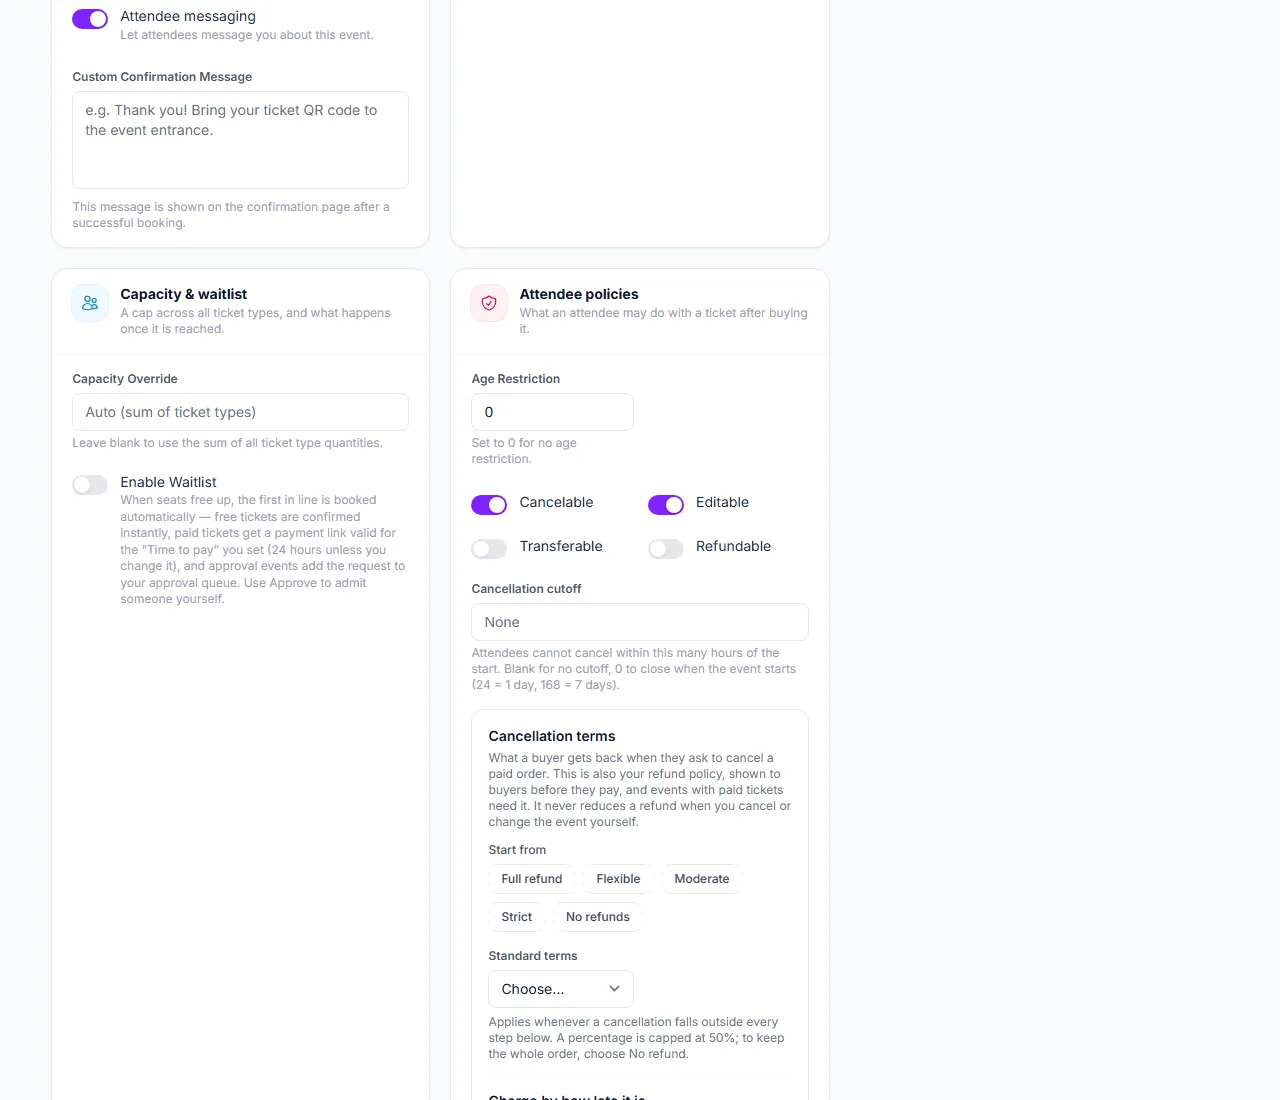
Capacity Override and Enable Waitlist under Capacity & waitlist. A capacity override is a ceiling across all ticket types.
Under Attendee policies, set an Age Restriction (0 for none) and switch Cancelable ①, Editable, Transferable and Refundable. A Cancellation cutoff in hours stops cancellations shortly before the start.
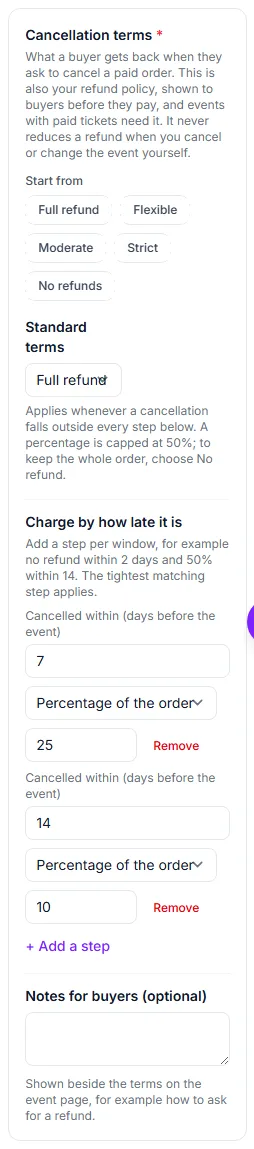
If any ticket is paid you must choose Cancellation terms: pick a preset such as Moderate ② or build your own, optionally with steps of the kind “no refund within 2 days” under Charge by how late it is ③. These terms are shown to buyers before they pay. See Cancellation terms.
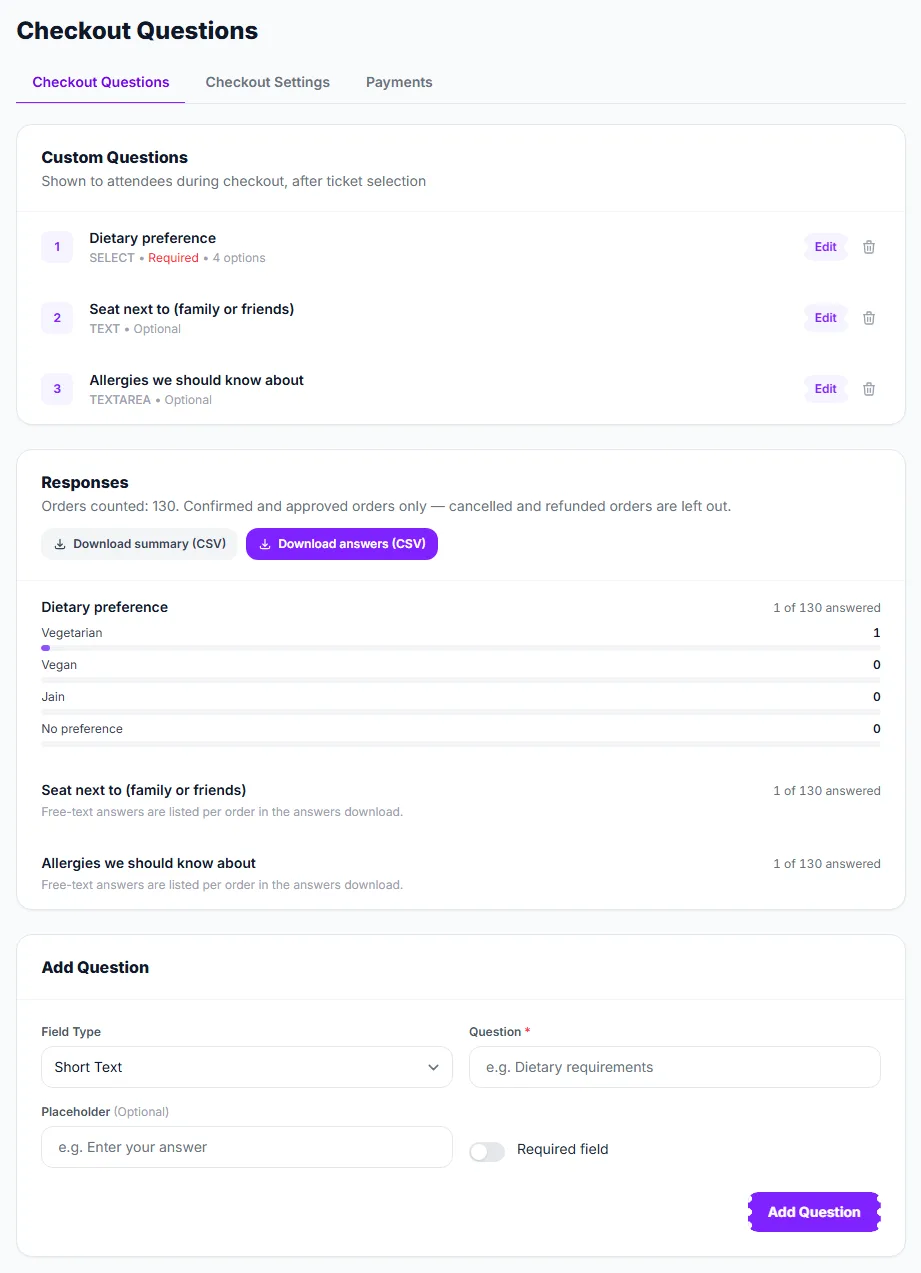
Member early access lets members of your organization book a number of hours before sales open to everybody. Add Checkout Questions to ask attendees something extra.
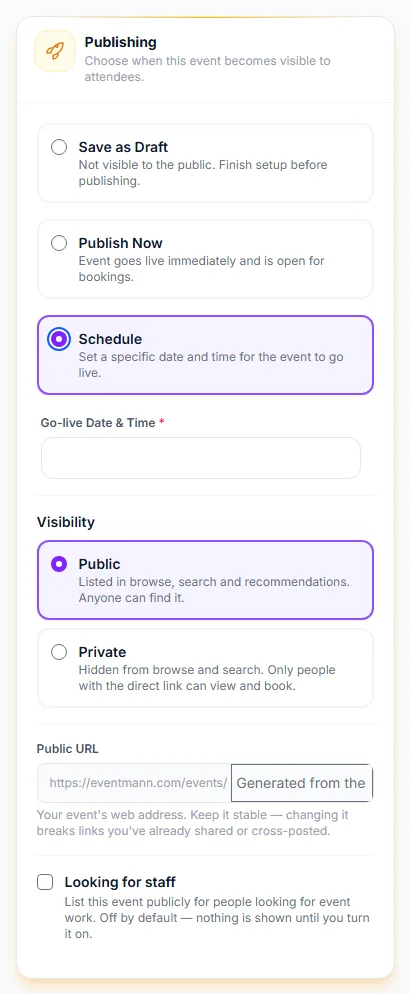
Save as Draft ① — nothing is visible to the public.
Publish Now ② — the event is created Live and open for bookings.
Schedule ③ — choose a Go-live Date & Time; the event goes live automatically at that time, which is read in the event’s own timezone.
Choose Visibility: Public (listed in browse and search) or Private ④ (hidden from search; only people with the link can see and book). Visibility is separate from the lifecycle status.
Check the Public URL. It is generated from the title unless you type your own; keep it stable once shared.
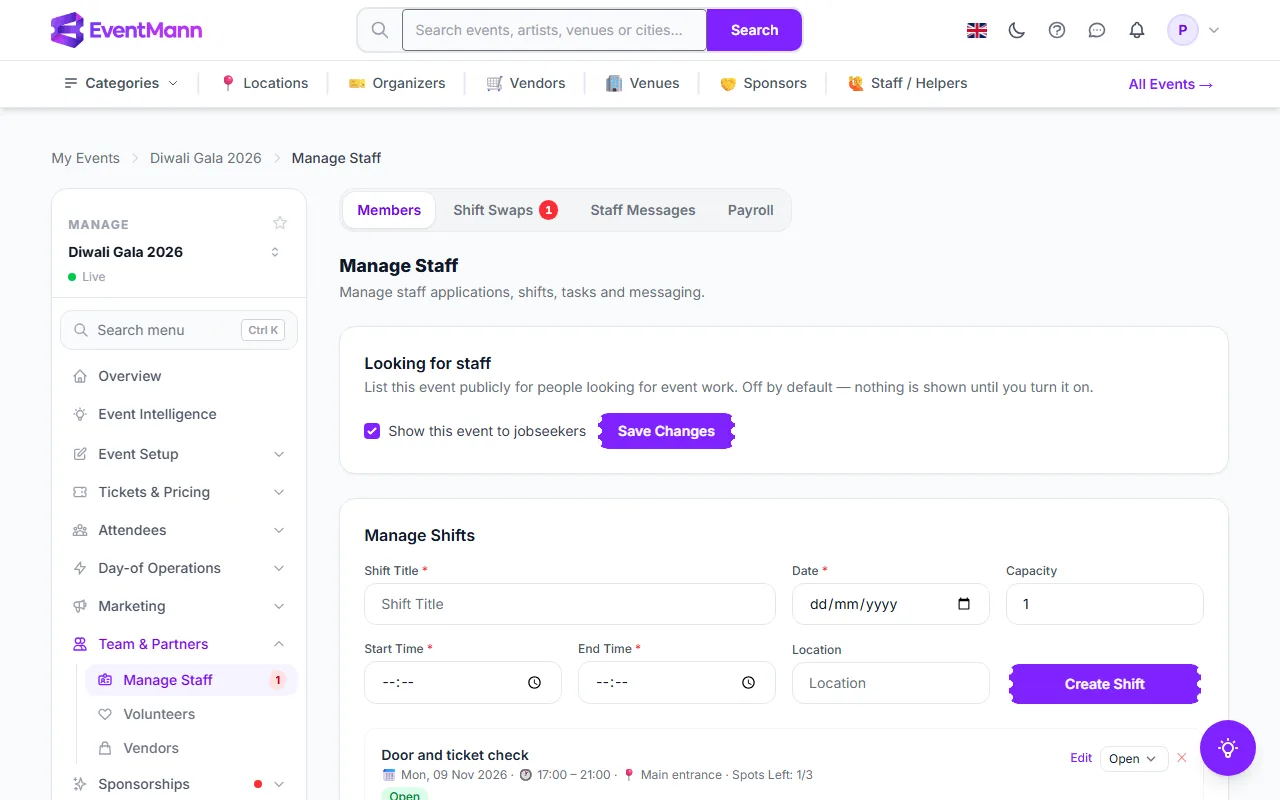
Tick Looking for staff only if you want the event listed publicly for people looking for event work. It is off by default.
The bar at the bottom shows how much of the form is filled in. Save as Draft keeps the event unpublished, Save as Template asks for a template name and also keeps the setup for later use, and Create Event creates it as chosen above. Custom Fields (optional) store extra text, number, URL or email facts shown on the event page.
Good to know
Publishing can be held back. If you choose Publish Now or Schedule but your email address is not verified, a paid ticket needs Stripe Connect that is not finished, or a platform agreement is waiting, the event is created as a Draft and a message says why. Nothing you typed is lost.
When the platform reviews events before they go live, or the event is flagged by the automatic risk check, it is created as a Draft and submitted for review; you publish once it is approved.
A saved Draft lands you on Details & dates so you can carry on; a published or scheduled event lands on its Overview.
Starting from a template copies its details, ticket types and settings, and gives the new event its own copy of the cover image, so replacing it later never changes the template.
All dates are wall-clock times in the timezone you pick, not converted per viewer.
Troubleshooting
“The image must have a 16:9 ratio” — use the cropper on the picker, or upload a 16:9 picture such as 1600×900.
“The cancellation terms are required” — a paid ticket needs terms; choose a preset, even “Full refund”.
Publish Now saved a Draft — read the message at the top of the next page: verify your email, finish Stripe, or accept the waiting agreement.
I do not see recurrence fields — choose Event Type Recurring.
The page lost my cover image after an error — a file kept from a failed submit stays attached; a new pick replaces it.
The short Edit Event form (title, category, description, cover image, dates, address and a Published checkbox) has been retired. Everything it changed is edited on Details & dates, which is where Edit in My Events has led for some time. If you open an old bookmark to /organizer/events/<id>/edit, you are taken straight to Details & dates for that event.
Where each field is now
Event Title, Category, Description and the Cover Image — the Event Information card on Details & dates.
Start and End date and time — the Event Dates card, together with the timezone and currency.
Venue, Address, City, State / Province and Country — the Location card, which also has the Online Event switch the old form never had.
The Published checkbox — replaced by the buttons in the Event Status panel on the right of Details & dates and on the Event Overview: Go Live, Schedule and Pause. See Event status.
Good to know
Going live from Details & dates checks exactly what Go Live always checked: a verified email, Stripe for paid tickets, chosen cancellation terms, outstanding agreements and any review.
Moving the dates or the venue emails ticket holders what changed, as before. Once orders have been paid, that email cannot be switched off and a start date cannot be moved into the past.
If you still had the old form open in a browser tab and pressed its save button, nothing was saved: you land on Details & dates with what you typed filled in and a message saying so. Check it, add the cover image again if you had chosen one, and press Save Changes.
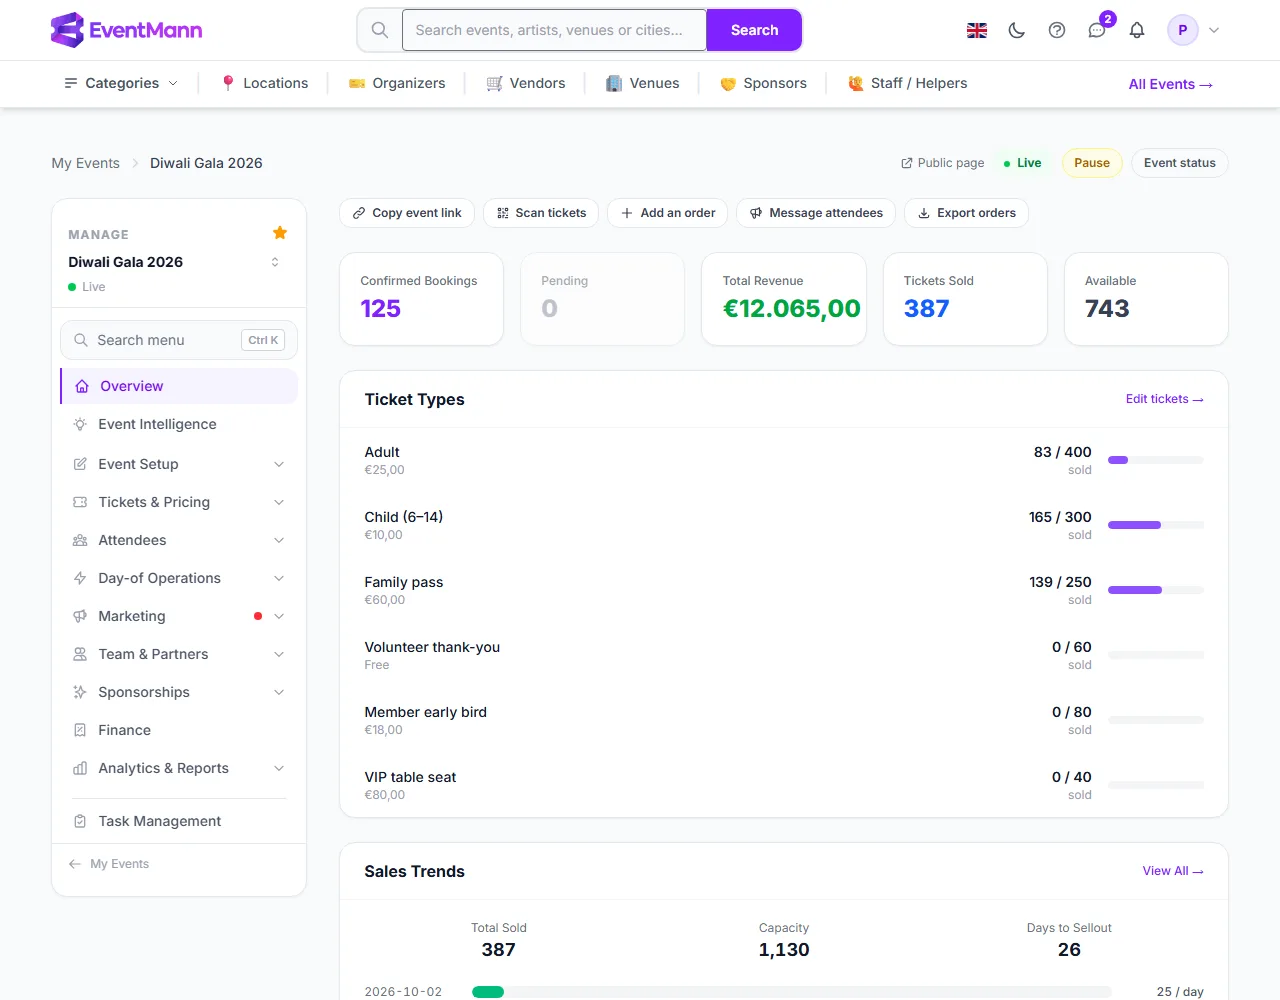
Event Overview is the page you land on when you press Manage on an event: status controls, the headline numbers, ticket sales and recent orders, and a readiness check. Everything else for the event is reached from the Manage sidebar on its left. Shortcut: g then v.
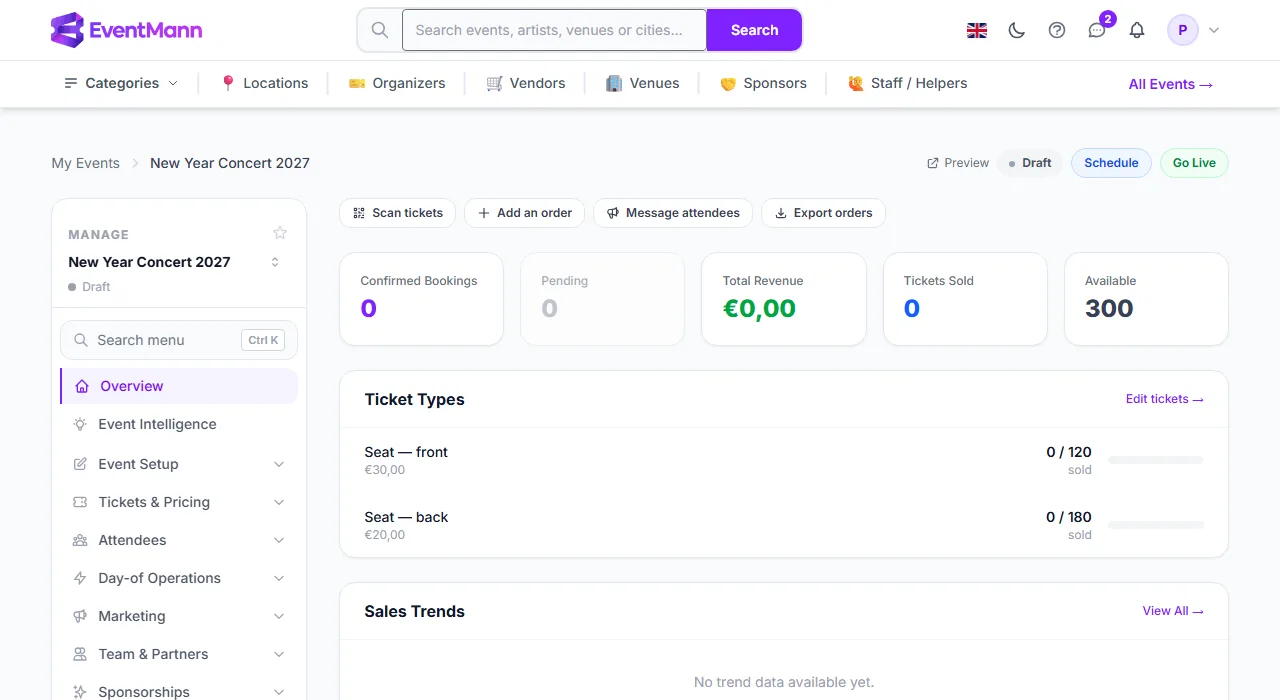
The header
The link ① opens the Public page while the event is Live. For any other status it reads Preview and opens a private preview marked “Preview mode”, so the link never ends in a “not found”.
Next to the status badge are the reversible moves: Schedule and Go Live on a Draft, Go Live on a Paused event, and Pause ② on a Live one. Pausing asks you to confirm.
The Event status chip ③ opens the page for the irreversible moves, Cancel and Mark Complete. It only appears while one of them is available. See Event status: publishing, pausing, cancelling.
The buttons only show if you hold the publish permission for the event. A draft that cannot be published yet shows a notice above the figures that says why, with a link to the screen that fixes it.
Quick actions and the figures
The row of quick actions ④ is filtered to what you may do: Copy event link, Scan tickets, Add an order, Message attendees and Export orders.
The five cards ⑤ show Confirmed Bookings, Pending (greyed at zero), Total Revenue, Tickets Sold and Available. The first three link to the matching Orders view or report.
Ticket Types ⑥ shows sold against capacity per type, with an Edit tickets link.
Further down: Sales Trends (total sold, capacity, estimated days to sell out and sales per day), Recent Orders with a link to the full list, and, from 24 hours before the doors until the event ends, an event-day panel that leads with the door: tickets admitted and checked in, and buttons for scanning and advanced check-in.
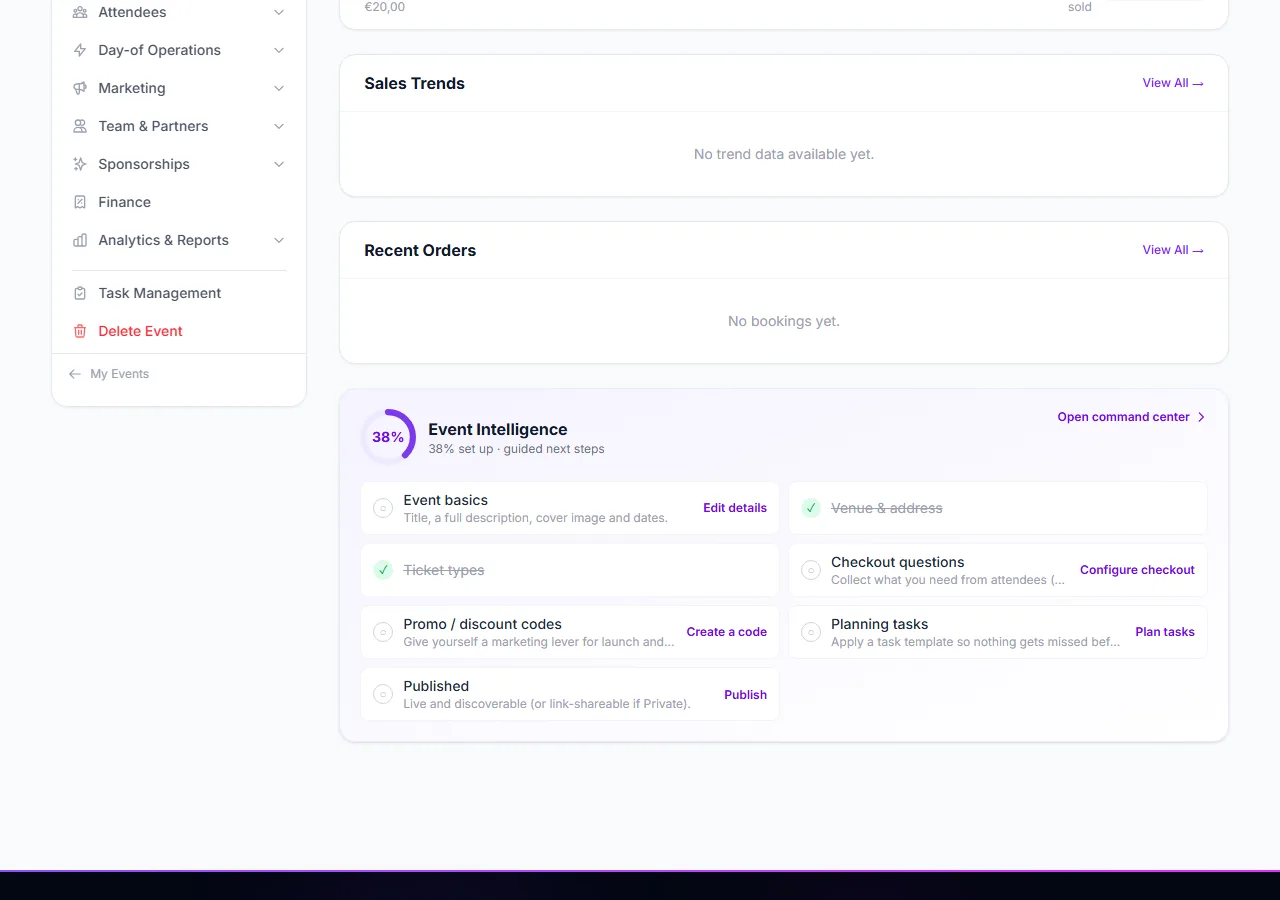
The readiness panel
The Event Intelligence panel is a checklist with a score. It is guidance, not a prediction of sales, and every unticked item links to the screen that fixes it.
Open command center ① opens the full Event Intelligence page with every check and recommendation.
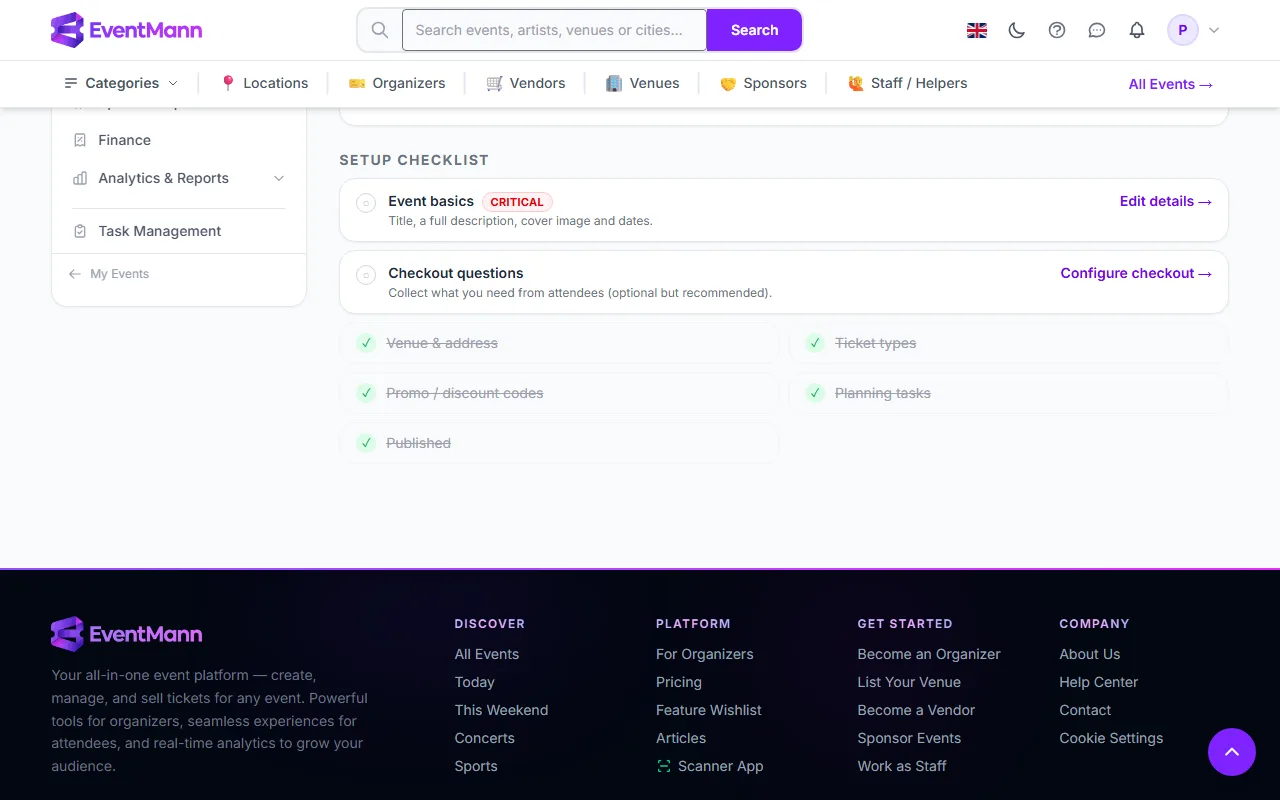
The checks ② are Event basics (title, description, cover, dates), Venue & address, Ticket types, Checkout questions, Promo / discount codes, Planning tasks and Published. Basics, venue and tickets are the critical ones: until they are done the Ready to publish button next to the score does not appear.
Time-sensitive recommendations appear under the score — for example orders waiting for payment, sales running slowly as the date nears, or a ticket type almost sold out — each with a one-click action.
The sidebar names the event, with a star to pin it and a switcher to move to another event (see Finding your way around). Its groups are Event Setup (Details & dates, Venue & seating, Translations), Tickets & Pricing, Attendees, Day-of Operations, Marketing, Team & Partners, Sponsorships, Finance, Analytics & Reports and Task Management. Delete Event appears only when the event can be deleted. A red dot or a number on a group means something inside it is waiting for you.
Good to know
Revenue and bookings count only confirmed orders; pending ones are shown separately.
Ticket counts agree with the Ticket Types page; sales of a ticket type that has since been removed are shown as their own line so that totals still add up.
Team members see only the actions and menu rows their role allows.
Troubleshooting
Go Live shows an error instead of publishing — the message names the cause: unverified email, a paid ticket without a connected Stripe account, cancellation terms not chosen for a paid event, or an agreement waiting.
There is no lifecycle button, only the badge — your role does not include the publish permission.
“Ready to publish” does not appear — one of the three critical checks is still open.
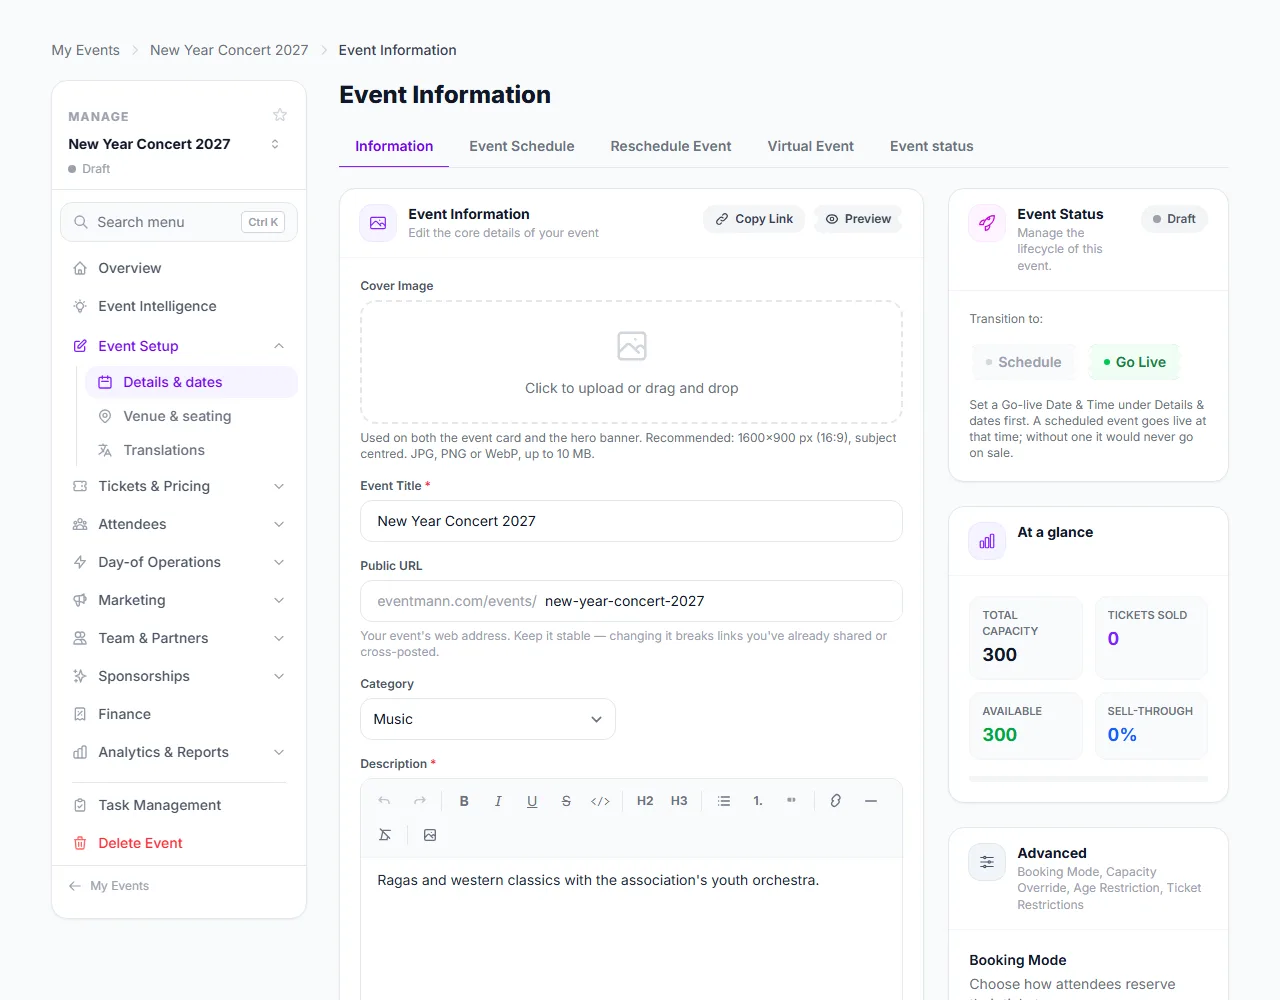
Details & dates is where you edit everything about an event after it exists: its description, dates, location, booking window, visibility, booking mode, ticket rules and cancellation terms. Open it from Manage → Event Setup → Details & dates, or press Edit in My Events. The page opens on the Information tab; the other tabs are Event Schedule, Reschedule Event, Virtual Event and Event status.
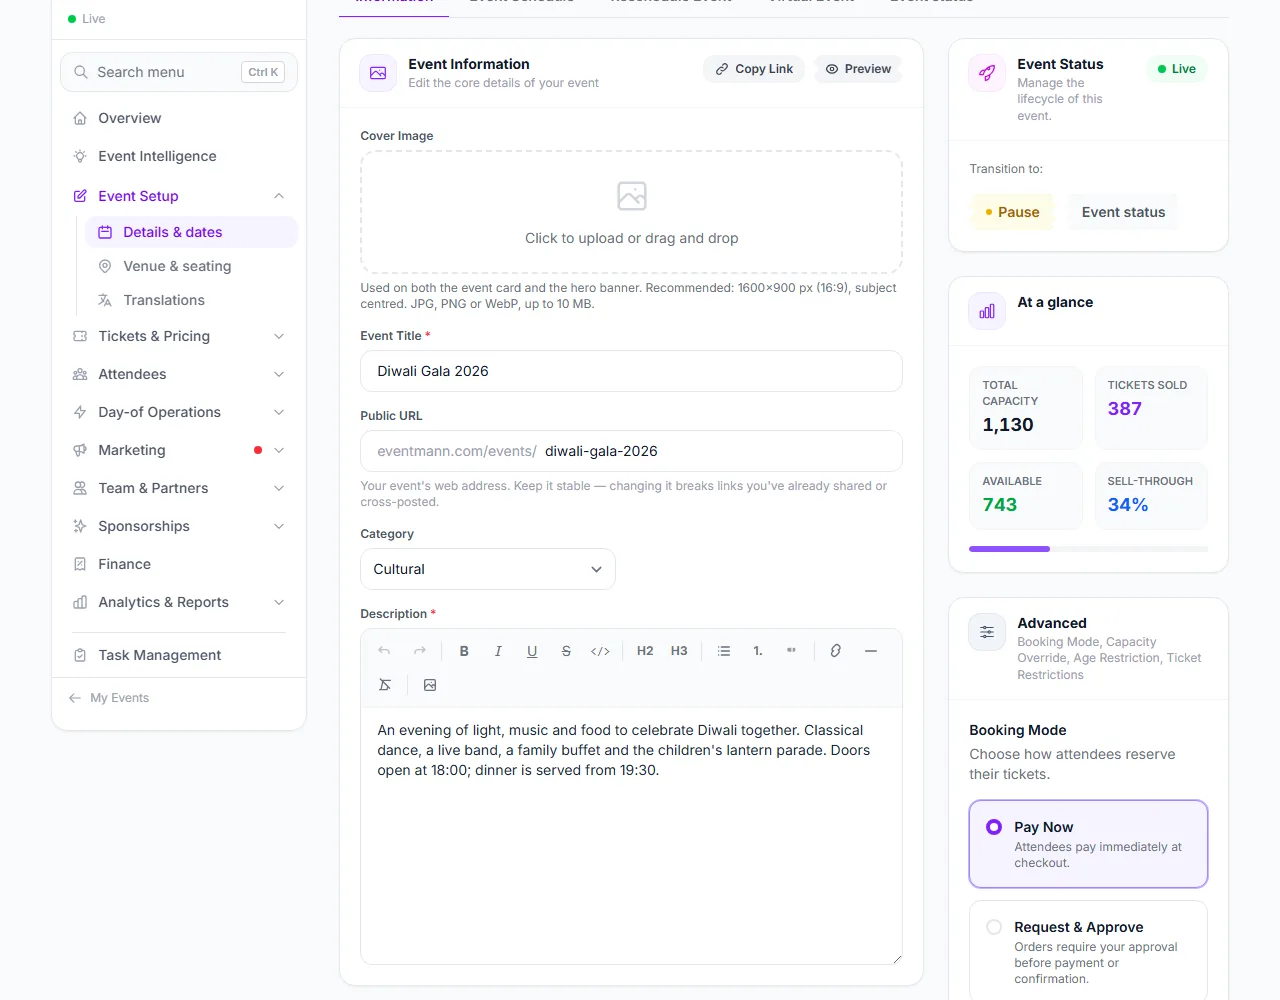
The left column is the event itself, in cards that each save on their own: Event Information, Event rules & what to know, Event Dates, Location, Booking Window and Visibility. A bar that reads “Saves this section only” holds Save Changes.
The right column has the Event Status panel (the same moves as the Overview; Cancel and Mark Complete are behind its Event status button), an At a glance card (capacity, tickets sold, available, sell-through) and the Advanced card, which has its own Save Changes.
Cover Image — click to upload; it is used on both the event card and the hero banner (recommended 1600×900, 16:9; JPG, PNG or WebP up to 10 MB). Leave it alone to keep the current one.
Event Title ⑤ and Public URL ⑥ — the URL is the stable address of the event page, eventmann.com/events/your-name. Changing the title does not change the URL, because it is the field you edit; changing the URL breaks every link you already shared. Copy Link copies the saved URL and Preview opens the private preview.
Category and Description (rich text).
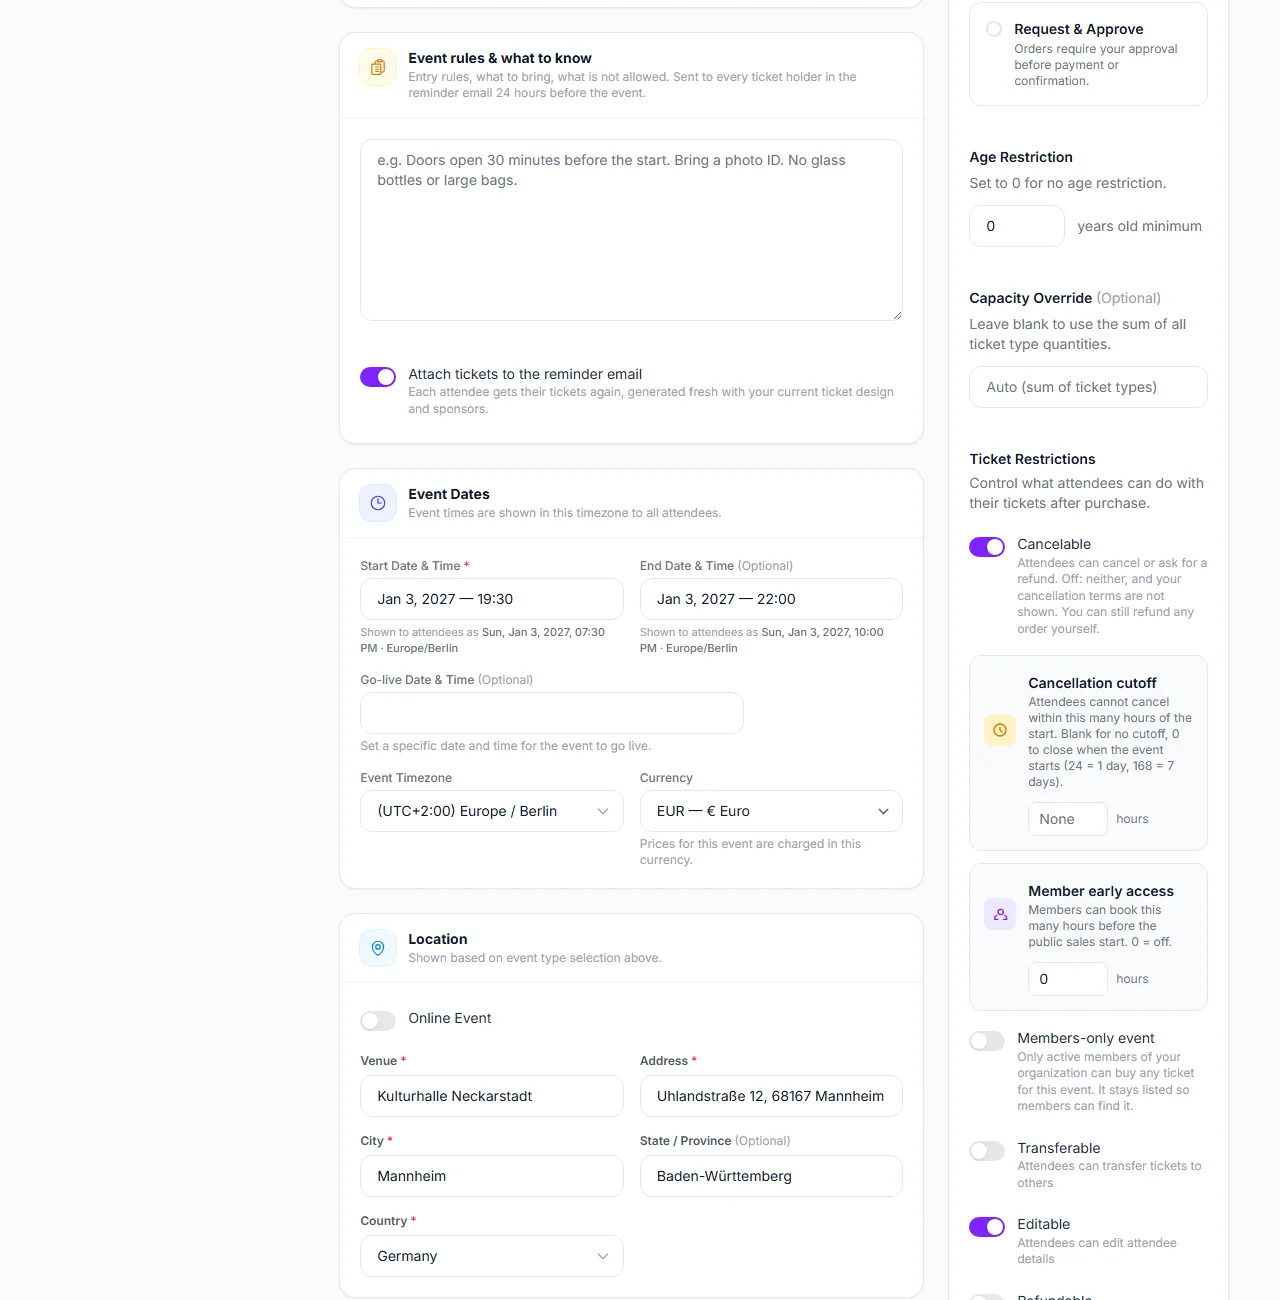
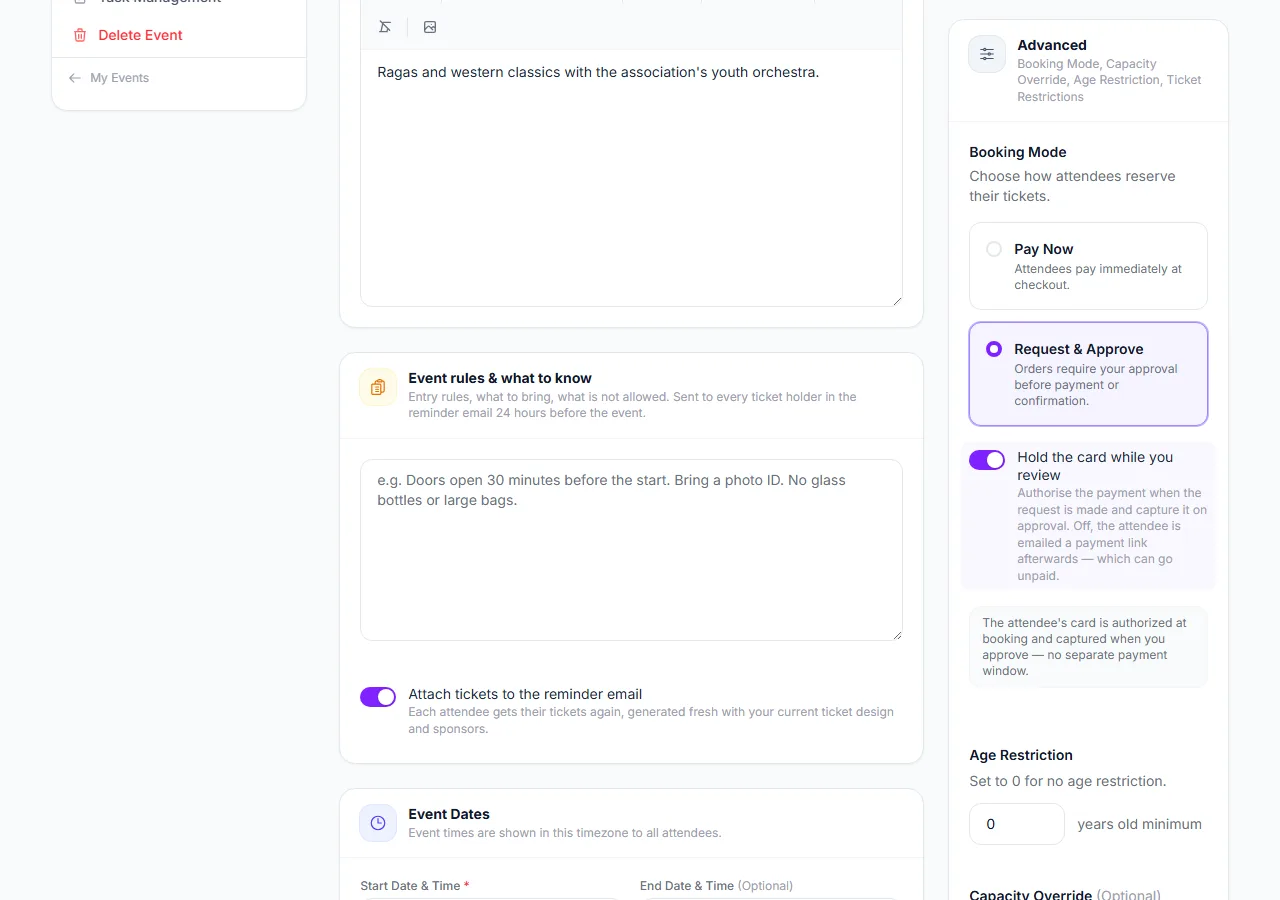
Event rules & what to know — entry rules, what to bring, what is not allowed (up to 10,000 characters). It is printed in the automatic reminder email sent to every ticket holder 24 hours before the event. Attach tickets to the reminder email sends each attendee their tickets again, generated fresh with your current ticket design and sponsors.
Event Dates and Location
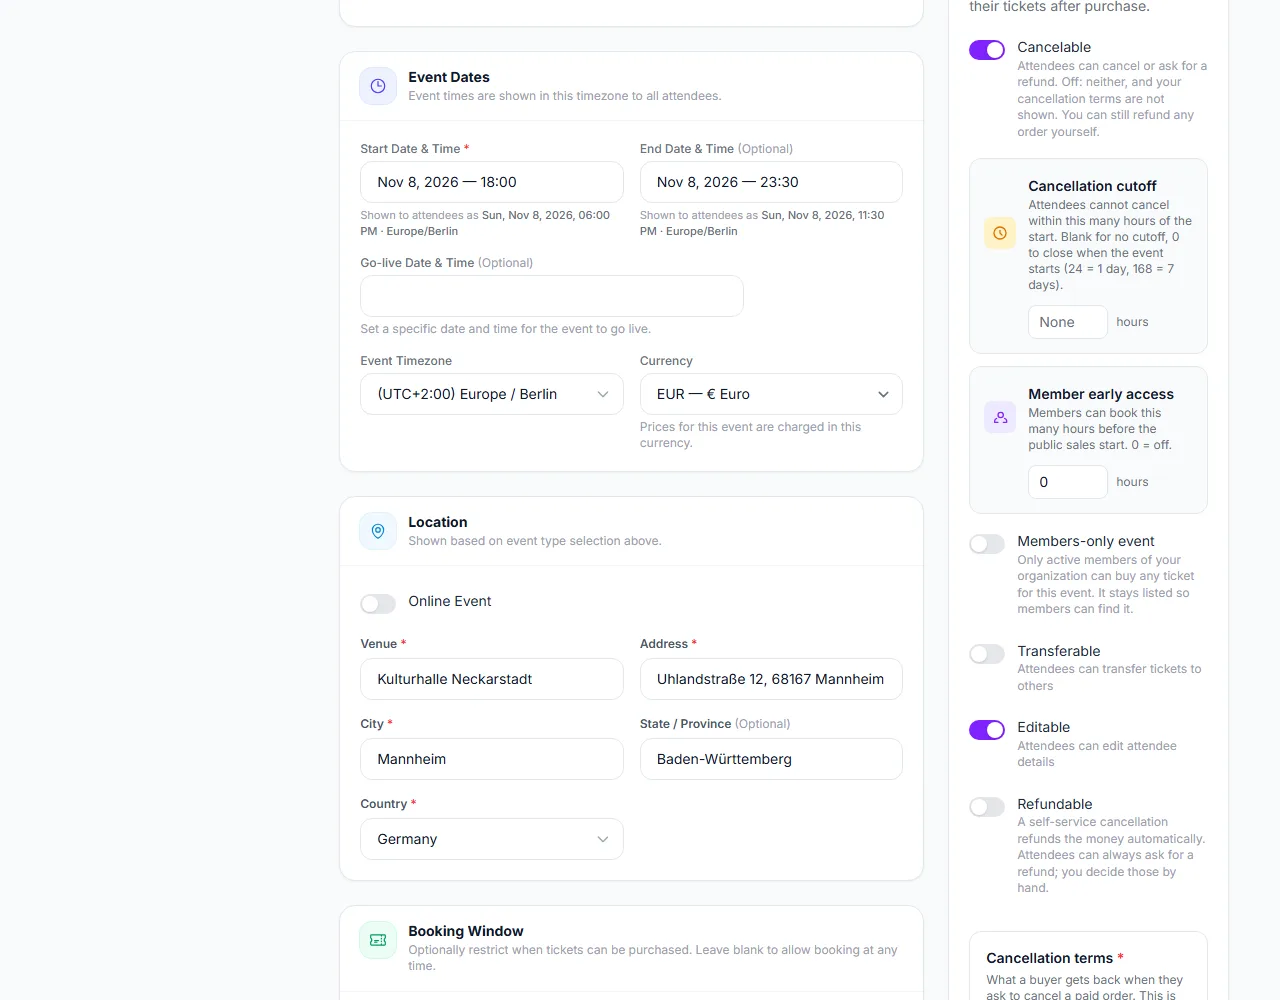
Set the Start Date & Time ① (required) and End Date & Time (optional). The line beneath each shows how attendees will read it, with the timezone.
For a draft you want to publish automatically, enter a Go-live Date & Time ②, save, and then use Schedule in the Event Status panel; the button stays greyed out until a go-live time is saved. Once an event is Scheduled the go-live time cannot be cleared, only moved. See Event status.
Check the Event Timezone ③ and Currency. Times are wall-clock times in that timezone, the same for every viewer; prices are charged in that currency.
Switch Online Event ④ on for an event without a venue: the address fields are hidden and a stream or meeting URL is required instead. Otherwise fill in Venue ⑤, Address, City and Country, all required for an in-person event, and State / Province if your address uses one (optional; it is printed on the event page and the ticket).
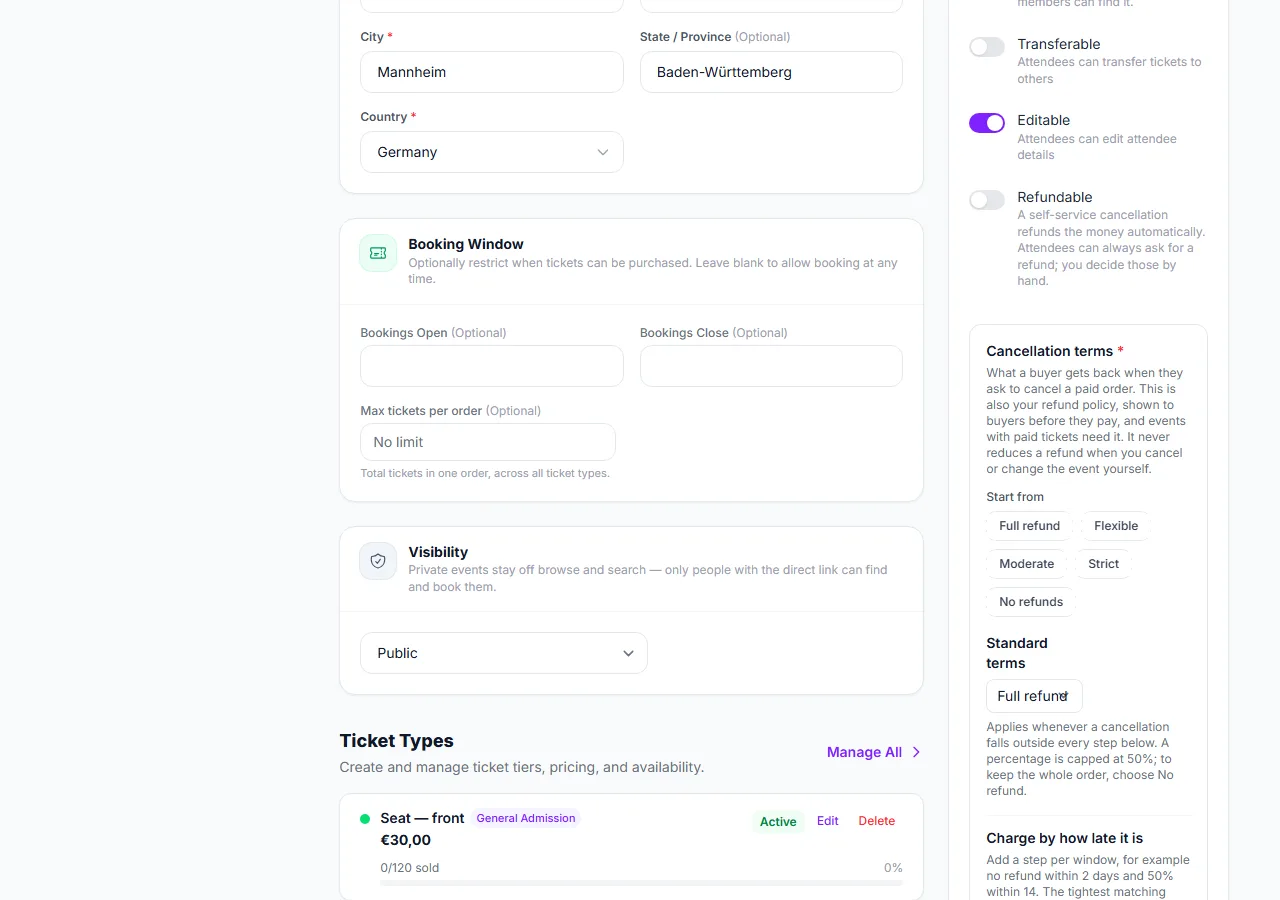
Bookings Open ① and Bookings Close (both optional) control when tickets can be bought, independently of the event’s own dates. Individual ticket types can have their own sale dates too.
Max tickets per order ② caps the whole basket across ticket types; blank means no limit.
Visibility ③: Public events are listed in browse and search. Private events stay off browse and search and can only be reached with the direct link.
The Advanced card holds the rules for how tickets are bought and what attendees may do with them.
Booking Mode ① — Pay Now or Request & Approve. See Booking Modes.
Age Restriction ② — a minimum age in years; 0 for none.
Capacity Override ③ — a hard ceiling across all ticket types. Blank uses the sum of the ticket types. When it is below that sum, the figures on this page use the override.
Ticket Restrictions: Cancelable ④ lets attendees cancel or ask for a refund (off: neither, and the cancellation terms are not shown; you can still refund any order yourself); Cancellation cutoff stops cancellations a number of hours before the start (blank for none, 0 to close when the event starts); Transferable, Editable (attendees may edit attendee details) and Refundable (a self-service cancellation refunds automatically; attendees can always ask, and you decide those by hand).
Cancellation terms — what a buyer gets back when they cancel. Required once an event has paid tickets. See Cancellation terms.
1234The Event Status, At a glance and Advanced cards
Member early access ① — hours before sales open to everybody that your active members may already book (0 = off). It only has an effect when a booking start is set.
Members-only event ② — every ticket is reserved for active members; the event stays listed so members can find it.
Transferable ③ and the other switches described above.
123Member access, ticket rights and cancellation terms
Enable Waitlist ① lets attendees join a list when a ticket type is sold out. Book waitlisted people automatically books the longest-waiting person as soon as a seat frees up; off, you admit people from the list yourself. See Waitlist.
Time to pay ② — hours (0.5 to 72) an admitted person has to pay for a paid ticket. A free ticket is confirmed at once.
Waitlist limit ③ — how many tickets may be queued per ticket type; blank for no limit.
Looking for staff ④ — list the event publicly for people looking for event work (off by default).
Changing dates, venue or format notifies your attendees
Dates, venue, address, city, country and online or in-person are promises to everybody who has a ticket. When you save a change to any of them and orders are confirmed, the ticket holders are emailed that the event details changed. The change is recorded with the number of orders and the amount affected. The dedicated Reschedule Event page does the same for date changes.
Dates are compared to the minute, so saving the form without touching them never sends an email.
Once money has been taken, the email cannot be switched off: a material change gives buyers a right to a refund, and that is not something to withhold.
A start date cannot be moved into the past once orders have been paid.
If the same paid event changes twice within 30 days the platform team is told, and your next paid event may be reviewed before it can go live.
Good to know
Cancellation terms are recorded on each order when it is bought: changing them affects future orders, while orders already placed keep the terms they were sold under.
A paid event cannot go live without cancellation terms you chose yourself — “Full refund” is a valid choice, a blank is not.
The cancellation cutoff, the capacity override and the age limit apply to every ticket type of the event.
Troubleshooting
Saving fails with a venue, address, city or country error — those are required unless Online Event is on.
The stream URL will not save — it is required once Online Event is on.
The booking window is rejected — Bookings Close must be on or after Bookings Open.
“The start date cannot be moved into the past” — the event has paid orders. Use Reschedule Event for a future date or cancel the event.
My changes on the right did not save — each side has its own Save Changes button; the Advanced card is saved separately from the left cards.
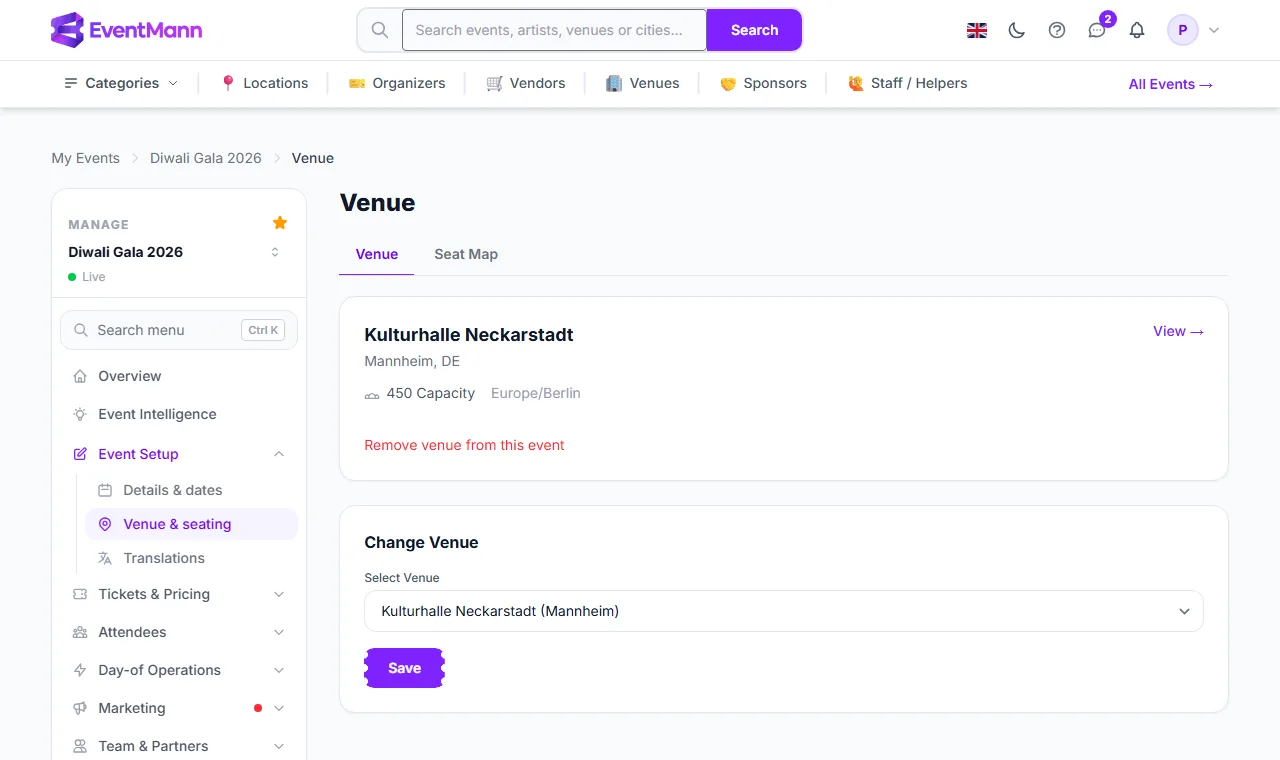
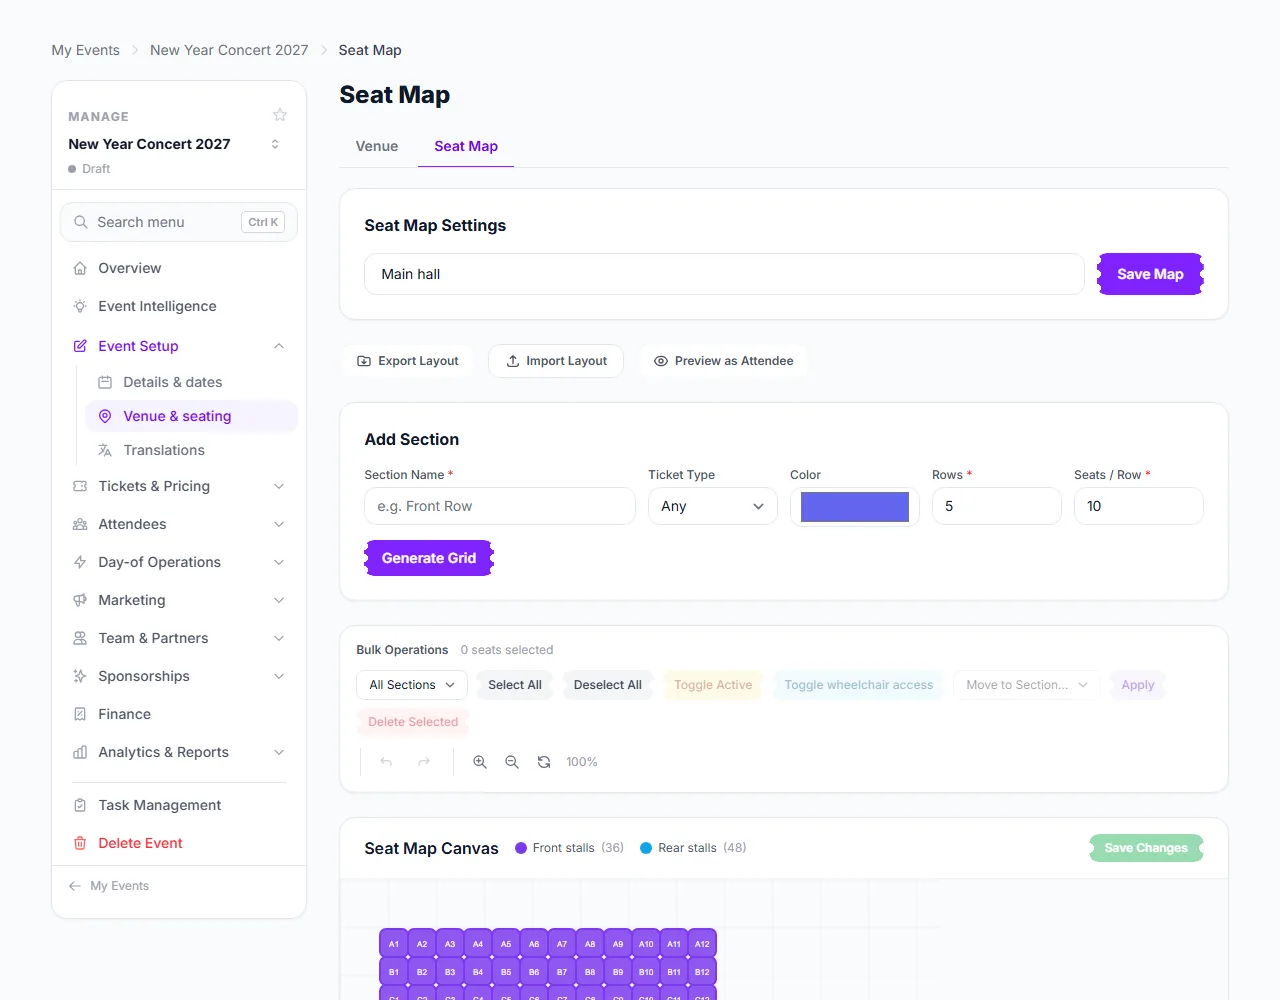
Venue & seating links an event to one of your saved venues and, for seated events, holds its seat map. Open it from Manage → Event Setup → Venue & seating. The page has two tabs: Venue (this article) and Seat Map (see Seat Map). Venues themselves are created separately under Work → Venues; see Venues.
What you can do here
Move between Venue and Seat Map with the tabs ①.
Read the venue card ②: its name, city and country, its capacity and its own timezone when set, and a link to the venue’s page.
To remove the link click Remove venue from this event ③ and confirm. The event is then not tied to a saved venue; the address typed on Details & dates stays as it is.
To assign or change the venue, choose it in Select Venue ④ and click Save.
When you pick a venue the page checks it against the event’s start and end. You see either Venue is available for this event or Another event or block overlaps these dates. The warning covers your other events at that venue and blocks the owner has set. It is a warning: you can still save. If the dates are wrong, fix them on Details & dates first and come back.
Which venues you can choose
Venues you created that are active.
Venues of other owners that you booked through a venue request and the owner approved. They appear under the group Booked venues, and the card notes that the venue was booked through a venue request.
If you have no venue yet, the page links to Create Venue.
Clone the venue layout into the seat map
If the assigned venue has seating zones, a Clone layout action appears: it copies the venue’s blueprint into this event’s seat map so you can adjust it for this event without touching the venue’s own layout. It replaces the current seat map, so you are asked to confirm, and it is refused once seats have been sold.
Good to know
Assigning a venue does not rewrite the venue, address and city shown to attendees; those come from Details & dates.
Team members with the venue-manager role can assign venues, even though the venues belong to the organizer.
Removing a venue does not delete a seat map you already created.
Troubleshooting
The list is empty — you have no active venue yet; use Create Venue.
I see an overlap warning right after assigning — another event of yours or a block of the venue owner overlaps these dates. Change the dates or the venue.
Clone layout is not offered — the venue has no seating zones.
Cloning the layout says seats are already sold — the layout cannot be replaced while seats are sold.
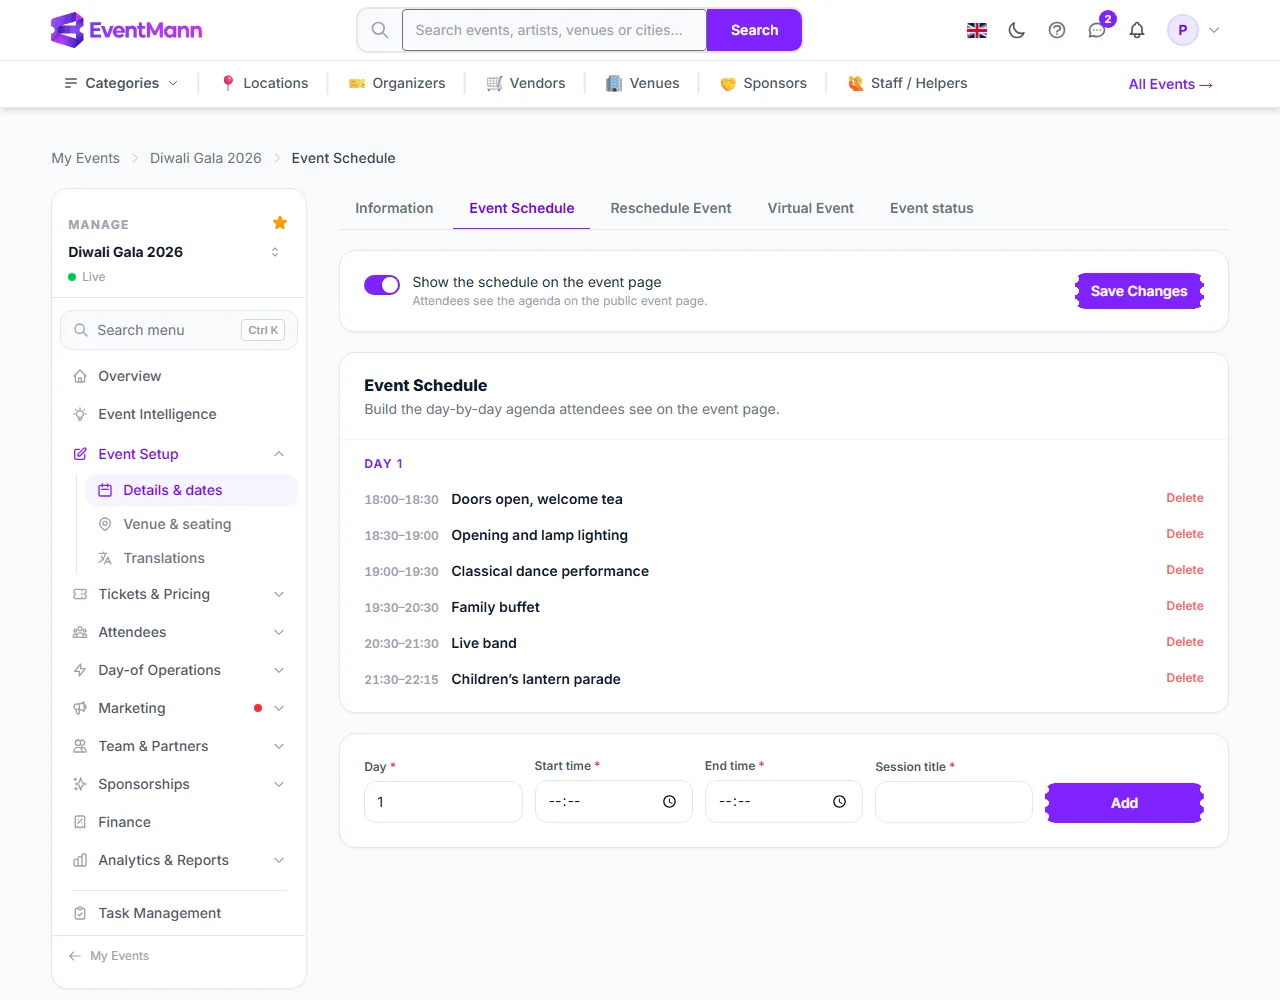
Event Schedule is the agenda of an event — the sessions, breaks and performances in order — shown to attendees on the public event page. Open it from Manage → Event Setup → Details & dates → Event Schedule.
What you can do here
Decide whether attendees see the agenda with the switch Show the schedule on the event page ① and click Save Changes. It is on by default. Switch it off while an agenda is still being drafted on an event that is already live.
To add a session, fill in the row at the bottom: the Day ②, Start time ③, End time and Session title ④, then click Add.
To remove a session click Delete at the end of its row and confirm.
Day — a number that groups sessions under “Day 1”, “Day 2” and so on. It is a sequence, not a calendar date, so it keeps working if you reschedule the event.
Start time and End time — plain times of day in the event’s timezone. The end must be after the start.
Session title — required, up to 255 characters.
Good to know
Sessions are listed by day, then by their position, then by start time.
Each session is saved as a plain session. Speakers, locations, descriptions and a type (session, break, keynote, workshop, networking) exist in the data but this form does not ask for them.
The schedule is separate from the event’s own start and end. Moving the event on Reschedule Event does not move the sessions, so check them afterwards.
The public page shows the agenda only if the switch is on and at least one session exists.
Troubleshooting
The end time error — the end time must be later than the start time.
The sessions are in the wrong order — check each session’s Day number first; the order is by day.
The agenda does not show on the event page — the switch is off, or the schedule is empty.
Every event has a status that says whether it is being prepared, on sale, paused, finished or called off. This article explains how to move an event between statuses, what can stop you from publishing, and what happens when you cancel, complete or delete an event. The irreversible moves, Cancel and Mark Complete, live on the Event status tab of Details & dates.
The statuses
Status
What it means
You can move it to
Draft
Being prepared; nobody else can see it
Scheduled, Live
Scheduled
Goes live automatically at the go-live time you set
Live, Cancelled
Live
Published and selling
Paused, Cancelled, Completed
Paused
Hidden from browse, search and booking; existing tickets stay valid
Live, Cancelled
Completed
Over; no more sales; final
—
Cancelled
Called off, buyers refunded; final
—
Completed and Cancelled are final: there is no way back from them in the panel (only a platform administrator can reverse one). A Draft cannot be cancelled; a Draft you no longer want is deleted. There is no way to send a Live event back to Draft: pause it instead.
Where to change the status
The header of the Event Overview shows the reversible moves — Schedule, Go Live and Pause — and an Event status chip that opens the status tab.
On Details & dates → Information, the Event Status card lists the reversible moves under Transition to:, with an Event status button for the rest.
On Details & dates → Event status you cancel or complete an event with the explanations and confirmations they deserve.
All of them need the publish permission for the event. Without it you see the badge but no buttons.
Go live, schedule, pause
To publish now, click Go Live. The event is public at once (if its visibility is Public it also appears in browse and search).
To publish later, set a Go-live Date & Time on Details & dates first, then click Schedule. A minute-by-minute job takes the event Live when that time arrives in the event’s own timezone. Schedule is refused until a go-live time is saved, and a Scheduled event’s go-live time can be moved but not cleared.
To stop sales for a while, click Pause and confirm. Pause hides the event from discovery and booking but keeps every order and ticket. Click Go Live to resume.
What can stop you from publishing
Going live, scheduling and the scheduled job all check the same conditions. If one fails you get a message that names it and the event stays as it was. The checks, in order:
Verified email. Verify your email address first; the link is in the message you received at sign-up. It applies to free events too, because registrations collect real people’s details.
Stripe, for paid events. A paid ticket needs a connected, verified Stripe account that can take card payments. See Setting Up Stripe Connect.
Agreements. Any platform agreement waiting for you has to be accepted. See Agreements.
Cancellation terms, for paid events. Choose the terms on Details & dates (even “Full refund”). See Cancellation terms.
Review. When the platform reviews events before they go live, or the automatic risk check flags a paid event (very high ticket prices, large total exposure, a first paid event and similar), the event is submitted for review and you are told “Event submitted for review — you can publish once it is approved.” The Overview and My Events show the state of the review.
A scheduled event that fails these checks when its time comes is held as Scheduled and you are notified; it is not lost. If you later add tickets or raise prices so much that an approved event looks different, it may be reviewed again.
Mark an event complete
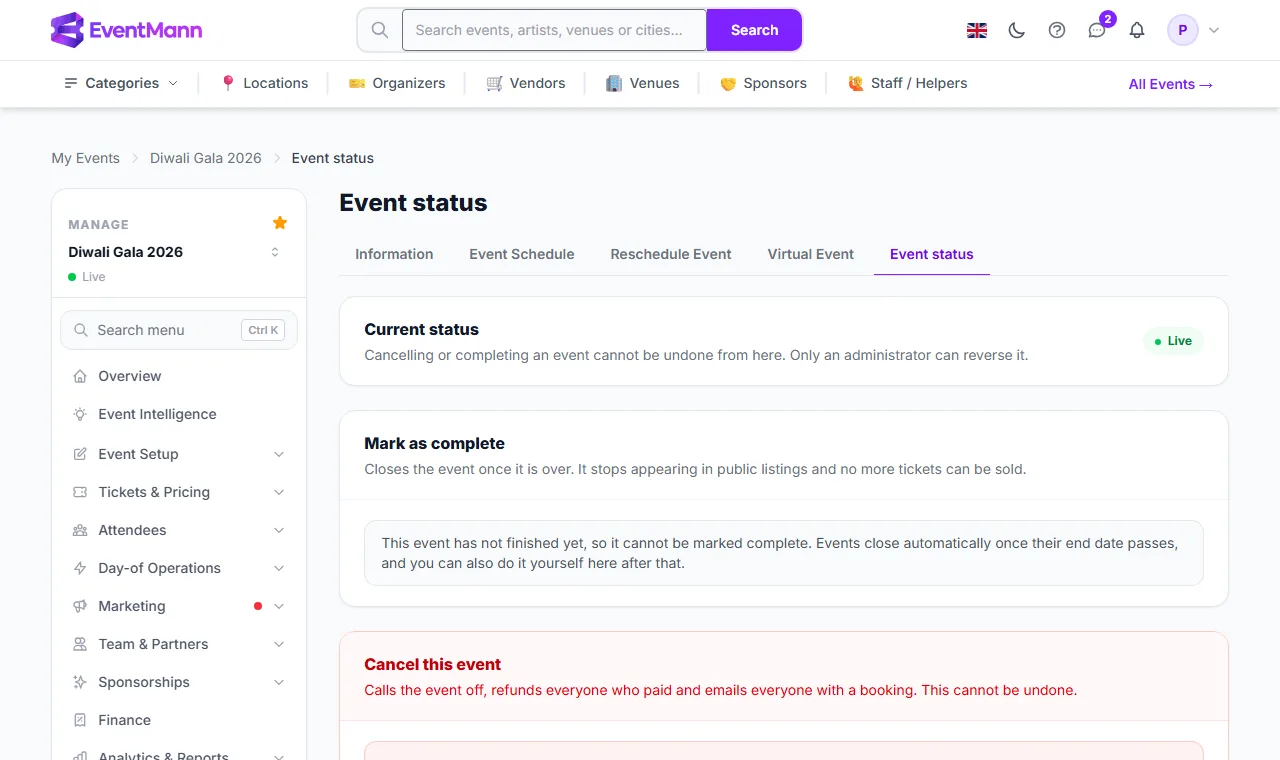
Open Details & dates → Event status and find Mark as complete ②.
The button is available once the event has ended. Before that the card explains that the event has not finished yet.
Click Mark Complete and confirm. Completing closes the event: it stops appearing in public listings and no more tickets can be sold.
123The Event status tab: current status, Mark as complete and Cancel this event
You rarely need this: a Live event is completed automatically about a day after it ends (the job runs every night at 03:00).
Cancel an event
Cancelling calls the event off, refunds everyone who paid and emails everyone with a booking. It cannot be undone. An event that is not going ahead can always be cancelled, even with orders.
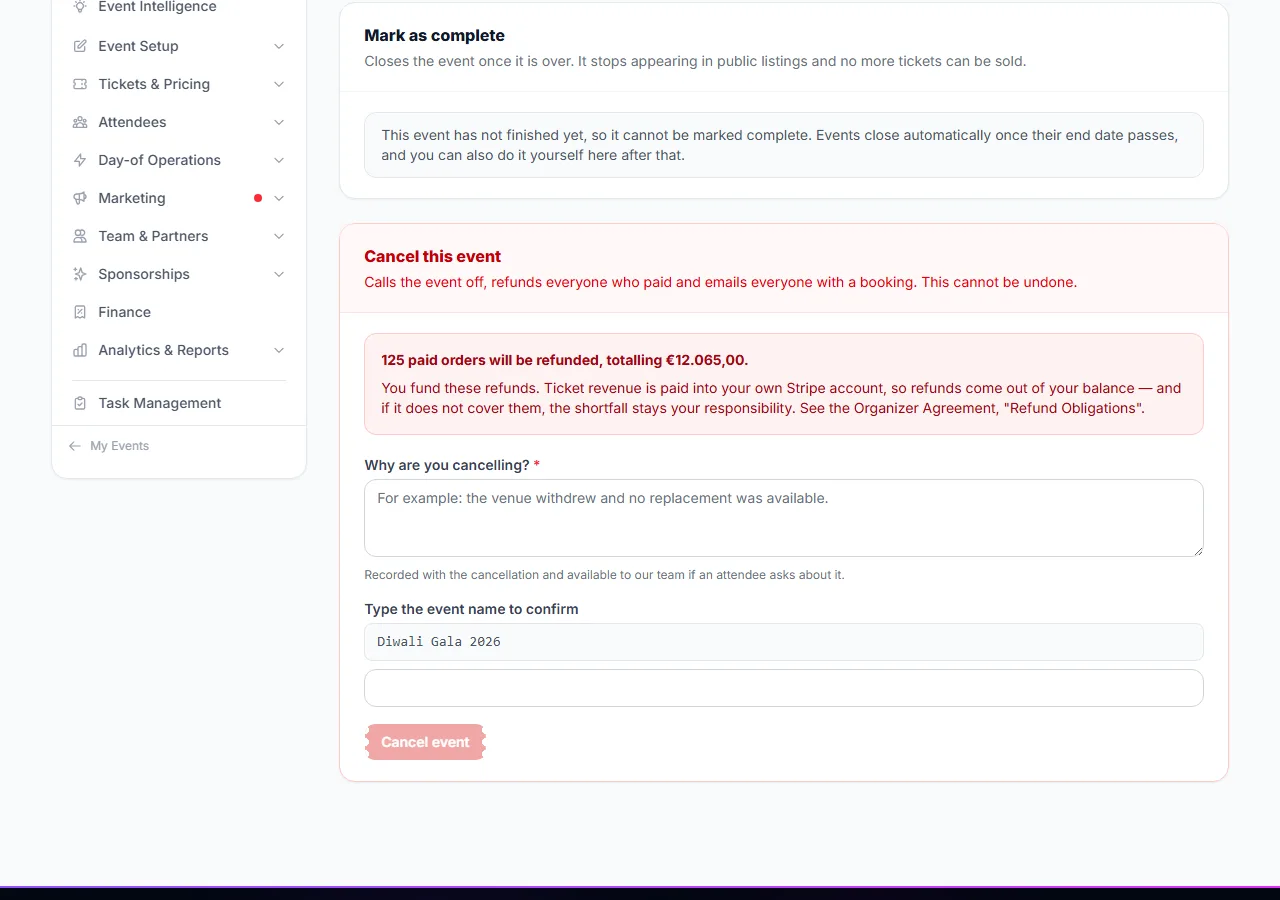
Read the box at the top of Cancel this event. It states how many orders and how much money will be refunded, and reminds you that you fund the refunds: ticket money is paid into your own Stripe account, so refunds come from your Stripe balance, and a shortfall remains your responsibility. If EventMann can read your balance and it will not cover the refunds, the page says so; if it cannot read it, it says nothing rather than guess.
Write Why are you cancelling? ① (10 to 500 characters). It is required whenever money is going back, and the platform team and your attendees can read it.
Type the event’s name in Type the event name to confirm ② and click Cancel event ③.
123The cancel form with the reason and the confirmation
What happens next: the event becomes Cancelled and leaves the public site; the attendees are notified; a background job refunds every confirmed booking; the platform team is notified when paid orders are involved; and a webhook event.cancelled is sent if you use webhooks.
Delete an event
Delete Event in the Manage sidebar removes an event for good. It is only offered when the event is not Live and has no orders. A live event must be paused first. An event with orders cannot be deleted, because the people who bought tickets hold them and may be owed money — cancel it instead. The confirmation page lists what will be removed and asks you to type the event name.
Good to know
Pausing does not refund anyone and keeps tickets valid. Use it for a pause in sales, not for an event that will not happen.
Private events (hidden from search) follow the same statuses; visibility and status are independent.
A Live event that has already ended is closed automatically; you do not need to mark it complete yourself.
Reaching Live through the wizard, the Overview, the Information tab, the simple edit form, the scheduled job and the Published checkbox all go through the same checks.
Troubleshooting
“Verify your email address before publishing an event” — confirm your address from the email we sent, then try again.
“Connect Stripe before publishing a paid event” — finish the connection. Free events do not need it.
“Choose this event’s cancellation terms” — set them in the Advanced card of Details & dates.
Schedule says “Set a Go-live Date & Time under Details & dates first”, or my scheduled event did not go live — save a go-live time on Details & dates, then click Schedule again; at that time the event must still pass the checks above, and a held event shows a notice.
Mark complete says the event has not finished — wait until it has ended.
The cancel form asks for a reason — money is going back, so a reason of at least 10 characters is required.
Delete Event is not in the sidebar — the event is Live or has orders; pause it, or cancel it.
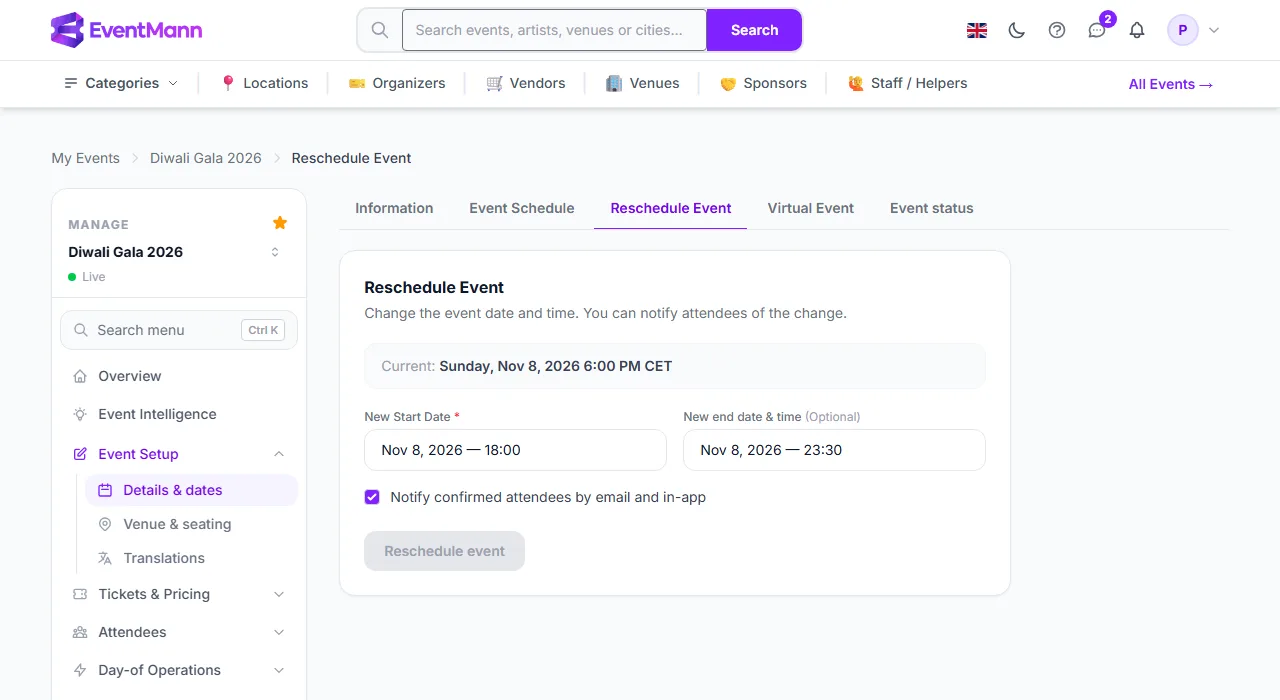
Reschedule Event moves an event to a new date and time and, where people already hold tickets, tells them. Open it from Manage → Event Setup → Details & dates → Reschedule Event.
What you can do here
Check the line Current: at the top: the event’s present date and time in its own timezone.
Enter the New Start Date ① (required) and the New end date & time ② (optional). Both are filled in with the present values, so change what you need; clear the end to keep the present end. A new end must be after the new start.
Decide on Notify confirmed attendees by email and in-app ③. Tick it to send them the new date.
Click Reschedule event ④. You land back on the Overview with a confirmation.
Who is told, and when notification is not optional
The notice goes to the people with confirmed orders. It says the event moved and reminds them that they may be entitled to a refund.
If any order on the event has been paid, the notice is sent even if you leave the box unticked. A change of date gives buyers a right to a refund under consumer law, and whether to tell them is not the organizer’s choice.
For a free event with no payments the box is honoured: untick it to move the date quietly.
If nobody has a confirmed order, there is no one to tell.
Safeguards
If you save without changing anything the page says there was no change, and nothing is sent. Dates are compared to the minute.
Once an event has paid orders its start cannot be moved to a date in the past; the form refuses it. An event that has already taken place keeps its date.
Every change is recorded with the number of orders and the amount affected. A second change of the same paid event within 30 days alerts the platform team, and your next paid event may be reviewed before it can go live.
Good to know
Changing the dates on Details & dates has the same effect on attendees as this page; this page is the focused version.
The sessions of the agenda, the booking window and any go-live time are not moved. Check them after rescheduling.
Attendees can see what changed after they booked, on their order page.
To change the venue or switch between online and in person, use Details & dates; that also notifies ticket holders.
Troubleshooting
“No change” message — the new start and end equal the current ones.
“The start date cannot be moved into the past” — the event has paid orders; choose a future date, or cancel the event.
Attendees were notified although I unticked the box — the event has paid orders, so the notice is mandatory.
When you run the same kind of event again, start from the last one instead of from a blank form. There are two ways: Duplicate copies an existing event under a new date, and a template is a setup you saved in the wizard to start new events from.
Duplicate an event
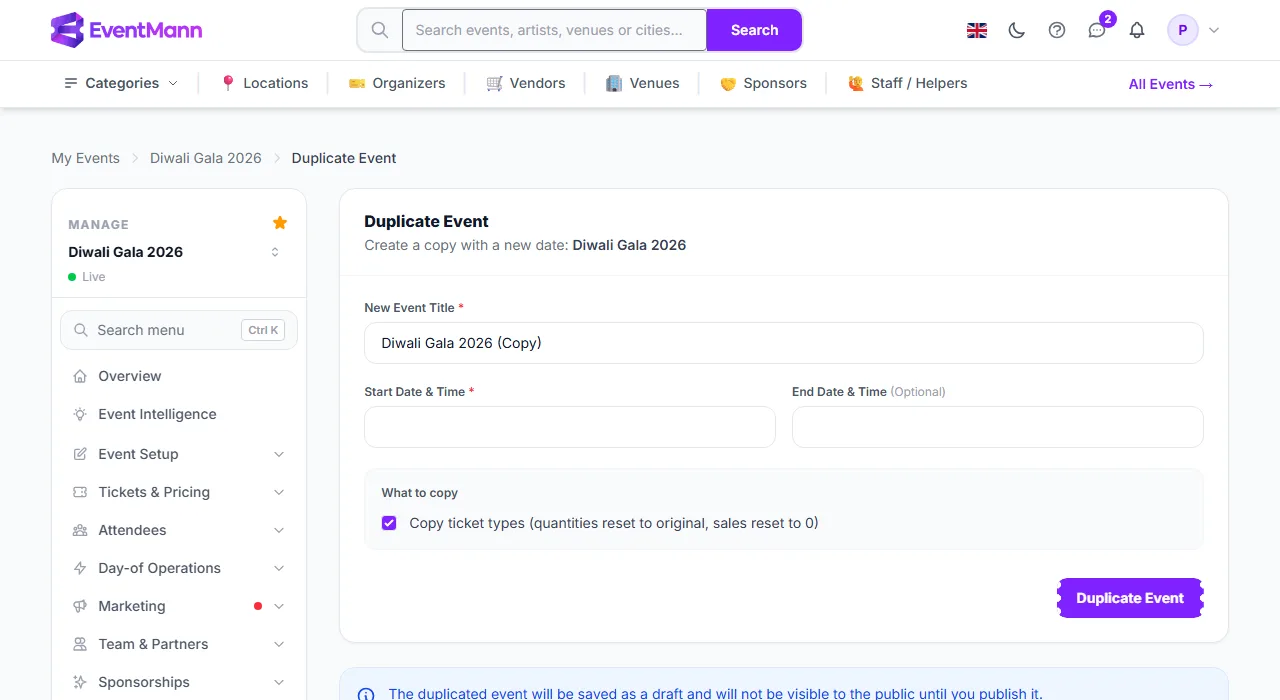
Open My Events, click the ••• menu on the event and choose Duplicate (or use the same action inside the event’s Manage area). You need the duplicate permission for the event.
Edit the New Event Title ①. It starts as the old title followed by “(Copy)”.
Enter the Start Date & Time ② (required) and optionally the End Date & Time. If you leave the end blank the copy keeps the original’s duration.
Leave Copy ticket types ③ ticked to copy them with their capacity; the sales counters start at 0. Untick it to start with no tickets.
Click Duplicate Event ④. You land on the new event’s Overview.
The copy is a Draft with a new public URL. It is not visible until you publish it, and the normal publishing conditions apply.
It carries the event’s settings and details: description, venue, category, currency and timezone, booking rules, cancellation terms, and the ticket design. Dates, time and venue text typed into the ticket design are removed, because they described the old event.
The cover image is copied as a separate file, so replacing it on one event never changes the other.
With Copy ticket types ticked, ticket types come across with their prices and rules. No orders are copied.
Not copied: orders, discount codes, pricing rules, flash sales, bundles, checkout questions, schedule items and the seat map. Set those up again on the copy, or use More copy options at the bottom of the Duplicate page: it can also copy the seat map, checkout questions, reminders, pricing rules and translations, move all dates by a number of days, or create several copies at once from a list of dates (one per line, YYYY-MM-DD). Those copies are Drafts too.
Save and use a template
A template is an event you marked as a template while creating it.
In the event wizard, fill in the event and click Save as Template at the bottom. Give it a Template Name, for example “Concert evening”.
The next time you open the wizard, a row Start from a template: lists your templates. Click one to fill the form with its title, description, dates, location, currency, timezone, custom fields, settings and ticket types.
Adjust the date and anything else and create the event as usual. The new event gets its own copy of the cover image.
Good to know
A template is a real event: it also appears in My Events and can be managed or published like any other. Delete it there when you no longer need it, and it disappears from the template row.
Templates belong to you; team members do not see them.
For many dates of the same event, a recurring event creates them all from one pattern.
Troubleshooting
Duplicate is not in the menu — you lack the duplicate permission for that event.
The copy has no tickets — Copy ticket types was unticked.
My template is missing from the wizard — it was deleted, or it was saved by another organizer account.
The copy cannot be published — the usual conditions still apply: see Event status.
A recurring event is one you run again and again on a pattern — a weekly practice evening, a monthly market. You describe the pattern once in the event wizard and EventMann creates a separate event for each date, so each date has its own tickets, sales and orders.
Set up a series
In the wizard choose Event Type Recurring. The Location card is replaced by a note that no location fields are needed for this type, and a Recurrence Pattern appears under Date & Time.
Enter the Start and End of the first date. Every later date has the same length and time of day.
Choose the Frequency ① — Weekly or Monthly — and Every N weeks / months ② (1 to 12).
For weekly series, tick the days of the week. With several days ticked, each ticked day is created in every repeat week. With none ticked, the weekday of your start date repeats.
Decide when the series stops: an Ends on date, Or after N occurrences ③ (at most 52), or both — the first limit reached wins. If you set neither, the series stops at its maximum of 52 dates, as the note under the fields says.
Add at least one ticket type, choose how to publish and click Create Event.
The event you filled in is the first date. It keeps the recurrence pattern.
Each following date is its own single-day event, created as a Draft, with the same title, description, settings and a copy of the cover image. Its public URL is the title plus its date.
Each date gets copies of the ticket types (name, description, price, capacity, maximum per order and whether active). Sale windows, member prices and other per-ticket rules are not carried over; pricing rules, flash sales and discounts are separate for every date.
A background job runs every night and creates dates that are missing, so a series with a long horizon fills in over time and never repeats a date that already exists. A date you delete is not recreated.
Running a series
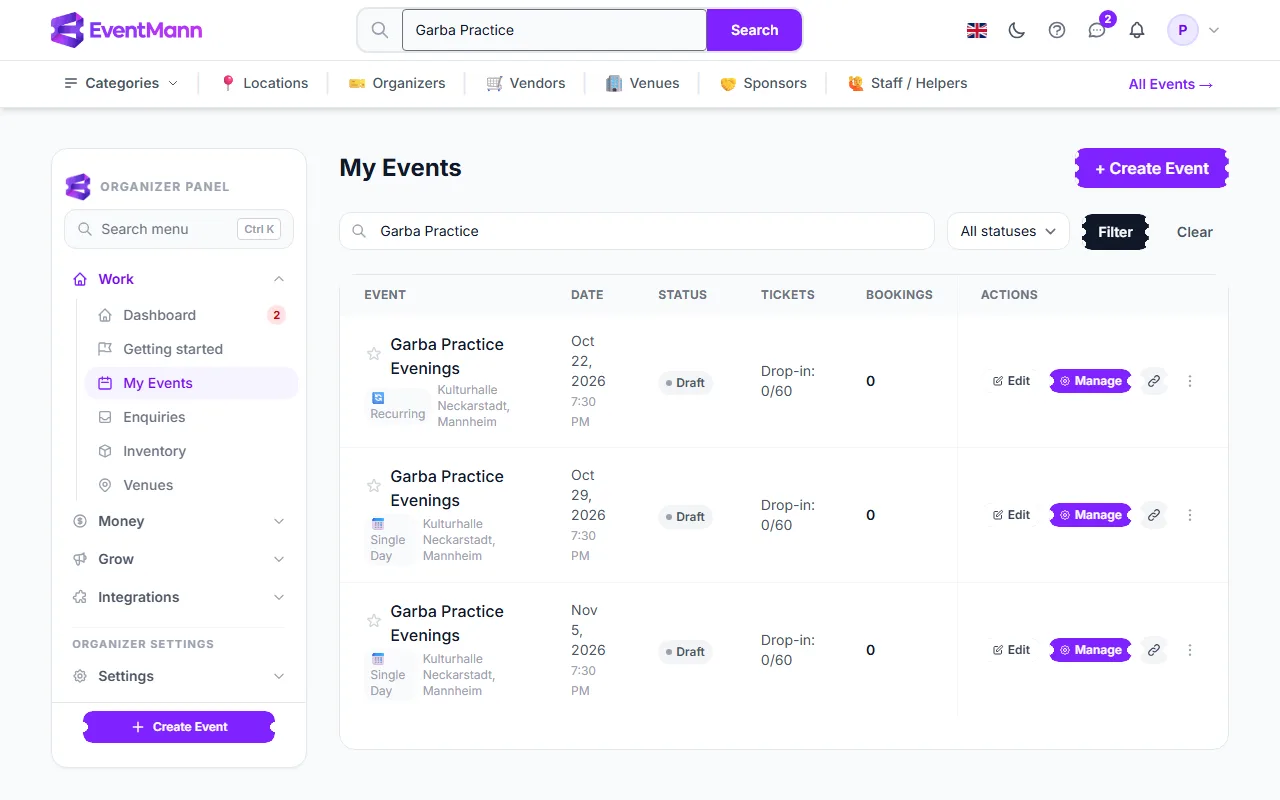
Find the dates in My Events ①: search for the series title to list them all, one row per date.
Open a date with Manage. Every date has its own Overview, orders, check-in and reports.
Publish each date when you are ready: the generated dates are Drafts, and the usual publishing conditions apply to each one (see Event status).
To change a detail for the whole series, edit the dates one by one, or edit the first date and use Duplicate for new dates later. Editing the first date does not update the dates already generated.
1A series in My Events: the first date and the dates generated from it
Monthly series
A monthly series repeats on the same calendar day. In a month that does not have that day, such as the 31st in April, the date falls on the last day of the month instead; the next month is back on the original day.
Good to know
Cancelling one date does not cancel the others. Each is a separate event with its own refunds and notices.
Dates, venue and format of each date are promises to the people who bought a ticket for that date; changing them notifies them. See Details & dates.
For a series of different events linked by a theme, choose the Series event type; it is a label for your own organization and creates no dates.
A pass that covers several dates sold as one purchase is a bundle — see Ticket Bundles.
Troubleshooting
I do not see recurrence fields — choose the event type Recurring first.
Far too many dates appeared — no end date or occurrence count was set; up to 52 dates are created in that case. Delete the extras in Manage → Delete Event (only possible for events without orders).
The dates are not on sale — they start as Drafts; publish each one.
The later dates have fewer ticket settings than the first — only the basics of each ticket type are copied; set the rest per date.
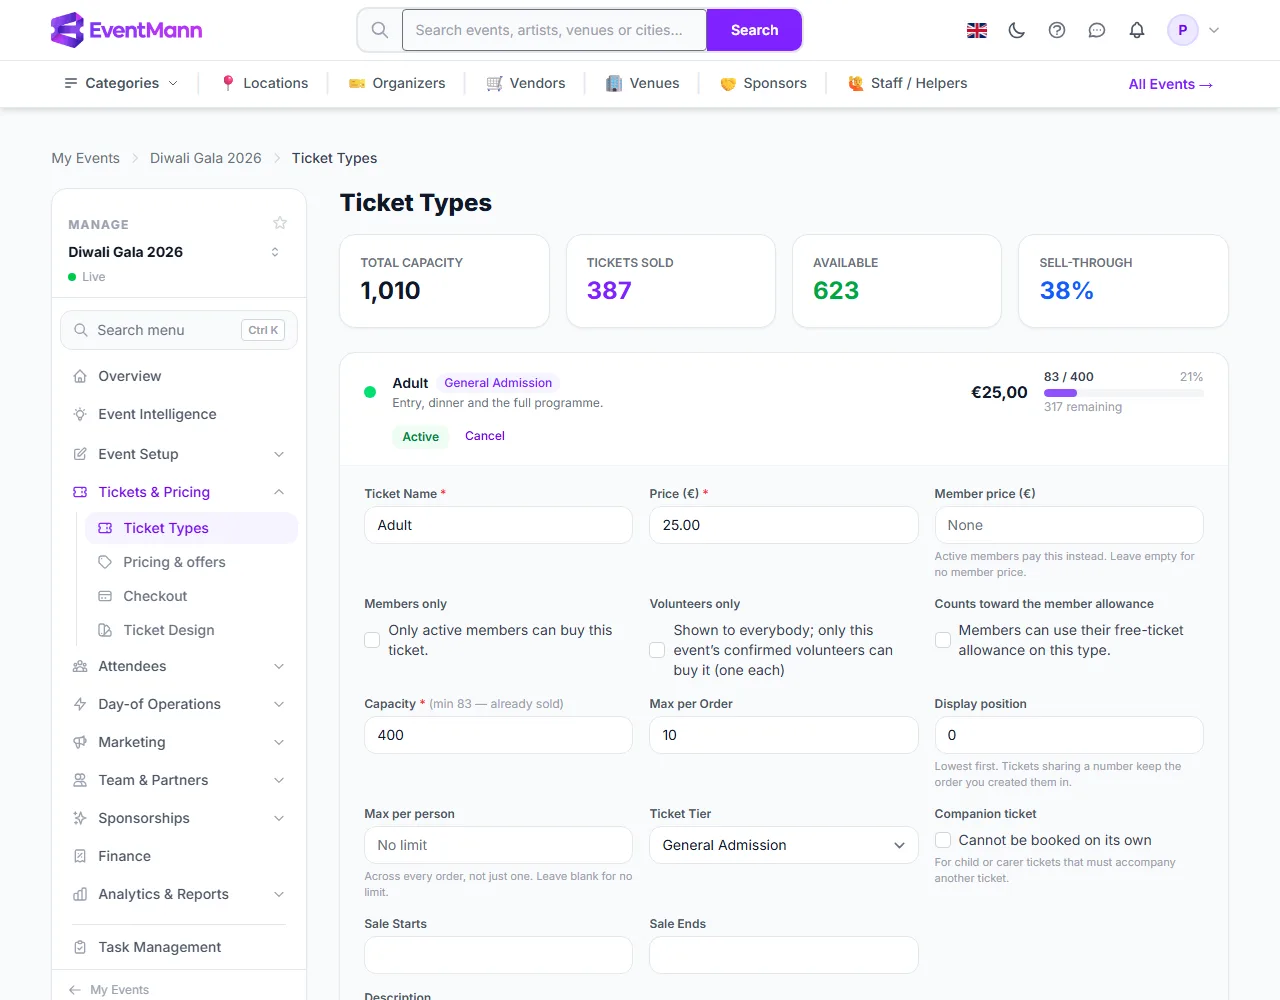
Ticket types are what attendees buy: General, Child, Family pass, VIP, a free registration, a members-only seat. Each has its own price, capacity and rules. Manage them under Manage → Tickets & Pricing → Ticket Types (shortcut: g then t). You can also edit them in the Ticket Types card at the bottom of Details & dates.
The list
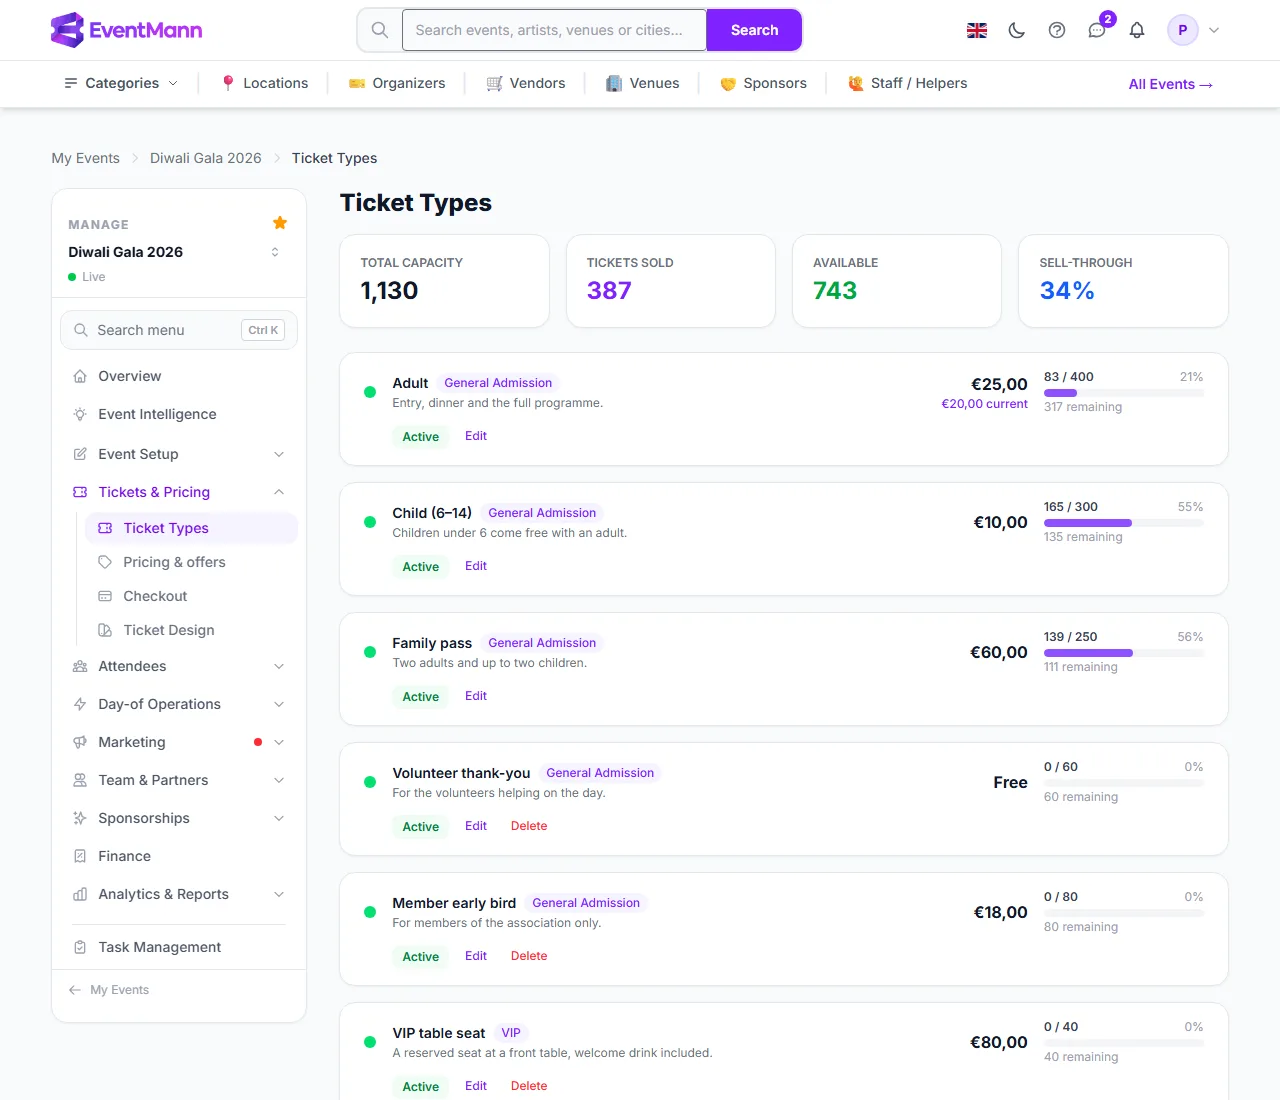
The four figures ① at the top show Total capacity, Tickets sold, Available and Sell-through.
Each type is a card: name, tier badge, description, price, sold / capacity with a progress bar and the number remaining. A discount from a pricing rule or flash sale shows beside the price.
The green Active button toggles a type on and off. An inactive type is not for sale but keeps its orders. Edit ③ opens the type in place.
Delete ② appears only on a type that has no sales. A type that has sold cannot be deleted; deactivate it instead.
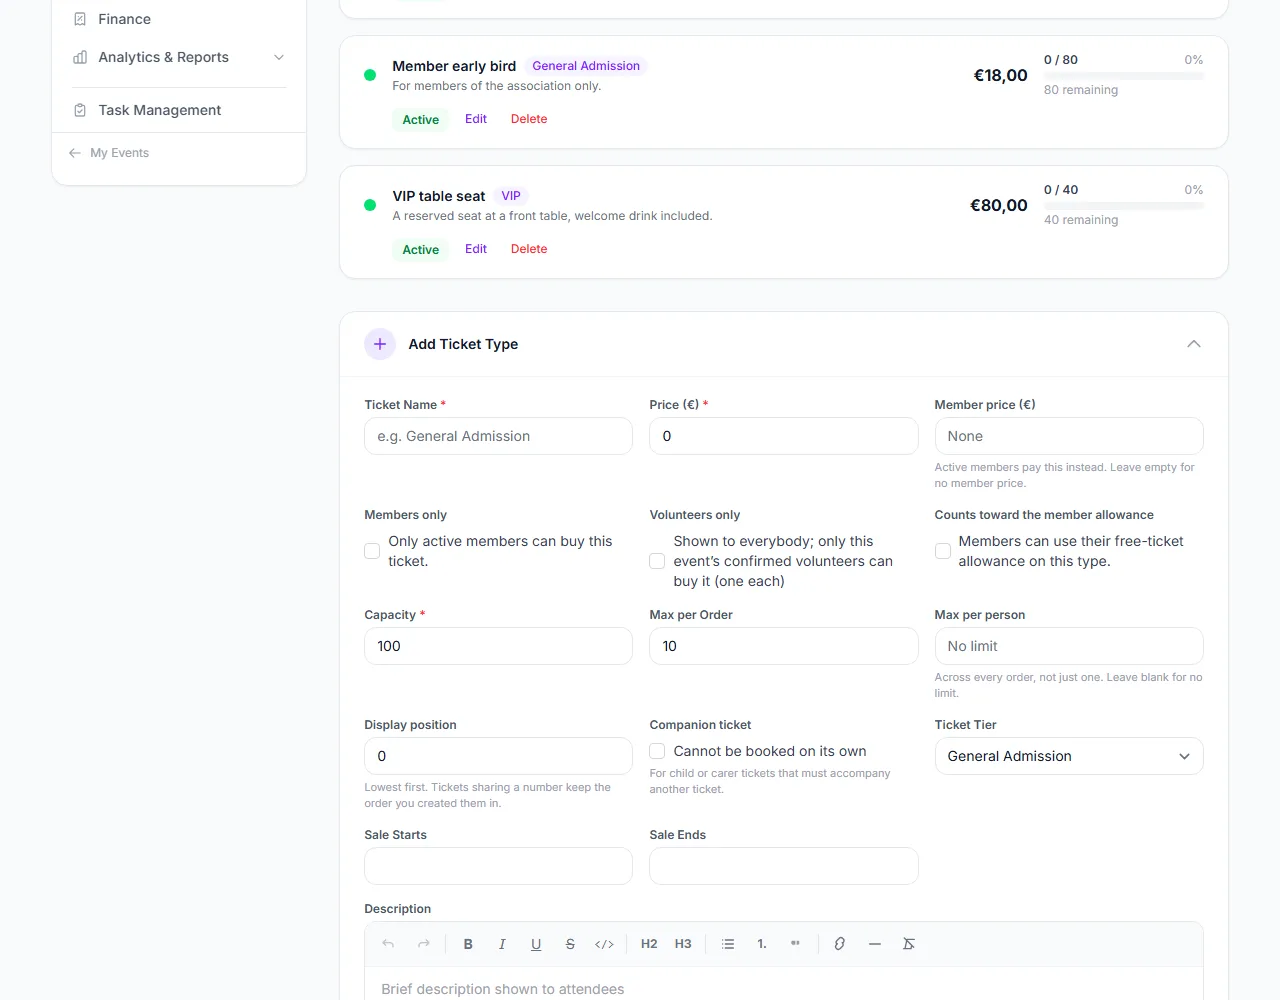
Enter the Ticket Name ① and the Price (0 makes it free). A paid ticket can only be created or switched from free to paid when your Stripe account is connected and verified.
Optionally set a Member price ②. Active members of your organization pay it instead of the price, but never more than the best price they could otherwise get: if a flash sale or pricing rule already brings the price below the member price, the lower one applies. It cannot exceed the normal price.
Tick Members only ③ to reserve the ticket for active members. Everyone else sees it as a locked row that explains how to join.
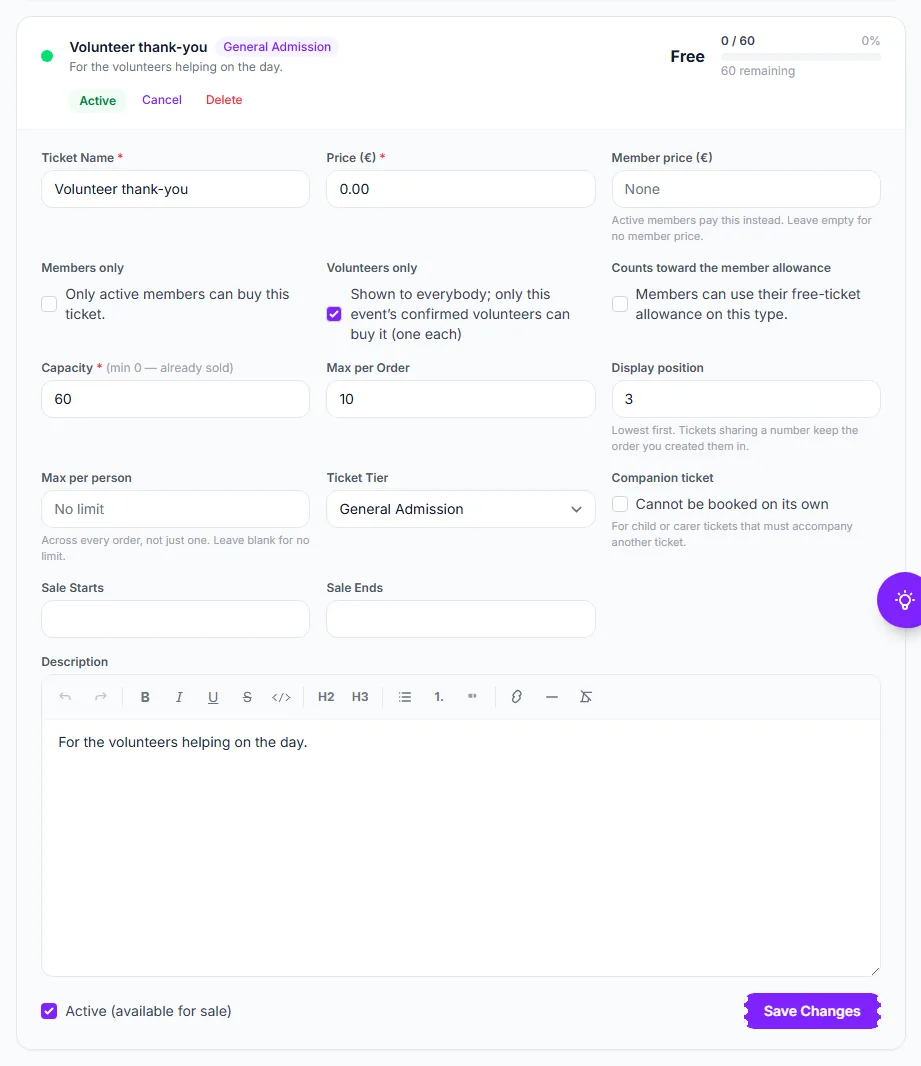
Tick Volunteers only ④ for a thank-you ticket: it is shown to everybody, but only this event’s confirmed volunteers can buy it, one each unless you set a higher per-person limit. It is left out of the prices shown in listings, so a free thank-you ticket never makes a paid event look free. See Volunteers.
Counts toward the member allowance lets members spend a free-ticket allowance from their membership plan on this type. See Memberships.
Set the Capacity, the Max per Order (default 10) and Max per person ⑤. Max per person counts across every order a buyer places, not only one; blank means no limit.
12345The Add Ticket Type form: price, member price, members only, volunteers only, limits
The remaining fields:
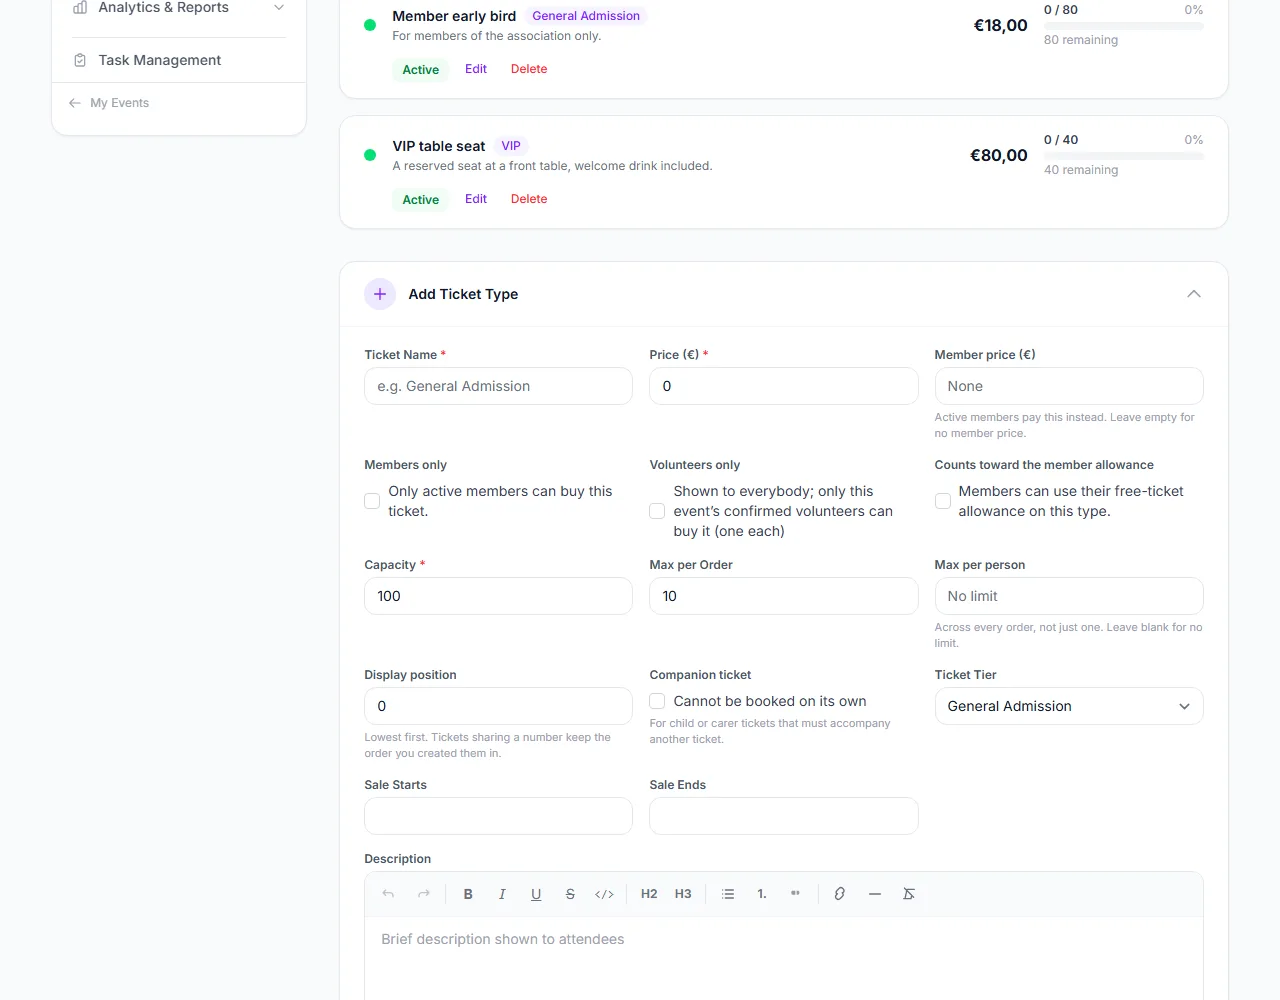
Companion ticket ① — “Cannot be booked on its own”. For child or carer tickets that must accompany another ticket in the same order.
Ticket Tier ② — General Admission, VIP, Early Bird, Group, Student or Season Pass. The tier shows as a badge and drives the VIP list at check-in.
Display position ③ — lowest first; types with the same number keep the order you created them in.
Sale Starts and Sale Ends ④ — a sale window for this type alone, in the event’s timezone, inside the event’s own booking window.
Write a Description shown to buyers, and leave Active (available for sale) ticked to put it on sale. On an event with a seat map you also see requires a seat; untick it for a lap child or any ticket that should not take a seat.
Click Add Ticket Type (or Save when editing).
1234Companion ticket, ticket tier, display position and sale dates
Good to know
Capacity cannot be set below the number already sold. To stop selling, deactivate the type.
Two limits apply to every basket: the type’s own Max per Order and the event-wide Max tickets per order on Details & dates. A companion ticket additionally needs another ticket in the order.
On an event whose tickets are all reserved for members, use the Members-only event switch on Details & dates instead of ticking each type.
There is no automatic limit on free tickets per person; if you want one, set Max per person.
The sold counter on this page reflects real, committed sales; pending checkouts that have not paid are not counted until they do.
Troubleshooting
“Please connect your Stripe account before creating paid tickets” — finish Stripe onboarding, or keep the price at 0. See Setting Up Stripe Connect.
The member price is rejected — it cannot be higher than the price.
“Cannot delete a ticket type that has sales” — deactivate it instead.
Capacity will not go down — it cannot be lower than tickets sold.
Members do not see their price — they must be signed in with an active membership of your organization; an expired or revoked one does not count.
A bundle is a percentage off for people who attend more than one of your events — a two-day festival pass, a season ticket, “the gala and the workshop”. You build it from tickets of at least two of your upcoming events, and a buyer who takes tickets from every event in the offer gets the discount in one purchase. Manage bundles under Manage → Tickets & Pricing → Pricing & offers → Bundles.
A bundle is not tied to one event. It is shown on the page of every event it covers, and you can open and edit it from any of those events.
Create a bundle
Give the bundle a Bundle Name ①, for example “Two-day pass”. Add a Description; buyers see it under the offer name.
Enter the Discount % ②. It is taken off the face price of the whole basket and never stacks on a flash sale or a member price.
Under Which tickets qualify ③ tick the ticket types that count, grouped by event. Choose from at least two of your upcoming events, and at most five. An event you leave unticked is not part of the offer, and an event that has ended or been cancelled cannot be included.
A ticket type such as Adult ④ is eligible when ticked; the buyer decides how many of each to take at checkout.
1234Create Bundle: the offer and which tickets qualify
Min tickets per event ① — the basket must hold at least this many from every event in the offer, or the offer does not apply. The minimum is 1.
Max tickets per event ② — an upper limit per event; blank for none.
Max tickets per order ③ — the most tickets one order may take under the offer.
Total Qty ④ — how many tickets can be sold under the offer across all its events; blank for no limit.
Sale Starts and Sale Ends limit when the offer is available. Then click Create Bundle.
The buyer must take tickets from every event in the offer. Tickets for only one event get no discount.
The percentage comes off the whole basket of eligible tickets, calculated on regular ticket prices, never on an already discounted price. A free ticket costs nothing and adds nothing to the discount.
The offer goes on sale once every event in it is live.
The buyer pays once. EventMann issues a separate booking and ticket for each event, each with its own QR code, so the scanner at each event admits the holder on its own date.
Your bundles
The list below the form ① shows each bundle: the discount, how many events it covers, the eligible tickets per event, the limits and how many are sold. Edit reopens the form; Delete removes the bundle. Existing orders keep what they were sold.
A bundle can carry a notice Never chosen. It means another of your bundles covers the same tickets on terms at least as good, so buyers will always prefer that one. You also get this warning when you save. It is only a warning; building a replacement before switching off the old offer is normal.
Older fixed-price bundles keep selling exactly as before and are labelled as older offers; create a new percentage bundle if you want to change the model.
Good to know
A bundle’s sales are counted as purchases, not as bookings: one purchase for two days uses one place of the bundle’s quantity.
Tickets for several dates of a recurring event can be bundled the same way.
Troubleshooting
“Choose tickets from at least two events” — a percentage bundle is a discount for attending more than one event; tick tickets from a second event.
“A bundle can cover at most 5 events” — split it into two offers.
“… has ended or been cancelled, so it cannot be part of a bundle” — untick that event.
Buyers do not see the offer — one of the events is still a draft or paused, or the sale window has not opened.
The discount did not apply — the basket was missing tickets from one of the events, or fewer than the minimum per event.
A flash sale is a time-limited percentage off chosen ticket types: “20% off this Saturday”. It switches on and off by itself at the start and end times you set. Open it under Manage → Tickets & Pricing → Pricing & offers → Flash Sales.
Create a flash sale
Give it a Sale Name ①, for example “Weekend flash sale”. The name is for you.
Enter the Discount % ② — from 1 to 90.
Choose Starts At and Ends At. The end must be after the start. Times are in the event’s timezone.
Under Apply to Ticket Types ③ tick every type that should be discounted; at least one is required.
Click Create Flash Sale. It appears under Flash Sales ④ with its discount and dates.
1234The Flash Sales page: the form and a scheduled sale
Manage your flash sales
Edit changes the name, discount, times and ticket types.
Deactivate switches a sale off without deleting it, and Activate switches it back on.
Delete removes it. Orders already placed keep the price they paid.
How it combines with other prices
A flash sale is applied after a pricing rule: the rule sets the price, then the flash sale takes its percentage off that price.
The two together can never take a ticket below 10% of its regular price.
A member price is compared with the flash-sale price and the lower of the two is charged. A member never pays more because of a sale.
A bundle discount is calculated on regular prices and does not stack with a flash sale.
A discount code is a separate mechanism that the buyer enters at checkout.
Good to know
While a sale is running, buyers see the reduced price on the event page and in checkout. The figure they see is the figure they pay.
Only one flash sale applies to a ticket at a time.
Free tickets have no price to discount.
Changes apply to new checkouts; a basket already in checkout keeps the price quoted when that checkout started.
Troubleshooting
The sale does not apply — check that it is active, that the current time is between its start and end in the event’s timezone, and that the ticket type is ticked.
The end time is rejected — it must be after the start time.
The discount is smaller than expected — the combined reduction is capped at 90% of the regular price, and the best price for a member wins.
The percentage is rejected — use a value from 1 to 90.
A pricing rule changes the price of one ticket type automatically: an early-bird price until a date, or a higher price once most seats are sold. Open it under Manage → Tickets & Pricing → Pricing & offers → Pricing Rules. The tab strip ① also leads to Flash Sales, Bundles and Discounts.
12345The Pricing Rules page with an early-bird rule and a demand rule
Add a rule
Enter a Rule Name, for example “Early bird”. It is for you; buyers do not see it.
Choose the Ticket Type ② the rule applies to. A rule belongs to one ticket type.
Choose the Type ③:
Time-Based — the price changes inside a date window. Set Starts At and Ends At; both are required, and the end must not be before the start.
Demand-Based — the price changes once sales reach a threshold. Set the Demand Threshold, the percentage of the ticket type’s capacity that must be sold (0 to 100).
Choose the effect: a fixed New Price, or a Discount % off the regular price (0.01 to 90). One of the two is required. A fixed price cannot be below 10% of the regular price.
Set the Priority ④ (default 10). When several rules are active for the same ticket, only the one with the lowest number applies.
Click Add Rule. It appears under Active Rules ⑤.
Reading the list
Each rule shows its type, its effect and its window or threshold — for example “Time-Based · €20,00 · Oct 12–Oct 21” or “Demand-Based · €30,00 · ≥80.00% sold”. Edit changes it, Deactivate switches it off (and Activate back on) and Delete removes it.
How the price is worked out
The regular ticket price is the starting point.
The active rule with the lowest priority number sets the price (a New Price replaces it, a Discount % reduces it). Others are ignored.
An active flash sale then takes its percentage off the result.
The result never goes below 10% of the regular price.
A member price, if the buyer has one and it is lower, wins.
The ticket list shows the current price next to the regular price, and the figure on the event page is the figure charged.
Good to know
Dates and times are in the event’s timezone.
A demand rule counts what has actually been sold against the type’s capacity. It does not apply to a type without a capacity.
Changing a rule never changes an order that is already paid.
Troubleshooting
“Enter either a new price or a discount percentage” — fill one of the two fields.
“Set a start date and time for a time-based rule” — time-based rules need both ends of the window.
“Set a threshold percentage for a demand-based rule” — enter the share sold at which the rule starts.
“The new price can’t be below … (10% of the regular price)” — raise the price or use a smaller discount.
The rule does not seem to apply — it may be inactive, outside its window, below its demand threshold, or another rule with a lower priority number applies.
The seat map turns an event into seated sales: you lay out the hall in sections of rows and seats, link each section to a ticket type, and buyers choose their own seats at checkout. Open it under Manage → Event Setup → Venue & seating → Seat Map. An event without a seat map sells tickets without seat choice.
Build a seat map
Enter a Map Name ① (for example “Main hall”) and click Save Map. Sections can only be added once the map has a name.
Under Add Section enter a Section Name ⑤ such as “Front stalls”.
Choose the Ticket Type ⑥ the section sells. Buyers of that ticket type pick seats from this section.
Pick a Color, the number of Rows (up to 30) and Seats / Row (up to 50), then click Generate Grid ⑦. Rows are lettered A, B, C… and seats numbered from 1; each new section is placed below the previous one.
Repeat for every section. The ticket types come from the Ticket Types page, so create them first.
1234567The Seat Map page: map name, export and import, and the Add Section form
A section without a ticket type is marked “No ticket type — unsellable” and a notice lists it: it is not shown or sold at checkout until you give it one (Edit on the section → Ticket Type).
Fine-tune the layout
The seat canvas ② draws every seat in its section colour. Click seats, or drag a box around several, to select them, then use the bulk bar ① above it: All Sections filters by section, Select All / Deselect All, Toggle Active (take seats out of sale without deleting them), Toggle wheelchair access, Move to Section… with Apply, and Delete Selected.
Drag seats to reposition them. Use undo and redo, and zoom in, zoom out and reset to work on a big hall.
Click Save Changes ③ to keep your canvas edits. It is greyed out until something changed.
Below the canvas each section has a card with its ticket type, seat count and active seats. Edit changes its name, colour, ticket type and wheelchair-accessible flag; Delete removes the section and its seats.
123Bulk operations, the seat canvas and the section list
Preview, export and import
Preview as Attendee shows the map the way a buyer sees it, with sold and held seats marked.
Export Layout downloads the sections and seat positions as a JSON file; Import Layout loads such a file (up to 2 MB) into this event. Use them to reuse a hall layout for another event.
When the event has a saved venue with seating zones, Clone layout on the Venue tab copies that venue’s blueprint. See Venue & seating.
How buyers use it
At checkout the buyer chooses seats of the section that matches each ticket type; the number of seats must match the tickets.
A chosen seat is held while the buyer completes checkout (15 minutes) and then released.
Each ticket carries its seat.
A ticket type that should not take a seat, such as a lap child, can be untoggled with requires a seat on the Ticket Types page; that option only appears on events with an active seat map.
Good to know
A section sells as many seats as it has; keep the linked ticket type’s capacity in step with the seats you generated.
Deleting a seat or section that has already been sold is a serious change: check Orders first.
Seats can be marked wheelchair accessible; use it to find and reserve them.
Replacing the map with a venue layout is refused once seats are sold.
Troubleshooting
“Save the map name above to start adding sections” — save a Map Name first.
A section does not appear at checkout — it has no ticket type, or all its seats are switched inactive.
The grid will not generate — rows must be 1 to 30 and seats per row 1 to 50.
Import fails — the file must be a layout exported from EventMann (JSON, up to 2 MB).
My canvas edits disappeared — click Save Changes before leaving the page.
Booking Mode decides whether attendees pay and get their tickets at once, or send a request that you approve first. It is set per event, under Manage → Event Setup → Details & dates → Information, in the Advanced card, and also in the event wizard when you create the event.
Pay Now
The default. An attendee chooses tickets, pays, and is confirmed on the spot.
The attendee picks tickets and checks out. The seats are reserved while they do.
They pay through Stripe. The order does not exist until the payment succeeds or is authorized, so an abandoned or declined checkout leaves nothing for you to clean up.
The order is confirmed and the ticket emails go out immediately.
Tickets only count as sold once payment has succeeded, so two buyers racing for the last ticket are settled by whoever pays first. A payment that is still clearing, such as a bank debit, keeps the order waiting; the ticket is issued when the money arrives.
Request & Approve
The attendee asks for a place and you decide. By default their card is held, not charged, so the money is there the moment you say yes.
Choose Request & Approve ② in the Advanced card and click Save Changes.
The attendee picks tickets and enters a card as usual. The amount is authorized — reserved on the card, not taken. Many banks show it as pending.
The request appears in your approvals queue (Attendees → Approvals in the Manage sidebar, with a number on the row) and on your dashboard under Needs attention. The seats are taken off public sale at once, so a hundred requests cannot oversell the event.
You decide:
Approve on a paid event — the held amount is taken, the order is confirmed and tickets are sent. There is no payment link and no waiting for the attendee.
Approve on a free event — the order is confirmed.
Reject — the hold is released, the order is cancelled and the attendee is told. You can add a reason of up to 500 characters; it is included in their email.
Decide promptly: if you leave a request too long, the authorization lapses on the bank’s side, the order expires and the seats go back on sale. Nobody is charged before you have reviewed the request.
Settings explained
Booking Mode ① — Pay Now or Request & Approve, per event.
Hold the card while you review — on by default under Request & Approve. The card is authorized at checkout and captured when you approve. Switch it off and no card is collected up front: you approve first, and the attendee is then emailed a payment link with a countdown. That older way offers buyers every payment method, but approved requests may never be paid.
Payment window — only shown when the hold is off: how long an approved attendee has to pay, from 0.5 to 72 hours (default 30 minutes).
Both modes work for free events; the payment step simply disappears. Pay Now confirms at once; Request & Approve confirms when you approve.
Switching the mode affects only new orders. Orders already confirmed, waiting or approved keep the rules they started under.
Holding a card narrows the payment methods a buyer is offered, because not every method can be authorized now and taken later. That is Stripe’s rule, not a setting here.
The waitlist, when you use it, follows the booking mode: with Request & Approve a promoted person goes into your approval queue. See Waitlist.
Troubleshooting
An approved attendee says their booking disappeared — with the hold off they missed the payment window and it expired. They need to request again.
An attendee says they were charged before you approved — they were not; the held amount often shows as a pending line and clears on its own if you reject.
A buyer sees fewer payment methods than on your other events — expected while the hold is on.
I cannot find the setting — it is in the Advanced card of Details & dates, at the top.
An event can be held online, or in a hall with an online audience. You switch the event to online on Details & dates, and prepare the stream or meeting on the Virtual Event tab next to it (Manage → Event Setup → Details & dates → Virtual Event).
Online, hybrid and in-person
Online only — on Details & dates switch Online Event on. The venue fields are hidden and a stream or meeting URL is required. The event page shows “Online Event” and “Link shared after registration” instead of an address.
Hybrid — choose the event type Hybrid in the wizard. It asks for the physical venue and for a Stream / Meeting URL, which is required, and the event is flagged as online.
In person — leave Online Event off. An in-person event has no join link; switching an event from online back to in-person clears the old link.
Switching between online and in-person, or changing the link, is a material change: ticket holders are notified like for a new date. See Details & dates.
Set up the stream
Open the Virtual Event tab and pick the Platform ②: Zoom, Microsoft Teams, YouTube Live, Vimeo or Custom / Other.
Fill in what applies: Meeting / Join URL ③, Meeting ID, Meeting Password, Stream Key and Embed URL. None is mandatory, but attendees need at least a join URL or an embed URL to get in.
Optionally set Max Virtual Attendees ④ — a ceiling on viewers at the same moment. Blank means no limit.
Click Save Configuration.
When the session starts, click Go Live ① at the top; click End Stream when it is over. The card shows the status (Not Started, Live, Ended) with the start time, end time and duration.
Afterwards add a Recording URL to offer a replay.
1234The Virtual Event tab with a configured Zoom session
Settings explained
Meeting / Join URL — the direct link, for example a Zoom link. For YouTube and Vimeo it is used when no Embed URL is set.
Embed URL — an embeddable player link, shown directly on the viewing page (YouTube and Vimeo).
Meeting ID / Password — for platforms that need them. Stream Key is for your own streaming software and is kept in the configuration.
Recording URL — once set, confirmed ticket holders can watch the replay.
Max Virtual Attendees — when this many people are watching, the next one is told that the limit has been reached and can try again in a few minutes. People who manage the event are never turned away.
What attendees see
The viewing page is signed-in only and open to people with a confirmed order for the event and to your team. It shows the player (YouTube and Vimeo) or a button to open the meeting (Zoom and Teams), and a note that the stream has not started until you click Go Live.
Joining and leaving is recorded (with the device type). It drives the live viewer count on the viewing page and the attendee limit. There is no attendance report screen yet.
After the event, if you set a Recording URL, a replay is offered.
The viewing page address is the event’s address followed by /virtual, using the event’s number: https://<your site>/events/<number>/virtual, where the number is the one in your own Manage page addresses. EventMann does not add this link to tickets or reminder emails by itself, so send it to your attendees yourself, for example in an announcement or a custom reminder.
Good to know
The status reflects what you clicked, not what is happening on Zoom or YouTube. Forgetting End Stream leaves the event marked Live.
The meeting link is not published in the event’s page source or in calendar files; those point to the event page.
Configuring a stream does not need a special event type, so an in-person event can have an online audience too.
Troubleshooting
An attendee gets “forbidden” opening the page — they are not signed in, or their order is not confirmed yet (waiting for payment or approval).
“This virtual event has reached its attendee limit” — raise or clear Max Virtual Attendees, or ask the person to retry shortly.
The recording link gives an error — no Recording URL has been saved, or the order is not confirmed.
Checkout questions are your own questions, asked once per order at checkout — dietary requirements, a company name for the badge, which workshop somebody wants. They sit alongside the standard fields and the answers travel with the order. Find them under Tickets & Pricing → Checkout, on the Checkout Questions tab (next to Checkout Settings and Payments).
1234Three checkout questions for the gala, with the Responses panel and the two download buttons
The strip ① leads to Checkout Settings. Each question shows its type and whether it is required, with Edit ②. The Responses panel counts the answers, with Download summary (CSV) ③ and Download answers (CSV) ④. The form to add a question is at the bottom of the page.
What you can do here
Add a question — fill in Field Type, Question, an optional Placeholder, tick Required field if needed and click Add Question. Choice types ask for their options.
Choose the type — short text, email, phone, long text, dropdown, radio buttons, or checkboxes.
Edit or delete a question, and reorder them.
Read the responses — how many people answered each question, and for the choice types a count for every option.
Download the answers — one file with a row per order, and one with a row per option.
The question types
Short text, Email, Phone — a single line. Email and phone are checked for a plausible format.
Long text — a box for a sentence or two.
Dropdown — one choice from a list, collapsed until opened. Good for a long list.
Radio buttons — one choice with every option visible at once. Good for two to five options, where you want the buyer to see the whole set.
Checkboxes — any number of choices, including none.
How the answers reach you
The buyer answers at checkout. A required question stops the order until it is answered.
The answers are stored with the order and shown on the order page under Checkout Questions. You can fill in or correct an answer there with Edit order.
The Responses panel on this page counts them: how many answered, and for a choice question how many picked each option.
Answers CSV gives one row per order and one column per question — the file to hand a caterer or a badge printer.
Summary CSV gives one row per question and option with its count — the file for a headcount.
Good to know
Questions are asked once per order, not once per ticket. If you need something from every attendee by name, switch on per-ticket attendee details instead.
A question belongs to one event. Running the same conference again means adding the questions to the new event.
The counts and both downloads cover confirmed and approved orders. A cancelled order is somebody no longer coming, so counting their dietary requirement would send the wrong number to the kitchen.
Changing a question’s type clears its options, because the old ones may make no sense for the new type. Answers already given are untouched.
If you remove an option people had already chosen, the summary still lists it, marked as no longer an option, so the historic count is not silently lost.
The downloads sit behind the same permission as the orders export, since the answers are personal data belonging to your attendees.
Troubleshooting
A question is not appearing at checkout — a question saved with an empty label is skipped rather than blocking the form. Reopen it and give it a label.
The response count is lower than the number of orders — expected for an optional question, and expected for any question added after selling started: orders placed before it exists have no answer to give.
“Can I ask each attendee separately?” — not with these. Use per-ticket attendee details for anything that belongs to a person rather than to the order.
Orders is the full list of bookings for one event — who bought what, whether they have paid, and what you can still do about it. Use it to look someone up at the door, chase a pending request, or pull a list for the box office. Find it in the event’s Manage menu under Attendees → Orders.
What you can do here
Status tabs — Confirmed, Pending, Approved, Cancelled, Refunded and All, each with a live count. Confirmed is the default view.
Search & filter — by reference, name, email or phone; narrow by ticket type, by whether a discount was used, or by a date range; choose how many rows per page.
Sort — click Attendee, Reference, Price or Date; click again to flip the direction.
Per-row tickets — each order lists one row per ticket type (for example “2 Adult”). Click it to expand the named attendees, their seat if the event has a seat map, and a check-in badge for anyone already scanned in.
Export CSV — a menu with two files: Orders (one row per order) and Tickets (one row per ticket, with the price actually paid). Both follow your current tab and filters, not just the visible page.
Columns — choose which columns the table shows.
Manual order — raise a booking for a guest. See Manual Orders.
Bulk actions — tick rows to act on several orders at once.
Message — a link on each row opens a direct thread with that buyer. It only appears for buyers with an account.
12345The Orders page for the Diwali Gala, with status tabs, filters and the three summary figures
Click a status tab ① to switch lists, type in the search box ② to find an order, use Export CSV ③ for a file, Columns ④ to tidy the table and Manual order ⑤ to raise a booking yourself. The tiles at the top (Orders, Tickets, Total Revenue, Total discount) follow your current filter.
Export and columns
Hiding a column only changes what you see: both CSV files always carry every column, so nothing you hide can go missing from your accounting. Your choice is saved per person, so a finance colleague can show different columns on the same event. The Attendee column cannot be hidden. Optional columns include Subtotal, Fees and Tax, which are off by default.
12The Export CSV menu offering one file per order or one file per ticket
Click Export CSV.
Choose Orders — one row per order ① for a booking list, or Tickets — one row per ticket ② for a door list or a per-ticket price report.
Act on several orders at once
Tick the boxes on the left of the rows. A bar appears showing how many are selected and the actions that apply. Each button only appears if you hold the permission behind it, so a box-office member may see Check in but not Cancel orders.
12345Two orders ticked, with the bulk action bar showing Resend tickets, Check in, Undo check-in, Cancel orders and Export selected
Tick the rows you want. The box in the header ① ticks every row on the page you are looking at — never rows you have not seen.
Resend tickets ② emails the tickets again to every selected order (Confirmed tab).
Check in ③ admits every ticket in the selected orders that is not inside yet; Undo check-in reverses it. Useful for walking a group through the door in one action. Each ticket goes through the same check-in as a scan: it is admitted once, written to the check-in log with your name and the method Bulk, counted in the attendance figures, and announced to your ticket.checked_in webhook. Tickets already inside keep their original arrival time.
Cancel orders ④ cancels the selected orders. Every order paid online is refunded in full; an order whose refund fails is left unchanged.
Export selected ⑤ downloads just the ticked rows.
On the Pending tab the bar offers Approve and Reject instead. A bulk action skips any selected row it cannot apply to and tells you how many it skipped, rather than failing the whole batch.
Review requests that need a decision
Events using Request & Approve collect orders as Pending before anything is charged for good (see Booking Modes). A yellow banner — Orders awaiting your review — appears on every tab except Pending, so a request never sits unnoticed. The dedicated queue is described in Booking Approvals.
The Approved tab is a running record of every order that ever went through approval, not just those still waiting for payment. An approved order stays listed there after it is paid, refunded or cancelled.
Approving an order on a payment-link event moves it to Approved but does not mark it paid. Use Copy Payment Link to hand the buyer their checkout link, or open the order and use Mark Paid for an offline payment.
Cancel cancels the whole order, releases its tickets and any held seat, and emails the buyer. A paid order is refunded as part of it — the dialog shows the amount first.
Delete permanently removes an order together with its items, but is only offered for orders that took no money (free or never paid). An order that was paid is cancelled or refunded instead, so its record is kept.
Good to know
A ticket with no named attendee still shows as a row, labelled unnamed, so the quantity always reconciles with what was paid for.
Resend and the bulk check-in actions only apply to Confirmed orders — they assume a paid, valid ticket.
Bulk Check in follows the door’s rules: a ticket marked as a no-show is skipped (scan it at the door or use Advanced Check-in), and if the venue has a capacity it stops admitting once that many people are inside. An order where nothing could be admitted counts as skipped.
Orders that were abandoned at checkout (a declined card, an abandoned 3-D Secure step) are not orders and never appear here.
Team members need permission to view bookings to see the list and a separate permission to export it.
Troubleshooting
Export has fewer rows than I expected — the export follows your current tab, search and date filters. Clear them first for everything.
No Message link on a row — that booking has no linked account (a guest checkout), so there is nobody to open a thread with.
An approved order still shows as unpaid — approval and payment are separate steps on payment-link events. Send the link or mark it paid.
Bulk Resend or Check in is missing — you are not on the Confirmed tab, or your role does not include that permission.
Check in reported orders as skipped — every ticket in them was already inside, marked as a no-show, or the venue had reached its capacity.
Check-in is where you scan tickets at the door. It opens as a full-screen door screen with three tabs — Scan, Orders and Stats — works from any phone or tablet browser, and keeps working when the venue Wi-Fi does not. Open it from Day-of Operations → Door (scan tickets) in the event’s Manage menu. The Door page (/door) lists every event you can check people into, with tickets sold against capacity — the simplest bookmark for a team on the night.
1The Door page on a phone listing the events a person can check guests into
Tap an event ① to open its door screen.
Install it to the home screen first
The scanner is an installable app (a PWA), separate from your general EventMann bookmark, and it opens straight to this event’s door screen; the install steps are at the bottom of its Stats tab. Do this before doors open, not at them:
iOS Safari (16.4+) — there is no install prompt on iPhone; the page walks through Share → Add to Home Screen instead. Camera scanning inside an installed app needs iOS 16.4 or later; the page warns you if your version is older.
Once installed, the app is scoped to the scan screen only — if your session expires mid-shift, signing back in opens in the regular browser, not inside the installed app. That is a deliberate trade-off so the installed icon can never turn into a second admin panel.
Installing for a second event creates a separate home-screen icon; it does not overwrite the first.
The door screen
1234The Scan tab on a phone: progress bar, Enter code and Start Camera
The purple bar at the top always shows how many guests are in ① (here 31 of 49 tickets) with a progress bar. The coloured dot beside it is green while you are online and amber when you are offline, with a count of scans waiting to sync. Enter code ② types a code instead of scanning, Start Camera ③ opens the camera, and the tabs at the bottom switch between Scan, Orders ④ and Stats.
Scanning tickets
Tap Start Camera and point it at the attendee’s QR code (screen or print).
A large banner gives the verdict. Admitted is green when the order is now complete and violet when other tickets of the same order are still outside (it says, for example, “1 of 2 in this order”). Not valid is red: the ticket was not found or cannot be admitted.
If a ticket was already scanned you get an amber Already inside banner — not an error, just a heads-up. Tap Check out on it when a guest is leaving, so the inside count stays honest; a check-out shows a blue Checked out banner.
No camera, or a cracked screen? Tap Enter code instead — it accepts the ticket’s own token, the booking reference, or a partial name/email, in that order, so you can find someone even without their ticket in hand. The Orders tab lists the latest orders and finds any order as you type, with a check-in or check-out button on each ticket.
1The Admitted banner after a ticket was checked in by typing its code, showing that one of two tickets in the order is now inside
The verdict ① comes first, in large type, then who it is and why. The banner clears itself after a few seconds; a duplicate (Already inside) stays longest.
The Stats tab
The Stats tab: admitted, check-in rate, inside now, remaining, tickets cached for offline and the install steps
Stats shows how many are admitted, the check-in rate, how many are inside now and how many are still to come, how many tickets are cached for offline use, and a live list of recent check-ins (it refreshes every few seconds) with Undo check-in and Check out. At the bottom are the install steps, and on Android a link to the native scanner app, which has the same offline queue and a faster camera.
The Orders tab
1The Orders tab listing the latest orders with their check-in state
The Orders tab lists the latest orders and finds any order as you type in the search box ① (reference, name or email). The three chips filter by state — Fully checked in, Partially checked in, Not arrived yet — with a count on each. The colour bar and the figure on each row (2/2, 1/2, 0/2) show how many of the order’s tickets have arrived. Tap a row to expand its tickets and use Check in or Check out on each one.
Undo, sound, and the attendee list
Undo check-in is available for 5 minutes after the scan; past that window the check-in log no longer offers an Undo button.
Sound toggle — iOS installed apps have no vibration API, so an audible beep is the only non-visual confirmation a scan landed; the on/off choice is remembered per event.
The clipboard icon at the top of the door screen (for people allowed to manage check-in) opens Advanced Check-in: search by name, email or reference, bulk check-in, no-shows and live rates.
Offline mode
Load the scan page once while online — it downloads a manifest of every valid ticket so scans can still be validated with no signal.
Everything the camera scan needs, including the QR decoder, is served by EventMann itself and kept on the device with the page, so the camera keeps reading codes with no connection.
Scans made offline queue on the device and show a pending-sync count; they upload and reconcile automatically once connectivity returns.
The server is always the source of truth for duplicates — if the same ticket was checked in elsewhere while you were offline, the sync marks it “already in” rather than double-counting it.
Good to know
Only confirmed bookings resolve at all — a cancelled or refunded order’s ticket will not scan, even if the attendee still has the QR code.
If the event’s venue has a capacity set, scanning stops with a “venue at capacity” message once that many people are checked in — regardless of how many tickets were sold in total.
Team members need the box_office or staff sub-role (or an equivalent custom permission) to open this page at all. For helpers who are not on your team, create a door pass instead: no account needed, and only this event’s door.
Troubleshooting
“Not found” on a ticket you know is valid — the order may have been cancelled or refunded since it was booked; check its status in Orders.
Scanning stopped working for everyone — check whether the venue’s capacity has been reached; every further scan is blocked until you raise it or check people out.
Can’t undo a wrong check-in — the 5-minute window has passed; there is no override past that point.
Camera won’t open on an installed iPhone app — confirm the device is on iOS 16.4 or later; older versions block camera access for installed web apps.
When a ticket type sells out, people can join its waiting list instead of walking away. This screen is where you decide who gets a seat when one frees up — you admit them, one by one, rather than the platform booking whoever has waited longest. Find it under Attendees → Attendee tools, on the first tab (Waitlist, Transfers, Group Import). The sidebar shows a badge with the number of people waiting.
What you can do here
See everyone waiting: their name, email, the tickets they want — an entry is a basket like an order, for example 2× Adult · 2× Child — the total, and how long they have been queuing.
Each entry shows a status — Waiting, Rejected or Expired — and, once you have admitted it, what became of the order it created: Confirmed (free tickets), Payment link sent with the pay-by time, Paid, Awaiting your approval, Payment window lapsed, Order cancelled or Refunded. The order number under it opens the order.
Approve an entry to give that person every ticket in it. This creates one real order for the whole basket on the spot — all of it or nothing, never half a family.
Reject an entry. They are emailed, and they cannot rejoin this queue afterwards.
Switch the list on, cap it, and choose how long an admitted person has to pay — all under Event Setup → Details & dates, in the waitlist settings.
12345The waitlist for a sold-out Family pass, with four people waiting — one of them a family asking for a Family pass and a child ticket — and their Approve and Reject buttons
The Transfers tab ① is next door. The chip ② shows, per ticket type, how many tickets and how many people are waiting — counted from every basket, so a family waiting for a Family pass and a child ticket counts once under each. The Tickets column ③ shows each entry’s basket. Entries that are still Waiting have Approve ④ and Reject ⑤.
How approving works
Find a Waiting entry and click Approve.
If every ticket type in the entry has enough free places, the order is created at once. If one of them does not, EventMann asks first (see below).
One order is created for the whole basket, and the seats come off public sale straight away. Nobody else can buy them while the order stands.
If the ticket is free, the order is confirmed at once and their tickets are emailed.
If the ticket is paid, they are emailed a payment link. They hold the seat until the payment window you set runs out.
If the event uses request and approve, the order joins your approval queue instead, and you make the usual decision there. For paid tickets the person is sent a payment link once you approve it there, as for any request without a card hold.
If they do not pay in time, the order is cancelled automatically, every seat in it goes back on sale, and the entry is marked Expired. You do not need to tidy anything up.
Admitting beyond the ticket quantity
Sometimes you want to let a family in although the ticket type is still sold out — you know the room has space, or two places will not be used. Approve lets you do that, the same way a manual order can, but it never does it without asking.
123The confirmation Approve shows when the Family pass has no free place: the entry, the shortfall, and Confirm
Click Approve on the entry. When a ticket type in it has fewer free places than the entry asks for, a confirmation opens ① instead of creating the order.
It names the shortfall for each type ② — for example Family pass: 0 free, this entry needs 1 — and how far over its quantity the event will go.
Click Confirm ③ to admit them anyway, or Cancel to leave them waiting.
The order then works exactly like any other admission: free tickets are confirmed and emailed, paid ones get a payment link for your Time to pay, and on an approval event the request joins your approval queue. The sold count shows the oversell honestly (for example 252 of 250), the type stays sold out on the event page, and cancelling or an expired payment window puts the count back.
Settings explained
Enable Waitlist — whether people may queue for a sold-out ticket type at all.
Book waitlisted people automatically — leave this off (the default) to admit people yourself with Approve. Switch it on and the platform books the longest-waiting person the moment a seat frees, without asking you. Events created before this setting existed keep booking automatically until you change it.
Time to pay — how long somebody you admit has to pay for a paid ticket, from half an hour to three days (the default is 24 hours). Their seat is held until then, so a long window keeps the rest of the queue waiting. A free ticket is confirmed at once and ignores it.
Waitlist limit — the cap is per ticket type, so a full queue on one popular tier does not lock people out of the others. It counts tickets, not people, across every basket: a family waiting for 2 adult and 2 child tickets uses two places of the adult limit and two of the child limit, and a limit of 50 means fifty seats’ worth of demand.
Good to know
Approving does reserve the seats. They are held for that person for the length of the payment window, so two people cannot be admitted into the same last seat.
Approving is refused, with a reason, if the event is no longer selling — not live, a ticket type in the entry switched off or outside its sale window, the person cannot buy one of the types, or the basket breaks a per-order limit. This is checked for every type in the entry at the moment you click, not when they joined. Not enough free places is the one reason you can overrule, with the confirmation above.
The note above the list says which way the event works: the first in line is booked automatically, or everybody waits for your Approve. Either way a paid ticket gets your Time to pay.
Members are placed ahead of non-members in the queue, if you sell memberships and have given them waiting list priority.
A ticket that cannot be booked on its own — a child or carer ticket — can only be waited for beside another ticket in the same entry, exactly as at checkout. A family joins with 2× Adult and 2× Child in one entry; a child ticket on its own is refused when they join.
Automatic booking (when you switch it on) never goes beyond the ticket quantity. It admits an entry only when every type in it has room, and otherwise keeps it waiting — smaller entries further down can go first.
You are notified when seats free up on a type that has people waiting, so you do not have to watch this screen.
Rejecting is final from the attendee’s side: they see the outcome on their own bookings page and cannot queue again for that ticket type.
Troubleshooting
“Where is the Notify button?” — there is no longer one. Notifying sent an invitation and reserved nothing, so two people could be invited into one seat and the loser was told it had gone. Approve gives the seat to the person you choose and holds it for them.
Approve is refused — the message says why. If it says a type is sold out, places were taken between loading the page and clicking: click Approve again and the confirmation shows the shortfall so you can admit them anyway, or raise the quantity under Ticket Types. The other reasons it names: the event is not live, a ticket type is switched off or outside its sale dates, or the person cannot buy one of the tickets (a members-only or volunteer-only type).
An entry says “Needs another ticket” — it holds only child or carer tickets, from before entries could hold several types. It cannot be admitted on its own; reject it and ask the person to join again with an adult ticket in the same entry.
An entry says Payment link sent but no money has arrived — that is a paid admission inside its payment window; the row shows the pay-by time. It resolves itself either way: they pay and the row says Paid, or the window closes, the seats are released and the row says Payment window lapsed.
I cannot find the admitted order in Orders — Orders opens on the Confirmed tab. A paid admission waiting for payment is on the Approved tab, and one awaiting your approval on Pending; every one of them is on All and carries a From waitlist badge. The order number on the waitlist row takes you straight to it.
Somebody you rejected asks to be added again — delete their entry and ask them to rejoin; the block is tied to the rejected entry.
When ticket transfers are enabled for an event, an attendee can hand their ticket to someone else by email. This screen is your review queue for those requests. Find it under Attendees → Attendee tools, on the Transfers tab. Switch transfers on for the event with the Transferable setting under Event Setup → Details & dates.
What you can do here
See every transfer request for the event: who sent it, the recipient’s email, the ticket type, and its status (Pending, Accepted, Declined, Cancelled).
Approve or Decline any request still Pending.
12Three transfer requests: one pending with Approve and Decline, one accepted and one declined
Only a Pending row has buttons: Approve ① and Decline ②.
How it fits together
An attendee starts a transfer from their own ticket, addressed to a specific email. The system emails that person a one-time acceptance link, valid for 7 days.
The recipient can accept directly from that email — they do not need you to do anything first.
Approving a request here has the same effect as the recipient clicking their link: the ticket is marked transferred immediately. Use it when a recipient is having trouble with the email link, or you want to push a transfer through without waiting.
Whichever happens first — your approval or the recipient’s own click — finalises the transfer; the other route then has nothing left to do.
Good to know
A ticket that has already been checked in cannot be transferred.
A ticket already mid-transfer blocks a second, overlapping request until the first is resolved or expires.
Declining or letting a request expire leaves the original attendee’s ticket exactly as it was — nothing is cancelled or refunded.
Troubleshooting
Approve/Decline buttons are missing on a row — the transfer is no longer Pending; something already resolved it (the recipient accepted, it was declined earlier, or it expired).
Attendee says transfers are not available on their ticket — ticket transfers must be switched on for the event first; if the setting is off, attendees never get the option to start one.
The Refunds page is where you send money back to an attendee yourself, through Stripe, without waiting for them to ask. It also keeps the history of every refund on the event. Find it under Attendees → Refunds, on the middle tab of the strip (Refund Requests, Refunds, Cancellation terms).
What you can do here
Initiate a refund against any paid, confirmed order — in full, in part, or record a ticket exchange.
Read the refund history — every refund transaction for the event with its method, amount, status, reason and date.
1234The Initiate Refund form with Partial Refund chosen, and the Refund History table below it
How to issue a refund
Choose the Booking ①. Only paid, confirmed orders with something left to refund are listed.
Choose the Refund Method ②: Full Refund, Partial Refund or Ticket Exchange.
For a partial refund, type the Refund Amount ③. When you pick an order, the field is pre-filled with what your cancellation terms return for it; choose Full Refund to refund everything.
Add a Reason (for example “Event cancelled”) and, if you like, internal Notes.
Click Initiate Refund ④. The refund is sent to Stripe immediately; there is no second confirmation.
The three methods
Full Refund — returns everything that has not been refunded yet to the buyer’s original payment method. When it completes, the tickets are cancelled and the places go back on sale. Any discount code used on the order is given back, so it can be used again.
Partial Refund — returns the amount you type. The order stays Confirmed, the tickets stay valid and nothing is released.
Ticket Exchange — no money moves. It is a note that you settled the matter by swapping tickets by hand, kept in the history.
Good to know
You can never refund more than the order total minus what was already refunded. Only one refund can be in progress per order at a time.
Some payment methods take days to complete. The places are released when the refund really completes, not when you click.
The buyer is emailed when a refund completes, whether you started it here or approved their request.
A refund that fails at Stripe is recorded as failed, with the reason in its notes, rather than left pending. Try again after fixing the cause.
The refund returns the platform commission on that part of the sale too, so a refunded sale costs you no commission.
Mark processed appears on refunds that are still pending; it cannot be used on one that was rejected.
Cash, comp and other orders paid outside EventMann are not listed: there is nothing to send back through Stripe. Cancel them from the order page and return the money yourself.
You need the permission to manage refunds.
Troubleshooting
The order is not in the list — it is free, was not paid through Stripe, is not Confirmed, or is already refunded in full.
“Nothing left to refund” — the order has already been refunded up to its total, here, from a request or automatically.
Seat still shows as sold after a partial refund — expected: only a full refund releases the places.
The refund is refused for lack of balance — older orders (paid before 17 September 2026) are refunded from your own Stripe balance. See the banner in Order Detail & Timeline.
Group import creates confirmed bookings in bulk from a spreadsheet — useful for a corporate block, a guest list, or anyone paying you outside the checkout, where you already have the attendee list in hand. Find it under Attendees → Attendee tools, on the Group Import tab. You need permission to edit the event.
What you can do here
Download a CSV template.
Upload your file and check it row by row before anything is created.
Choose the default ticket type and map your columns.
Import: every valid row becomes its own confirmed booking.
123The Group Import page with the template link, the upload area and the Preview & Validate button
How to import
Click Download Template ① to get group-booking-template.csv, with the columns name, email, phone and ticket_type. Or use your own file with a header row.
Click the upload area ② and choose your CSV (CSV or plain text, up to 5 MB).
Click Preview & Validate ③. Nothing is created yet.
Read the preview, set the ticket type and column mapping, and click Import.
123The CSV preview showing three valid rows and one invalid row, with the ticket type and column mapping below
The preview shows how many rows are valid and how many are not, with a green tick or red cross on each row; a row with an email address that cannot be right (here not-an-email) is marked invalid. Under it, choose the Ticket Type ① that applies to every row without a ticket type of its own, check the Column Mapping ② (it is detected from your header names and you can override each field) and click the Import button ③, which states how many attendees will be created.
Column auto-detection
The importer recognises common variants, so your spreadsheet rarely needs renaming: name also matches full_name, fullname, attendee_name or attendee; email also matches e-mail, email_address, attendee_email or mail; phone also matches telephone, phone_number, mobile, tel or attendee_phone; ticket_type also matches ticket, type or tier. Name and email columns are required.
What an imported row becomes
Its own booking, with a reference starting GRP-, already Confirmed at the ticket type’s current price, with the payment method shown as group import. There is no payment step. It is a guest order in the attendee’s name, like a manual order: it is not attached to your account or to anybody else’s.
If a row has a value in the ticket type column, it is matched to one of the event’s ticket types by name. A blank cell uses the ticket type you chose in the dropdown. A name that matches nothing fails that row with “Unknown ticket type”, so a typo never silently lands on the wrong type.
Stock is respected like at checkout. If a ticket type is sold out the row goes onto the waitlist when the event has one, and otherwise fails with a sold-out message.
When it is finished you get a summary: created, waitlisted and failed, with the specific error for each failed row. The rest of the file still imports.
Good to know
No emails are sent. Imported bookings are created silently. Open Orders and use Resend tickets (one order, or ticked in bulk) to email the tickets.
Name and email are checked on every row: a missing name, or an email address that is not valid, rejects that row.
Every row is one ticket. For several tickets for one person, add several rows.
The checked file is kept for you for 30 minutes between preview and import, and is never saved as a file anywhere. Wait longer, or import it once already, and you are asked to upload it again (“CSV file expired”).
Troubleshooting
Attendees did not get their tickets — group import never emails. Resend from Orders.
“Unknown ticket type” — the name in the ticket_type cell does not exactly match a ticket type (capitals do not matter). Fix the cell or clear it to use the default.
“Invalid name or email” — that row was skipped. Fix it in your spreadsheet and import just those rows.
“Missing required columns” — the header row has no name or email column the importer can recognise.
“CSV file expired” — more than 30 minutes passed since the preview, or the file was already imported. Upload it again and preview once more.
A direct, private channel between you and each attendee — for pre-event questions (access, dietary needs, travel) that do not belong in a public review or a support ticket. Find it under Marketing → Attendee comms, on the first tab, Attendee Messages; the sidebar badge counts messages you have not read yet.
What you can do here
A two-pane inbox: the conversation list on the left, the open thread on the right, so you never leave the page to read or reply.
Search conversations by attendee name, email, phone or booking reference.
New message to any confirmed or approved attendee, whether or not you have messaged them before.
Switch the whole channel on or off for the event with a single toggle (Messages on / Messages off).
1234The Attendee Messages inbox: conversation list on the left, the open conversation on the right
Use Search attendees ① to filter the list, the Messages on switch ② to open or close the channel for this event, New Message ③ to write to somebody first, and the box at the bottom ④ to reply (Enter sends, Shift + Enter starts a new line). A purple number marks unread messages in a conversation.
When the channel is open
Messaging opens 90 days before the event — a booking made a year out does not get a live channel for eleven months of silence.
It closes the moment the event ends (or is marked Completed/Cancelled), with no grace period afterwards.
Once closed, the full history stays visible to both sides — only sending is disabled. The thread never disappears.
Turning the channel off yourself closes it immediately, ahead of any date rule.
Sending limits
Attendees are limited to 10 messages per hour on a given event, to stop one person’s thread from flooding your inbox.
There is no equivalent cap on your replies as the organizer.
Good to know
Guest checkouts (no account) have nobody to open a thread with — they are counted and noted in the attendee picker rather than silently missing.
Only team members with the Reply to Messages permission (or full event-edit access) can open this page — box office staff can be granted messaging without also being able to change the event.
The picker shows the name printed on the attendee’s order next to their account name whenever the two differ, since the order name is the one you likely recognise.
Troubleshooting
Can’t reply to a thread — the event has ended, been cancelled, or the channel was switched off; the read-only notice on the thread explains which.
An attendee is missing from the picker — only confirmed/approved bookings with a linked account are listed; a guest checkout or a still-pending order will not appear.
Attendee says their message did not send — check whether they have hit the 10-messages-per-hour limit on this event.
Surveys and polls let you ask your attendees structured questions after the event — a feedback survey with a recommendation score, or a one-question poll you can share with a WhatsApp group. Find them under Analytics & Reports → Feedback, on the Surveys tab (the other tab, Reviews, holds what attendees wrote on their own; see Ratings & Reviews). You need permission to edit the event.
What you can do here
See every survey and poll for the event with its question count, responses, status and send mode.
Create Survey with any mix of question types, or Create poll for a single question with a few answers.
Send now to invite ticket holders yourself, or let it go out automatically after the event.
Copy a poll’s shareable link.
Open Results to see the answers, the NPS and the response rate, and export them.
1234The Surveys tab listing a feedback survey and a poll, with totals above
Start a poll with Create poll ① or a full survey with Create Survey ②. On each row, Send now ③ invites ticket holders and Results ④ opens the answers.
How to create a survey
12345The survey form with title, switches, closing time, reminder and the first question
Click Create Survey and give it a Title ① and an optional description.
Tick Active — inactive surveys are saved but not shown or sent.
Tick Auto-send to have it emailed automatically after the event, and set Send delay (hours after event) ② (1–720). Leave it off to send by hand.
Optionally set Closes at ③. After that time the survey stops accepting answers and its email buttons stop being offered. The time is in the event’s time zone.
Optionally set Remind non-responders after (days) ④ (1–30). Each person gets at most one reminder, ever, and only while the survey is open.
Add your questions (see below) and click Save Changes.
The question types
Rating (1–5 stars), Emoji scale (5 faces) and Scale 1–10 — numeric answers with an average in the results.
NPS (0–10) — the “how likely are you to recommend us” question; it feeds your Net Promoter Score.
Multiple choice — pick any number of the options you list.
Single choice (poll) — pick exactly one option.
Yes / No
Free Text — an open answer.
Any question can be marked Required. Choice questions take a list of options (use Add Option). Editing a survey keeps the answers already given to its questions; removing a question permanently deletes its answers.
Who gets invited, and when
Auto-send invites every ticket holder with a confirmed order once the event has ended plus your delay, checked hourly.
Send now invites every ticket holder who has not been invited yet, straight away (and asks you to confirm first). Each gets an email with a personal link, and a bell notification when they have an account.
Guests who bought without an account can answer too: their email carries a personal link that does not need a login.
A survey invitation is treated like marketing mail: people who opted out of marketing email or unsubscribed from you are skipped.
A closed or inactive survey sends nothing.
Polls and the shareable link
12A poll with a shareable link switched on, results shown after answering and four options
A poll is a survey with one choice question. Two settings make it work for groups:
Shareable link ① — anyone with the link can answer, signed in or not. Paste it into a WhatsApp group or a social post, or let a follow-up email use it. Each browser and each account can answer once. These answers are kept apart and do not count towards NPS, because the link can reach anybody. Turning the link off kills it at once; turning it on again creates a new one.
Show results after answering ② — people see the share of each option after they vote. Free-text answers are never shown.
On the surveys list, a poll with a link has a Copy button. See After-the-event follow-ups to put a poll into an email.
Reading the results
123Survey results: Net Promoter Score, response rate and the answer to each question
Export CSV ① and Export XLSX download the answers.
The Net Promoter Score ② is promoters (9–10) minus detractors (0–6) as a percentage, with the three groups counted; passives are 7–8. It counts ticket holders only.
The Response rate ③ divides answers by the people actually invited. If nobody was invited by email (a poll shared by link), it says so instead of showing a made-up percentage.
Each question shows its answers: averages and bars for ratings, shares for choices, and the written answers for free text, newest first (the latest 50 on the page; the export has every one).
If the survey has answers from the shareable link, the page offers All answers, Ticket holders and Shareable link views.
A poll’s results page with the share of each option
Good to know
Only people with a ticket (an account or the email on the order), invitees and you can answer a survey through its normal page. The shareable link is the one deliberate exception.
The response count on the list rises as answers arrive.
Both switches have to be on for an automatic send: Active and Auto-send.
Troubleshooting
The survey never went out — check Active and Auto-send, the delay, and that the event has ended. Or use Send now.
Nobody was invited — every ticket holder may already have been invited, opted out of marketing email, or the survey is closed.
The results page is empty — nobody has answered yet.
NPS is missing — the survey has no NPS question, or the only answers came from the shareable link.
Public star ratings and written reviews attendees leave about your event, alongside your average score. Find them under Analytics & Reports → Feedback, on the Reviews tab (the Surveys tab next to it is what you asked; this is what they say unprompted). Anyone with view access to the event can read the page.
What you can do here
Read every rating and review for the event with its stars and how long ago it was posted. The header shows how many there are and the average rating.
Two lists, because attendees can leave feedback in two places: Event page ratings (stars, with an optional comment, from the event page) and Reviews page (a titled review from My Bookings, marked Verified attendee).
Reply publicly — your reply appears directly under the review, visible to anyone who can see it.
Hide or show — the Published / Hidden badge on each review is a button: click it to hide the review from public view or to publish it again.
1234The Reviews tab for the Navratri Garba Night: event page ratings and the reviews page, one with a reply
The section headings ① separate the two sources. Click Reply ② under a review to answer it, and click the Published badge ③ to hide it. The Reviews page ④ list works the same way.
How to reply to a review
Click Reply under the review (it reads Edit reply if you already answered).
Type your response (“Write a public reply to this review…”) and click Save Reply. A reply can be up to 1,000 characters on a rating and 2,000 on a review.
Your reply is shown immediately beneath the attendee’s review; editing it later overwrites the same reply rather than adding a second one.
Good to know
Hiding a review removes it from public view but keeps it here for you — hiding is reversible any time.
Until the first review arrives the page says “No reviews yet”.
A review can also be taken down by platform staff moderating abuse reports. That is a separate switch from yours — both your toggle and theirs have to say “show” for a review to be public, so re-publishing here will not bring back a review the platform hid, and it still counts toward “Reviews” here either way. Such a review carries a red Hidden by moderation badge.
Replying and hiding need permission to edit the event; reading does not.
Troubleshooting
Page shows no reviews at all — either nobody has rated the event yet, or every review has been hidden; hidden reviews still count toward “Reviews” here even though the public cannot see them.
A review you published is still not showing on the event page — platform staff may have hidden it for a moderation reason. Toggling it here will not override that; check with support if you believe that was a mistake.
Manual orders let you raise a booking on somebody’s behalf, from the event’s own Orders screen, for the situations the public checkout was never built to cover — a phone booking, a comp for a sponsor, an invoice customer, or someone who genuinely cannot pay online. You pick the tickets, name the attendee, and either send them a link to pay or, for a free order, confirm it on the spot.
What you can do here
Open it from the Manual order button in the Orders header (.../manage/orders/create). It only appears if you hold the order-management permission for this event.
Enter the buyer’s name, email and phone, then choose one or more ticket types and a quantity for each.
Each ticket type is quoted at its effective price — the current price after any active pricing rule, flash sale or member price is applied, exactly what the public page would charge right now. The figure you see on screen is the figure the buyer is asked to pay.
Name the attendee holding each ticket if you know it; leave any of them blank and the buyer’s own name is used on that ticket instead.
Apply a discount code if the buyer is entitled to one — it is checked the same way the public checkout checks it, not waved through because you typed it in.
Set how long the tickets are held for the buyer before the order is given up as unpaid.
1234The New manual order form: buyer details, hold time, discount code and the ticket quantities
Fill in the buyer’s Name ① and Email, set Hold the tickets for (hours) ②, add a Discount code ③ if they are entitled to one, choose how many of each ticket (each ticket type shows its price and how many remain) and click Manual order ④.
The hold
Hold the tickets for is measured in hours and defaults to 168 — seven days. That default has not changed; it used to be shown as 10,080 minutes, a number nobody could read at a glance, so the field now reads in hours instead.
There is also an exact date-and-time field. Set it and it wins over the hours field — use it when the hold has to end at a specific moment, such as the night before doors, rather than a round number of hours counted from when you raised the order.
Setting the hours to 0 means no expiry at all: the tickets stay held until you cancel the order yourself.
While an order is held, the tickets are reserved for that buyer. If the hold runs out with nothing paid, the order expires and the seats go back on general sale.
What happens after you submit
If there is nothing left to pay — a fully comped order, or a discount that brings the total to zero — the order is confirmed immediately and the attendee is emailed their tickets straightaway, the same as any other free booking.
Otherwise the order is created as an approved, unpaid order and the buyer is emailed a link to a normal payment page — the same checkout everybody else uses, so they pay by whatever methods you accept there, and the same confirmation and ticket emails follow once it clears.
The order appears on the Orders screen as soon as it is raised, whether or not it has been paid yet.
If a payment link has gone stale before the buyer got to it, open the order and use Resend payment link (see Order Detail & Timeline). You can also Copy Payment Link there and send it yourself. Resending revives an order the hold already expired on and gives it a fresh window; it will not touch an order that was cancelled or refunded, and it does nothing once the order has already been paid.
Good to know
This form deliberately skips your own order limits — the maximum tickets per order, per ticket type or per buyer that apply on the public page — and says so on screen. It exists for a named guest you have decided to seat, not as a way to work around your own rules at scale.
It also does not stop you overselling. The remaining count is shown next to each ticket type and turns amber once it runs out, but the order can still be raised. Nothing is actually taken from inventory until the buyer pays, so raising more orders than you have seats for is possible, and managing that is on you.
A discount code that cannot be redeemed is refused outright, not silently dropped — you get an on-screen error rather than a booking that quietly charged full price after telling the buyer they had a discount.
Raising a manual order needs the same permission as approving a pending one, so a box office role can be given exactly that without also handing them full event management.
The email you enter for the buyer is where the payment link, or the free confirmation, is sent, and it goes on their own ticket. A name typed for a different attendee does not carry an email or phone of its own unless you type one for that row too.
Troubleshooting
Manual order button is missing — you need the order-management permission on this event; ask the event owner to grant it if you are on a sub-role.
Buyer says the payment link has stopped working — the hold most likely ran out. Open the order and use Resend payment link; on an expired order this puts it back in front of the buyer with a new window rather than sending a link to a dead page.
Discount code was rejected — the same rules apply as at checkout: wrong event, expired, past its use limit, or already used by this buyer.
An attendee’s name is missing from their ticket — that row was left blank when the order was raised, so the buyer’s own name was used instead; open the order afterwards to edit the ticket holders.
Resend payment link does nothing — it only revives an order that is genuinely expired and still unpaid; a paid, cancelled or refunded order is left exactly as it is.
A door pass lets people check guests in at one of your events from their own phone, without an EventMann account. You create a pass, show its QR code or send its link to your door helpers, and each helper types their name once. From then on they have the door screen for that event and nothing else: no organizer panel, no other events, no money. Every ticket they scan shows the name they gave.
What you can do here
Create a door pass — give it a name, such as Main entrance volunteers, and choose until when it works. Leave the time empty and it keeps working until six hours after the event ends.
Share it — helpers scan the QR code with their phone camera or open the link. Helpers with the EventMann Scanner app can tap Join with a door pass on its sign-in screen and scan the same code.
See who joined — each pass lists its helpers with the time they joined, when they were last active and how many tickets they scanned.
Remove one helper — their phone stops being able to scan at once; everybody else on the pass carries on. Anyone who still has the link can join again, so to shut somebody out for good, revoke the pass and give the rest a new one.
Revoke the pass — every helper using it stops at once. Create a new pass if you need one again.
1234The Door passes page with the create form, a pass with its QR code and link, and the helpers who joined it
Name the pass ① and choose when it ends, then click Create door pass ②. Each pass is shown with its QR code ③ and a Copy link button, then a table of helpers with Joined, Last active and Scans. Revoke ④ ends the whole pass; Remove ends one helper.
How to set up the door
Open the event and go to Day-of Operations → Door passes. (The default end time is six hours after the event ends, and never less than 12 hours from now.)
Enter a name for the pass, check the end time, and click Create door pass.
Show the QR code to your helpers before doors open, or copy the link into your team chat.
Each helper opens it, enters their name and taps Start scanning. They see the same door screen as your team: scan, search the event’s orders, undo a check-in, and keep scanning offline.
12What a helper sees on their phone after opening the pass: a name field and Start scanning
A helper sees this page. They type their name ① and tap Start scanning ②. The organizer sees that name next to every ticket they scan.
Good to know
A pass works for one event only. Helpers cannot open the organizer panel, see sales figures or change anything about the event.
Helpers can search this event’s orders, so they see attendee names. Share a pass only with people you chose for the door.
Every scan made with a pass carries the helper’s name, so you can always see who let somebody in.
Team members with the Box Office or Staff role do not need a pass; they scan with their own account. A pass is for helpers who are not on your team, such as volunteers on the night.
Troubleshooting
A helper sees “This door pass has ended” — the pass expired or was revoked. Create a new one and share that.
A helper can no longer scan — check whether they were removed from the pass. If that was a mistake, they open the link again and enter their name.
I cannot see Door passes in the menu — creating passes needs permission to edit the event.
Cancellation terms say what a buyer gets back when they cancel a paid order. They are also your refund policy: buyers see them on the event page and at checkout before they pay, and the terms shown at the time of purchase are recorded on the order. Every event with paid tickets needs terms before it can go on sale. You set them under Event Setup → Details & dates (in the Cancellation terms section), or in the event wizard when you create the event. The Refunds strip also has a Cancellation terms tab that jumps straight there.
What you can do here
Start from a preset — Full refund, Flexible, Moderate, Strict or No refunds, then adjust it.
Set standard terms — a full refund, a cancellation charge (a percentage of the order of at most 50%, or a fixed amount), or no refund.
Add steps by date — for example no refund within 2 days of the event and 50% within 14 days. The tightest step that matches applies.
Add notes for buyers — shown beside the terms on the event page, for example how to ask for a refund.
12The Cancellation terms section: presets, standard terms and two steps by how late the cancellation is
Optionally click a preset under Start from (Full refund, Flexible, Moderate, Strict, No refunds).
Pick the Standard terms ① — Full refund (no charge), Percentage of the order, Fixed amount or No refund. These apply whenever a cancellation falls outside every step below.
Under Charge by how late it is, click Add a step ② for each window: “Cancelled within (days before the event)”, the kind of charge and the amount. Up to six steps; the tightest matching one applies.
Optionally write Notes for buyers, then save the section.
The example in the picture reads: a full refund earlier than 14 days out, 10% kept within 14 days, 25% kept within 7 days.
Settings explained
Cancellation cutoff — hours before the start after which buyers can no longer cancel themselves. Leave it blank for no cutoff, or enter 0 to close when the event starts.
Cancelable (Details & dates) — on: attendees can cancel or ask for a refund. Off: the event cannot be cancelled. Buyers can neither cancel nor ask for a refund, and the event page and checkout show no cancellation terms. You can still refund any order yourself.
Refundable (Details & dates) — decides whether a self-service cancellation refunds the money automatically or waits for you. Attendees can always ask for a refund while the terms return something; you decide those requests by hand.
What the numbers mean
A percentage charge is capped at 50% of the order. To keep the whole order choose No refund — that one is not capped.
A step is measured in whole days before the event starts, in the event’s own time zone.
When you cancel an order or tickets yourself, you choose the reason: We cancelled it is always refunded in full and never charged; Attendee asked to cancel applies these terms.
Good to know
Changing the terms later does not change orders already sold: each order keeps the terms shown when it was bought.
Self-service cancellations, approved refund requests and the refund suggested when you cancel tickets from an order all use the same terms, so a buyer gets the same figure whichever way they ask.
If you cancel the whole event, every paid order is refunded in full, whatever the terms say.
Troubleshooting
I cannot publish a paid event — choose terms first. “Full refund” is a valid choice; leaving the section blank is not.
The event page shows no terms — Cancelable is switched off, so no terms are shown.
A buyer got a different figure than the terms say — they bought under the terms that applied at the time of purchase; later changes never touch existing orders.
The order page is where you look after one booking: who it is for, what was bought, what has happened to it and what you can still do. Open it from Attendees → Orders by clicking an order’s reference (it looks like KV-ABC123).
What you can do here
See the tickets, the buyer’s contact details, the answers to your checkout questions, the price breakdown and a timeline of everything that happened.
Resend the tickets, correct names and contact details, add internal notes.
Cancel the order, refund it, or cancel only some of its tickets.
Decide a request that is waiting for you, copy a payment link, or mark an order paid.
1234567A confirmed order with named tickets, contact details, checkout answers, internal notes and the timeline
The buttons in the header — Resend tickets ①, Edit order ②, Refund ③ and Cancel + refund ④ — change with the order’s status and with your permissions. Below, the Tickets card has Cancel tickets ⑤, Internal notes ⑥ are a private log for your team, and the Timeline ⑦ lists what happened and when.
Which buttons you see
Button
When it appears
Resend tickets
Confirmed orders with an email address. Each ticket also has its own Resend link, and Tickets PDF downloads them.
Copy Payment Link
Orders that are waiting for payment (Pending, Approved or a failed payment). It copies the buyer’s own payment page, ready to paste into a chat.
Mark Paid
Pending or Approved orders, for a payment you received outside EventMann. Needs permission to edit the event.
Approve / Reject
Pending orders (Reject also on Approved ones). Needs the orders-desk permission. See Booking Approvals.
Edit order
Confirmed, Pending and Approved orders.
Refund
Confirmed orders that were paid. Opens a confirmation; see Event Refunds.
Cancel + refund / Cancel order
Confirmed, Pending and Approved orders. The label says “+ refund” only where money can really go back.
Delete
Only orders that took no money. A paid order is cancelled or refunded instead so its record stays.
Invoice
Paid orders, when you issue invoices. See Invoices.
Correct who an order is for
Typos happen: a misspelt email address means the buyer never gets their tickets. Edit order corrects the people, never the money — what was bought and the payment stay as they are.
123The Edit order form open, with contact fields, one field per ticket holder and the option to email the tickets
Click Edit order in the header; the form opens above the tickets.
Correct the buyer’s contact details ① — name, email, phone, city, address and country.
Type the name printed on each ticket ②. This is who the ticket shows and who the door checks in.
Tick Email the tickets to the buyer after saving ③ if the address was wrong, then click Save.
Cancel the whole order
Click Cancel + refund (or Cancel order when no money can go back) to open the cancel dialog. The buyer is emailed in every case.
12The Cancel order dialog: reason, the cancellation terms the order was sold under, and what the buyer gets back
Choose Why are you cancelling? ①. We cancelled it always refunds in full; Attendee asked to cancel applies the terms; Does not meet the event requirements keeps no charge unless you tick the box.
Read Cancellation terms for this order — the terms that were shown when it was bought, with the step that applies now marked — and Refundable now / Buyer gets back.
Pick what to do: Keep order closes the dialog; Cancel, no refund cancels and returns nothing; Cancel + partial refund refunds the Refund amount you typed; Cancel + refund ② cancels and refunds the full amount shown.
Cancelling releases the tickets and any held seat. Orders from before 17 September 2026 may wait for your Stripe balance (see below).
Internal notes
Type a note under Internal notes and click Add. Notes show who wrote them and when, are visible to your team only and never to the buyer. System entries are labelled System.
The timeline
The timeline lists, in order: Order created, Payment received, Order approved, each refund with its amount and outcome (refunded, pending or failed), tickets cancelled on their own, free tickets added later, a cancellation, a reinstatement, and — if the buyer disputed the payment with their bank — the chargeback and how it ended. An order can be cancelled, brought back and cancelled again; each step is listed so the page never reads as if the first never happened.
12An order with one ticket cancelled and part of the money refunded, as the timeline records it
This order shows the badge ① and the timeline ② after one of its tickets was cancelled on its own and ten euros were refunded.
Orders you raised by hand, and orders waiting for payment
An order raised through Manual order carries a banner saying who raised it and, if you allowed it, that it went past the remaining capacity. While it waits for payment you can hand over the link yourself.
123A manual order waiting for payment, with Copy Payment Link, Mark Paid and Resend payment link
Click Copy Payment Link ① and paste it into WhatsApp or an email. It is the buyer’s own payment page and works without their logging in.
If the buyer paid you in cash or by bank transfer, click Mark Paid ②.
To email the link to the address on the order again — which also revives an order whose hold has expired — click Resend payment link ③.
A refund waiting for your Stripe balance
Some older orders, paid before 17 September 2026, were charged in a way that makes Stripe take the refund from your own Stripe balance. If that balance is too low a yellow banner appears on the order.
1The banner explaining that a cancellation is waiting for the organizer’s Stripe balance
EventMann tries again every hour, and again as soon as Stripe reports new available funds. The banner shows the last balance it saw.
Adding funds, or setting your Stripe payouts to weekly or manual, helps it complete sooner.
Changed your mind? Click Withdraw cancellation ① (only for a cancelled order, needs permission to cancel).
Good to know
When a buyer accepted your own terms at checkout, the order shows Organizer’s terms with the date accepted and a link to the text they saw.
Seat-mapped events show the seat beside each ticket.
An order that has a refund in flight, or an open dispute, blocks some actions. The page says why instead of failing silently.
Troubleshooting
No Edit order button — the order is cancelled, refunded or expired. Those are closed records.
Refund is missing — nothing was paid (free, cash or comp orders), or the order is not Confirmed.
The buyer says they never got their tickets — check the email address under Contact details, correct it with Edit order and tick the email option.
An order does not have to be all or nothing. From the order page you can cancel some of its tickets and keep the rest, or add a free ticket for a child or companion who was left off at checkout. Both live in the Tickets card of Attendees → Orders → (an order).
What you can do here
Cancel tickets — cancel one or several tickets of a confirmed order. Their QR codes stop working at once, the places go back on sale and the buyer is emailed.
Add free ticket — add free tickets to an existing confirmed order without changing what the buyer paid.
Cancel some tickets of an order
Use this when part of a group cannot come. The refund suggested is those tickets’ share of what was paid, worked out with the cancellation terms the order was bought under.
123The Cancel some tickets form with one Adult ticket ticked and the refund calculated
On the order, click Cancel tickets. The form opens under the ticket list.
Tick the tickets to cancel ①.
Under Why are you cancelling? ② pick the reason:
We cancelled it — you or the event changed. Always refunded in full; no charge can be kept.
Attendee asked to cancel — your cancellation terms apply and a charge may be kept.
Does not meet the event requirements — no charge unless you tick Keep the cancellation charge (shown only when your event has a charge configured).
Optionally add a note for the record.
Check Buyer gets back. If your terms keep a charge, Cancellation charge kept is listed above it. To refund a different amount, type it under Different refund amount — it can be lower, never higher than these tickets’ share.
Click Cancel selected tickets ③ and confirm.
Rules and limits
The order must be Confirmed and have at least two tickets that can still be cancelled. If you tick every remaining ticket, the form warns you that the whole order will be cancelled.
Tickets that are already checked in or are in the middle of a transfer cannot be cancelled one by one.
Orders from a bundle or multi-event pass, and orders with an open dispute, cannot have single tickets cancelled.
You need the permission to cancel bookings.
Each cancellation is written to the order’s timeline (“2 tickets cancelled”) and its refund appears beside it.
The classic case: a family bought two adult tickets and forgot the toddler who comes free. Instead of asking them to place a second order, add it yourself.
123The Add free tickets form with the Child under 6 ticket chosen and a name typed
On the order, click Add free ticket.
Choose the Ticket ①. Only free ticket types on sale appear, each with how many are left.
Set How many ② (1 to 10 at a time).
Optionally type the Name on each ticket.
Leave Email the buyer the order’s tickets ticked to send them the updated tickets, then click Add tickets ③.
Rules and limits
Free tickets only. The order total and any invoice already issued do not change. For a paid ticket, raise a new manual order.
The order must be Confirmed and the event not cancelled or over. You need the permission to create bookings.
Seated ticket types are not offered — a seat is chosen on the seat map, which this form does not have.
Stock, the event’s total capacity, the order limit and the rule that a child ticket needs an adult ticket are all checked against the whole order.
Each added ticket is its own ticket with its own QR code, and it is recorded on the timeline.
Troubleshooting
There is no Cancel tickets button — see the rules above: the order may have only one ticket left, be part of a bundle, be disputed, or you may lack the permission.
There is no Add free ticket button — the event has no free, unseated, active ticket type with stock left, or the order is not Confirmed.
“Only N left” — that ticket type, or the event as a whole, is nearly full.
Cancelled the wrong order, or the buyer changed their mind and can come after all? Reinstate brings a cancelled order — or tickets cancelled on their own — back to life. It is the only way back from a cancellation, and it appears on the order page of Attendees → Orders.
What you can do here
Make a whole cancelled or refunded order valid again.
Make tickets that were cancelled on their own valid again (a Reinstate link sits beside each cancelled ticket).
When the buyer has already been refunded, choose between giving the tickets back free of charge or sending a payment link so they pay again.
Not refunded: one click
If no money went back (a free order, or an order cancelled without a refund), a Reinstate order button appears on the cancelled order.
Open the cancelled order.
Click Reinstate order and confirm.
The order becomes Confirmed again, the places are counted again, and the buyer is emailed their tickets. The original QR codes scan again — cancelling never changed them.
Refunded: you choose
A refund cannot be undone, so when the buyer was refunded EventMann asks you what to do instead of deciding for you.
1A refunded order with the Reinstate this order panel offering Buyer pays again and Free of charge
The panel at the top of the order ① offers two ways:
Buyer pays again — click Send payment link. A new order is raised for the same tickets and names, at today’s ticket prices, and the buyer is emailed a link to pay. The tickets become valid once they pay, with new QR codes. The old order stays as it is, and the two orders link to each other.
Free of charge — click Reinstate free. The tickets are valid again at once and the buyer keeps the refund. The original QR codes work again. The refund stays recorded on the order, so your revenue figures remain true.
Money is never taken a second time on the old order: its payment, refund and invoice already balance, which is why paying again always creates a new one.
Rules and limits
There must be room. The places were released when the order was cancelled and may have been sold, or offered to the waitlist, since. EventMann checks again at the moment you click.
Refused for: an event that is cancelled or already over; orders from a bundle or multi-event pass (raise a new order instead); orders with an open dispute; orders whose refund is still on its way; orders that were never paid; and events with a seat map, because the seat was released and may be someone else’s now.
Permissions. Undoing a cancellation needs the permission to cancel bookings. Free reinstatement of refunded tickets needs both cancel and create. Sending a payment link needs the permission to create bookings.
Every cancellation and reinstatement is listed on the order’s timeline, so an order that was cancelled, reinstated and cancelled again reads correctly.
Troubleshooting
“The event is over” — reinstating is only possible before the event has ended.
“A refund is still on its way” — wait until the refund has gone through, then try again.
The seats are gone — somebody else bought them. Free up room (raise the quantity of the ticket type or cancel another order) or raise a manual order.
No Reinstate button on a refunded order — check the rules above, especially seated events and bundles.
When an event uses Request & Approve, nobody is booked until you say so. Booking Approvals is the queue of those requests, with one-click Approve and Reject. Find it under Attendees → Approvals; the sidebar shows a number badge while requests are waiting. Turning the mode on is covered in Booking Modes.
What you can do here
See every request still waiting for a decision: reference, who asked, the tickets, the total and how long ago they asked.
Approve a request to confirm it.
Reject a request, with an optional reason.
123The Booking Approvals queue of the Diwali Dinner with four requests waiting
Each row shows the order’s reference ① with the buyer’s name and email beside it. Use Approve ② or Reject ③ at the end of the row. The tickets are added up per ticket type, so an order for three dinner seats shows one line: 3× Dinner seat.
What Approve does
What happens next depends on how the event takes payment.
Paid event, card held for review (the default). The buyer’s card was authorised when they asked, so no money has been taken yet. Approve takes it (captures the hold) and confirms the order at once; the buyer gets their tickets. There is no payment window to miss, and the seats were already counted when the request came in.
Free event. Approve confirms the order and emails the tickets.
Payment-link events (the setting Hold the card while you review is off). Approve moves the order to Approved and emails the buyer a link to pay. They have the Payment Window After Approval you set (30 minutes by default, up to 72 hours) before the order expires and the seats go back on sale.
Type the reason in the field ①. For a held card, the authorisation is released so the money is freed at the buyer’s bank, and the seats go back on sale (and to the next person on the waitlist). The buyer is emailed that the request was declined.
Where else you can decide
You can approve or reject from the Orders page (Pending tab, one row or in bulk) and from the order’s own page. All of them do the same thing. Once approved, an order stays on the Orders page’s Approved tab as a record.
12The Orders list for the dinner showing the Approved and Pending tabs
Use the Approved tab ① for everything that ever went through approval, and the Pending tab ② for what is still waiting.
Good to know
Card holds do not last for ever. A card authorisation lapses after roughly 7 days, sooner on some debit cards. Decide in time: EventMann cancels a hold that is about to lapse and frees the seats, and the buyer is told. If a hold has already lapsed when you click Approve, you see “The payment hold could not be taken. It may have expired — ask the attendee to book again.”
Only genuine requests appear. A buyer who abandoned the payment page never created an order and is not listed.
A request already decided in another tab cannot be decided twice: you get a message instead of a second change.
Deciding needs the orders-desk permission (create bookings), the same one used for manual orders. Box-office team members can have it without full event access.
Approving does not bypass capacity: a held request already counted its seats, and a free one is checked against what is left.
Troubleshooting
The queue is empty but I expected requests — check the Orders page: the order may already be decided, or the buyer never finished the payment step.
Approve says it is sold out — on a free event the places went to someone else in the meantime. Add capacity or reject.
I approved but the order shows as unpaid — the event uses the payment-link flow. The buyer has to pay through the link, or you can mark it paid on the order page.
Refund Requests is the queue of refunds your attendees asked for from their own booking. You see the reason they gave and what your cancellation terms would return today, then approve or decline. Find it under Attendees → Refunds; it is the first tab of the Refunds strip, and the sidebar shows a number badge while requests are waiting.
What you can do here
Read each request: the order’s reference, the buyer, the amount they asked for, the order total and the reason they wrote.
Approve & Refund or Decline, with an optional note to the buyer.
1234Two pending refund requests, each showing the buyer, the amount, the terms that apply and the Approve & Refund and Decline buttons
The strip at the top ① switches between this queue, the manual Refunds page and your Cancellation terms. Under each request the line Cancellation terms today ② tells you which step of your terms applies right now and what it keeps. Approve & Refund ③ sends the money back through Stripe; Decline ④ closes the request without paying.
How to handle a request
Open Attendees → Refunds. Pending requests are listed first.
Read the reason and the terms line under it.
Click Approve & Refund and confirm. The dialog states the amount that will be refunded.
Or click Decline and, if you like, write a note. The buyer is told either way.
How much gets refunded
The refund is the smaller of what the buyer asked for and what your cancellation terms return today. You cannot refund more through a request than the terms allow — use the Refunds page to refund a different amount yourself.
If your terms return nothing for this order right now (for example “no refund within 48 hours”), Approve is refused and the page suggests declining.
If the amount reaches everything that is left, it is a full refund: the order is cancelled, its places go back on sale and the next person on the waitlist is considered. Anything less is a partial refund and the tickets stay valid.
A request is decided once. After approval or a decline, the buttons disappear.
Refunds that are still on their way
Some payment methods settle slowly. While a refund is in progress the request shows Refund in progress and the order is not released yet; the places are freed when the refund completes. If your Stripe balance is too low to fund a refund on an older order, see the banner described in Order Detail & Timeline.
Good to know
Attendees can only ask while the event allows cancelling and your terms return something. If cancelling is switched off for the event, buyers cannot ask at all, though you can still refund any order yourself.
Whether a buyer’s own cancellation is refunded automatically or waits for you is the Refundable setting on Details & dates. Requests are always decided by you.
You need the permission to manage refunds.
Troubleshooting
No Approve button — the request was already decided, or a refund is in progress.
“Nothing left to refund” — the order has already been refunded up to its total.
The queue is empty — no buyer has asked, or the event does not allow cancelling.
Advanced Check-in is the control room for the door: live numbers, a search across every attendee, bulk check-in, no-shows and an export of who came. It complements the phone scanner described in Check-in & Entry Management and is meant for the person running the entrance from a laptop or tablet. Find it under Day-of Operations → Advanced Check-in, or tap the clipboard icon at the top of the door screen. It needs the permission to manage check-in.
What you can do here
Watch the door live: total tickets, checked in, remaining, no-shows and the check-in rate, refreshed automatically.
See the pace: scans per minute over the last ten minutes and the busiest hour so far.
Break the event down by order: fully checked in, partially checked in, not arrived yet.
Search every attendee by name, email or booking reference and check people in, one or many at a time.
Mark someone as a no-show.
Open the VIP list and, on events with a seat map, the occupancy of each zone.
Export check-ins as a file.
123Advanced Check-in during the event: 31 of 49 tickets checked in, the three order groups and the search box
The tiles at the top ① are the numbers the door is asked all night. Orders by check-in ② counts orders rather than tickets: an order is fully checked in once every ticket has been admitted, and not arrived yet until the first one is. A guest who stepped out still counts as arrived. Click a group to list its orders. Use the search box ③ to find attendees.
How to check people in by search
Type at least two characters of a name, email or booking reference in the search box and click Search.
Each match shows the person with a status: Pending (not in yet), Checked in or No-show.
Tick the people to admit — one or many; people already inside cannot be ticked — and click the green Check in button that shows how many are selected. You are told how many were checked in and how many could not be.
To record that somebody did not come, use No-show on their row and confirm.
Exports
Export all check-ins downloads every check-in for the event.
The button beside it, Export: …, exports just the group you have selected (for example the orders that are partially checked in — the people to chase).
Good to know
The numbers refresh by themselves; Refresh forces an update.
Only confirmed bookings are counted and can be admitted. A cancelled or refunded order never appears.
Scans made with the phone scanner, a door pass or a team member’s own account all land here, so you see the whole door in one place.
If the venue has a capacity, check-in stops with a “venue at capacity” message once that many people are inside.
Zone occupancy only has data for events with a seat map; otherwise it says there is no zone data yet.
Troubleshooting
The page is not in my menu — you need the permission to manage check-in; ask the event owner.
Search says “Enter at least 2 characters” — type a little more.
Some people could not be checked in — the message after a bulk check-in says how many; typical causes are an order that was cancelled in the meantime or a venue that reached capacity.
Marketing is where you reach people who already know you: everyone who has bought a ticket to one of your events, and your active members. It lives under Grow in the organizer sidebar (Grow → Marketing), next to Audience, Membership, Volunteers, NPS & Surveys and Social Accounts. EventMann never gives you access to anyone else’s customers.
The Marketing page opens on an Overview with four tabs: Overview, Campaigns, Landing Pages and Push Notifications.
12345The Marketing overview: sidebar entry, the four tabs, the New Campaign button and the two summary cards
Open Grow in the sidebar and click Marketing ①.
Use the tabs ② to move between the overview, your email campaigns, landing pages and push notifications.
Click + New Campaign ③ to write an email to your customers.
Top Campaigns ④ ranks your campaigns by clicks and shows each one’s open rate.
Promo Code Usage ⑤ lists your discount codes with the number of uses and the money from confirmed orders that used each code.
Track ad conversions with Tracking Pixels (they sit under Integrations).
Marketing for one event
Inside an event (My Events → Manage) the Marketing group of the event sidebar holds the event-specific tools: Attendee comms (messages, announcements, reminders, after-event follow-ups, email templates), Promotion (SEO settings, social marketing and AI tools) and Campaigns. Discount codes live under Tickets & Pricing → Pricing & offers → Discounts — see Discount Codes.
The numbers on this page
Campaigns Sent counts campaigns whose status is Sent. Recipients adds up the recipients of all your campaigns.
Avg. Open Rate is every open divided by every recipient across all your campaigns. An open is recorded when the invisible tracking image in the email loads, or when the person clicks a link. A mail app that blocks images undercounts opens.
The CSV and Excel buttons export the promo code usage table.
Nothing here measures conversions per campaign. EventMann cannot tell which order came from which email, so it shows opens, clicks and unsubscribes only.
Good to know
The Marketing area under Grow is for the account owner. A team member with the Marketing role works on one event at a time through Manage → Marketing → Campaigns.
Every campaign passes a content filter before it is saved. If the subject or the text contains a blocked term, saving fails with an error and nothing is stored.
People who switch off marketing email, and people who unsubscribe from one of your emails, are skipped automatically. Tickets, booking confirmations and other messages a person is waiting for are not marketing and are never held back by those choices.
Replies to a campaign go to the email address of your EventMann account.
Troubleshooting
The recipient count looks small — check the segment. “Customers not opted out of marketing” and the event-specific segments are narrower than “All Users”. See Email Campaigns for what each one means.
Open rates are zero — tracking may be switched off under Settings → SMTP & Mail (Measure opens and clicks). Opens and clicks then stay at zero by design.
I cannot see the Marketing page — it is only available to the account owner. Ask the owner, or use the event’s own Campaigns page if you hold the Marketing role.
Every email an attendee gets about a booking starts from a platform default. Email Templates lets you rewrite that email for one event only, without touching the default or any other event. Open it from Manage → Marketing → Attendee comms and click the Email Templates tab.
1234The Email Templates list: totals, groups and the Preview and Edit actions
The top counters show how many templates exist ①, and how many you have changed ②.
Templates are grouped: booking and tickets, waitlist, reminders and event notices. Preview ③ shows the email as an attendee would see it.
Click Edit ④ to change one. A template you changed is marked Customised instead of Default.
The ten templates
Booking Confirmed, Pending, Approved, Rejected and Cancelled; Refund Processed; Waitlist Promoted and Waitlist Rejected; Event Cancelled Notice and Event Updated Notice. Each one replaces an email that is really sent; the attendee still receives exactly one mail per occasion.
Edit a template
12345The visual editor: subject, variables, blocks, test and save
Change the Subject line ①.
Click a variable in Available Variables ② to copy it, then paste it into the subject or a block. Each template offers only the variables its email can fill; they differ per template.
Build the body from blocks: use Add block ③ for a header, text, button, image, divider, spacer, alert or footer; click a block to edit it in the panel on the right; use the Layers list to move or remove blocks.
Click Preview to see your unsaved draft, and Send Test Email ④ to receive it in your own inbox.
Click Save Preferences ⑤. This creates or updates the override for this event only.
The Templates button offers ready-made designs to start from; picking one replaces your current design after you confirm. Every ready-made design, and every new header block, starts with your organizer name and the logo from your profile.
Good to know
A variable the email cannot fill is refused on save, and the message names it. One unfillable variable would otherwise make the whole design be dropped, and the attendee would receive the standard body under your subject.
Some lines are always added back, whatever your design says: the payment button on a paid approval, the sentence about the right to refund when an event changes, and your own note on a refund. They are obligations.
Reset to Default deletes your override. The event then uses the default as it is today, which may be newer than the one you started from.
An override applies to the one event only. Repeat the edit on another event to reuse the wording.
A logo in the header is a public https image link; many mail apps hide images at first, so your name shows in the header colour meanwhile.
My change did not reach the attendees — check you edited the right template on the right event. If a template is marked as not in use, it carries a variable nothing can fill; open it and save to see which.
Save is refused over a variable — use the variables listed for that template.
Can I send the test to a colleague? — no. A test goes to your own address only, so this cannot be used to mail strangers from EventMann’s name.
The test did not arrive — check your own inbox and spam first, then your mail server settings.
A discount code lets a buyer take money off an order by typing a code at checkout. Each code belongs to one event. Open it from Manage → Tickets & Pricing → Pricing & offers and click the Discounts tab; the other tabs on that page (Pricing Rules, Flash Sales, Bundles) are the other ways to change a price.
1234The Discounts tab with codes in several states
Click the Discounts tab ①.
Each code shows its size, how often it has been used and a status ②: Active, Disabled, Expired or Exhausted.
Use the pencil ③ to edit a code.
A greyed trash can ④ means the code has been used and cannot be deleted. Deactivate it instead.
Type the Promo Code ①. It is turned into capital letters automatically and compared without regard to case, so a buyer typing welcome10 still matches. With AI switched on, Generate with AI suggests a memorable name.
Choose the Type ②: a percentage, or a fixed amount in the event’s currency.
Enter the Discount Value ③. A percentage can be up to 100.
Optionally set Max Uses ④ — the total for everybody.
Optionally set Uses per person ⑤ — how often one customer may use it.
Optionally set a Start date ⑥. Before that day the code does nothing.
Optionally set an Expiry Date ⑦. For a new code it must be at least tomorrow.
Click Create Code. The code is active at once.
Settings explained
Percentage or fixed. A percentage takes that share off the order. A fixed amount takes a flat sum off and never takes an order below zero. A fixed code remembers the event’s currency, so a euro code cannot discount an order in another currency.
Max Uses is the total. When uses reach it, the status reads Exhausted and checkout refuses the code.
Uses per person counts by account when the buyer is signed in and by email address otherwise. Orders that are confirmed, approved or still being paid count, so a buyer cannot use the code twice in parallel.
Start date and Expiry Date are whole days in the event’s time zone. A code starts at the beginning of its start day and is valid through the whole of its expiry day.
Active (edit screen) switches a code off and on without deleting it.
Click the pencil next to a code. The form is the same as for a new code, with the current values filled in.
Under Max Uses the form says how often the code has been used ①.
The Active checkbox ② switches the code on or off. A switched-off code reads Disabled in the list and checkout refuses it, but nothing is lost.
Click Save Changes. You can change the value, limits and dates at any time; orders that already used the code keep what they were given.
What the buyer sees
Buyers enter the code in the Promo Code box of their cart and press Apply. One code applies at a time; entering another replaces it. They are told plainly when a code is not active yet (with the date), has expired, or has already been used by them. A code that is disabled, used up or typed wrongly shows as “Invalid or expired promo code”, so check the status column before assuming a code is broken.
Good to know
The discount also applies to a bundle’s own price.
If an order that used a code is refunded in full, the use is given back and a used-up code can work again. A partial refund does not give it back.
A code that has been used cannot be deleted, because the order is the only record of why that buyer paid less. Switch it off with the Active setting instead.
A code cannot be limited to one ticket type; it applies to whatever is in the cart.
Every order that used a code is recorded. The Promo Code Usage card on Marketing shows uses and revenue per code, and the Discount codes report in Reports shows the discount given.
Troubleshooting
A buyer says the code does not work — open the list and read the status. Disabled, Exhausted and an unknown code all read the same to the buyer.
The code is not accepted before its start date — that is the Start date at work; the buyer sees the date it becomes active.
The save was refused — the code already exists on this event, or the expiry date is not in the future.
The delete button is greyed — the code has been used. Edit it and switch off Active.
Social marketing lets you write, schedule and publish posts about one event from EventMann. You connect your accounts once under Grow → Social Accounts; you write the posts in Manage → Marketing → Promotion → Social marketing inside each event. EventMann supports Facebook, Instagram and LinkedIn.
Connect an account
1234Social Accounts: one card per platform with its connected accounts
Open Grow → Social Accounts ①.
Click Connect on a platform (the button reads Add another ② once one account is linked). You are sent to that platform to sign in and approve access, then you choose which page or account to link. You never paste a key.
A status shows next to each account: Active, Paused, or token expired. When a token has expired, Reconnect ③ starts the approval again.
The pause button ④ stops posts going to that account without disconnecting it. A cross removes the account.
Facebook posts to a Page you administer, not a personal profile.
Instagram must be a Business or Creator account connected to a Facebook Page. Instagram posts always need an image.
LinkedIn posts as you, from your own profile. EventMann does not post to a LinkedIn Company Page.
See an event’s posts
1234An event’s Social marketing page with posts in different states
Click Create post ① to write a new one.
The row of accounts at the top shows what is connected; Connect account ② takes you to Social Accounts.
Tabs ③ split the list into All, Drafts, Scheduled, Published and Failed.
A Failed badge ④ means a platform refused the post; open it to read why.
Write a post
12345The post composer with per-platform tabs, preview and publish options
Click Generate with AI ① to describe the post in a few words and pick a tone; the assistant drafts a version for each selected platform using the event’s real name, date, venue and booking link. Always read it before you publish.
Click Templates ② to start from one of seven ready-made posts (announcement, early bird, last call, day-of reminder, recap, behind the scenes, sold out).
Click Hashtags ③ to insert a saved hashtag set, or save a new one.
Write separate text for each platform on its own tab, switch the platforms you want on, and watch each counter: Facebook allows 63,206 characters, LinkedIn 3,000 and Instagram 2,200. The insert chips add the event’s name, date, link and so on.
Add an image per platform by link, by uploading one, or with Event image.
Choose how it goes out: switch on Schedule for later ④ and set a time, Save as draft, or click Post now ⑤.
Good to know
A post belongs to one event. There is no single post to all your events.
Scheduled posts are picked up by a job that runs every five minutes, so allow a few minutes around the time you chose.
Publishing runs in the background; the page checks the status for you.
A post is shown as Published as soon as it reached at least one platform. If you posted to several, open the post and read each platform’s own status: another one may have failed.
A post that is publishing or already published cannot be edited. Drafts and scheduled posts can.
You need an active, unexpired account for each platform you tick, or that platform fails with a message saying so.
Troubleshooting
I cannot connect Instagram — the account must be a Business or Creator account linked to a Facebook Page.
A post failed on one platform — open it. The usual reasons are an expired token (use Reconnect), a missing image on Instagram, or a platform that rejected the text.
The post did not go out at the scheduled time — the account may be paused or expired. Fix it and edit the post to schedule it again.
X (Twitter) is missing — EventMann posts to Facebook, Instagram and LinkedIn only.
SEO settings control how one event appears in search results and when it is shared in a messaging app or on social media. Open them from Manage → Marketing → Promotion; SEO Settings is the first tab of that page. Team members need the SEO permission.
12345SEO Settings with a title, description and keywords filled in
Open Marketing → Promotion ① in the event sidebar.
Write a Meta Title ② — the title search engines show for the event.
Write a Meta Description ③ — the short text under it.
Add Meta Keywords ④ if you like (comma separated).
Or click Generate with AI ⑤ to draft a title, description, keywords and a schema type from the event, then review them. The button only appears when AI is on for your account (AI-Powered Tools).
Under Open Graph, paste the address of an image in OG Image URL ①. It is the picture shown when the event is shared. It must be a direct link to an image that is already online; it is not an upload.
Choose the Schema Type ② that fits: Event, Music, Sports, Education, Food, Business or Social event.
Click Save.
Good to know
Leave a field blank and the page falls back sensibly: the title to the event title, the description to the start of the event description, the share image to the event’s own cover image or the generated cover for its category.
Ticket prices, availability and, once the event has reviews, a star rating are added to the page’s structured data for you. You do not enter them here.
Changes are served at once. Search engines and messaging apps keep their own copy for a while, so an old title or picture can linger.
Besides the title, description and image you set yourself (SEO Settings), EventMann does a good deal of search-engine work for you, automatically, for every published event. This article describes that background work so you know what you do not have to do.
What EventMann does automatically
Structured data. Each event page carries machine-readable event information: dates, venue or online location, organizer, ticket offers with price and availability, and whether the event is scheduled, postponed or cancelled. Once the event has published reviews, an average star rating is included.
Breadcrumbs. A breadcrumb trail is added so search engines can show where the event sits instead of a bare link.
Sitemap. Every published, public event is listed in EventMann’s sitemap, with language alternatives so searchers get the right language. An event is advertised only in the languages it is actually translated into, so that thin copies are not offered to search engines.
Share previews. The Open Graph and Twitter Card tags that make a link look good in a chat or feed are produced from the same title, description and image you can override.
Place pages. Events with a venue in a city can appear on EventMann’s city and country pages (for example “events in Mannheim”). A place page exists only while it has at least one public event.
What you control per event
Meta title, description and keywords.
The share image.
The schema type (Event, Music, Sports, Education, Food, Business or Social).
All of it is on the event’s Promotion → SEO Settings tab. What you write about the event itself also matters: a full description, a clear venue and address, and a cover image all feed the structured data. The Event Intelligence checklist flags the first two.
Good to know
An event is listed only while it is published and public. Drafts, paused events, unlisted and private events are left out on purpose, so search engines are never offered a page most visitors cannot book.
Prices and “sold out” in the structured data follow your live ticket types. There is nothing to refresh.
Whether a search engine shows rich results (stars, prices) is its own decision. Correct data is a precondition, not a guarantee, and it can take days after publishing.
The address of an event’s country is part of the structured data and is what tells search engines which market the event is for.
Troubleshooting
My event does not appear in search — check it is Live and public. Then allow time: a new page is found on the search engine’s schedule.
Stars or prices are not shown — the data is there, but search engines decide whether to display it.
My event is missing on the city page — the page lists only live, public, in-person events with a valid country, not online events.
An announcement is a one-way message to people who already hold a ticket: a venue change, new doors time, parking advice. Find it under Manage → Marketing → Attendee comms and click the Announcements tab (the other tabs are Attendee Messages, Reminders, After the event, Email Templates and Ticket attachments).
1234The Announcements tab: one sent, one scheduled
Click New Announcement ① to write one.
The list shows what happened: Sent, or Scheduled ② with the time and how long until it goes out. After sending, the Recipients column shows how many people it reached.
While an announcement is scheduled, Edit time ③ changes when it goes out and Cancel send ④ stops it for good.
Write the message in the editor ②. It has bold, italics, headings, lists, quotes and links. The text is cleaned of unsafe markup when it is saved and can be up to 10,000 characters.
Choose the Audience ③: All Attendees, By Ticket Type (then pick the type), Checked In or Not Checked In.
Choose the Channel ④: Email, In-App (the notification bell) or Both.
To send later, tick Schedule for later ⑤ and set a date and time. The time is in the event’s own time zone, which the form names.
Click Send Now ⑥. An immediate send asks you to confirm first. When Schedule for later is ticked the button reads Schedule instead and saves the announcement to go out at that time.
Settings explained
All Attendees — everyone with a confirmed booking at this event.
By Ticket Type — holders of one type, for a change that only affects one tier. With no type chosen it reaches nobody.
Checked In / Not Checked In — split by whether any of the order’s tickets has been scanned. Useful on the day: “gate 3 is now open” to those not yet in.
Scheduled time must be in the future. A job picks up due announcements every five minutes, so expect it within a few minutes of the time you set.
Good to know
Guest buyers are reached by email. A buyer who checked out without an account gets the email at the address on their order; they have no notification bell, so an In-App-only announcement does not reach them. Somebody who bought both as a guest and with an account gets one copy.
An announcement is an operational message, not marketing, so it does not look at marketing opt-outs. Addresses that bounced, and guests who unsubscribed from your mail, are skipped.
An immediate announcement cannot be recalled. A sent announcement stays in the list as the record of what attendees received and cannot be edited or deleted.
An announcement is a broadcast. To talk with one person, use Attendee Messages.
Troubleshooting
Recipients shows 0 or a small number — the audience is narrow (a ticket type nobody holds, or Checked In before the doors opened), or the channel is In-App only and most buyers are guests without an account.
A scheduled announcement was a few minutes late — expected; the scheduler runs every five minutes.
Attendees say they did not see it — check the channel. An email-only announcement does not appear in the bell, and an in-app one is not emailed.
I cannot edit it — a sent announcement is history. Send a new one.
AI tools help you write copy, forecast sales and answer questions about your event. They draft text for you to read, edit and use; nothing is published, sent or changed by itself. You switch AI on once for your account (Integrations → AI), then use the tools on each event under Manage → Marketing → Promotion → AI tools.
Switch AI on
123Integrations, AI: the master switch, the provider and your own key
Open Integrations → AI in the sidebar and turn on AI features ①. It is off by default; while it is off nothing about your events is sent to an AI provider and no AI button appears.
If your plan already includes AI you are done. Otherwise, or if you want usage billed to your own account, turn on Use my own AI credentials, choose the AI provider ② your key belongs to and paste your API key ③. The key is stored encrypted and never shown again; leave the field blank when you save to keep the one on file.
Click Save Changes.
If your platform administrator has switched AI off for everyone, the page says so and your own key cannot be used until they switch it back on.
The AI tools page
12345The AI tools tab of an event: tool groups with their tabs
Open the event, then Marketing → Promotion ① and choose the AI tools tab. The tab only appears when AI is available for you.
Pick a tool from a group’s tabs, for example Email Campaign ② or Discount Code ③.
Fill in the short brief the tool asks for, click its button (for example Generate Email) and wait a few seconds. The result appears in place with a button to copy it.
Copy it, edit it and paste it where you need it.
What is on the page
AI Copywriting Tools — Email Campaign (announcement, confirmation, reminder, last call or post-event, in a tone you choose), Discount Code (a name for a code), Ticket Tier Names, FAQ Generator, Staff Briefing, Analytics Insight and Sponsor Pitch.
Dashboard Intelligence ④ — Revenue Forecast (from your sales pace, fill rate and days left), Post-Event Report, Anomaly Alerts and Ask a Question, a free-text box about this event’s data.
Marketing & Social ⑤ — Ad Copy Variants for a platform and goal, Influencer Outreach and Hashtag Strategy.
Support & Moderation — Support Response, Refund Decision (an assessment, not a decision) and Review Reply.
AI also appears inside other screens: Generate with AI on SEO settings, on discount codes and in the social composer; the briefing on Event Intelligence; and a floating assistant button at the bottom right of the event management pages that answers questions about the event.
Good to know
Every result is a suggestion. Read it before you publish a post, send an email or act on a forecast.
The tools use the event’s real name, date, venue and link, but only know what is on the event. A thin event page gives a vaguer draft.
The Event Intelligence readiness score and recommendations are not AI: they are a fixed checklist computed from your data. Only the optional written briefing uses AI.
With your own key, usage is billed by your provider, not by EventMann.
Troubleshooting
There is no AI tools tab — AI features are off for your account, no key is available, or the administrator has disabled AI. Check Integrations → AI.
A tool returns an error — usually a temporary problem reaching the AI service, or a rejected key. Try again; if it persists, re-enter your key.
Ad copy is too long for a platform — the drafts aim at each platform’s limit but cannot guarantee it. Trim before posting.
White Label puts your own look on the pages your buyers use: your logo, name and colours instead of EventMann’s. It applies to your account, not to one event. Open it from Settings → White Label.
1234White Label: activation, branding, colours and the live preview
Open Settings → White Label ①.
Turn on Activation ②. Saving alone does nothing until this is on.
Under Branding, type your Brand Name ③ and upload a logo and a favicon.
Under Colors ④, set the primary, secondary, accent, background and text colours as hex codes.
Choose a Font family further down the page.
Click Save Settings, then Preview to open the branded page before buyers see it.
The Live Preview on the right updates while you type.
What you can set
Brand name and logo. A logo (JPG, PNG or WebP, up to 2 MB) and a favicon (up to 512 KB). SVG files are not accepted.
Colours — five hex values.
Typography — Inter, Poppins, Roboto, Montserrat, Open Sans, Lato, Nunito or Playfair Display.
Custom CSS — up to 5,000 characters, cleaned before it is stored.
Platform Branding — a switch to hide the EventMann mark.
Social links — Facebook, Twitter / X, Instagram and a website, shown in your branded footer.
Custom HTML — a header and a footer of up to 2,000 characters each, cleaned of scripts and unsafe markup.
Reset to Defaults — deletes your settings and the uploaded files. It cannot be undone.
Where it shows
Branding applies to your event pages and to the buying journey that follows: the cart, checkout, payment, the pending page and the confirmation. It does not change your public organizer page, the ticket PDF, or the emails. Email branding follows your organizer name and logo, and the sender you set under Who your emails are sent from.
Good to know
The custom CSS and HTML are shown to your own buyers, so they are sanitised: scripts and unsafe markup are stripped rather than stored.
Preview needs saved settings. Save once first.
In the live preview the footer says “Powered by EventMann” until you switch on Platform Branding; then the EventMann mark is removed and your brand name is shown instead.
Troubleshooting
Nothing changed on the live page — Activation is off. Turn it on and save.
My CSS or HTML looks stripped — the sanitiser removed something unsafe. Simplify the markup.
The logo upload is rejected — use JPG, PNG or WebP under 2 MB (512 KB for the favicon).
Unless you say otherwise, every email about your events is sent by EventMann from its own address. Connect your own mail server under Settings → SMTP & Mail and your attendees hear from you. Until you do, your dashboard shows a banner, “Attendees still see EventMann as your sender”, with a Set up sending email button that leads here.
123SMTP & Mail Settings: what is sent through it, and the provider choice
Open Settings → SMTP & Mail ①.
Read the box ②. It lists what is sent through your server and what is not.
Pick a provider under Select Provider ③: Custom SMTP, Mailchimp, SendGrid, Mailgun, Postmark, Amazon SES or Brevo. Each choice shows a short guide for that provider.
Fill in the connection: host, port and encryption for Custom SMTP, Mailgun and Amazon SES; a user name and password or an API key, as the provider asks.
Set your From Name and From Email.
Click Send Test Email. It sends a real message to your own inbox, so you know the connection works. Then click Save Settings.
What gets sent through it
Sent as you, once configured: booking confirmations and tickets, event reminders, reschedule and cancellation notices, waitlist offers, invoices, surveys, announcements, cart reminders and marketing campaigns.
Always sent by EventMann: email verification, password resets and security alerts. They concern your EventMann account, not your event.
If you configure nothing: everything keeps working from EventMann’s address. Replies come to EventMann instead of you, and your own domain builds no sending reputation.
Common providers
Provider
Host
Port
Encryption
Gmail
smtp.gmail.com
587
TLS
Outlook / Microsoft 365
smtp.office365.com
587
TLS
Brevo
smtp-relay.brevo.com
587
TLS
SendGrid
smtp.sendgrid.net
587
TLS
Mailgun
smtp.mailgun.org
587
TLS
Postmark
smtp.postmarkapp.com
587
TLS
Amazon SES
email-smtp.[region].amazonaws.com
587
TLS
Good to know
Use a From address on the same domain as the account you sign in with. Sending as your own domain through an unrelated provider makes the checks (SPF and DKIM) disagree and mailbox providers send the mail to spam.
Gmail and Microsoft 365 need an app-specific password, not your normal one. Mailgun, Brevo and Amazon SES give you a separate SMTP secret that is not your account key.
For more than a few hundred emails a day, a dedicated provider delivers far more reliably than a mailbox.
Saving again without typing a password or API key keeps the stored one. You do not need to re-enter a secret to change the From name.
If your provider starts rejecting the login, use Use EventMann instead at the bottom of the page. Attendee mail goes out through EventMann again at once, tickets and confirmations keep working, and your settings are kept. Saving the form switches your server back on.
The test fails with a credentials error — for Gmail or Google Workspace use an App Password; for another provider use its dedicated SMTP secret, not a general API key.
The test mentions SMTP AUTH — on Microsoft 365 an administrator must enable SMTP AUTH for that mailbox.
The test cannot connect — check host and port. Use 587 with TLS or 465 with SSL; port 25 is blocked by most cloud providers.
It connects but encryption seems wrong — match them: TLS with 587, SSL with 465.
An email campaign is a marketing email you write once and send to a group of your customers. You can write campaigns in two places: Grow → Marketing → Campaigns (for the whole account, owner only) and Manage → Marketing → Campaigns inside an event (for that event’s customers, also open to team members with the Marketing role). Both send through the same engine, so the delivery rules in Sending, progress and unsubscribes apply to both.
1234The Campaigns list with one campaign in every status
Open Grow → Marketing → Campaigns. Click + New Campaign ① to write one.
Use the filter chips ② (All, Draft, Scheduled, Sent, Paused) to narrow the list.
The status badge ③ tells you where a campaign stands: Draft, Scheduled, Sending, Sent, Paused or Cancelled.
Click View ④ to open a campaign, send it, edit it or read its figures.
Write a campaign for the whole account
The form has three tabs: Audience, Content and Schedule.
123456The Audience tab with an event and the By Ticket Type segment chosen
Give the campaign a Campaign Name ①. Only you see it.
Pick a Type ②: Announcement, Reminder, Promotional or Follow-Up. The type is a label for your own records; it does not change how the email is sent.
Optionally choose a Related Event ③. Several segments need it (see below).
Choose the Audience Segment ④.
If you chose By Ticket Type, a Ticket Type picker ⑤ appears with the ticket types of the related event. Choose the event first, or the list stays empty.
Optionally Attach a survey ⑥. The picker only appears once one of your events has an active survey; see “Add a survey button” below.
The audience segments
Everyone below must have a confirmed booking with you (an abandoned or unpaid checkout does not make someone your customer). Buyers who checked out without an account are included, because EventMann keeps the email address they gave you. Everyone who switched off marketing email is removed from every segment.
Segment
Who receives it
All Users
Everyone with a confirmed booking at any of your events, plus your active members. Despite the label, this is your customers, not every EventMann user.
Event Attendees
Customers with a confirmed booking at the Related Event. With no related event it reaches every customer with a confirmed booking.
By Ticket Type
Customers who hold the chosen ticket type at the related event. With no ticket type chosen it reaches nobody.
Past Attendees
Customers with a confirmed booking at any of your events other than the related event — for example people who came to last year’s event but have not booked this one.
Customers not opted out of marketing
Customers with an account who have not switched marketing email off. Guest buyers are left out because they never subscribed to anything.
Members
People with an active membership of yours, whether or not they ever bought a ticket. Members always have an account.
Write the email
Open the Content tab.
12The Content tab with a subject line and a short HTML message
Type the Subject Line ①.
Write the message in Email Content (HTML) ②. It is a plain HTML field, not a visual editor: use simple tags such as <p>, <strong> and <a href=...>. Scripts and other unsafe markup are removed before the mail is built.
EventMann wraps your text in its branded email layout and adds an unsubscribe link at the bottom. You do not add either yourself.
Send now or schedule
Open the Schedule tab.
12The Schedule tab with a send time set three days ahead
Leave Send At ① empty to save a draft that you send by hand, or choose a date and time in the future to schedule it.
Click Save ②.
A scheduled campaign is picked up by a job that runs every minute and sent as soon as its time has passed. The time you pick is read in the platform time zone (Europe/Berlin by default), not necessarily your own. If your sending hours are limited (Sending, progress and unsubscribes), the send waits for the next opening.
Send a draft
Open the campaign and click Send Now. EventMann first asks you to confirm and tells you exactly how many people the send will attempt.
12The confirmation dialog: the count of people and the Confirm button
Read the number ①. It is the same count the send itself uses, after opt-outs and unsubscribes have been removed.
Click Confirm ②. The send starts in the background; the status changes to Sending.
A message that has been sent cannot be taken back. You can stop a send in progress, but mail already handed to the mail server stays sent.
After the send: the figures
The campaign page shows how the email performed.
1234A sent campaign: open rate, click rate and unsubscribe rate
Open Rate ① — opens divided by recipients.
Click Rate ② — people who clicked a link divided by recipients. A click also counts as an open, because many mail apps block the tracking image.
Unsubscribe Rate ③ — people who used the unsubscribe link, divided by recipients.
Recipients ④ — how many people the mail was handed over for.
Below the figures, the Send Log lists every recipient: Email ①, when it was sent, Opened ②, Clicked ③ and Unsubscribed ④. A dash means it has not happened (yet).
Write a campaign for one event
Inside an event, Manage → Marketing → Campaigns lists only that event’s campaigns. Team members need the campaign permissions of their role (view, create, edit, delete) to see and use it.
1234The event’s Campaigns page, reached from the Marketing group of the event sidebar
Open Marketing → Campaigns in the event sidebar ①.
Click Create Campaign ②.
Filter the list by status ③, or Edit ④ a draft.
123456The event campaign form: name, type, audience, subject, content and schedule on one page
This form is a single page: Campaign Name ①, Type ②, Audience Segment ③, Subject Line ④, Content ⑤ and Schedule ⑥. The campaign is always tied to this event; the event cannot be changed from the form. The audience choices are the event’s own attendees, all your attendees (everyone who booked any of your events) or your active members.
Check it first: Send a test
On an event campaign’s page, Send a test mails one copy to you so you can read it in a real inbox. It is not counted in the campaign and no customer receives it; the subject starts with [TEST]. A test can only go to your own address or to someone on your team, so that the test cannot be used to mail strangers. The organizer-wide campaign page has no test button; write the campaign from an event if you need one.
Add a survey button
Choose a survey under Attach a survey and the email gets a “Take the survey” button. Clicks on it count in the campaign’s click figures. Only active surveys can be attached, and a campaign tied to an event can only use that event’s surveys. If you switch the survey off before the mail goes out, mail that has not yet been sent leaves the button out. Guests without an account can answer too: the button carries a personal link that is created for their confirmed booking. See NPS & Surveys.
Good to know
A campaign can be sent once. Once its status is Sent or Cancelled the send buttons are gone and a second attempt is refused with a message. To mail the same people again, write a new campaign.
Change or remove the send time while editing. Giving a draft a Send At and saving schedules it; clearing the time on a scheduled campaign turns it back into a draft that you send by hand.
Scheduled and paused campaigns can still be sent early. The button then reads Resume sending.
Subject and text are screened for blocked terms when you save.
A campaign is one email, sent once to its audience. To follow up, write a new campaign.
Troubleshooting
The confirm dialog says 0 people — the segment is empty for the event you chose (for example By Ticket Type with no ticket type, or Past Attendees when nobody else booked). Go back and adjust the audience.
The campaign will not save — the subject or the text contains a blocked term. Reread it, change it and save again.
Send Now is missing — the campaign has already been sent or cancelled. Duplicate the text into a new campaign.
A customer says they never got it — look them up in the Send Log. A recipient who had switched marketing email off, or had unsubscribed from you earlier, is not in the list at all.
Sending a campaign is deliberately careful: it runs in the background in small batches, shows you how far it has got, can be stopped and resumed, honours the hours you allow, and skips people who asked not to be mailed. This article explains each part. You will meet it on a campaign’s page after you press Send Now.
Watch a send: the progress panel
On an event campaign’s page (Manage → Marketing → Campaigns) the Send progress panel updates by itself every few seconds while the campaign is Sending or Scheduled.
12345A campaign that is sending: test box, progress bar and the sent, pending and failed counts
The Send a test box ① lets you mail yourself a copy at any time.
The Send progress panel ② shows a bar and three numbers.
Stop sending ③ halts the send (see below).
Pending ④ is everyone the send set out to reach who has not been mailed yet.
Failed ⑤ counts messages that could not be delivered even after every retry.
The first number, Sent, is the count of messages handed to the mail server. That is not proof the message reached an inbox. A message only counts as failed after its whole retry schedule (up to six hours) is spent, so a short hiccup at your mail provider does not show up as a failure. Once a campaign settles, Pending drops to zero.
Choose when campaigns may go out
You decide the hours and the pace under Settings → SMTP & Mail, in the Campaign sending pace card.
1234The Campaign sending pace card: hours, emails per hour and measuring opens
Send from ① and Send until ② — the hours campaign mail may leave, in your account time zone (the card names it; change it under Account). Set both or neither. The window may cross midnight, for example 20:00 to 06:00.
Emails per hour ③ — a ceiling on how many campaign emails go out in an hour. A slower, steadier rate is often accepted better by mailbox providers than one large burst. Leave it empty for no limit of your own.
Measure opens and clicks ④ — switch it off to send without any per-person measurement. Opens and clicks then stay at zero, and the email carries no tracking image or notice.
Click Save.
These are your own brakes, not a promise about delivery. EventMann also protects its sending address with a platform-wide budget that nothing here can raise. The hours and the cap apply to marketing mail only: tickets, booking confirmations, password resets and anything else your attendees are waiting for are always sent straight away. The sending hours also apply to your After the event follow-ups.
When nothing is moving: a held campaign
If you press Send outside your sending hours, the campaign does not send at 3 a.m. It goes back to Scheduled with the next opening as its time, and the panel says why.
12A scheduled campaign waiting for the sending window to open
The line Waiting for your sending window ① names your hours. You can still Stop sending ②. A send that is already running also stops at the closing time and carries on at the next opening, however long it takes.
Stop a send, and resume it
If you spot a mistake while a send is running, click Stop sending.
Read the warning ①: no further emails will go out, and messages already sent cannot be taken back.
Click Confirm ②.
Mail stops within about one message. The campaign is parked as Paused. If nothing is sending, EventMann tells you so instead of pretending it stopped something.
12A paused campaign with its Resume sending button
A Paused campaign shows a Paused badge ① and a Resume sending button ②. Resuming continues with the people the stopped send had not reached; nobody who already received the email gets it twice. A send that ends with failed batches also lands in Paused, so resuming finishes it. The same button un-sticks a campaign that stays on Sending after a server restart.
Who is skipped, and why
People who switched marketing email off on their EventMann account are removed from the audience before you confirm, and checked again for each message, so an unsubscribe that arrives mid-send is honoured.
The unsubscribe link in every campaign works in one click. For someone with an account it switches marketing email off for their whole EventMann account. For a guest buyer it adds their address to a list that only blocks your campaigns. Either way the person remains able to receive their tickets and confirmations.
Addresses that no longer exist (a clear “mailbox does not exist” reply) are blocked from all campaigns. Policy rejections and full mailboxes are deliberately not treated this way: they say nothing about the address itself.
Each unsubscribe is counted on the campaign (Unsubscribe Rate) and marked in its Send Log.
Good to know
The whole send is split into batches of 100 recipients, so a long list takes minutes or hours depending on your pace settings.
Your own mail server is used for campaigns when you have connected one (Who your emails are sent from); otherwise campaigns go out from EventMann’s sender.
The organizer-wide campaign page has no live progress panel; it shows the totals and the Send Log. Open the same campaign from the event if you want to watch it live.
Troubleshooting
The campaign has been Sending for hours with nothing moving — check whether your sending hours are closed, or whether your hourly limit is low. The panel explains a deliberate wait. If neither applies, press Resume sending; it continues where it left off without duplicating anyone.
Failed is not zero — hover the red cross in the Send Log for the reason, usually a mailbox that does not exist or a full one. Those addresses will not be retried.
Pending shows 0 but the status is Paused — Pending is only counted while a send is running. Resume to reach the remaining people.
Opens look too low — many mail apps hide the tracking image until the reader allows it. Clicks are the more reliable signal.
Audience (Grow → Audience) is a read-only list of everyone who has booked one of your events: one row per email address, with the events they came to, tickets, what they spent and when they last booked. It is built from your bookings. Nothing on this page sends anything.
1234567The Audience page: counts, the read-only note and the contact table
Open Grow → Audience ①.
Rebuild ② recomputes the list from your bookings right now. It is safe to press twice.
The three counters ③ show Contacts (people on the list), Returning (people who came to more than one event) and Marketable.
The note ④ reminds you the page is read-only.
The Basis column ⑤ is the legal basis recorded for marketing email to that person: Opted in ⑥ with the date they gave it, Unsubscribed, or None.
Erase ⑦ removes a person on request.
What is on the list
People with a confirmed or approved booking at any of your events. An abandoned checkout, a cancelled or refunded order does not add anyone.
Only the buyer of an order. The names printed on individual tickets are not added, because they are often children.
One email address is one contact. A family that books under one address shows as one row, so the ticket and spending figures are per household, not per person.
Search by name, email or city with the box above the table. The list is sorted by most recent booking and shows 50 per page.
How it stays up to date
The first time you open the page with an empty list and bookings behind it, the list is built for you. After that EventMann rebuilds it every night around 04:10. You can press Rebuild at any time to see today’s bookings immediately.
Erase a person
If someone asks you to delete their data, click Erase next to their name and confirm. Their name, phone, city, country and language are removed for good and a rebuild will not bring them back; only the address that marks the row as erased is kept, so the same person is not recreated. Erasing a contact does not delete their bookings or tickets.
Where consent comes from
Every checkout for your events, paid or free, guest or signed in, shows the buyer an unticked box: “Keep me informed about future events from your organizer name by email. You can unsubscribe at any time.” The name is your company name from Settings → Profile, or your own name when you have not set one. The box is optional and never ticked in advance, so a buyer can always order without it.
When the buyer ticks it, the date is recorded on that order. The next rebuild shows them as Opted in in the Basis column with the date of their most recent opt-in, and counts them under Marketable.
A later order without the box ticked takes nothing away; consent is withdrawn by unsubscribing.
A person shows as Unsubscribed, and is not marketable, when they used the unsubscribe link in one of your campaign or after-the-event emails, or when their account has marketing email switched off. That wins over any box they ticked.
Buying a ticket on its own is not consent. Buyers who never ticked the box show None, and so does everybody whose orders were placed before the box existed — nobody is opted in after the fact.
A mailbox that bounced is not counted as an unsubscribe; such a person can still show as Opted in.
Audience is not your campaign list
This page and your email campaigns are separate. A campaign picks its recipients directly from your bookings and memberships when it is sent (Email Campaigns), and it removes people who switched off marketing email or unsubscribed. It does not look at the Basis column: Marketable tells you how many people have opted in, it does not limit who a campaign reaches.
Good to know
Only the account owner sees this page.
Do not use this list as a mailing list outside EventMann. A booking is not consent to marketing; only Opted in records one, and a campaign sent through EventMann respects each person’s own opt-out.
Troubleshooting
The list is empty — you have no confirmed bookings yet. Press Rebuild after your first order.
A recent buyer is missing — the list refreshes at night. Press Rebuild.
Marketable is lower than I expected — only buyers who ticked the “Keep me informed” box at checkout count, minus anyone who unsubscribed. A buyer’s new opt-in appears after the nightly rebuild or when you press Rebuild.
Returning shows a small number — returning means more than one event with you, matched on the buyer’s email address.
A landing page is a simple standalone web page for one event, published at /lp/your-page on EventMann. Use it when you want a page of your own to put in a poster, a WhatsApp group or an advert: a headline, a few sections of text, and a Get Tickets button that leads to the event. Find them under Grow → Marketing → Landing Pages.
1234The Landing Pages list with a published page and a draft
Click + New Landing Page ① to start one.
The Slug column ② is the end of the page’s address (/lp/diwali-gala-2026).
The Views column ③ counts how many times the published page has been opened.
View Live ④ opens the published page in a new tab. It only appears for published pages.
Build a page
Click Edit next to a page (or create a new one). The editor has two parts: Page Settings and Sections.
12345The landing page editor: page settings at the top, sections below
Type a Title ①. It becomes the browser tab title and, on a new page, the start of the address.
Choose the Event ② the page sells. With an event, the page gets a top bar with the event name and a Get Tickets button, and your headline is followed by the date and city.
Tick Publish Page ③ when it is ready. Until then the page is a draft that only you can open with Preview.
Under Sections ④ build the page from top to bottom. Click + Add Section ⑤, pick a type, add a heading and text, and use × to remove a section.
Click Save.
Section types
Type
What you type
How it looks
Hero
A heading and a short text
A large, centred announcement.
Text
A heading and paragraphs
Plain text; your line breaks are kept.
Speakers
One per line: Name — Role
A card for each person.
Schedule
One per line: Time — What
A timetable with times on the left.
FAQ
One per line: Question | Answer
Questions that open to show the answer.
CTA
A heading and a short text
A highlighted box with a Get Tickets button (when an event is chosen).
The published page as a visitor sees it
Good to know
The address is created once, from the title plus a few random characters so it is unique. You cannot change it afterwards, so decide the title before you print the link.
Pages contain text only: there is no image upload and no colour or theme setting.
EventMann does not list landing pages anywhere on the site. A page is found only through the link you share.
Un-ticking Publish Page takes the page offline at once; the link then shows a not-found page.
The event page itself stays the place where tickets are sold. The landing page only leads to it.
Troubleshooting
The link shows “not found” — the page is not published. Tick Publish Page and save.
There is no Get Tickets button — no event is chosen. Pick one under Page Settings.
A list section looks wrong — each line must follow the format shown under the section: Time — What, Name — Role or Question | Answer.
Views looks high — every load of the published page counts, including your own visits to the live link. Preview does not count.
A push notification is a short message that pops up on a customer’s phone or computer, even when EventMann is closed. Use it for time-sensitive news: doors are open, the last tickets are going, the venue changed. Find it under Grow → Marketing → Push Notifications.
1234The Push Notifications page: subscriber count, the create form and the history
The Subscriber Count ① is the number of devices you can reach. Click View subscribers next to it to see who they belong to.
Choose the Target Audience ②.
Write a title and message, then click Create Draft ③. Nothing is sent yet.
In the history below, click Send Now ④ on a draft to send it. EventMann asks you to confirm and states the number of devices.
Who can receive a push notification
Only people who bought from you. EventMann does not give you platform-wide subscribers.
Each person chooses to receive push on their own device: in their EventMann account under notification settings they press Enable on this device and allow the browser to show notifications. One person may have several devices; the count shows devices, the subscribers list shows people.
Marketing push can be switched off by the person. Those who did are skipped.
The View subscribers link opens the list of people behind that count.
12Push subscribers: one row per person with their device count
Each row is one person. Devices ① is how many of their devices will receive your notification, and Subscribed On ② is when they switched push on.
Settings explained
Target Audience — Confirmed attendees: customers with a confirmed booking at any of your events.
Target Audience — Everyone who has booked: anyone who ever started a booking with you, including orders that were later cancelled or never paid.
Title and Message are required; keep both short, because phones cut long text.
Action URL is optional: the address that opens when the person taps the notification, for example your event page.
Statuses
Draft — saved, not sent. You can send it or delete it.
Sent — delivered to at least one device. The Delivered column shows how many devices.
Failed — reached nobody. Send Now is offered again so you can retry, or you can delete it.
Good to know
A notification that has been sent cannot be sent a second time or recalled. Send Now is only offered on drafts and failed ones.
Sending runs in the background in batches of 100 devices.
There is no scheduling and no per-event audience on this page: it sends when you press Send Now, to the audience you chose across all your events.
Delivered counts devices the push service accepted. It does not say whether the person looked at it.
Troubleshooting
Subscriber Count is 0 — nobody who booked with you has enabled push on a device yet. Ask people to turn it on in their EventMann notification settings.
A draft shows Sent but Delivered is 0 — the audience contained nobody reachable at that moment. Nothing was sent.
Status Failed — every device refused or the push service was unreachable. Try again later with Send Now.
Every organizer has a public page that lists their upcoming events, a short introduction and links. People find it from your event pages, from the Organizers directory, and from your own short link. You edit what it says under Settings → Public Profile.
123Your public page as a visitor sees it: name, tagline, followers, bio and links
The follower count ① shows how many people follow you.
The Payments verified badge ② appears once you have finished Stripe Connect and can receive payments. You cannot set it by hand.
The line with events hosted ③ counts your live and completed public events. Drafts are never counted.
Below the introduction the page shows your Upcoming Events (public, live and not yet over, nine to a page), then up to six Past Events, so a visitor can see that your events really happen. If you sell memberships and can take payments, your plans appear too. Private or unlisted events never show on this page.
Edit your public profile
12345Settings, Public Profile: the fields that feed your page
Open Settings → Public Profile ①.
Set the Company / Organizer Name ②. This is the name buyers see on tickets, invoices and your public page. Without it, your personal account name is shown.
Choose a Public page URL ③ (your handle): 3 to 50 letters, digits and hyphens, not starting or ending with a hyphen. Your page is then eventmann.com/your-handle. A handle that is taken, or a reserved word, is refused.
Write a short Tagline ④ (up to 160 characters).
Write your Bio / About ⑤ (formatted text, up to 5,000 characters).
Add your website and Facebook, X or Instagram addresses, and upload a Logo / Avatar (JPG, PNG or WebP, up to 2 MB; you can crop it as you upload).
People who are signed in see a Follow button ① on your page (and on your events). Following is one click and can be undone with Following.
What following does, exactly:
It adds the person to your public follower count.
It adds you to the Following list in that person’s own attendee account.
It does not send them emails or notifications about your events, and EventMann does not show you a list of your followers. To reach people, use email campaigns to your customers, or share your page link.
You cannot follow yourself.
Good to know
Your page address /organizers/<number> always works, with or without a handle. The handle is the friendly alternative.
With white label switched on, your own branding applies to your event pages and booking flow; the organizer page is EventMann’s standard profile.
Your personal email address is never shown on your public pages. Visitors who want to ask you something use the contact form on your event pages, and you answer from Enquiries.
Troubleshooting
My handle is rejected — it is already used, it is a reserved word, or it has characters other than letters, digits and hyphens.
The badge is missing — finish Stripe Connect under Money → Stripe Connect.
An event is not listed — only live, public, upcoming events appear. Check its status and visibility under Event Information.
The follower count went down — someone clicked Following to unfollow.
The Finance Overview is the money page for your whole organization: sales, refunds, fees and Stripe’s own costs across every event you run. Open it from Money → Finance in the sidebar. The other money pages sit in the tab strip along the top — Overview, Payouts, Tax Rates, Revenue Shares and Exports — while Invoices, Expenses and Stripe Connect are their own rows under Money. Only the organizer account (and platform admins) can open these pages; team members see a per-event version instead, described in What a finance team member can see.
What you can do here
See what you have sold, what was refunded, what EventMann kept and what Stripe charged, in five cards.
Compare every event side by side in the Reconciliation table.
Watch the monthly revenue and refund-rate charts.
Download the reconciliation as CSV or Excel.
Read the cards
Use the tab strip ① to move between the money pages. Card payments are paid out by Stripe, so look under Payouts for what has reached your bank.
Total Revenue ② — what buyers paid on confirmed and refunded orders, minus the money refunded.
Platform Fees ③ — the commission (and any service fee) EventMann kept. When an order is refunded, the commission on it is returned, so a refunded sale adds nothing here.
Stripe fee ④ — what Stripe charged your own Stripe account for processing these payments, as Stripe reported it.
Net Revenue ⑤ — Total Revenue minus Platform Fees minus the Stripe fee. This is what is left for you.
Pending Payout ⑥ — the total of payouts that EventMann itself recorded for you and has not marked paid. This is not your Stripe balance: Stripe’s payouts are listed on Payouts, and EventMann records no payout of its own for card sales, so this card is normally €0.
Click CSV ⑦ (or Excel next to it) to download the per-event reconciliation shown further down the page.
1234567The Finance Overview with the tab strip and the five money cards
Below the cards, a second row shows Avg. Order Value, Refund Rate and Completed Payouts. Then come the Monthly Revenue chart (revenue by the month an order was paid, for the latest twelve months), the Refund Rate chart (the share of paid orders that were refunded, in full or in part) and, once EventMann has recorded payouts for you, a Payout Status chart.
The reconciliation table
Gross ① is everything buyers paid for that event.
Refunds ② is what you gave back, including partial refunds.
Platform fees ③ is the commission EventMann kept after refunds.
Net ④ is Gross minus Refunds minus Platform fees minus the Stripe fee. Every row adds up the same way, so the table can be checked against your accounts.
1234Per-event reconciliation: gross, refunds, platform fees, Stripe fee and net
The last panel, Recent Activity, lists your ten most recent confirmed orders, newest first, with the order reference, event, amount, platform fee, Stripe fee, net and date. A free order has no payment date, so it is placed by the day it was booked. A dash in the Stripe fee column means Stripe has not reported the fee for that order yet, or the order was not paid by card.
Good to know
Orders that were never paid, or were cancelled before payment, are not counted. A partially refunded order stays confirmed, and its refund is subtracted from the totals, so nothing needs adjusting by hand.
If you sell in more than one currency, the cards add the raw amounts under your account currency. Treat cross-currency totals as a rough guide.
Ticket sales only. Money you record by hand (venue costs, sponsorship) lives under Expenses, and each event’s own profit and loss is on Event revenue and event expenses.
Everything reads zero although I have sales. Your orders are probably still pending (awaiting payment or approval), or the event is free. Check Orders for the event.
Pending Payout is €0 but Stripe is about to pay me. That card only counts payouts EventMann recorded. Open Payouts to see what Stripe has sent or scheduled.
The Recent Activity rows do not add up to the cards. The rows show each order as it was paid; the cards subtract refunds and return the commission on refunded orders. The reconciliation table and each event’s revenue page use the same figures as the cards.
Stripe Connect is how ticket money reaches you. You connect your own Stripe account, buyers pay into it, and Stripe pays your bank. You need it for paid tickets and memberships; organizers who only run free events can skip it. Open it from Money → Stripe Connect in the sidebar.
Why it works this way
Every payment is a direct charge on your own Stripe account. You are the seller on the buyer’s statement, Stripe bills its processing fee to you, and refunds and chargebacks come out of your Stripe balance.
EventMann takes only its fee, which Stripe collects at the moment of the charge as an application fee. EventMann never holds your ticket money and cannot delay, schedule or release your payouts — see Payouts.
Stripe collects and checks your identity and business documents. EventMann never sees them and never stores card numbers.
How to connect
Open Money → Stripe Connect.
Choose the country your business is legally registered in ①. Stripe fixes this when the account is created, so pick carefully.
Click Connect with Stripe ②. EventMann creates a Stripe account for you and sends you to Stripe’s own onboarding pages.
On Stripe’s pages enter your business type, legal name and address, tax details and the bank account to be paid. Stripe may ask for an ID document.
When you finish you return to EventMann. If Stripe still needs something, the page says Onboarding incomplete and lists what is missing.
12The Stripe Connect page before an account is connected
Reading your account page
The Active badge ① and your Stripe account number tell you the account can take payments. Until then you see Onboarding incomplete with a list under “Required before you can accept charges”, and a Continue Stripe Onboarding button that picks up where you stopped.
Open Stripe Dashboard ② takes you to your own Stripe dashboard. That is where your balance, every payout, the payout schedule and disputes live.
The four tiles ③ — Charges Enabled, Payouts Enabled, Details Submitted and Card Payments — should all be green. Card Payments is what lets EventMann charge on your account.
What Stripe charges you per sale ④ lists Stripe’s rate for each payment method your account accepts. Rates depend on the method and country, so these are estimates; a row marked measured was fitted from charges Stripe really made on your sales.
Disconnect Stripe Account ⑤ removes the link after a confirmation (see below).
12345A connected, active account with its capabilities and Stripe’s rates
Good to know
Paid events need an active account. A paid event cannot go Live (or be scheduled) until the account can take charges, and checkout refuses a card payment otherwise. Free ticket types do not need Stripe.
Disconnecting pauses your Live paid events, so they stop advertising a checkout that would fail. You get an email straight away with the time and IP address. Connecting again resumes your existing Stripe account where Stripe still allows it.
If a banner says your account was set up under an older fee model, or lacks the card-payments capability, use its Reconnect Stripe button. Paid checkout stays off until you do; your old Stripe account remains yours.
If Stripe has paused payouts to your bank, a banner says so. Selling continues and the money stays in your Stripe balance — fix the open requirements in your Stripe dashboard (Fix in Stripe opens them).
Event pages show the same status under Checkout → Payments; the Manage link there brings you back here.
Troubleshooting
“Onboarding incomplete” will not go away. Click Continue Stripe Onboarding again. Stripe’s links expire quickly, and this button asks for a fresh one.
Verification looks stuck. Stripe tells you directly by email about unreadable or mismatched documents; EventMann does not see them.
I cannot publish a paid event. The publish check names the reason; usually the account is not active yet, or was disconnected.
The page offers “Connect your Stripe account” but I connected before. The account was disconnected. Press Connect with Stripe again.
On a paid order three things can sit on top of the ticket price: the EventMann platform commission, an optional service fee, and tax. Separately, Stripe charges you its own processing fee. This article shows where each comes from, who pays it and how to set it for an event. The event settings live under an event’s Checkout → Payments tab.
Set it for an event
Open your event and go to Checkout → Payments.
Switch Absorb Booking Fees ① on or off.
Enter the Tax Rate (%) ② and the Tax Label ③ shown to buyers, for example VAT.
Click Save Changes ④.
The Stripe Connect card ⑤ shows whether your account can take payments and links to the event’s revenue page.
12345Checkout → Payments for an event: absorb fees, tax rate and label
Platform commission
It is set by your pricing plan as a percentage of the ticket subtotal — the ticket price after any discount code or bundle price, before tax. Some plans also set a minimum and a maximum amount per ticket, and a plan can start charging only from a set date.
Free orders never carry a commission, and a refund returns the commission on the refunded part.
Your rate is on Settings → Billing under Your Plan.
Absorb Booking Fees
On (the default) — the buyer pays exactly your ticket price plus tax. The commission is taken out of what reaches you, and no fee line appears at checkout.
Off — the commission (and a service fee, if your plan has one) is added on top of the ticket price as separate lines at checkout. You then keep the full ticket price.
Service fee
A plan can carry a service fee made of a percentage plus a fixed amount per ticket. It is charged to the buyer only when Absorb Booking Fees is off and is kept by EventMann. If your plan has none, nothing is added.
Stripe’s processing fee
Stripe charges its fee to your Stripe account on every payment, because you are the seller. It depends on the payment method and country, so you do not set it — but you can see it: Money → Stripe Connect lists Stripe’s rate per method, and the Finance Overview and each event’s revenue page show the amount actually charged.
Worked example (illustrative rates)
A €40.00 ticket, a plan commission of 1% (€0.40) and a Stripe card fee of 1.5% + €0.25. Check your own rates before relying on these numbers.
Absorb Booking Fees
Buyer pays
Platform commission
Stripe fee
You receive
On
€40.00
€0.40
€0.85
€38.75
Off
€40.40
€0.40
€0.86
€39.14
With the switch off the buyer pays the commission, but Stripe’s fee is calculated on the larger amount charged, so it still comes off your side.
Tax
Tax is worked out on the discounted ticket subtotal and added on top as its own line. EventMann has no tax-inclusive pricing for tickets.
If you have tax rates set up, the rate that matches the buyer’s billing country is used and shown as its name and percentage (“VAT 19%”). Otherwise checkout falls back to the Tax Rate and Tax Label on this tab.
Good to know
Free events carry no commission, service fee or Stripe fee.
A discount code or bundle lowers the subtotal first; commission and tax are calculated on the lowered amount.
Refunds follow the event’s cancellation terms; the link under the tax fields takes you to them.
Troubleshooting
Buyers ask about an extra fee at checkout. Absorb Booking Fees is off for that event. Switch it on and the fee line disappears (the commission still applies, out of your side).
My net is not ticket price minus commission. Stripe’s processing fee also comes off. It has its own column on the Finance Overview and its own card on the event revenue page.
No tax appears on an order. No tax rate matched the buyer’s country, no default is set, and the event’s Tax Rate is 0.
Use Money → Expenses (the page is titled Expenses & Income) as a running ledger of money in and out that is not a ticket sale: venue deposits, printing, equipment, sponsorship you were paid, donations. It is your own bookkeeping; attendees never see it. For one event’s profit and loss, use the event’s own page — see Event revenue and event expenses.
What you can do here
Record income and expenses, optionally linked to an event, with a reference, notes and a receipt.
See totals for income, expenses and net balance, shown separately for each currency you use.
Filter the list to All Entries, Income or Expenses.
12345The Expenses & Income ledger with totals, filter tabs and entries
How to add an entry
Click Add Income ① or Add Expense ②. The entry type is already chosen, and you can switch it on the form.
Give it a title, a category, the date, the amount and the currency.
Optionally pick the event it belongs to, add a description, your own reference (an invoice or receipt number) and notes, and attach a receipt.
Save. The entry appears at the top of the list and the totals update.
To change or remove an entry later, use Edit ⑤ or Delete on its row. The Income tab ④ and the Expenses tab filter the list; the Net Balance card ③ is always the total of everything.
On the form, Entry type ① switches between income and expense, Title ② names it, Category ③ files it, Amount ④ takes the figure, Linked Event ⑤ ties it to one event and Attachment ⑥ holds the receipt.
Linked Event — leave it empty for organization-wide costs (hosting, general marketing). Link it for anything that belongs to one event, so it shows in that event’s profit and loss.
Attachment — PDF, JPG, PNG, WebP, Word or Excel, up to 10 MB, stored privately. Only you can open it, through the View file link on the row. Replacing or removing a receipt deletes the old file at once.
Reference — free text for your own invoice or purchase-order number. EventMann does not check it.
Stock purchases appear here too
When you (or a volunteer team lead) record the purchase of an inventory item, for example four folding tables, EventMann creates an ordinary expense for it: category Equipment (or Other for consumables), the quantity in the title, the receipt attached and, if you chose one, the event. It then counts in your event’s expenses like any other cost. A purchase that a volunteer paid out of their own pocket stays marked as awaiting reimbursement until you mark it paid back under Inventory → Purchases. The inventory itself is described in Volunteers.
Good to know
This ledger is entirely separate from ticket sales. The organization-wide totals here contain only what you entered by hand; ticket income is added on each event’s own Expenses & Income page.
If you also type your ticket sales in as income, they will be counted twice on that page. Leave ticket sales to EventMann.
Each currency gets its own row of totals, so a euro event and a pound event never mix.
Only the organizer account can use this page.
Troubleshooting
Net Balance looks wrong. It is always income minus expenses across every entry, whichever tab you are on, and it excludes ticket sales.
Upload rejected. The limit is 10 MB and the file must be one of the listed types. Save it again in a supported format.
An old receipt is gone. It was replaced or its entry deleted; there is no recovery.
Money → Invoices lists every invoice issued in your name: the receipts EventMann creates for paid orders and membership purchases, and the invoices you write yourself for sponsors, partners or anyone else who owes you money. Invoices are your documents — you are the seller — so they carry your details, your tax ID and your own numbering. How they look is set on Invoice design.
The three kinds of invoice
Booking — created automatically when a paid order is confirmed, if Issue invoices automatically is switched on under Invoice design. It lists the tickets, any discount, fees and tax, is marked Paid, and is attached to the buyer’s confirmation email. The buyer can also download it from their bookings, and you from the order’s page. Free orders get no invoice.
Membership — created for every paid membership, whether or not ticket invoicing is on. The price includes VAT and the invoice shows it separately.
Custom — invoices you create here by hand. They have no tax line: put any tax in the line items or the tax note.
The list shows each invoice’s number, recipient, Type ③, Status ④ and total. Click + Create Invoice ① to write one, Invoice design ② to change how invoices look, or View ⑤ to open one.
12345The invoice list with order receipts, membership receipts and custom invoices
How to create a custom invoice
Click + Create Invoice.
Enter the recipient’s Name ① and Email; an address is optional.
Set the Issue Date ② and, if you want one, a Due Date ③ on or after it.
Fill in the first line item ④ — description, quantity and unit price — and use + Add Item ⑤ for more. The total is calculated for you, in your account’s payment currency.
Optionally add notes, then click Save ⑥. You land on the invoice, which starts as Draft.
123456The Create Invoice form with a sponsorship line item
Send, download, edit
Open an invoice with View in the list.
Download PDF ① gives you the document.
Send Invoice ② emails the PDF to the recipient and marks it Sent. If you configured your own mail server under SMTP & Mail, it leaves from there.
Edit ③ changes the recipient, dates and notes — not the amounts. To change an amount, delete the invoice and create a new one. Delete removes an invoice for good; its number is not handed out again.
123An invoice with its download, send, edit and delete actions
Settings explained
Invoice number — assigned automatically, in one running sequence for your account (INV-00001, INV-00002, …), shared by all three kinds. You cannot type or change a number.
Status — Draft, Sent, Overdue or Paid. Sending moves a draft to Sent. Overnight, a Sent invoice whose due date has passed becomes Overdue. Order and membership receipts are Paid from the start. There is no “mark as paid” button for custom invoices, so keep track of those payments yourself.
Currency — a custom invoice is in your account’s payment currency.
The recipient’s labels (“Invoice”, “Total”, …) follow the buyer’s language on order invoices; text you write yourself stays as written.
Good to know
The figures on an order invoice are fixed when it is issued. Changing the design later restyles the PDF but never restates an invoice that was sent.
Invoices are stored privately and reachable only through your own signed link.
Switching Issue invoices automatically off stops new order invoices only. Existing ones keep their number and stay available.
Troubleshooting
No invoice for an order. It was a free registration, or automatic invoices were off when it was paid.
The recipient did not receive it. Check the email address on the invoice; sending again repeats the same send and cannot confirm delivery.
I cannot edit the amounts. Edit only changes recipient, dates and notes. Create a new invoice instead.
I do not see invoices in the menu. Only the organizer account has this page; team members do not.
EventMann does not pay you your ticket money, and it cannot hold, delay or release it. Each card payment is made to your Stripe account, and Stripe pays that balance to your bank on its own schedule. Money → Finance → Payouts shows you what Stripe has paid or is about to pay, so you do not have to leave EventMann to check.
What you can do here
Read your Stripe Payout History: every payout Stripe has reported for your account, across all events.
See the total still on its way (Pending Payout).
Check whether EventMann is holding anything for you (it normally is not).
Read the Stripe payout history
The Stripe Payout History panel ① lists each payout with its Stripe ID, amount, arrival date, status and description.
The Pending Payout pill ② adds up payouts that are pending or in transit.
The Arrival date ③ is the day Stripe expects the money in your bank. Statuses are PENDING, IN_TRANSIT, PAID, FAILED or CANCELLED; a failed payout shows the reason Stripe gave.
The card at the bottom ④ explains the second ledger: Nothing for us to pay out means EventMann holds no money for you. Card sales go from Stripe to your bank, and box office, cash and complimentary sales are money you took yourself.
When Stripe decides. Your payout schedule, the first-payout waiting period and any holds are set by Stripe for your account, and you manage them in your Stripe dashboard (Money → Stripe Connect → Open Stripe Dashboard). EventMann has no control over it — which is why the Payouts page says “Stripe pays out on its own schedule for your account. We cannot set or change it.” when the list is still empty.
Good to know
The history is filled in as Stripe reports payouts to EventMann. Payouts older than that connection may be missing; your Stripe dashboard always has the complete list.
A sale reaches you as the ticket price minus EventMann’s fee and Stripe’s fee. To see what one event earned, open its Event revenue page.
A Create Payout form appears here only if EventMann ever holds money on your behalf. Today no way of selling does, so the form is normally hidden. If a payout does exist, it is listed under Payout History with its period, bookings, amount and status (Pending, Processing, Paid, Failed or Rejected), and its detail page lists the bookings in it.
If Stripe pauses payouts to your bank, the Stripe Connect page shows a banner. Selling carries on; the money waits in your Stripe balance until you resolve the requirement in Stripe.
Troubleshooting
“No payouts recorded yet” although I have sold tickets. Stripe has not paid out yet, or has not reported it. Check your Stripe dashboard: Stripe may hold the first payout of a new account for a while.
A payout shows FAILED. Stripe could not deposit it, usually because of the bank details. The reason is shown on the row; correct it in your Stripe dashboard.
The amount in my bank is lower than I expected. A payout is a batch of your Stripe balance after fees, refunds and disputes, across several days of sales. Reconcile it in Stripe, or compare events on the Finance Overview.
Invoice design decides how the invoices in your name look, and switches automatic invoicing on or off. Open Money → Invoices and choose the Invoice design tab. The amounts on an invoice always come from the order itself; this page only controls the presentation and the legal text around it.
What you can do here
Turn Issue invoices automatically on or off.
Choose the accent colour, whether your logo or your name is printed, and the heading.
Add the legal lines your tax office expects: a tax note, payment terms, bank details and a footer.
Preview the result on a real invoice.
How to set it up
Tick Issue invoices automatically ① so that every paid order gets a numbered invoice in your name. Untick it to stop new invoices; ones already issued keep their number and stay available to buyers. Free orders never get one.
Pick the Accent colour ② used for the heading and rules.
Under Logo ③, choose between Print my logo (the logo you uploaded on your public profile) and your organization name as plain text. The tick box Print my logo switches the logo off entirely.
Type a Heading ④ to replace the word “Invoice” at the top, or leave it empty.
Write a Tax note ⑤ — for example a reverse-charge or small-business statement — printed under the totals.
Fill in Payment terms ⑥, Bank details and a Footer if you want them printed.
Tick Print my tax ID to show your tax number (it prints only if you entered one) and press Save ⑦.
Next to Save a link named Preview — INV-… opens your most recent invoice as a PDF drawn with the design as it is now. Until you have issued at least one invoice there is nothing to preview. Save first, then preview.
Where the other details come from
Your name or company, address, country and tax ID are taken from Settings → Billing (Billing Information). Fill them in there.
Everything you type here is printed exactly as written; EventMann does not add or translate legal wording for you. Which lines an invoice must carry differs by country, so check with your tax adviser.
Good to know
A change to the design restyles how an invoice is drawn but never changes its figures or number. Invoices already emailed are not resent.
Membership receipts are issued whether or not this switch is on, and use the same design. When the plan has a VAT rate, the invoice shows the VAT included in the price; use the Tax note for any statement your tax office expects on membership fees.
Colours must be a valid hex colour; the colour picker always gives one.
Troubleshooting
Buyers get no invoice.Issue invoices automatically is off, or the order was free.
My logo does not print. The logo option must be set to Print my logo with the tick box on, and a logo must be uploaded on your public profile.
My tax ID is missing. Add it under Settings → Billing and keep Print my tax ID ticked.
Every event has its own small finance section under Finance in the event’s Manage menu, with two tabs: Expenses & Income, the event’s profit and loss, and Event revenue, where the event’s sales money went. Use them to see whether one event paid for itself. For the whole organization, see the Finance Overview.
Expenses & Income: the event’s profit and loss
Open the event and choose Finance → Expenses & Income.
Ticket Income ① is what the event actually earned from ticket sales: net of refunds, the platform fee and Stripe’s fee. It is added for you; you do not type it in.
Net Balance ② is ticket income plus income you entered, minus all expenses.
The Expense Breakdown ③ bars show where the money went by category.
Click Add Entry ④ to record a cost or income for this event. A window asks for the type, category, title, amount, currency, date and optional reference, description, notes and receipt.
Every row has Edit and Delete. Stock bought for the event shows up as an ordinary row ⑤, such as “4 × Folding tables”.
12345An event’s Expenses & Income: ticket income, breakdown and entries
Event revenue: where the sales money went
Choose Finance → Event revenue.
Gross Revenue ① is what buyers paid for confirmed and refunded orders.
Platform Fees is EventMann’s share; the Stripe fee ② is Stripe’s cost to you.
You Receive ③ is the event’s total after refunds and both fees.
The Booking Revenue Split table ④ lists each order with its buyer, gross amount, platform fee, Stripe fee, what you receive, the gateway, the paid date and its status. Refunded orders are included so the list explains the totals.
1234Event revenue: four totals and the order-by-order split
Good to know
Both pages read the same figures, so the ticket income on the Expenses & Income tab equals You Receive here.
The table shows each order as it was paid: its platform fee, Stripe’s fee as Stripe reported it (a dash while Stripe has not reported it yet, or for an order not paid by card) and what is left. The four totals at the top also subtract refunds and return the commission on refunded orders, so with refunds the rows add up to more than You Receive.
Rows in another currency than the event are listed in an amber note instead of being added to the totals.
Payouts are not shown per event. Stripe pays your account, not an event; see Payouts for the history.
Costs that belong to no particular event live under Expenses; give them a linked event and they appear here as well.
Who can open these tabs: Expenses & Income needs permission to edit the event; Event revenue needs the payouts permission, which the built-in Finance role has (see What a finance team member can see).
Troubleshooting
Income looks doubled. You entered the ticket sales as income by hand. Delete that entry; ticket income is already included.
Ticket Income is lower than I expected. It is net of refunds, EventMann’s fee and Stripe’s fee. Compare with the Gross Revenue card on Event revenue.
The Stripe fee shows a dash on some orders. Stripe has not reported the fee for that order yet, or the order was not paid by card, for example cash or a free ticket.
You can invite someone to keep an eye on the money without handing over your account: add them to your team with the Finance Manager role under Settings → Teams. This article shows what that role opens and what it deliberately keeps closed, so you know what to expect before you invite your treasurer. How to invite and manage team members is in Teams.
What a Finance Manager can open
Team members work inside the events you add them to. From My work they open an event you added them to and see a short Manage menu: Overview, Event Intelligence, Attendees, Finance and Analytics & Reports.
Under Finance ① they see Event revenue: gross revenue, platform fees, the Stripe fee and what the event receives ②, with the order-by-order split below.
Under Attendees they can read the order list and work the Refunds queue. The role includes exporting bookings, so the Export CSV button on the order list is there for them too; see Export attendee data.
Under Analytics & Reports they can read the event’s reports and insights.
The payout history is not on the event’s pages: Stripe pays the organizer’s account, not an event, so only the organizer account sees the Looking for your payouts? card and its View payouts link. Stripe’s dashboard or the organizer has that information.
12The Event revenue page as a Finance Manager sees it
What stays closed
The organization-wide Money pages — Finance Overview, Payouts, Tax Rates, Revenue Shares, Exports, Invoices, Expenses and Stripe Connect — are for the organizer account only. A team member who opens them gets a “This area is off-limits” page.
Each event’s Expenses & Income tab needs the permission to edit the event, which the Finance Manager role does not include. So does Checkout → Payments, where the fee settings live.
They cannot change tickets, prices, discounts or the event itself.
Good to know
If someone needs Expenses & Income as well, create a custom role that combines the permissions you want. Check what each permission allows first — the permission to edit an event also lets the person change it.
Access is per event: a Finance Manager sees only the events they were added to.
Troubleshooting
My treasurer gets “off-limits” on Finance. That is the organizer-wide page. Point them to the event’s own Finance → Event revenue.
They cannot see an event. Add them to that event’s team.
They need to edit expenses. Use a custom role, or enter the expenses yourself.
Revenue shares are a note to yourself about how an event’s money is meant to be divided — with a venue, a catering partner, a co-organizer. Open them from Money → Finance → Revenue Shares. Read this first: nothing here moves money. EventMann does not withhold these amounts from what you receive, does not pay the recipients and does not use them in any report. They are a list for your own planning; you settle with the other party yourself, outside EventMann.
What you can do here
Pick an event and add a share to it.
Read the shares you have noted for that event, in the order you added them.
Delete a share.
How to add a share
Open Money → Finance → Revenue Shares. The yellow notice ① repeats that the amounts are for your own planning.
Choose the event in Select Event ②. Shares belong to one event; the list changes when you pick another.
Type a Share Name ③, for example “Venue rental split”, and choose a Recipient Type (Organizer, Venue, Vendor or User).
Choose the Share Type ④ — % or Fixed Amount — and enter the Value.
Click Add Share ⑤. It appears in the list below, as a percentage or as a fixed amount.
12345Revenue Shares for an event, with the reminder that EventMann does not pay them out
Settings explained
Share Name — free text for you; attendees never see it.
Recipient Type — only a label. The form does not link the share to a real account.
Share Type and Value — a percentage or a fixed amount. Nothing stops your shares adding up to more than 100%, so check the total yourself.
Good to know
Your full takings arrive in your own Stripe account (minus EventMann’s fee and Stripe’s fee). To pay a partner you transfer the money yourself, and you can record it under Expenses so it shows in the event’s profit and loss.
There is no edit button. To change a share, delete it and add it again.
Shares are not copied when you duplicate an event.
Only events you own are listed. Only the organizer account can open this page.
Troubleshooting
My co-organizer says they were not paid. Expected: this page records an agreement and pays no one.
The event I need is not in the list. Only events you own appear.
I deleted a share by mistake. There is no undo; add it again.
Tax rates tell EventMann how much VAT or sales tax to add to a ticket order, based on where the buyer says they live. Open them from Money → Finance → Tax Rates. They belong to your organizer account, so they apply to every event you sell tickets for.
What you can do here
Add a rate for a country, or for a region within it.
Mark one rate as the default for buyers whose country has no rate of its own.
Edit a rate in place, switch it off without deleting it, or delete it.
How to add a rate
Open Money → Finance → Tax Rates.
Enter a Tax Name ①, such as VAT or GST, and the Rate (%) ② from 0 to 100.
Choose the Country ③ from the list. Your own country is preselected.
Optionally type a Region ④ (a state or province) to make the rate apply to that region only.
Tick Set as default ⑤ if this is the fallback rate. Only one rate can be the default; ticking it clears the flag on the others.
Click Add Rate. Later, use Edit ⑥ on a row to change anything, including the Active switch.
123456Adding a tax rate, and the list of existing rates
Edit a rate
Click Edit on the row. A window opens with the same fields.
Change the Rate (%) ①, tick or untick Set as default ② and Active ③, then click Save Changes.
123The edit window for a tax rate, with the default and active switches
How the rate is chosen at checkout
EventMann applies exactly one rate to an order — never the sum of several — to the whole ticket subtotal (after discounts), not per ticket type. The rate is looked up from the billing country (and region, if given) the buyer enters:
An active rate for that exact country and region.
Otherwise an active rate for that country with no region.
Otherwise your active rate marked Default.
If none of these exist but you have exactly one active rate in total, that one is used.
The tax is always added on top of the price, as its own line named after the rate (“VAT 19%”). If no rate resolves at all, checkout falls back to the Tax Rate and Tax Label on the event’s Checkout → Payments tab, or to no tax if that is 0.
Settings explained
Tax Name — shown to the buyer next to the tax line.
Rate (%) — 0 to 100, two decimals.
Country — required. A rate only matches buyers who give that billing country.
Region — optional free text. It must match what the buyer enters; leave it empty for a country-wide rate.
Default and Active — an inactive rate is ignored everywhere.
Good to know
The checkout page previews the rate for the country it already knows; the rate actually charged is worked out again from what the buyer submits.
One rate applies to the whole order, so you cannot give different ticket types different rates.
Memberships work differently: a plan’s price already includes VAT at the rate you set on the plan. See Membership Plans.
Changing a rate affects new orders only.
Troubleshooting
No tax was added to an order. No active rate matched the country, no default is set, you have more than one active rate, and the event’s own Tax Rate is 0.
The wrong rate was charged. A country-only rate may be matching where you expected a regional one (the region text must match), or your default is broader than intended.
I need different rates per ticket type. Not supported.
Exports give you your sales and fees as a spreadsheet for your accountant. There are two: the Accounting Exports page under Money → Finance → Exports, which writes one row per paid order for a period you choose, and the CSV and Excel buttons at the top of the Finance Overview, which download the per-event reconciliation. Order lists for one event are covered in Export attendee data.
What you can do here
Export every confirmed or refunded order paid in a date range as a CSV file.
Keep a history of the exports you ran, with the period, number of orders and status.
Where your EventMann has the Xero connection switched on, a Connect Xero / Sync Xero button appears next to Export CSV. If you do not see it, Xero is not available to you.
How to run an export
Open Money → Finance → Exports.
Set the From and To dates ①. They start on last month.
Click Export CSV ②. The file is built straight away.
A new row appears in Export History ③ with the period, the number of orders in it and the status Completed (or Failed if something went wrong).
123The Exports page with the period selector and the history
What is in the CSV
Column
Contents
Reference, Event
The order reference and the event title
Date, Status
The day the order was paid, and its status (confirmed or refunded)
Currency
The event’s currency
Gross
What the buyer paid
Refunds
What was refunded, including partial refunds
Platform Fee
The commission and fees EventMann kept, after refunds
Stripe Fee
Stripe’s processing cost, as reported by Stripe
Net
Gross minus Refunds minus Platform Fee minus Stripe Fee
Gateway
Where the payment went through, or manual for orders without one
Orders are picked by the date they were paid, and pending, cancelled and never-paid orders are left out. Each order is its own row, in its own currency; the file does not add currencies together.
The Finance Overview download
The CSV and Excel buttons on the Finance Overview download one row per event: Event, Gross, Refunds, Platform fees, Stripe fees and Net, over everything you have ever sold. They give exactly the table on that page.
Good to know
Both exports contain money figures and buyer references. Keep the files private.
Your figures will not match your bank statement row for row: Stripe pays out in batches on its own schedule, while the export is by order date. See Payouts.
Only the organizer account can use the Exports page.
Troubleshooting
Download a file again later. Click the ↓ arrow on its row in Export History. Each row keeps its own file, and only your organizer account can download it.
The export has 0 orders. No order was paid in that period. Check the dates.
The row says Failed. Run the export again; if it keeps failing, contact support.
No Xero button. The Xero connection is not switched on for your EventMann.
Every promotion tool in EventMann is already included with your account. There is no paid boost and no purchasable placement; the homepage and recommendations are curated by EventMann’s own team and cannot be bought or switched on for an event. This article is a map of where each tool lives, with a link to the article that explains it.
Tools for the whole organization
These are under Grow in the organizer sidebar.
Marketing — the overview, plus Campaigns (email to your audience), Landing Pages (a page for one campaign or partner) and Push Notifications. See Marketing.
Audience — the people who have booked with you.
Membership — sell passes, give members early access and member prices. See Memberships.
Social Accounts — connect your Facebook Page, Instagram Business or Creator account and LinkedIn once, so posts can be published from EventMann.
Tools for one event
Open the event and look under Marketing and Tickets & Pricing in its Manage menu.
Pricing & offers — the tabs Pricing Rules, Flash Sales, Bundles and Discounts. Discounts are the codes you can hand out, with a percentage or fixed amount off, a usage limit and an expiry date. See Discount Codes.
Promotion — SEO Settings (title, description and share image for search and social previews, see SEO Settings) and Social Marketing, where you create, schedule and track posts for your connected accounts (see Social Media Integration). AI Tools appears here too when AI is available.
Campaigns — email campaigns for this event’s audience.
Attendee comms — announcements, reminders, after-event follow-ups and email templates for the people who already booked. See Announcements and Email Templates.
A simple order of work
Fill in the event page and SEO settings so links look good when shared.
Connect your social accounts and schedule a few posts leading up to the event.
Create a discount code for an early-bird push, and send the campaign that announces it.
Keep ticket holders in the loop with reminders and announcements, and follow up after the event.
Good to know
AI helpers (for social posts, SEO text and discount codes) work only where an AI key is available to your account; you can add your own under Integrations → AI.
Troubleshooting
My event is not featured on the homepage. Featuring is chosen by EventMann; it is not a setting of your event.
I cannot find where to post to social media. Connect your accounts under Grow → Social Accounts first. Without a connected account you can still write drafts.
I do not see AI Tools. No AI key is available to your account yet.
You can download the people who booked an event as a CSV file, to open in Excel or any spreadsheet. The export is on the event’s Attendees → Orders page and always follows the filters you have set there. It is available to the organizer account. Whether a team member sees the button depends on their role; box-office and staff roles do not have it.
How to export
Open the event and go to Attendees → Orders.
Choose the tab (Confirmed is selected by default) and any filters — search, ticket type, discount, dates. The export contains exactly the orders you filtered to.
Click Export CSV ① and choose a file.
Orders — one row per order ② is the booking list, with names, contact details and money.
Tickets — one row per ticket, with the price actually paid ③ lists every ticket, with the ticket holder’s name and what that ticket really cost after discounts.
The file downloads straight away; there is nothing to wait for.
What is in the files
File
Columns
Orders
Reference, Name, Email, Phone, Tickets (for example “2x Adult”), Subtotal, Discount code, Discount, Fees, Tax, Total, Status, Date, Payment method, then one column for each checkout question you set up, with the buyer’s answers
Tickets
Reference, Attendee, Email, Ticket type, Ticket holder, List price, Discount, Price paid, Discount code, Status, Date
Subtotal minus Discount plus Fees plus Tax equals Total, so you can reconcile an order in a spreadsheet. Cancelled tickets are left out of the Tickets column and file. Dates are in the event’s own time zone.
Export only some orders
Tick the boxes in front of individual orders and use Export selected in the bar that appears. That file is shorter: Reference, Name, Email, Phone, Tickets, Total, Status, Date, Payment method and the checkout-question columns.
Your responsibility once you download it
The files contain personal data — names, emails, phone numbers and the answers to your checkout questions. Once the file is on your computer, you are responsible for storing, sharing and deleting it under GDPR or whatever data-protection law applies to your attendees.
EventMann removes old attendee records on its own retention schedule, but that does not reach copies you have exported. If someone asks you to delete their data, delete it from your exports too.
Export only what you need and keep as few copies as possible.
Good to know
You cannot add or remove columns. Hiding columns in the table (the Columns button) changes only what you see on screen; both exports always contain every column.
Cells that start with a character a spreadsheet would treat as a formula are made safe, so a hostile answer cannot run code when you open the file.
Financial summaries across events are separate: see Financial Exports.
Troubleshooting
An attendee is missing. Check the tab and filters on the Orders page. The export includes only what you are looking at.
A checkout-question column is empty for some rows. The order was placed before the question existed, or the question was optional.
I do not see Export CSV. You are signed in as a team member whose role does not include exporting bookings (box office and staff do not; the Finance Manager role does). Ask the organizer to export, or to give you a role that includes it.
I need Excel format. Open the CSV in Excel; it reads CSV directly.
This article is the map of the numbers EventMann gives you across all your events. They are spread over a few pages, each for a different question: the Dashboard for the state of the business, Reports for exact tables you can download, Marketing for campaign results and NPS & Surveys for how guests felt. For the numbers of a single event see Event Analytics, Event Insights and Event Intelligence.
The dashboard
Your Dashboard (Work → Dashboard) opens with four cards.
Total Revenue ① — the sum of your confirmed orders. If your events use more than one currency, the card lists each currency instead of adding them together.
Tickets Sold ② — tickets on confirmed orders.
Avg. Order Value ③ — the average confirmed order. With several currencies it shows a dash, because an average across currencies is not a price.
Refund Rate ④ — the share of paid orders that had any refund, full or partial. It is a count of orders, not an amount.
My Events ⑤ — every event with its date, status and number of real orders, and a Manage button.
123The Top Events by Revenue and Event Pipeline charts
Below, Top Events by Revenue ① ranks up to five events. Event Pipeline ③ shows how many events are Draft, Live, Completed and so on. Each chart can be downloaded as SVG, PNG or CSV ②. When something waits for you across your events (approvals, refund requests, and so on) a Needs attention card appears with one row per event and queue; its total is the badge on the Dashboard entry in the sidebar.
Where to find the rest
Money → Reports — nine downloadable tables across your events: sales, orders, refunds, tax, discounts, attendance and more. See Reports.
Money → Finance — the money view: gross, refunds, fees and net. See Finance Overview.
Grow → Marketing — campaign results and promo code usage. See Marketing.
Grow → NPS & Surveys — your Net Promoter Score across events. See NPS & Surveys.
Integrations → Tracking Pixels — send your page visits and purchases to your own analytics and ad tools. See Tracking Pixels.
How the numbers are counted
Revenue and tickets count confirmed orders at their full total. A partly refunded order is still counted in full here, because its status stays confirmed; Reports and Finance net the refund off. Pending, cancelled and abandoned orders never count.
Most dashboard figures are kept for up to ten minutes, so a payment that just settled can take a few minutes to appear.
EventMann does not measure page views or how many people looked at a ticket, so no screen shows a visit-to-sale conversion. The conversion rate in Event Analytics compares confirmed orders with all orders started.
Good to know
These pages are for the account owner. Team members see the event-level pages their role allows.
For an exact figure for a period or event, use Reports: its table and its download are the same data.
Troubleshooting
Revenue looks lower than I expected — check whether you are comparing with a total that includes pending or refunded orders. Only confirmed orders count here.
A sale from a minute ago is missing — the figures refresh within about ten minutes.
The dashboard and Reports disagree — the dashboard shows confirmed totals before partial refunds; Reports shows gross, refunds and net separately.
Analytics is the sales and check-in view of one event. Open the event and choose Analytics & Reports → Analytics in the event sidebar. The page has three tabs: Overview (this page), Event Insights and Reports. You need the analytics permission to see the Overview; team roles that hold only reports or insights see the other tabs.
12345The Overview tab of a finished event: six figures, the check-in bar and the 30-day chart
Open Analytics ① under Analytics & Reports.
Tickets Sold ② and the other cards give the headline numbers for this event only.
Check-in Rate ③ is the share of confirmed tickets that have been scanned at the door.
Conversion Rate ④ is confirmed orders divided by all orders ever started for the event.
Tickets Sold (last 30 days) ⑤ is a chart of tickets per day.
What each number means
Tickets Sold — ticket quantities on confirmed orders.
Total Revenue — the sum of confirmed order totals, in the event’s currency. Refunds are not taken off here; use Reports or Finance for money after refunds.
Avg. Order Value — the average confirmed order.
Check-in Rate — scanned tickets divided by confirmed tickets. This is the figure you watch on the day, so it refreshes every two minutes.
Capacity Utilisation — tickets sold divided by the total quantity of all ticket types. It can read over 100% if a type was oversold.
Conversion Rate — confirmed orders divided by all orders ever started, including ones abandoned before payment. It is not based on page views, which EventMann does not measure.
The 30-day chart — grouped by the date an order was paid, with empty days shown as zero so the chart always spans 30 days.
Revenue by ticket type, cities and export
1234Revenue by ticket type, attendee cities and the export buttons
Revenue by Ticket Type ① lists what each ticket type earned and how many sold.
Attendee Demographics (by city) ② shows the ten cities your buyers come from, by number of orders.
The CSV ③, Excel and PDF ④ buttons download the ticket-type table.
Good to know
Every figure excludes pending, cancelled and refunded orders; only confirmed ones count.
Figures are kept for up to ten minutes (two for the check-in rate), so a sale that just settled may take a moment.
Event Insights answers “who is buying, when, and how fast?” for one event. Open the event, then Analytics & Reports → Analytics and click the Event Insights tab. It needs the permission to view the event. (The checklist and to-do list for the event is a separate page: Event Intelligence.)
1234Event Insights: the attendee cards and the hourly sales velocity
Click the Event Insights tab ①.
Total Attendees ② counts tickets on confirmed orders.
New Attendees ③ counts buyers who have no confirmed booking for any other event.
Sales Velocity ④ lists tickets sold hour by hour, from the first order.
Where your buyers come from, and what they buy
123The attendee map, price sensitivity and demographics
Attendee Map ① lists the top countries and cities by number of orders.
Price Sensitivity ② shows each ticket type with its price and how many tickets were bought. EventMann does not measure how many people looked at a ticket, so no conversion rate is shown.
Demographics ③ splits buyers into new and returning, orders into individual and group, and tickets by tier.
Sales Trends ① shows total sold, capacity and a projected Days to Sellout, then tickets per day. The projection uses the last seven calendar days (quiet days count as zero), so one launch-day spike does not make it look healthier than it is. If nothing sold in those seven days it falls back to the average pace since the first sale. It shows N/A when there is nothing to project, for example no sales yet.
Competitor Awareness ② lists other organizers’ public live events in the same category or city within four weeks either side of yours (up to 20), with date, city and venue.
Definitions
Returning means the buyer (by account, or by email address for a guest) has a confirmed booking for another event on EventMann. New plus returning equals the number of distinct buyers.
Group Bookings counts orders with a ticket line covering more than one seat; ordinary multi-ticket orders from the checkout count as individual.
Orders are counted at the time they were placed.
Good to know
A brand-new event shows mostly empty states until people buy.
These figures cover confirmed orders only.
Competitor Awareness never lists your own events and only lists events that are public.
Troubleshooting
A section is empty — there is no data behind it yet, for example no orders with a city, or no competing events nearby.
Days to Sellout shows N/A — there are no sales yet, or the event has no tickets left to sell.
The cities do not add up to my orders — only orders that have a country on them appear on the map.
Net Promoter Score (NPS) is one question: “How likely are you to recommend us to a friend, from 0 to 10?” The NPS & Surveys page (Grow → NPS & Surveys) shows your score for every event that has collected answers, so you can see whether guests are getting happier over time. Surveys themselves are built and read per event; see Surveys.
1234The NPS trend: summary cards and the trend chart
Open Grow → NPS & Surveys ①.
Current NPS ② is the score of your most recent event with answers. Green means 50 or more, amber 0 to 49, red below 0.
Avg promoters ③ (and Avg detractors beside it) is the average of each event’s share. Total responses counts every answer.
The NPS trend chart ④ plots one point per event, in the order the events took place.
123NPS by event: score, responses and the promoter, passive and detractor split
Below the chart, NPS by event lists each event’s NPS ①, number of responses and the shares of Promoters ②, Passives and Detractors ③.
How the score is calculated
Each answer is 0 to 10. 9 or 10 is a promoter, 7 or 8 is a passive, and 0 to 6 is a detractor.
NPS = (promoters − detractors) ÷ all answers × 100, rounded to one decimal. It always falls between −100 and +100.
Only questions of type NPS (0–10) feed the score. A survey without one never produces an NPS.
What counts
One point per survey that has at least one NPS answer. An event with several surveys appears once per survey.
Only answers from people who really held a ticket (or an invitation) count. Answers from a survey’s shareable open link can come from anybody the link reached, so they are left out of the NPS and the response figures, though you can still read them on the survey’s own results page.
How guests get the survey
A survey can be sent automatically after the event (you choose the delay after the event ends) to every confirmed booking. Each booking is invited once, and guests without an account can answer through a personal link in the email.
You can also attach a survey to an email campaign as a “Take the survey” button, or put it in an After the event follow-up.
Survey email is advertising under German law, so it is only sent to people who have not opted out of marketing email and are not on your suppression list.
Good to know
A survey that is switched off or past its closing time no longer collects answers, and no new invitations or reminders go out for it.
With very few answers the score swings widely. Treat a score from fewer than 20 or 30 answers as a hint.
Troubleshooting
The page says there is no data yet — none of your surveys has an NPS answer. Add an NPS question and wait for answers.
A survey shows no NPS score — it has no question of type NPS (0–10).
Auto-send never went out — it only runs after the event ends plus your delay, and only for confirmed bookings who have not opted out of marketing email.
A webhook tells your own system the moment something happens in EventMann, so you do not have to keep asking. EventMann sends an HTTPS request to an address you choose each time a subscribed event occurs: a booking is confirmed, an order is refunded, an event goes live. Webhooks are the Webhooks tab of Integrations in the sidebar.
1234The Webhooks tab: an active endpoint and a disabled one
Open Integrations and click the Webhooks tab ①.
Click Add Webhook ② to create an endpoint.
The Status ③ column shows Active or Disabled, with the HTTP status of the last attempt.
Enter the Endpoint URL ②, a public web address that accepts a POST.
Tick the events you want under Subscribe to Events ③. At least one is required.
Click Add Webhook ④. A 64-character signing secret is created for you.
Events you can choose
The form lists fifteen events, and each of them is sent:
Event
Sent when
booking.created
An order comes into existence: at checkout for free and approval-request orders, at the payment step for paid ones.
booking.confirmed
An order is confirmed: paid, free or entered by hand.
payment.received
A payment settles. It is sent together with booking.confirmed, including for free orders.
booking.cancelled
An order is cancelled: by the buyer, by you or your team, or by EventMann support. cancelled_by says which (attendee, organizer or admin).
booking.refunded
An order is refunded in full.
payment.refunded
A refund settles, partial ones included. One per refund, with its amount.
event.created
An event is created, however it was made (wizard, copy, recurring series).
event.updated
An event’s details change: title, description, image, dates, venue or address, online link, sales window, visibility. changed lists the fields. A status change is not an update; it has its own events.
event.published
An event goes live.
event.cancelled
You cancel an event.
ticket.checked_in
A ticket is admitted at the door: scanned, entered by hand, bulk checked in, synced from an offline scanner or sold and admitted at the box office. Checking a ticket out and marking a no-show do not send it, and neither does the Check in bulk action on the Orders list, which marks whole orders as arrived without a door scan.
staff.assigned
Somebody becomes staff on an event: you approve their application, or they accept an invitation for that event.
staff.checked_in
A staff member clocks in for a shift.
vendor.assigned
You assign a vendor to an event.
vendor.invoice_submitted
A vendor submits an invoice for an assignment.
There are no payout events. Stripe pays your ticket sales directly to your own account, and EventMann does not create or see those payouts.
What a delivery looks like
Each delivery is a POST with a JSON body in this shape: event (the name), data (the details), timestamp and delivery_id. The data for booking.confirmed holds the order id, reference, status, total, attendee name and email, event id and the confirmation time. booking.created adds the event title and carries the creation time instead. payment.received holds booking id, amount, gateway, transaction id and time.
The request carries three headers: X-Webhook-Event, X-Webhook-Delivery-Id and X-Webhook-Signature. The signature is an HMAC-SHA256 of the raw request body in hexadecimal, keyed with your endpoint’s signing secret. Recompute it on your side from the raw body and compare before you trust a payload.
Check an endpoint
12345An endpoint’s page: test, events, signing secret and recent deliveries
Click Send Test ① to send a sample ping to your address and see the result at once.
Subscribed Events ② shows what the endpoint receives. Use Edit to change name, address or events.
The Signing Secret ③ is hidden; click Show ④ to reveal it.
Recent Deliveries ⑤ lists the last attempts with event, status, HTTP code, duration and time. View All shows more.
Retries, failures and automatic switch-off
Only a 2xx answer counts as delivered. A redirect or any other answer is a failure; redirects are not followed.
A failed delivery is tried up to five times, waiting 10, 30 and then 60 seconds between attempts.
When all attempts for one event fail, the endpoint’s failure count rises by one. Ten failures within an hour pause delivery to that endpoint for five minutes; deliveries wait out the pause.
If the pause is triggered, or the failure count passes ten, the endpoint is switched off and you receive a notification naming it.
An address that points to a private or internal network is refused when a delivery is attempted. The test shows “Blocked”, and a real delivery switches the endpoint off.
Delivery history is kept for 30 days.
123A disabled endpoint with its warning, the Re-enable button and a Retry link
A disabled endpoint shows This endpoint is disabled ① with the reason.
Fix whatever was wrong on your receiver, then click Re-enable ②. The failure count is cleared; the address and the secret stay the same. Editing the name or address does not re-enable it.
Retry ③ on a failed delivery sends that event again as a new delivery to your currently active endpoints that subscribe to it. This includes your other endpoints, so they may receive it twice.
Good to know
Webhook sending runs on its own queue, so a slow receiver cannot slow down bookings or ticket emails.
Un-ticking an event stops it silently. You get no notice that you stopped receiving it.
If you connect a tool such as Zapier with an EventMann API token, the subscriptions it creates appear here too, named after the event.
Webhooks send each order’s attendee name and email to your server. Make sure the address is yours and that you may process that data.
Troubleshooting
Deliveries stopped and I see no error — open the endpoint. If it is disabled, fix the receiver and click Re-enable.
The signature never matches — hash the exact raw body, not a re-encoded copy, with the secret from the endpoint page, and compare hexadecimal text.
The test works but real events do not arrive — check the event is ticked on this endpoint, and that what happened matches the “Sent when” column of the table.
I get the same event twice — you pressed Retry, or you have two endpoints subscribed to it. Use the delivery id to ignore repeats.
Integrations in the sidebar has three tabs: Connected Apps (this article), Webhooks and Tracking Pixels. Connected Apps lists the outside services EventMann can work with and shows which of them are set up for you.
1234Connected Apps: search, categories and the cards with their Manage link
Open Integrations and stay on Connected Apps ①.
Search by name or filter by category ②.
A Connected badge ③ marks what is already set up.
Click Connect, or Manage ④ on a connected card.
What is available
Card
What it does
Where it is set up
Google Calendar
Puts your upcoming events into a Google calendar.
Sign in with Google on the card.
Google Analytics
Measures visits and purchases on your event pages.
The card leads to Tracking Pixels, where you enter your GA4 Measurement ID. It reads Connected once that ID is saved.
Stripe
Takes ticket payments.
The card leads to Money → Stripe Connect. It reads Connected once your account can take card payments.
The Google Analytics and Stripe cards are signposts: you set them up on the page they lead to, and the card shows the result. Other tools, for example Zapier or Make, connect through webhooks and an EventMann API token rather than through a card here.
Connect Google Calendar
123A connected Google Calendar: Sync Now, Settings and Disconnect
On the Google Calendar card click Connect. You are sent to Google to sign in and allow access.
Back in EventMann the card reads Connected. Click Manage.
Click Sync Now ① to push your events. You see a success message or the exact error at once.
Settings ② shows when you connected and when it last synced.
Disconnect ③ removes the stored connection. To use the calendar again you connect from scratch.
A sync pushes up to 100 of your upcoming live and scheduled events to the calendar you connected, and updates the ones it pushed before instead of duplicating them. It goes one way only, from EventMann to Google, and it runs only when you press Sync Now: EventMann does not keep the calendar up to date by itself, so sync again after you change an event.
Good to know
Google Calendar needs the platform to have its Google sign-in set up. If it has not, the card says so and you cannot connect.
Whatever credentials a connection stores are kept encrypted and are never shown back to you.
The Stripe card here is not a separate account: it is the same Stripe Connect connection you use to get paid.
Troubleshooting
Sync failed — the message names the reason, often an expired Google sign-in. Disconnect and connect again.
I cannot connect Google Calendar — the platform’s Google sign-in is not configured. Ask EventMann support.
The calendar is missing a changed event — press Sync Now again.
The Stripe or Analytics card shows Connect, not Manage — the underlying setup is not finished on its own page.
Event Intelligence is a checklist and a to-do list for one event. It turns the event’s real state into a readiness score, tells you what is still missing, and warns you about things that need attention while the event is selling. It is pinned right under Overview in the event sidebar, and a shorter version appears on the event Overview page.
12345Event Intelligence: the score, the figures, what to do next and the AI briefing
Open the event and click Event Intelligence ① in the sidebar.
The ring at the top is the readiness score. Under At a glance ② you see tickets sold against capacity, the share of capacity filled, confirmed revenue (after refunds) and the time to the doors.
What to do next ③ lists the things to act on, most urgent first, each with a button that takes you to the right page.
AI briefing ④ is an optional short written summary of the numbers above. Click Write briefing ⑤ to create it.
The setup checklist
123The setup checklist with the critical items marked
The Setup checklist ① lists seven checks. A tick means done.
Event basics ② needs a title, a description of at least 50 characters and a cover image. It is marked critical.
Each open item has a button, for example Edit details ③, that opens the page where you fix it.
Check
Counts for
Critical
Event basics (title, description, cover image)
3
Yes
Venue and address, or the streaming link for an online event
2
Yes
At least one active ticket type
3
Yes
Checkout questions
1
No
Promo or discount codes
1
No
Planning tasks
1
No
Published (the event is Live)
2
No
The score is the share of the weight that is done. When all three critical checks pass and the event is not live yet, a Publish recommendation appears.
What the recommendations are
Add tickets (critical) — no ticket type is active.
Publish (high) — the event is ready and still unpublished.
Near capacity (high) — a live event is 85% sold or more.
Slow sales (high) — a live event is less than 40% sold with 14 days or fewer to go; it points you to discount codes.
Pending payments (medium) — real orders are waiting for payment. Abandoned checkouts are not counted.
Overdue tasks (medium) — planning tasks past their due date.
The AI briefing
The briefing is written from exactly the figures and checklist you see. It never invents numbers. It is created when you ask for it, in your language, and kept for six hours per exact combination of score, checklist and sales, so it is not regenerated needlessly; Regenerate makes a new one. It only appears when AI is switched on (AI-Powered Tools); if the AI service is unavailable the rest of the page keeps working.
Good to know
The score and the recommendations are fixed rules over your real data, recalculated every time you open the page. They are not AI. Only the briefing is.
Publishing counts for 2 of 13 points, so a live event can still show under 100% while optional items are open.
Publishing is also guarded by other checks: a verified email address, a connected payment account for paid events and agreed platform terms. If the Publish recommendation fails, the message tells you which.
Troubleshooting
The score did not change after I fixed something — reload the page; it is recalculated on load.
A recommendation will not go away — the data behind it has not changed yet, for example the overdue tasks are still open.
There is no Write briefing button — AI is off for your account, or no key is available. Everything else still works.
The briefing says the service failed — try again in a moment.
Reports are exact tables of your sales, orders, refunds, tax, discounts and attendance that you can filter and download. There are two entry points with the same tables: Money → Reports covers all your events (account owner), and Analytics & Reports → Reports inside an event covers that event, with extra event-only reports.
123456The Reports page: report tabs, filters and downloads
Open Money → Reports ①.
Pick a report from the row of tabs ②. The first is Sales by event.
Narrow it to one Event ③ if you like.
Set a period with From ④ and To, then click Apply ⑥. Reset clears the filters.
Download the report you are looking at with ↓ CSV ⑤, ↓ Excel or ↓ PDF.
The reports
Report
What it shows
Sales by event
What each event took in, what went back out, and what you keep after fees.
Sales by day
Orders and money per day, on the date the order was paid.
Ticket types
How each ticket type sold against its capacity.
Orders
Every order, one row each, with the full money split.
Refunds
Every order refunded in full or in part, with amount and reason.
Tax summary
Tax collected per event, the figure your tax return needs.
Discount codes
Which codes were used, what they cost and the revenue they carried.
Every report has a heading with a one-line description ① and a totals row ② at the bottom. The totals cover the whole period, even when only the first rows are shown on screen.
Reports for one event
Inside an event the same nine reports are offered, plus nine that only make sense for one event.
1234An event’s Reports tab with the extra event-only reports
Open Analytics & Reports in the event sidebar and click the Reports tab ①.
Attendee list ② — every ticket that admits, one row each, with holder, seat and check-in: the door list.
Event summary ③ — the one-page debrief: sales, attendance, money, refunds and feedback.
Also available: Check-in timeline (scans per 15 minutes and gate, with a running count of who is inside), Sales pace (tickets and money per day counted back from the event date), Seat occupancy (empty without a seat map), Waitlist, Checkout answers, Ticket transfers and Refund requests.
Download with ↓ Excel ④ or CSV or PDF. The download buttons only show for people who may download.
12The attendee list of a finished event, with check-in status
The attendee list ① (Checked in ②) is useful after the event too: it shows who actually came.
How the figures are worked out
Money columns use the same arithmetic as Finance: net = gross − refunds − platform fee − Stripe fee. A fully refunded order stays in the table so its refund counts.
The period filters on the order date: the day the order was paid, or placed if there was no payment step (free, comp or box-office orders). Both dates are inclusive: “to 30 September” includes the whole 30th.
Each row carries its own currency; EventMann never adds amounts in different currencies together.
Good to know
The screen shows at most the first 200 rows and says so. The download contains every row.
The page address is the report. Copy it from the address bar to send an accountant the same filtered view.
A downloaded file is named after the report, the event and the period, so several downloads do not overwrite each other.
The account-wide page is for the owner. Team members use the event Reports tab: viewing needs the reports permission, downloading needs the export permission (usually the finance role).
Troubleshooting
“Nothing to report for this selection” — no orders fall in that event and period. Reset the filters.
The totals differ from the dashboard — the dashboard counts confirmed totals before partial refunds; Reports nets refunds and fees.
I see no download buttons — your role may view reports but not export them.
Seat occupancy is empty — the event has no seat map.
Tracking pixels connect your event pages to your own analytics and advertising accounts, so you can see where visitors come from and which ads lead to sales. You paste an ID from each service; EventMann does the rest. Find them under Integrations → Tracking Pixels.
12345The Tracking Pixels tab with the four ID fields
Open Integrations and click the Tracking Pixels tab ①.
Paste your Facebook Pixel ID ② (a long number).
Paste your Google Ads Conversion ID ③ (it starts with AW-).
Paste your GA4 Measurement ID ④ (it starts with G-).
Paste your TikTok Pixel ID ⑤.
Click Save Pixels. Leave a field empty for a service you do not use.
Where the pixels run and what they report
On your event pages: the visit. For Facebook this is a content view; GA4 and Google Ads record the page.
On the booking confirmation page, after a successful purchase: the sale itself, with its value, currency and order reference. GA4 receives a purchase, Google Ads a conversion, Facebook a Purchase and TikTok a CompletePayment.
Nothing runs in the event preview.
They do not run on other EventMann pages such as the cart or the payment page.
Cookie consent comes first
These tools set cookies, so they load only after the visitor has agreed in the cookie banner. GA4 waits for the analytics choice; Google Ads, Facebook and TikTok wait for the marketing choice. If a visitor says yes later, the pixel starts at that moment. A visitor who declines is not measured, so your own numbers will always be lower than the real traffic.
Good to know
You only enter IDs. You do not paste code snippets, and cannot.
The same IDs apply to all your events.
The purchase value is the order total. EventMann does not tell the services which campaign an order came from; the ad platform links the visit to the sale itself.
The Google Analytics card under Connected Apps leads here and shows Connected once a GA4 ID is saved.
Troubleshooting
I see no visits in my ad account — only visitors who accepted the matching cookie choice are counted, and the account can take some hours to show them.
The purchase does not show — the confirmation page must have been opened after consent. A buyer who declines marketing cookies is not reported to Facebook, Google Ads or TikTok.
Nothing happens in a preview — pixels are switched off in previews on purpose.
Event Staff is where you build the paid day-of team for one event: invite people, review applications, plan shifts, check people in, hand out tasks and write to them. Open the event, then Team & Partners → Manage Staff. It is separate from Team Management, which controls who may use your organizer account, and from Volunteers, which is the unpaid helper module with its own roster and rota. Staff here can be paid by the hour and run through Staff Payroll.
What you can do here
List the event for jobseekers so people can apply.
Invite people by email with a link that expires after 7 days.
Review applications and approve or reject them, setting an hourly rate on approval.
Plan shifts with date, times, capacity and place, and put approved staff on them.
Check staff in from the shift card when they arrive.
Give tasks to a staff member and follow them until done.
Message staff one by one or all at once, and read their replies.
Approve shift swaps that staff ask for.
The tabs of this page
A strip of four tabs runs across the top. Members ① is this page, with recruiting, shifts, invitations, applications and your approved staff. Shift Swaps ② lists swap requests and shows how many are waiting. Staff Messages ③ is the inbox. Payroll ④ opens the pay periods. Below the tabs, the box Looking for staff has one tick box ⑤, and Manage Shifts starts with a form that ends in Create Shift ⑥.
123456The Manage Staff page with its four tabs, the recruiting option and the shift form
Let jobseekers find the event
Tick Show this event to jobseekers ⑤ and click Save Changes to list the event publicly for people looking for event work, in the “Events looking for staff” list of the staff page. It is off by default, and nothing is shown until you turn it on. People who apply appear under Pending Applications.
Invite staff
Click + Invite Staff to open the form.
Type the person’s Name ① and Email ②. Both are required.
Optionally add a Role ③ such as “Security” or “Catering”. It is only a label; it does not grant any access.
Click Send Invite ④. The person gets an email with a link that works for 7 days.
Invitations that are still open are listed under Pending Invites with their expiry date. Resend ⑤ sends a fresh link and starts another 7 days; Cancel ⑥ ends the invitation. You cannot send a second open invitation to the same address for the same event. When the person accepts, they are approved for this event straight away, with your role label, and they appear under Approved Staff. They still have no rate until you set one.
123456The Invite Staff form with two pending invites
Review applications
People who applied from the staff pages wait under Pending Applications. You see their name and email, their note, a short bio, their skills and certificates, the days they are available and when they applied. Type an hourly rate in Rate/hr ③ if you will pay them, then click Approve ④, or click Reject ⑤. Their skills ② help you decide. Either way the applicant is told.
12345Two applications with profile, skills and the Approve and Reject buttons
Plan shifts
In Manage Shifts, fill in the Shift Title ①, the Date ②, the Capacity ③ and the Start Time ④ and End Time ⑤. The date must be today or later, the end must be after the start, and the capacity is 1 to 255.
Optionally add a Location ⑥ such as “Main entrance”.
Each shift becomes a card showing its title, date, times, place and Spots Left. Edit ① changes it. The status menu ② sets Open, Closed or Cancelled: a closed or cancelled shift takes no more people, but keeps its assignments and check-in history, which deleting it (the cross ⑦) would not. To staff the shift, choose a person in the list ③ — it offers only approved staff — and click Assign ④. Under the shift, each assigned person has Check In ⑤ and a cross ⑥ that removes them from the shift.
1234567Two shift cards, one with two people assigned
Check staff in
Click Check In next to the person when they arrive; their arrival time then shows as a tick. You can check someone in from two hours before the shift starts until four hours after it ends, and only while they are approved for the event. Checking out is done by the staff member themselves from their own staff pages, which records the hours. Payroll can only pay a shift once both times exist.
Approved staff, rates, tasks and messages
Under Approved Staff, each person is a row with their rate ① and status; click it to open the details. There you set their Hourly rate ④ (leave it empty for an unpaid helper, shown as Volunteer), give them Tasks and write to them. Add a task with a title and an optional due date; the person is notified, and you move it between Pending and In Progress with the menu ②. Once a task is Completed it shows only its badge. Use Add Task ③ for the next one. Send Message ⑤ writes to this person; Remove from Event ⑥ takes them off the team. At the bottom, Broadcast sends one message to every approved staff member of the event.
123456The approved staff list with Jonas Klein opened: tasks, rate and message
Messages
The Staff Messages tab is your inbox for this event. Conversations you started and replies to them appear at the top ①, newest first, with a mark when something is unread. Under Sent Messages you see each message you sent and how many recipients have read it ②. Open a conversation to read it and reply.
12The Staff Messages tab with one conversation and the sent list
Shift swaps
When a staff member asks to hand a shift to a colleague, the request appears on the Shift Swaps tab with the shift, who asks, who would take it and their reason. Approve ① moves the assignment to the colleague, unless they already work an overlapping shift; Reject ② keeps things as they are. Both people are told. The status badge ③ shows what is still pending.
Capacity — how many people a shift holds. Assigning stops once it is full, and the shift shows as full.
Hourly rate — empty means unpaid. Payroll includes only people with a rate.
Role (on invite) — a free-text label shown on the invitation and the team entry. It grants no permissions.
Location — free text on the shift card, useful for several check-in points.
Shift status — Open, Closed or Cancelled. Full is set automatically when the last place is taken.
Good to know
Staff here are not the same as volunteers. People with no rate are labelled Volunteer on this page, but they are still staff accounts; the Volunteers module has its own roster, invitations and rota.
There is no Suspend button here. Remove from Event takes the person off this event only, frees the shifts they have not started yet and tells them. Hours they already worked stay on record and can still be paid.
A person cannot be assigned to two shifts that overlap, and a staff member suspended by an administrator cannot be assigned at all.
A staff invite that nobody accepts simply expires after 7 days. Cancel it and send a new one, or use Resend.
Seeing and working on this page needs the Staff permission; shift actions need the Shifts permission; payroll needs permission to edit the event. A team member without one of them gets a 403 for that action.
Troubleshooting
A person is missing in the assign list — only approved staff are offered. Check Pending Applications.
“This shift is not open” — set the shift back to Open with its status menu.
Check In gives a message about the time — check-in opens two hours before the shift and closes four hours after it ends.
Someone’s hours never show up in payroll — they were never checked out, or they have no rate. Ask them to check out from their own page.
The invitation link says it is invalid — it expired or was cancelled. Use Resend.
Event Vendors tracks the outside suppliers working your event — caterers, sound and light, photographers — from the first assignment through tasks, contracts and invoices to a review after the event. Open the event, then Team & Partners → Vendors. Vendors are separate businesses with their own EventMann account and vendor portal: you assign them here, and they answer, sign and invoice from their side.
What you can do here
Assign a vendor from the vendors an administrator has approved, with an optional service and an agreed fee.
Give a vendor tasks with a due date and follow them to completion.
Issue a contract that the vendor signs online, and read the signed copy.
Approve and pay invoices the vendor submits.
Review the vendor after the event.
Remove a vendor from the event.
Assign a vendor
Open the Assign Vendor box at the top and choose the Vendor ①. The list is searchable and shows the company name with the contact name. Only vendors whose profile is complete and approved by an administrator appear. A vendor who has marked a day of this event as unavailable in their calendar carries “Not available on …” with the dates; you can still assign them, for example when they have told you they will make an exception.
Optionally pick a Service ②: the list shows each approved vendor’s active services, grouped under the vendor’s company name. Pick one of the vendor you chose on the left; a service of another vendor is refused. Leave No specific service for an assignment without one.
Optionally enter the Agreed Fee ③ in the event’s currency. It is a reference figure for you and the vendor; nothing is charged.
Click Assign Vendor ④. The vendor is told, and the assignment waits as an invitation.
Each assigned vendor is a row with their company name, status, agreed fee and a small arrow that opens the details. A vendor who has not answered shows Awaiting response ⑤ next to the status Invited; they accept or decline from their own portal, and the status becomes Confirmed or Declined. A vendor can be assigned to an event only once.
12345The Assign Vendor box and three assigned vendors, one still waiting for an answer
Work with one vendor
Click a vendor’s row ① to open it. Three columns appear: Tasks, Invoices and Contracts, with the Performance Review underneath.
Tasks — type a title ③, optionally a date, and click + Add Task. Move a task between Pending, In Progress and Completed with its menu ②. A completed task cannot be reopened, and shows only its badge. The bin deletes a task.
Invoices — the vendor submits them from their portal; you see the number, the total and the status. Once there is an invoice, a Pay to block underneath shows the bank details the vendor saved (account holder, IBAN, BIC, bank) — the same ones printed on their invoice PDF. Approve ④ moves a Submitted invoice to Approved; Mark Paid then records that you have paid it. An invoice has to be Submitted before you can approve it and Approved before you can mark it paid.
Contracts — each contract is a row ⑤ with its status; View opens it. To issue a new one, give it a title, write the full terms and optionally pick an expiry date after today, then click Issue Contract ⑥. It is sent to the vendor at once.
Performance Review — choose a rating of 1 to 5 stars ⑦, add an optional comment and click Submit Review. There is one review per vendor and event; Edit review changes it later.
Remove Vendor at the bottom takes the vendor off the event after a confirmation.
1234567One vendor opened: tasks, an invoice waiting for approval, a signed contract and the review
Read a contract
View opens the contract page: the terms as you wrote them, when it was sent, when it expires, and — once the vendor has signed — the date, the address the signature came from and the signature itself. A contract that the vendor has not signed shows “Waiting for the vendor to sign” and offers Cancel contract; the vendor can then no longer sign it, and this cannot be undone. A contract that expired unsigned says so.
A signed contract with its dates and the drawn signature
Settings explained
Agreed fee — informational only. It is not charged and not paid by EventMann.
Service — one of the chosen vendor’s active services, optional.
Contract expiry — optional, must be after today; empty means the contract does not expire.
Vendor status — Invited, Confirmed, Declined or Cancelled. The vendor changes it from their portal.
Not available on … — shown in the vendor list and on an assigned vendor’s row when the vendor blocked a day of this event in their own calendar. It is a warning from the vendor, not a lock. A vendor’s public profile lists their marked periods too, and shows you which of your upcoming events clash.
Good to know
EventMann does not move money between you and a vendor. Mark Paid is your record that you have paid the invoice.
A signed contract can never be cancelled. A contract that is Sent or has expired can be.
Who can do what: assigning vendors, tasks, reviews and removal need the Vendors permission; approving and paying invoices and issuing or cancelling contracts have their own permissions, so a team member may see an invoice and still not be able to approve it.
Troubleshooting
A vendor is missing from the list — their profile is still pending, was suspended, or is incomplete. An administrator approves vendors; you cannot approve them yourself.
The service is refused — it belongs to another vendor than the one you chose. Pick one listed under that vendor’s name, or none.
The vendor stays on Awaiting response — the vendor has not answered in their portal. Ask them to check their notifications, or remove and reassign them.
Approve or Mark Paid does nothing — the invoice is in the wrong status. It must be Submitted to approve and Approved to mark paid.
Cancel contract is missing — the contract is already signed or cancelled.
Sponsorships have two pages under Sponsorships in the event’s Manage menu. Sponsor Packages is where you define what a sponsor can buy; Manage Sponsors is where applications arrive, get approved, are paid for, tracked through deliverables and completed. EventMann takes no commission on sponsorship — the agreement and the money are between you and your sponsor.
What you can do here
Create sponsorship packages with a tier, a price, a cap on how many sponsors can buy it and a list of what the sponsor gets.
Show the packages on the event page so visitors can see what sponsoring costs.
Record a sponsor you already have, one who agreed with you offline and has no EventMann account.
Approve or reject applications from sponsors who found your event.
Take payment through a payment invoice, or record a payment you received yourself.
Track deliverables such as the logo and the signed agreement, and message the sponsor.
Complete a sponsorship once everything required is done.
Sponsor packages
The Sponsor Packages page shows your packages as cards, ordered Platinum, Gold, Silver, Bronze and then custom ones. Each card has its price, how many sponsors it has against its maximum (“1 sponsors / 1 max”), the benefits you listed and the benefit tags you ticked. The tick box at the top ② controls whether the packages appear on the public event page: when it is on, visitors see what it costs to sponsor the event and how to enquire. If no active package is attached to the event, the page says nothing will show yet. Create Package ① starts a new one, Edit ④ changes it and Deactivate ⑤ takes it off sale — sponsors can no longer see or apply for it, nothing already agreed is affected, and Activate brings it back. A package that already has sponsors cannot be deleted; deactivate it instead.
12345The Sponsor Packages page with four packages, the event page option and the actions on a card
Create a package
Click Create Package.
Type the Package Name ① (up to 120 characters).
Choose the Tier ②: Bronze, Silver, Gold, Platinum or Custom.
Write a Description in the editor.
Enter the Price ③ and pick the Currency.
Set Max Sponsors ④, or leave it empty for no limit. When the maximum is reached, the package stops being offered.
Under What the sponsor gets tick every benefit the package includes ⑤. The list is the same on every event on EventMann, which lets sponsors compare tiers side by side. It is grouped into brand visibility, on-site presence, access and hospitality, programme and more.
Use Anything else for items the list does not cover. Sponsors see these but cannot compare them.
Check the Package Preview on the right and click Create Package.
12345The Create Package form with tier, price, maximum and the benefit list
The sponsors list
The status chips along the top filter the list and carry a count: All, Pending ②, Approved, Active, Completed, Rejected, Expired and Cancelled. Each row shows the sponsor, the package and its tier, the amount with its payment status, a progress bar of the deliverables and the date. The buttons change with the status:
Pending — Approve ③ and Reject.
Approved (waiting for payment) — an amount field with Mark Paid ④.
Active — Complete ⑥.
Approved and Active rows also show Deliverables ⑤ and two tick boxes, On event page and On tickets, which decide where the sponsor’s name and logo are shown. Every row except a rejected one has Message, with a red number for unread messages.
Rejected — the reason you gave, in quotes.
123456The sponsors list with a pending application, two approved sponsors and an active one
Approve an application and take payment
Open the Pending chip and read the application. To decline, click Reject, optionally write a reason (it is shown to the sponsor) and confirm.
Click Approve ③. The sponsorship becomes Approved and the sponsor gets 14 days to pay. Three required deliverables are created: the logo, the signed agreement and the payment. If the application came with a logo, the logo deliverable is ticked straight away, in the sponsor’s name. The sponsor is told by notification, and by email if their notification settings allow it.
If your Stripe account is connected and the sponsor has an email address, EventMann also sends them a Stripe invoice from your account, due in 14 days. When they pay it, the sponsorship becomes Active by itself and its Payment deliverable is ticked. Without a connected account, a manual payment record is created instead.
If the sponsor pays you another way, enter the amount in the field next to Mark Paid ④ — it starts with the agreed amount — and click the button. The sponsorship becomes Active and its Payment deliverable is ticked in your name.
Work through the Deliverables (see below) and click Complete when all required ones are done.
Record a sponsor you already have
A local bank, a neighbourhood association or a shop that agreed with you in person has no account. Click Record a sponsor above the list.
Enter the Company or organisation ① and, optionally, the Website.
Enter the Agreed amount ② and optionally choose the Package ③ it belongs to.
Upload the Sponsor Logo ④ (JPG, PNG or WebP, up to 2 MB). Without it the sponsor shows as text only.
Tick Already paid ⑤ if you have the money. Choose where they appear: On event page (on by default) and On tickets ⑥.
Add internal notes if you like, then click Record sponsor.
No account is created and nobody is emailed. The sponsorship starts as Approved with no payment deadline, because there is no application to wait for, and with its three deliverables; if you ticked Already paid or uploaded a logo, the matching deliverables are ticked for you and a paid sponsor becomes Active at once.
Deliverables opens the checklist of one sponsorship, with a progress bar. Each line has a type, a due date, a status and Mark Complete ① and Delete ② buttons. Required lines carry a red Required badge. To add one, enter the Title ③, choose the Type ④, optionally a due date and description, tick Required ⑤ if the sponsorship cannot be completed without it, and click Add Deliverable ⑥.
123456The deliverables of the Gold sponsor with one completed line
Two types tick themselves, so you do not have to chase work that EventMann has already seen done:
Logo Upload — when the sponsor uploads or replaces their logo on My Sponsorships (or sent one with the application), the line shows Completed by with the sponsor’s name.
Payment — when Stripe reports the sponsorship invoice paid, the line shows Completed automatically; when you click Mark Paid, it shows your name.
Every other type — a banner, the signed agreement, a social post, a stage mention — stays with you, because it happens outside EventMann. An automatic tick never unticks anything and never overwrites a line you already completed.
Messages
Message opens a conversation with the sponsor. Both sides see it, new messages appear without reloading, and the sponsor is notified when you write. Type in the box ① and click Send ②.
Recording a sponsor yourself — the sponsorship is created already approved, with no payment deadline and no application. Its deliverables are ticked where the information you entered already covers them.
Max Sponsors — leave it empty for unlimited; once reached, the package is no longer offered.
Benefits — a record of what you promised the sponsor. EventMann does not automatically place a banner or a stage mention for you.
On event page / On tickets — where the sponsor appears. Logos on tickets also need Show sponsor logos on tickets to be on in Ticket Design.
Good to know
An approved sponsorship that came in as an application and is not paid within its 14 days expires: an hourly check moves it to Expired. A sponsor you recorded yourself has no deadline and never expires.
You can only complete an Active sponsorship, and only when every required deliverable is complete. Otherwise the page says the deliverables block it.
Mark Paid accepts an amount of up to twice the agreed one, as a guard against typing errors.
Sponsor logos appear on tickets from sponsorships that are Active or Approved and have On tickets ticked, at most five of them.
Permissions: viewing needs Sponsorships view, editing (approving, recording, paying, deliverables) needs edit, creating and deleting packages their own permissions, and writing messages needs the messages permission.
Troubleshooting
Complete shows an error — a required deliverable, usually the signed agreement or the logo, is still open.
The sponsor uploaded a logo but the line is still open — only a deliverable of type Logo Upload ticks itself. A logo request added as Other or Banner Upload needs your tick.
A sponsorship disappeared from Approved — it expired after 14 unpaid days. Look under Expired.
Mark Paid is missing — the sponsorship is not Approved. A pending application must be approved first; an Active one is already paid.
The sponsor is not on the event page — On event page is not ticked, or the sponsorship is not yet approved.
A package cannot be deleted — it has sponsors. Deactivate it.
Staff Payroll turns the hours your staff worked into pay you owe them: it collects the checked-out shifts of a date range into a pay period, adds overtime, lets you add bonuses and deductions, and walks the period through a fixed review before you export it. Open the event, then Team & Partners → Manage Staff → the Payroll tab. It covers Event Staff only; volunteers are unpaid and never appear here. EventMann prepares the figures and the export; it does not transfer any money.
What you can do here
Generate a payroll period for a date range from the shifts that were worked.
Add a bonus or a deduction to one line while the period is still open.
Lock, approve and mark as paid to record your review.
Export the period as a CSV file.
Delete a period that is still open or locked.
The pay periods
The Payroll tab lists the periods of the event, newest first, each with its dates, its number of line items, its status and its total pay and hours. Generate Payroll ① starts a new one. A period that is still Open ② can be edited and deleted; a Paid ③ one is closed for good.
EventMann takes every shift of this event in the range where the staff member checked out and has recorded hours. If nobody qualifies, no period is created and you are told why. If some people were left out because they have no hourly rate, the new period opens with a warning naming them.
How pay is calculated
Only completed shifts count. A shift that was never checked out is skipped, not paid as zero.
People with no hourly rate are skipped too. Set a rate on their entry under Manage Staff first if you want to pay them.
Within one shift, the hours up to the overtime threshold are paid at the agreed hourly rate, and the hours beyond it at the rate times the multiplier.
Base pay and overtime pay add up to the line’s total. A bonus you add goes on top and a deduction comes off. The total of the period is the sum of its lines.
The hours on a line are what the staff member recorded when checking out, capped at the length of the shift plus a two-hour allowance, so a forgotten check-out cannot book days of pay. The amounts use the currency of the event.
Review a period
The period page shows four figures — the line items, the total hours, the total pay and the number of staff — and one table with a line per shift worked: the hours, the rate, the base pay, any overtime, the bonus, the deduction and the total. Open periods offer Lock Payroll ①, and every period offers Export CSV ②. The Overtime column ③ shows the hours beyond the threshold, their rate and the pay, and the Bonus column ④ shows what you added. Edit ⑤ on a line changes its bonus and deductions.
12345An open period with an overtime line and a bonus
Add a bonus or a deduction
In an open period, click Edit on the line.
Enter a Bonus ① or Deductions ② as a positive number.
A period moves in one direction only: Open → Locked → Approved → Paid.
Lock Payroll recalculates the totals one last time and stops further edits.
Approve Payroll (only on a locked period) records who approved it and when.
Mark as Paid (only on an approved period) records the date. It is a record for your books: EventMann does not pay anybody, so make the transfers yourself first.
Export CSV downloads the lines with the name, event, shift, date, hours, rate, base pay, overtime hours, overtime pay, bonus, deduction and total pay.
Settings explained
Period From / Period To — the shift dates to include. A range overlapping an existing period of this event is refused.
Overtime after (hours per shift) and Overtime multiplier — per run. The values you enter are kept on the lines, so changing them later does not affect an existing period.
Bonus / Deductions — per line, editable only while the period is Open.
Good to know
Deleting is possible only while a period is Open or Locked, and it removes all its lines; an Approved or Paid period cannot be deleted.
Shifts worked before somebody was removed from the event stay payable.
Payroll needs the permission to edit the event. A team member without it cannot see this tab.
Troubleshooting
A staff member is missing from the period — they never checked out of the shift, the check-out recorded no hours, or they have no hourly rate. The warning after generating names the people skipped for a missing rate.
“No completed shifts were found in this date range” — no shift in the range has been checked out yet. Pick another range, or ask staff to check out.
“Nothing to pay: every completed shift in this range was worked by a team member with no hourly rate” — set their rates on the Manage Staff page and generate again.
“A payroll period already exists for this date range” — another period of this event already covers part of the range.
Edit is missing on a line — the period is no longer Open.
Approve does nothing — a period has to be Locked first, and Approved before it can be marked Paid.
My Venues is your portfolio of physical spaces, separate from any one event. Create a venue once, describe its zones, services and packages, and reuse it for your events; once an administrator has approved it, other organizers can find it and ask to book it. The same area lets you browse other organizers’ venues and send booking requests. Open it under Work → Venues in your organizer sidebar. Its two tabs are My Venues and Venue Requests (the requests you have sent).
What you can do here
Create a venue with address, capacity, timezone, photos, amenities and a registration reference.
Draw the zones and seats in the venue designer.
Block dates when the venue is not available.
Offer services and packages that other organizers can request.
Browse other venues and send a booking request.
Answer requests for your own venue and follow the requests you sent.
Your venues
The list shows each venue with its place, the date it was created, its capacity and a status badge. Create Venue ① adds one. Browse Venues ② switches to venues of other organizers. The badge ③ tells you what other people can do with the venue: Listed and accepting bookings, Awaiting review, not listed yet, Inactive, hidden by you or Rejected, not listed. View ④ opens the venue page, Edit changes it and Delete removes it. Requests you have sent are on the Venue Requests tab ⑤.
12345My Venues with a listed, a pending and an inactive venue
Add a venue
Click Create Venue.
Enter the Venue Name ① (required) and a description.
Fill in the address, city and country, the Timezone (required) and the Capacity ②. Add the website if you have one.
Enter the Business / venue registration reference ③: proof that you operate or are authorised to list the venue. It is checked by an administrator before the venue goes public, and it is not shown publicly.
Add Amenities ④ one by one: type a tag such as “Stage” and click Add. The first few appear on the venue’s card.
Add up to twelve Photos ⑤ (JPG, PNG or WebP, 5 MB each).
Leave Active ⑥ ticked to be listed once approved, or untick it to hide the venue for now. Click Create Venue.
A new venue starts in Pending review. Administrators are told, and you are notified of their decision. If a venue is rejected, the reviewer’s note is shown on its page. Rejected is checked first, then pending, then your own Active switch: an administrator’s decision always wins.
The venue page shows the facts, the amenities, the zones and an availability calendar, which colours blocked days red and days with an event at the venue violet (the first and last day included, so a one-day event shows too). The buttons at the top open the designer ①, the services ② and the packages ③ of the venue, and Edit. Manage Zones ④ leads to the designer. If the venue is not listed, a notice at the top says why.
To block dates, choose Blocked From ⑤ and Blocked Until (date and time), optionally write a reason and click Block Dates ⑥. Under Blocked Periods each block has a Remove ⑦. A block does not cancel anything already scheduled. It stops a booking request for those dates from being approved and shows up when you check the venue’s availability for an event.
1234567The venue page with zones, availability and blocked periods
Design the zones and seats
The designer is for events with assigned seating. In Add Zone give the zone a Name ①, a Type ② — Standing Area, Seated Section, Stage, Backstage, VIP Area or General Admission — a colour ③ and, optionally, a capacity, then click Add Zone ④. Each zone is a card on the left. Open it to rename it, to Generate a grid of rows and seats per row (rows are lettered A, B, C and seats numbered; generating again replaces the existing seats, after a warning, and is refused if the grid is larger than the zone’s capacity) or to delete the zone. Drag a seat ⑤ to move it; every move is saved at once.
Services are what you can add to a booking. Add Service ① asks for a name, one of eight categories (Catering, AV / Tech, Decor, Staff, Furniture, Parking, Photography, Other), a pricing type (Flat Rate, Per Person, Per Hour or Custom / Quote), a base price (in your account’s currency, which the form names) and optionally a maximum capacity. An activate/deactivate switch on each card hides a service without deleting it.
A package bundles services for one price. Add Package ① is offered once the venue has at least one active service. Choose the services and quantities, see the total of the parts and set the package price; if it is lower, the card shows the saving. The package list has Services ② as a shortcut back.
On Browse Venues, search ① by name, city or country and click Search ②. Only venues that are active and approved appear, never your own. A card shows the photo, capacity, place, the owner, amenities and two links: View ④ and Book Venue ③.
Choose From Date ① and Until Date (today or later; the end after the start).
Optionally link one of your own upcoming events ② and enter the Expected Guests ③.
Optionally choose one of the venue’s packages, or tick individual services.
Write a Message to Venue ④ and click Submit Booking Request ⑤.
If the dates already clash with something at the venue, you are warned but can still submit; the owner has to resolve it before approving. You cannot request your own venue.
The Venue Requests tab lists the requests you sent, with their dates, status, price and the venue’s response. Click Browse Venues ① to send another. A pending or approved request has Cancel ②; cancelling tells the venue owner and, if the request had set the venue on your event, takes it off again. When a request is Completed you can leave a star rating and a comment with Submit Review ③. The review is published at once and cannot be edited.
123The requests you sent, with a review form on the completed one
Requests for your venue
When another organizer asks to book your listed venue, you are notified and the request appears on the venue’s Booking Requests page (the amber Booking Requests button on the venue page, shown to the venue’s owner), with counters for pending, approved and total requests and a filter by status. Approve Request ① takes you to the details where you confirm the total price, an optional deposit and a message; approving is refused if the dates clash with a blocked period, another approved request or an event at the venue. Decline Request ② opens the request’s page at its decline form, where you write the reason that goes into the decision email to the requester, Mark as Completed ③ closes an approved one after the event, and View Details ④ shows the request, its services and the pricing. When a deposit is set, Mark deposit received records it. Approving a request that names an event which has no venue yet sets this venue on that event. The venue-owner pages of EventMann cover the same screens in more depth — see Booking requests.
Business / venue registration reference — optional text that supports the administrator’s approval. It is shown only to administrators.
Active — your own switch. A venue is listed for other organizers only when it is both active and approved.
Availability block — a date and time range with an optional reason. It does not cancel bookings; it prevents approvals and appears in availability checks.
Amenities — free-text tags. The first three appear on the cards of the Browse list.
Good to know
Choosing a venue for one of your own events is done on that event’s Venue & Seating page under Manage. It offers the active venues you own, and venues you hold through an approved or completed booking request.
Deleting a venue detaches it from your events, which keep their data, and removes its zones, services, packages, availability, requests and reviews.
You need the Venues permission to see the list, and its create permission to add a venue.
Troubleshooting
My venue does not show for other organizers — it is awaiting review, was rejected, or you have it switched inactive. The badge in the list says which.
I cannot request my own venue — that is expected. Assign it from the event’s Venue & Seating page.
Add Package is missing — the venue needs at least one active service first.
Generating a seat grid is refused — rows times seats exceed the zone’s capacity. Raise the capacity or use a smaller grid.
Approving a request is refused — the dates clash with a blocked period, an event or another approved request. Decline it or resolve the clash first.
Event Reminders sends a scheduled email and/or in-app notification to attendees, staff, or both, timed relative to when your event starts or ends — useful for last-minute logistics or a short thank-you. Find it under Marketing → Attendee comms, on the Reminders tab. For a full, designed follow-up with photos and a poll, use After-the-event follow-ups instead. Anyone who can view the event can see the list; creating and changing reminders needs permission to edit it.
What you can do here
Create a reminder — choose when it fires, who receives it, and how.
Edit an existing reminder inline, or send yourself a test copy.
Enable or disable a reminder without deleting it.
Delete a reminder.
See who it reached — after it runs, a summary shows the email and in-app counts and a sample of recipient addresses.
123456The Reminders tab: the Create Reminder form above three scheduled reminders
How to schedule a reminder
Pick a Trigger ①: Hours before, Days before, Day of event or Hours after.
Enter the value, e.g. 24 for "24 hours before" — ignored for "day of".
Choose the Audience ② — Attendees, Staff, or Everyone.
Choose the Channel ③ — Email, In-App, or Both.
Write the Email Subject and Message in the editor. Switch on Attach each attendee’s tickets ④ if you want the tickets with it.
Click Save Reminder ⑤. Under Scheduled Reminders, Send me a test ⑥ sends a copy to your own address first.
Settings explained
Trigger value — accepts 1 to 720 (up to 30 days); required for every trigger type except "day of".
Audience: Attendees — everyone with a confirmed booking, honoring each account holder's email-reminder preference; guest bookings with no account always receive it since there is no preference to opt out of.
Audience: Staff — every active team member for this event, plus you as the organizer.
Channel: Both — sends the email and also raises an in-app notification with the notification-bell counter.
Attach each attendee’s tickets — every order gets its own tickets with the email, generated fresh with your current ticket design and sponsors. Staff and other recipients without an order get the email without tickets.
Good to know
Attendees automatically get a reminder 24 hours before the event. If you add your own attendee email for 12 to 36 hours (or 1 day) before, yours replaces the automatic one, so nobody gets two.
A reminder fires exactly once. After it has sent, re-enabling it will not send it again — create a new reminder if you need another round.
Reminder emails go out at a steady pace rather than all at once: by default 200 an hour, which you can change under Settings → SMTP & Mail → Reminder sending pace. They always finish before the event starts, sending faster if they have to.
EventMann can also send its own automatic reminder 24 hours before the event. It is off unless you switch it on under Details & dates, and a reminder of yours for about the same time replaces it. It carries their tickets (switch that off under Details & dates) and your event rules, which you write once under Details & dates → Event rules & what to know.
Staff and other recipients without a booking receive a standalone reminder email rather than the ticket-table layout attendees with a booking see.
Troubleshooting
The sent summary shows 0 recipients — for Attendees, there may be no confirmed bookings yet, or everyone opted out of reminder emails; for Staff, check whether any team members are marked active.
A reminder never fired — either the event's start or end time has already passed the trigger window, or it already ran once before (see above).
I edited a reminder but the old message still went out — edits only affect runs that haven't fired yet; a reminder that already ran won't re-send with the new text.
Translations adds your event’s content in more languages, so visitors who browse EventMann in German, French or another language read your title, description, ticket names and checkout questions in that language instead of your original text. Open the event, then Event Setup → Translations. Your original text is what visitors see in English and in every language you have not translated, so this page adds the other languages only.
What you can do here
Translate the event: the title, the description and the confirmation message shown after booking.
Translate every ticket type: its name and description.
Translate every checkout question: its label and placeholder.
Draft a translation with AI, then review it and save, when AI features are available to you.
Delete a translation of one language.
Add a translation
Choose the language tab, for example Deutsch ①. A green dot after a language means a translation is already saved for it. The tabs offer the languages EventMann is published in other than English, which is your original text — Deutsch, Français, Español, Italiano, Nederlands, Português, Polski, Čeština, Dansk and Svenska — and you can scroll the strip sideways to reach the last ones.
Optionally click Translate to Deutsch ③ in the purple bar to have Claude AI draft the fields from the event’s text. This only fills the form: nothing is saved until you click Save Translation, and it overwrites what you had typed in fields it translates. The bar is missing when AI features are not available to you.
Fill in the Title ④. It is required.
Write the Description in the editor and the Confirmation message shown to attendees after a successful booking.
Translate the Ticket types and the Checkout questions further down.
Click Save Translation. The tab gets its green dot and the line below the button reads “Deutsch translation saved”.
1234The language tabs, the AI bar and the title field of the German tab
The fields
The Title ① (up to 255 characters) is required. The Description is a rich-text editor; leave it empty and visitors in that language see your original description. The Confirmation message ② (up to 5,000 characters) replaces the confirmation text of your checkout settings for that language. Each ticket type shows its original name and price; type the translated Name ③ (required) and Description ④.
1234The German translation with its title, description, confirmation message and ticket types
Further down, each checkout question has a Label ① and a Placeholder ②. Click Save Translation ③ when you are done. Delete Deutsch translation ④ removes the translation of that language after a confirmation: the event text, all its ticket-type texts and all its question texts for that language go with it, and this cannot be undone.
1234Checkout questions, the Save Translation button and the delete link
Settings explained
Title — the only required field of the event itself.
Ticket type name and question label — also required, but prefilled with your original text, so you only change what you want to translate. An item you leave as it is is saved as a copy of the original.
Descriptions, placeholders and the confirmation message — optional. Left empty, the visitor sees your original text for that field.
Options of choice questions — cannot be translated here; they stay in your original wording.
Where visitors see a translation
On the public event page: the title and the description.
At checkout: ticket names and descriptions, and question labels.
After booking: the confirmation message.
In the language switcher and the search-engine language links of the event page: the event is offered in your original language and in each published language you have saved a translation for, and in no others.
Not everything follows the visitor’s language yet: event cards in listings and search, the browser tab title, the ticket list on the event page itself (it uses your original ticket names; the translations show at checkout), checkout question placeholders, emails and the ticket PDF keep your original text.
Good to know
Everyone with the Settings view permission can open the page; saving and deleting need the permission to edit the event. A team member who lacks it gets an error when saving.
Languages that EventMann has not published (Japanese, Turkish and Chinese) are not offered, and cannot be saved. Translations saved earlier in such a language stay hidden.
The AI draft uses your event’s stored text as its source and sends the title, description, confirmation message, ticket types and questions in one request. Check every field before you save. A very long event may still be too much for one request; the bar then shows an error and nothing is filled in. The AI bar appears only when AI is switched on for the platform and for your account and a key is available.
Copying an event copies its translations with it.
Troubleshooting
Saving does nothing — a required field is empty: the title, a ticket name or a question label. Fill it in and save again.
Visitors still see my original text — no translation is saved for their language, or they are looking at a place that does not use translations (see above).
The Translate button is missing — AI features are not switched on for your account, or the platform has no key.
A language is missing from the tabs — it is not published on EventMann.
Ticket Design controls how your tickets look: the style, layout, colours and font, which details are printed, your logo and your sponsors. One renderer produces both the PDF an attendee downloads and the PDF attached to the confirmation email, so what the live preview shows is what is delivered. Open the event, then Tickets & Pricing → Ticket Design. You need the permission to edit the event.
What you can do here
Pick a style and layout, or start from one of six quick themes.
Set colours and typography and the language of the labels on the ticket.
Show or hide the date, venue, ticket type, category, price, attendee name, booking reference and ticket ID.
Add your logo, a background picture and your organizer branding.
Add sponsors and partners with their logos and a position.
Give one ticket type its own design.
Preview live and download a sample PDF.
The page
The settings are in collapsible panels on the left; the live preview of a ticket stays on the right and redraws a moment after every change. Design for ① at the top chooses what you are editing: All ticket types or one ticket type. The Style & Layout panel starts open. Quick themes such as Midnight ② set style, colours, layout and font in one click. Pick a Style — Modern, Minimal, Dark or Gradient ③ — and a Layout — Standard, Compact, Badge ④ or Mobile (one ticket per phone screen with a large centred QR code). Save Design ⑤ stays at the bottom of the page. The preview ⑥ uses sample data, so you do not need a real booking.
123456The Ticket Design page with the style and layout choices and the live preview
Colours, font and language
Open Colors & Typography. Choose Primary ① and Accent with the colour pickers; Background appears only for the Modern and Minimal styles, because Dark and Gradient have their own. A yellow warning shows when the contrast makes the ticket hard to read. Typography offers Sans-serif ②, Serif and Monospace. Ticket language ③ sets the language of the labels printed on every ticket, in the email and the download alike — it does not follow the buyer’s browser, so all copies of a ticket read the same. If you never set it, the event owner’s language is used.
Open Ticket Content to switch details on or off: Show Date ④, Show Venue / Location, Show Ticket Type, Show Category Badge, Show Price ⑤ (which also hides the discount-code line), Show Attendee Name (it prints the email under the name), Show Booking Reference and Show Ticket ID. Under the date and venue switches, Location text, Date text and Time text let you print your own words instead of the event’s details; leave them empty to use the event’s own. Edit these copies the real values into the fields, and Use event details clears them again.
12345The Colors and Typography and Ticket Content panels, open, beside the preview
Logo, background and organizer branding
In Event Logo, Show event image ① prints the banner photo at the top of the ticket (your event image, or the category artwork when you have none; never for an online-only event). Upload Logo ② takes a JPG, PNG or WebP of up to 2 MB, and offers two colours taken from it to apply. Upload background ③ fills the whole ticket with a picture (also up to 2 MB); the Readability veil ④ lays a white layer over it, from 0 (off) to 100 per cent, 35 by default, so the text stays readable.
1234The Event Logo panel with the logo, background and veil options
In Organizer Branding, choose a Display Mode ① — Logo Only, Logo + Text, Text Only or Hidden — and a Display Name ② of up to 100 characters. Left empty, the name is your company name from your profile, else your account name. Add an Organizer Logo and choose its Position ③: above or below the event information in the header, or above or below the footer text.
The Sponsors panel has the switch Show sponsor logos on tickets ①, a Display mode ② (Logo Only, Logo + Text, Text Only) and a Logo Position: the four header and footer positions or Sidebar ③ next to the QR code. Sponsored by lists the sponsors who qualify automatically: those whose sponsorship is Active or Approved and has On tickets ticked in Event Sponsors, at most five. Add Sponsor ④ under Additional Sponsors adds one who is not on EventMann: a name and a logo of up to 1 MB (JPG, PNG or WebP), one per save. The Partners panel works the same way for co-organizers, media partners or venues, with an extra website field; it is off by default.
1234The Sponsors panel with the position choices and one sponsor from Event Sponsors
Footer, QR code and size
In Footer & QR you can write a custom footer of up to 200 characters; the year is added after it. Show QR label prints “Scan at the door” under the code, and QR code size is Small, Medium or Large. Ticket size offers an A4 sheet, an A6 landscape ticket and a 7 × 3 inch pass with or without a bleed for printers, and Spacing is Compact, Standard or Roomy. The QR code itself is always printed, and the footer always names you, the organizer, as the issuer, next to the small EventMann mark of the platform the ticket was sold through.
Give one ticket type its own design
Choose the ticket type under Design for ①. The page reloads for that type.
Change the style ②, the layout ③ and anything else.
Click Save Design ④. The ticket type now carries a full design of its own and shows Custom design in the list.
A ticket type without a design of its own follows the event’s design. When you save the event default, a notice lists the types that have their own design and are not changed. Once a type has its own design, later changes to the event design do not reach it, and there is no button that returns it to the default.
1234The design of the Volunteer thank-you ticket type: dark style, compact layout
Settings explained
Design for — the event default, or one ticket type with a design of its own.
Display Name — overrides the organizer name printed on the ticket.
Show sponsor logos on tickets / Show partners on tickets — when off, no such section is drawn at all.
Logo files — JPG, PNG or WebP. The logo, organizer logo and background may be up to 2 MB, sponsor and partner logos up to 1 MB. SVG is not accepted.
Ticket language — one of the eleven languages EventMann is published in.
Good to know
The download and the email attachment use the same design, and an order of several tickets arrives as one PDF with a page for each.
Only the Standard layout honours every position for organizer branding, sponsors and partners. Compact, Badge and Mobile place them in a fixed spot.
Clicking the Modern, Minimal or Dark style card also resets the background colour to that style’s own.
Download sample produces a PDF of the last saved design; only the live preview shows edits you have not saved yet.
Duplicating an event, or saving it as a template, keeps the design but drops the date, time and venue texts you typed.
Chinese, Japanese, Korean, Thai and Latin, Cyrillic and Greek text print correctly. Arabic, Hebrew and Indic scripts print with the right glyphs; with the simple renderer, the joining and the positioning of marks can look slightly off.
Troubleshooting
My logo is rejected — the file is not a JPG, PNG or WebP, or it is too large. The form shows an error rather than skipping the picture.
A sponsor does not appear on tickets — its sponsorship must be Active or Approved with On tickets ticked, and Show sponsor logos on tickets must be on here. Only five are printed.
The sample PDF does not show my change — save the design first; the sample uses the saved one.
One ticket type looks different from the others — it has its own design. Choose it under Design for to edit it.
The event image is missing — Show event image is off, or the event is online-only.
A membership is a paid pass you sell to your own audience for a fixed term, separate from event tickets: a season pass, a supporter tier, a family card. Members can get early booking, member prices, members-only tickets and free tickets. Everything is managed in one place, Grow → Membership in the organizer sidebar, and people buy from the Membership section of your public organizer page.
What you can do here
Create plans with a price, a term and benefits — see Membership Plans.
The status pill Selling memberships ① means your plans are visible and can be bought. If it is missing, an amber box names the reason and links to the fix (see below).
The figures strip ② is worked out each time you open the page: Active members (people, not rows), New this month, Expiring in 30 days, Renewals (purchases by someone who already held a membership with you), Collected (what members paid, not counting memberships you refunded and ended) and Coupon uses.
The tabs Plans ③, Members ④, Coupons ⑤ and Settings hold the four areas of work; the number beside each tab is a count.
Each plan is a card ⑥ with its price, benefits, members and spots. Use New plan at the top to add another, and Public page to look at your shop window.
123456Grow → Membership: status, figures, tabs and plan cards
What members see
On your public organizer page the Membership section shows one card ① per plan that can be bought — with its price, its benefits and a Become a member button — and, for a plan with a member limit, how many spots are left ②.
If you switched on Public member count, the page also shows how many members you have.
12The Membership section of the public organizer page
How billing works
A membership runs for a fixed term — a month, a year, or a season you set — and then ends. There is no automatic renewal: nothing is charged again, and it is not a subscription. The member renews by buying again; an early renewal starts when the current term ends, so no days are lost.
Members get a renewal email 14 days and again 7 days before the term ends (each sent once, and not to someone who has already renewed), and one email after it has lapsed. A membership stays active for 7 days after its end date.
The price is what the buyer pays, VAT included. You set your own VAT rate on the plan, and the invoice shows the tax inside that price rather than adding it.
Every paid membership gets an invoice in your invoice sequence, whether or not ticket invoicing is on (Invoices).
Stripe, refunds and withdrawal
Selling memberships uses the same Stripe setup as paid tickets: an active connected account that can take card payments (Setting Up Stripe Connect). You are the seller, the charge is on your account, and a refund comes out of your Stripe balance.
The member can cancel within 14 days of buying and gets the full price back, whether or not they used any benefit. This is stated on the checkout page before they pay.
You can end any membership yourself with Refund & end on the Members tab; the member is refunded in full.
Good to know
A membership can be bought as a gift. It sits on the buyer’s account until the recipient claims it with a link, and the term starts at the claim.
When a plan has a member limit and is full, people can join a waitlist and are emailed when a spot frees up.
Each membership has a public member card link that shows whether it is currently valid — useful at the door of a members-only event.
Your Members audience in email campaigns includes everyone with an active membership, even people who never bought a ticket from you.
The page says memberships are not on sale. The amber box gives one of five reasons: Stripe is not connected; your account cannot take charges yet; it lacks the card-payments capability; it was created under an older fee model and must be reconnected; or card payments are switched off platform-wide. Plans stay hidden on your public page until it is fixed.
A member says the member price did not apply. A member price only ever lowers a ticket’s price. If a flash sale or discount was already cheaper, that price wins.
I want it to renew automatically. Memberships are fixed-term by design, so the member renews themselves after the 14- and 7-day reminders.
A plan is what a member actually buys: a price, a term and a list of benefits. Create and edit plans under Grow → Membership, on the Plans tab. You can run several at once, for example a cheap supporter pass and a family pass.
What you can do here
Set the name, term (monthly or yearly), price and the VAT included in it.
List benefits, add an intro price, give free tickets, limit the number of members and open the waitlist.
Sell only during a window, or sell a fixed season everyone shares.
Switch a plan off without losing its members.
How to create a plan
On the Plans tab, click New plan. A form opens.
Type the Plan name ①, choose the Term (Month or Year) and enter the Price ② in your payment currency. The minimum price is €0.50.
If VAT is included in the price, enter the rate in VAT % (included) (0 to 50). The buyer pays the price you typed; the invoice shows the tax inside it.
Optionally set the Member limit ③ and a Waitlist limit ⑧.
Optionally set Sales open ④ and Sales close, an Intro price (first term) ⑤, Free tickets per term ⑥, and a season with Term starts ⑦ and Term ends.
Write the Benefits ⑨, one per line; they appear as bullet points on your public page and at checkout. The Description is free text.
Click Create plan ⑩. The plan is on sale as soon as it is active and your Stripe account can take payments.
Display position — the order of your plan cards on the public page; lower numbers come first. It is not a quantity.
Member limit — how many people may hold the plan at once. An expired membership frees its spot, and a current holder renewing never needs a free spot. The limit is checked when someone starts to pay. You cannot set it below the number of current holders; setting it equal to that number means “no new members until someone lapses”.
Sales window — before it opens the plan shows “On sale from” and cannot be bought; once it closes it is no longer offered, renewals included. Times are in your own time zone, which the form names. Sales must close after they open.
Intro price — a lower price for a member’s first term only, and it must be lower than the regular price. Anyone who has held or been given the plan pays the regular price afterwards, and a gift is always at the regular price.
Free tickets per term — how many tickets a member can take free of charge each term, on ticket types you mark as counting toward the allowance. See Member benefits on your events.
Season (Term starts / Term ends) — everybody who buys the plan holds it for the same dates, whenever they join, instead of a term that starts on their purchase day. Set both dates or neither; the end must be after the start. Someone who joins halfway is not backdated, a season that has already ended cannot be sold, and the same person cannot buy the same season twice.
Waitlist limit — how many people may queue once the plan is full. When a spot frees up, the longest-waiting people are emailed an invitation. Nothing is reserved for them, so the spot still goes to whoever completes the purchase first.
Read a plan card
The Spots figure ① shows current members against the limit (“5 / 12”), with a bar underneath.
Waiting ② appears when people are on the waitlist.
Edit ③ opens the same form as for a new plan.
Deactivate ④ takes the plan off sale and hides it from your public page. Members keep their benefits; Activate brings it back.
While anyone holds the plan, delete is locked ⑤ (“Delete locked while members hold it”); deactivate it instead.
12345A plan card with spots, waitlist and its controls
Changing a plan that has members
Once anyone holds a plan, its term (monthly or yearly) cannot be changed. Create a new plan instead.
You can change the price at any time. People who already paid keep the price they bought at; the new price applies to new members and renewals.
The state badges on a card — Sold out, Opens …, Sales closed, Closes … — show why a plan can or cannot be bought right now.
Good to know
The member limit, sales window, season and intro price are all optional. A plan with none of them simply sells at its price, with a term from the day of purchase, until you deactivate it.
Every figure a member bought under is saved with their membership, so editing or deleting a plan never changes what anyone already paid.
Troubleshooting
My plan is not on my public page. Check, in this order: is it active; has its sales window opened; has it closed; is it full; has its season ended? Also check the status pill at the top of the page for Stripe problems.
My member limit was refused. It was lower than the number of current members. Set it to that number or higher.
Saving says the intro price must be lower. The intro price has to be below the regular price.
A member sees a different price. You repriced the plan. The member keeps what they paid; the new price is for renewals.
The Members tab under Grow → Membership is your roster: everyone who holds or has held a membership with you, with their plan, status and what they paid. Use it to look someone up, end a membership, or export the list. Member IDs and the import of an existing roster are set up on the Settings tab.
What you can do here
Read the roster: name and email, Member ID, plan and reference, status, expiry date and what was paid (with the coupon, if one was used).
Import people you already have with Import a roster ①.
Download the list with Export CSV ②.
End a membership and refund it with Refund & end.
Read the list
The Member ID ③ is the number from your own sequence, for example KV0015. A small imported tag marks people you loaded from a roster.
Active ④ means the membership is paid, not ended, and inside its term. It stays active for 7 days after its end date; after that it reads Expired.
Refunded ⑤ marks a membership you ended with a refund.
The list holds 25 people per page, newest first.
End and refund a membership
Find the row and click Refund & end ⑥.
Confirm. The whole purchase is refunded from your Stripe balance to the member, the benefits end at once, and the spot on a limited plan is offered to the waitlist.
A membership with no payment behind it (imported or given free) simply ends with no refund.
If the refund cannot be made, the page says so and the membership stays as it was; check your Stripe balance and try again. This cannot be undone.
123456The Members tab with member IDs, statuses and actions
Member IDs
Open the Settings tab.
In Member IDs, set a Prefix ① (up to 12 characters), the number of Digits ② and the Next number ③. The Next ID box ④ shows the result, for example KV0022.
Click Save. Every membership you issue from now on takes the next number.
Import a roster ⑤ opens the import page, and the Public member count ⑥ switch shows your member count on your public page.
123456The Settings tab: member ID sequence, import and public member count
Good to know
Changing the prefix or width affects only IDs issued from now on. You can move the next number forward — to continue a roster that already reached 400 — but not back over IDs already issued.
Memberships sold before you set up the sequence keep a blank ID; they are never renumbered, because a number someone already holds must not move.
The exported CSV has Name, Email, Plan, Status (active, expired, revoked or gift_pending), Starts, Expires, Price, Currency and Reference. It has no member ID column.
Members can also end their own membership within 14 days of buying, in full.
A gift that is bought but not yet claimed sits under the buyer’s name with the status Not yet claimed and the recipient’s address. It has no expiry date yet, because the term starts when the recipient claims it, and it does not count as an active membership until then. In the CSV its status is gift_pending and its dates are empty.
Renewal emails go out 14 and 7 days before expiry, once each, and never to someone who has already renewed.
Troubleshooting
A member has no ID. They joined before you set up the sequence. There is no renumbering by design.
The next number was refused. It is lower than a number already issued. Pick the suggested number or higher.
Somebody renewed early and says they lost days. They have not: an early renewal starts when the current term ends.
The refund failed. Stripe returns refunds from your balance; top it up or wait for sales to settle, then try again.
A coupon is a code members enter at the membership checkout to get a discount. Create them on the Coupons tab under Grow → Membership. They apply to memberships only; discount codes for tickets are separate (see Discount Codes).
What you can do here
Create a code that takes a percentage or a fixed amount off, for one plan or for all of them.
Limit how often it can be used in total and per member, and give it an end date.
Edit, switch off or delete a coupon, and see how often it has been used.
The coupon list
New coupon ① opens the form.
The Value column ② shows the discount, for example 10% or €5.00, and the next column shows which plan it is for (Any plan or one).
Uses ③ counts redemptions against the limit (“6 / 50”), with the per-member limit underneath.
Deactivate ④ stops the coupon working without deleting it; you can activate it again. Edit and Delete sit beside it.
1234The Coupons tab with two coupons and their usage
How to create a coupon
Click New coupon.
Type the Code ① — letters, digits, hyphens and underscores, up to 40 characters. Codes are not case-sensitive and are saved in capitals.
Choose the Discount ② — Percent off or Amount off — and enter the Value ③. A percentage cannot be more than 100.
Choose the Plan ④: Any plan or one plan.
Optionally set Max uses ⑤ (total) and Max per member ⑥.
Optionally set Expires ⑦, then click New coupon to save.
The member enters the code on the membership checkout page and presses Apply. The price shown after the discount is exactly what is charged.
A coupon can never take the price below €0.50. A code that would do so (a 100% code, for instance) is refused, and no free memberships are created this way.
A code is refused if it is switched off, expired, used up, used by that member as often as allowed, or meant for a different plan.
A coupon is counted as used only when a purchase succeeds. Someone who applies a code and abandons the payment does not use it up.
The member’s invoice shows the list price and the discount as separate lines, and the Members tab shows the code and the amount saved.
Good to know
You can edit everything except the code, so a code printed on a flyer stays that code. To change it, create a new coupon and deactivate the old one.
The expiry is a date and includes that whole day: a code that expires on 31 October can still be used on 31 October and stops working from 1 November.
Deleting a coupon stops it working at once. Memberships already bought with it keep their price and the code on record.
The Coupon uses figure at the top of the page adds up redemptions across all coupons.
Troubleshooting
“You already have a coupon…”. Codes are unique per organizer, ignoring case.
A member says the code is not valid. Check whether it is active, expired, used up, restricted to another plan, or already used by that member.
“The price would fall below the minimum charge.” The discount takes the plan below €0.50. Lower the value.
If you already run your association from a spreadsheet, you can load that list instead of asking everyone to buy again. Open Grow → Membership, choose the Members tab and click Import a roster (it is also on the Settings tab). You first see exactly what would happen; nothing is written until you confirm.
Prepare the file
A CSV file with these columns: name, email, plan, starts_at, expires_at, member_id. Only name and email are required.
plan must match the name of one of your plans exactly (capitals do not matter). Leave it empty to use the plan you pick on the page.
starts_at and expires_at are dates such as 2026-01-01. With neither, the member gets the plan’s season if it has one, otherwise one term from today. With only a start, the term runs from it; with only an end date, the term starts now. The end must be after the start.
member_id is optional. Empty cells take the next number in your sequence; a number you supply must not be in use yet.
At most 5,000 rows. Use Download the template to start from a correct file.
How to import
Open the import page and click Download the template ① if you need it. Create at least one plan first — an imported member has to hold something.
Choose the Plan ② used for every row that does not name one.
Choose your CSV file ③.
Click Check the file ④.
1234The import page: template, default plan and file
Review before anything is written
The page now lists every row with the line number, member, plan, end date and a status. The three counters above the list show how many rows will be added, skipped as duplicates and skipped as invalid.
Choose a file again with ① if you want to correct it and re-check.
Will be added ② counts the rows marked Ready.
A Duplicate row ③ is skipped: the same address twice in the file, somebody who is already an active member, or a member ID that is taken. The reason is printed beside it.
An Invalid row ④ is skipped: no name or no valid email, an unknown plan name, or a date that cannot be read.
When it looks right, click Import 2 members ⑤ (the button shows the real count).
12345The review step with ready, duplicate and invalid rows
What happens when you confirm
The members are active immediately, so the roster, the public count and the benefits are right straight away. They are marked imported, no money changes hands and no invoice is created.
Every imported member gets an email. Someone with no account gets one made for them, plus a link to choose a password. Someone who already has an account is told to sign in instead; no password link is sent for an existing account.
The result says how many members were imported and how many were emailed.
The uploaded file is deleted as soon as it has been used, because a roster is personal data.
Good to know
If you leave the page between checking and importing, the checked file may no longer be available. Upload it again.
Importing never mails anybody during the check; only the final confirmation sends emails.
The same person cannot be imported twice while their membership is active.
Troubleshooting
“The file has no ‘email’ column.” The header row must contain name and email. Re-export from your spreadsheet as CSV.
“The file could not be read.” Save it as CSV (UTF-8) and try again.
Everyone is a duplicate. They already hold an active membership with you.
An imported member cannot sign in. They already had an account, so they were told to sign in with their existing password. They can reset it on the sign-in page.
A plan on its own is only a pass. What members actually get is decided on your events: a lower ticket price, tickets only members can buy, early booking, free tickets. This article lists every benefit, where you switch it on and how it behaves, so you can match your plans to your events.
Per ticket type
Open the event, go to Tickets & Pricing → Ticket Types and click Edit on a ticket type. Three fields concern members. (The same fields also appear on the ticket list of Event Setup → Details & dates.)
Member price ① — what active members pay instead. Leave it empty for no member price. It can only lower the price: if a flash sale or discount is already cheaper, that cheaper price is what the buyer gets.
Members only ② — only active members can buy this ticket type. Everybody else sees it as a locked row with a link to become a member; it is not hidden.
Counts toward the member allowance ③ — members can use their free tickets (the plan’s Free tickets per term) on this type.
These are on Event Setup → Details & dates, in the Advanced panel.
Member early access — members can book this many hours before the public sale opens (0 turns it off). It only has an effect when the event has a Bookings Open date.
Members-only event — only active members can buy any ticket. The event stays listed, with a banner and a join link, so members can find it.
Benefits that need no setting on the event
Waitlist priority — a member who joins an event waitlist is placed ahead of non-members.
Free tickets per term — set on the plan. At checkout the allowance is used on the member’s most expensive eligible tickets first, never inside a bundle. Cancelling an order that used it gives the free tickets back.
Member card — every membership has a public card page showing whether it is valid today, to show at the door.
Members audience — in email campaigns you can write to everyone with an active membership.
Who counts as a member
A person whose membership with you is paid, not ended, and inside its term — plus a 7-day grace after the end date. A gift not yet claimed does not count.
Benefits are checked when someone buys, so a membership that lapses between choosing tickets and paying keeps the price that was quoted.
Members must be signed in to get any benefit.
Good to know
Benefits are never automatic: none apply to an event until you switch them on for it or its ticket types.
The Stripe and checkout rules for memberships themselves are in Memberships.
Members see the benefits on your public page and at checkout, from the list you wrote on the plan.
Troubleshooting
A member did not get the member price. Their membership may have lapsed more than 7 days ago, they were not signed in, or another price was already lower.
Members cannot book early. The event has no Bookings Open date, or early access is 0.
The free ticket was not offered. The ticket type is not marked as counting toward the allowance, the plan has no free tickets per term, or the allowance is used up.
Ticket attachments let you send your own PDFs alongside the ticket confirmation email — house rules, travel or arrival instructions, a programme, your own terms and conditions, or anything else attendees should have before they arrive. Find it under Marketing → Attendee comms, on the Ticket attachments tab. Viewing needs access to the event; uploading and changing needs permission to edit it.
What you can do here
Upload a PDF — give it a name and, optionally, a language.
Add to this event or Remove from this event any document you have uploaded.
Preview a document straight from the list before you add it.
Delete a document you no longer need, from anywhere it is used.
1234The Ticket attachments page: the Add a PDF form and the document library, with two documents sent with tickets
Give the PDF a Name ①, optionally pick a Language ② (Everyone by default), choose the PDF file ③ and click Upload. In Your documents, a document marked Sent with tickets has Remove from this event ④; the others have Add to this event.
How it fits together
Uploading a PDF puts it in your library and adds it to this event at once.
On another event, open this page and click Add to this event on a document from your library. Nothing goes out until a document is added to the event.
From then on, every ticket confirmation email for this event carries that PDF, using the name you gave it as the file name the attendee sees.
Click Remove from this event to stop sending it on this event; the document stays in your library for other events.
Library vs. event
A document belongs to you, not to one event — upload your house rules once and add them to any event you run.
Removing a document from an event leaves it in your library, untouched, ready to add elsewhere.
Delete removes it from every event that sends it and deletes the file itself. There is no undo.
Naming and language
The name you give a document becomes the file name the attendee sees when it lands in their inbox — give it a real one (“House rules”) rather than whatever your scanner or camera called the file.
Leave the language field blank to send a document to every buyer, regardless of what language they are reading the site in.
Tag a document with a language to send it only to buyers reading that language — that is how you carry German and English house rules side by side without mailing both to everybody.
Good to know
PDF only — nothing else is accepted, at upload or in this feature.
Attachments ride on the confirmation email only. A ticket that is re-sent later — from the Resend button on an order, a bulk resend, or an admin resend — goes out without them.
This applies to the whole event, not to individual ticket types — there is no way to attach a document to only one type.
Free events get attachments too; nothing here depends on a paid ticket.
Each file is capped at 5 MB, and everything attached to one event together is capped at 10 MB — that is the ceiling for the whole email, ticket PDF included. Email providers reject a message over that outright, and a rejected confirmation is a customer with no ticket at all, so if your attached documents together go over the limit, whichever ones push it over are skipped and the ticket still goes out. The screen shows a running total and warns you once you are over.
If a document’s file has gone missing from storage, it is skipped the same way — the ticket still goes out, and the screen marks the document so you find out before a buyer does.
Troubleshooting
I uploaded it but nobody received it — it only rides on new confirmation emails. Check it says Sent with tickets for this event; and if the buyer you are checking got their ticket by a resend rather than the original confirmation, that resend never carried attachments in the first place.
A buyer did not get the German version — the document is likely tagged for one language and their account reads another. Leave it untagged if you want everyone to receive it regardless of language.
My file was refused — it is either over 5 MB or not a PDF; both are rejected at upload.
The total warning is showing — three files can each sit under the 5 MB file limit and still add up past the 10 MB email limit between them. Remove one, or split your content across fewer, smaller documents.
Enquiries is your inbox for people who contact you through EventMann — a form on your public event pages, not your own email address. Your address is never printed in public HTML, since an address there gets harvested and put on spam lists; the form is what replaced it. Find it as Enquiries in your organizer sidebar under Work (a badge counts the new ones); it covers all your events, not one.
What you can do here
See every enquiry sent to you: the sender’s name and email, their message, when it arrived, and the event it is about (where it is about one).
The header shows how many are New, Handled, and the total; filter the list to All, New or Handled.
Mark handled or Mark new on any enquiry — a status you set for yourself, so you can tell at a glance what still needs a reply.
Reply opens an email addressed straight to the sender.
A Contact form panel holds your reply-time line (What to expect) and the switch Let people contact me through EventMann (see below).
View public form opens your public contact form in a new tab, exactly as a visitor sees it.
123The Enquiries inbox with two new enquiries and one handled, and the filter tabs above
Filter with the tabs ① (All, New, Handled). Each enquiry has Mark handled ② and Reply ③.
How an enquiry reaches you
A visitor fills in the form on one of your event pages, or your general contact form if you have one.
You get it two ways at once: as an email, and as a row on this page. The row is what survives if you delete the email.
The email’s reply-to is set to the sender, so replying from your inbox goes straight to them — you do not need to copy their address anywhere.
The form is protected against automated submissions, so what lands here is from a real visitor.
The reply-time line and the form switch
You can write a line saying what people can expect — for example “We reply within two working days”. It shows above your public contact form, before somebody writes.
It is free text in your own words. The platform sets no default and enforces nothing — a reply time is your promise, not ours. Leave it empty to show nothing.
Both the reply-time line and the switch that turns the form on or off are edited here, alongside the messages they govern.
Switching the form off means nobody can write to you through EventMann; the page tells you plainly that it is off.
Good to know
The platform’s own contact form is separate from yours. An enquiry sent to you is never visible to EventMann administrators, and the platform’s own messages never appear in your list.
The sender’s email address is shown on the row. This page is behind your login and replying is the point.
“Handled” is your own marker for your own inbox — the sender never sees it and it changes nothing about the enquiry itself.
Troubleshooting
I am not getting any enquiries — check the form is switched on in the settings panel here, then use View public form to see what a visitor actually sees.
Somebody says they could not find how to contact me — the contact button lives on your event page and it opens the form, not an email address; there is nothing else to point people at.
I replied and heard nothing — a reply leaves the platform as an ordinary email to the sender’s address; there is no thread here to check for a response.
After-the-event follow-ups are emails you write once and EventMann sends automatically after the event ends: a thank-you, a link to the photos, a quick poll or survey, a look at your next events. Find them under Marketing → Attendee comms, on the After the event tab — the counterpart of Reminders, which go out before the event. Anyone who can view the event can read the page; creating, editing and sending needs permission to edit it.
What you can do here
Write a follow-up in a full-page editor with a live preview, saved as a draft until you decide.
Choose who gets it: everyone with a ticket, only those who came, or only those who did not arrive.
Add a feedback poll or survey, photo and social links, and your next events.
Schedule it, watch delivery live, stop and resume sending, and share a public web version.
Keep the event’s photo and video links in one place.
1234The After the event tab with a draft and a scheduled follow-up, and the Photos & videos links below
Click New follow-up email ① to start. Each row shows its status (Draft, Scheduled, Sending, Stopped or Sent), who it goes to and when it is due — for example “24 hours after the event (Mon 9 Nov, 23:30)”. A draft has Schedule ②; a scheduled one has Back to draft ③. The Photos & videos panel ④ holds your shared links (see below).
How to write and schedule one
123The follow-up editor: numbered sections on the left, live preview on the right
Click New follow-up email. The editor has seven numbered sections ①, and the same numbers appear in the live preview ③ beside the part of the email each one changes.
Who & when — pick Send to and the Hours after the event ends (1–720). A box below shows the exact send time, how many people it reaches and how long sending will take at your hourly limit (Change the limit opens that setting).
Subject & banner — the Subject ②, a colour theme (Violet, Festive, Ocean, Forest or Midnight & gold), and an optional banner emoji, title and subtitle. A switch shows your event picture above the banner.
Your message — the text under the banner.
Photos & social — buttons to your shared photo folder and your social profiles.
Feedback — choose a poll or survey (see below).
Your next events — up to three of your upcoming public events. If you have none, the block is left out.
Closing & footer — your sign-off and the band at the bottom.
Check the preview. Switch Desktop / Phone and Light / Dark to see how it looks. Click Send me a test for a real copy in your own inbox.
Click Save draft to keep working, or Schedule and confirm. Nothing is sent to your guests until you press Schedule.
Who it goes to
Everyone with a ticket — every confirmed order.
Attended — orders where at least one ticket was scanned at the door.
Not arrived yet — orders where nobody was scanned.
Each option shows how many orders it covers. If nobody has been scanned at the door at all, EventMann has no attendance data: then Attended goes to everyone and Not arrived yet goes to nobody, and the editor warns you.
Sending, pace and consent
It goes out at the event’s end plus your hours, checked every five minutes. If that moment has already passed when you schedule, it goes within about five minutes.
Mail is paced at your organizer hourly sending limit (200 an hour by default; change it under Settings → SMTP & Mail). If you have set a sending window, mail due outside it waits for the next opening.
A follow-up is treated like marketing. People who opted out of marketing email, or unsubscribed from you, do not receive it, and every copy carries an unsubscribe link.
Feedback blocks: polls, stars and surveys
Pick a poll or survey (created under Surveys) and the email shows its first choice question as tap-to-answer options, its first rating question as stars, and a Give feedback button for the rest. Three switches let you turn each off. A tap preselects the answer on the survey page; the person still presses Submit, so a mail scanner can never vote for anybody.
Watching delivery, stopping and resuming
123A follow-up that is still going out: 22 delivered, 18 waiting, with Stop sending and the poll results
Open a sent follow-up with View. The Delivery panel ① shows Delivered, Waiting, Held (stopped), Failed and Skipped (opted out), and when the last email goes out.
Click Stop sending ② to hold the mails not yet sent. Nothing is lost: they wait.
Click Resume sending to send exactly the held ones again, at your pace. Nobody is mailed twice.
The Answers panel shows poll or survey results as they arrive.
Under Public link ③ click Create public link for a web version of the email you can post in a WhatsApp group (Share on WhatsApp, Copy, Open). It shows nothing personal; anyone with it can open it and vote in the poll. Stop sharing kills it at once.
123A follow-up that has finished sending: delivery, survey results, the shareable link and recipients
The page ends with the recipient list. Unsubscribed addresses are marked. A mail that still failed after repeated attempts counts under Failed.
Photos & videos links
EventMann stores no photos or videos. On the After the event tab you add up to ten links to a shared drive people can upload to (Upload & share), an album or aftermovie (View album / video), or your social profile (Social profile), each with button text and an optional note. They appear in your follow-ups and, once the event has started, on the event page. Make sure the folder allows uploads and that you may share what people send you.
Good to know
A follow-up that has been sent cannot be edited or sent again; write a new one. A follow-up can be deleted from the list with the bin icon.
“Sent” means delivered, not merely queued: the page counts real deliveries so you can tell queued from done.
A test copy has the same blocks as the real thing but no personal links, and it does not count as a recipient.
Troubleshooting
It did not go out — it may still be a draft (press Schedule), or the event has no date. Scheduled and Sent badges tell you.
Fewer people than expected — opted-out guests are skipped, and several tickets on one address are one email.
Some are Failed — the address rejected the mail after repeated tries. They are listed on the page.
Volunteers are the people who help at your events for free. EventMann gives them their own tools: a roster you keep across all your events, standing teams with leads, an invitation per event, a rota, tasks, messages and a live view for the day itself. It is built for associations whose whole event team is volunteers, and it works just as well for a single helper at a single event. You find it in two places: Volunteers in the Grow group of your sidebar for everything that spans events (roster, teams, import), and Volunteers under Team & Partners in an event’s Manage menu for everything that belongs to one event.
The sidebar entry Volunteers ① opens the volunteer roster. Its tab strip leads to Teams ② and Import volunteers ③.
123The organizer sidebar with Volunteers under Grow, and the three pages across all events: roster, Teams and Import volunteers
Volunteers, staff and members are three different things
Volunteers
Staff
Members
Who
People who help for free, often again and again
Paid helpers for one event
People who bought a membership from you
Where
Roster, Teams and Manage → Volunteers
Manage → Manage Staff, the staff portal
Settings → Membership
Rota
Volunteer shifts
Staff shifts, with swaps and payroll
None
Money
None. Hours are only recorded
Hourly rates and payroll
Plan price, paid by the member
The three do not mix. A volunteer is never put on the staff rota, and a volunteer rota never feeds payroll. If you pay somebody, they belong under Event Staff.
What you can do here
Keep a roster of everyone who has helped or whom you want to ask, add people by hand or import them from a spreadsheet — see The volunteer roster and CSV import.
Run standing teams such as Registration, Music or Kitchen, each with leads and a core team that is on every event — see Standing teams, leads and the core team.
Open an event, then Team & Partners → Volunteers ①. A strip of tabs runs across the top. People ② lists who was asked and what they answered. Shifts ③ and Tasks ④ are the rota and the job list, Run sheet ⑤ puts both in time order, Live ⑥ shows what is happening right now, Messages ⑦ writes to the team, Settings ⑧ holds the event’s volunteer options and Roster ⑨ is the same roster as in your organizer panel, for people who only hold this one event.
123456789The Volunteers section of the Diwali Gala with its eight tabs
A typical path
Build your roster once and set up your teams. Make the people who are always there core: they are added to every new event.
On the event, open People and invite the rest, or post a join link in your WhatsApp group.
Add Shifts and Tasks, or copy them from last year’s event, then put confirmed people on the shifts.
Before the day, send a Message, print the Run sheet and check the team sizes on People.
On the day, keep Live open. Afterwards the hours are on the roster, and you can download an hours statement for each volunteer.
Good to know
Being on the roster is not an invitation. Importing a list sends no email; you decide per event whom to ask.
Only confirmed volunteers can be put on shifts, be given tasks, hold a role and buy the thank-you ticket.
Saying no to an invitation needs no account. Saying yes does: the volunteer creates a free account from the invitation page, or signs in, and only then are they confirmed and you are told. The account is how they see their shifts and tasks, check in and buy the thank-you ticket. Their side is described in Volunteering at an event.
Invitation, confirmation and message emails leave at your own hourly sending limit (Settings → Email), so a hundred invitations are spread out rather than sent in one burst.
Every invitation carries a link to opt out of your volunteer invitations. People who opted out are skipped whenever you invite them, and show as No invitations wanted on the roster.
A team member can work with volunteers when their role holds the Volunteers permission; Team lead (own teams only) limits it to the teams they lead. The Tasks permission opens the task board. Both are ticked in Custom Roles.
Troubleshooting
The Volunteers entries are missing from the menu — your role does not hold the Volunteers permission for that event. Ask the organizer who owns it.
A volunteer says they cannot see their shifts — they need an account on the email address you invited and the address must be confirmed. If People shows No account yet beside them, use Send sign-up link.
Somebody was skipped when you invited — they are already on this event in some status, or they opted out of your invitations.
The volunteer roster is your list of everybody who has helped at your events, or whom you would like to ask. It belongs to you, not to one event: a person is added once, gets a volunteer number such as V0001, and keeps their history across all your events. Open it under Grow → Volunteers in your organizer sidebar.
What you can do here
Add people one by one, or import the list you already keep as a CSV file.
Search and filter by name, team, skill, whether they have an account, whether they have helped before or have asked not to be invited.
Edit contact details, skills and your own notes.
See how many events and hours each person has behind them, and download an hours statement as a PDF.
Export the whole roster as a CSV file, or delete a person together with their history.
123456The volunteer roster with its four counters, filters and the first volunteers
Click Add a volunteer ① to add somebody, Import volunteers ② to load a file, or Export CSV ③ to download the list. The four cards above the table count everybody on the roster, those who have helped, those With an account ④ and those who asked for no invitations; each card is a shortcut to that filter. Use the search box ⑤ for a name, email, phone number or volunteer number, and the dropdowns, such as Everybody ⑥, to narrow the list further.
Add a volunteer
Click Add a volunteer.
Type the person’s Name ① and Email ②. These two are required; the email must be unique on your roster, and capital letters do not matter.
Add Skills ③ separated by semicolons, for example Entrance; First aid; Stage crew. Up to 20 skills are kept, and they become a filter on the roster.
Each row starts with the person’s volunteer number ① and the teams they belong to ②, with a star for the teams they lead. The Events column counts events where they were confirmed, Hours adds up the time between check-in and check-out of every shift that was checked out. A green badge ③ Has an account means a confirmed EventMann account uses this email address, and No invitations wanted means the person opted out of your invitations. Edit ④ opens the same fields as the add dialog. The download icon ⑤ gives the person’s hours statement as a PDF, and the bin deletes them.
12345Roster rows showing the number, team badges, account badge and actions
Import a list from a spreadsheet
Under Import volunteers you load the list you already keep. Importing adds people to your roster only. It sends no email and it never changes anyone who is already there.
Click Download the template ① to see the exact column names, or save your spreadsheet as CSV.
The first row must name the columns: name, email, phone, skills and notes. Only name and email are required. Separate several skills with a semicolon. Files saved by Excel, including German Excel with semicolons as separators, are read as they are.
Choose the file ② — up to 5 MB and 5,000 rows — and click Check the file ③.
123The Import volunteers page with the template link, the file field and Check the file
You then see a preview with the counts Will be added, Skipped (already there) and Skipped (unreadable). Rows marked Ready ① will be added. A row is Skipped ② when the email is already on your roster or appears twice in the file, and Not readable ③ when the name or the email is missing or not valid. Nothing has been written yet. Click Import ④ to add the ready rows.
1234The preview after checking a file, with one ready row, one skipped and one unreadable
Settings explained
Volunteer number — assigned automatically from your own sequence (V0001, V0002 and so on) and never reused.
Skills — free text, separated by semicolons. The skill filter reads the skills actually on the roster.
Notes (only you see these) — never shown to the volunteer or to team leads.
Rows per page — 25, 50, 100 or 200; Sort by name, volunteer number, most events or most recently added.
Good to know
If you change a person’s email address, the link to their account is cut. It is re-attached automatically when somebody signs in to a confirmed account on the new address.
A person may opt out of your invitations from the link in any invitation email. You cannot send them an invitation until they sign up again themselves.
Delete from roster removes the person together with their invitations, shifts and hours on every one of your events. It cannot be undone; this is what a deletion request asks for.
The Export CSV file contains contact details, skills, your notes and hours. Treat it as personal data. See Volunteer hours and privacy.
A volunteer coordinator who holds only one event reaches the same roster under that event’s Roster tab. A team lead sees it read-only, to recruit from.
The import preview waits for you for 30 minutes. After that, choose the file again.
Troubleshooting
The import says a column is missing — the first row must name the columns, at least name and email. Use the template for the exact spelling.
The import says the file is no longer available — the checked file was kept for 30 minutes. Choose it again and check it again.
A person I added is not offered when I invite to an event — they are already on that event in some status, or they opted out. See Inviting volunteers to an event.
The email is refused as already used — each email address can appear once on your roster. Search for it; the person may already be there.
Teams are the departments of your association — Registration, Music, Marketing, Sponsors, Hall management, Kitchen — that exist from event to event. A team has leads, members and a core, and it is what lets a lead run their own part of an event without touching anyone else’s. You set them up under Grow → Volunteers → Teams. Only you, the organizer, can create or change teams.
What you can do here
Create the teams you run events with and choose what their leads and members may open at an event.
Add people from your roster to a team, as members, as leads and as core members.
Rename a team, change its access, take people out of it or delete the team.
Lead, core and member
Member — belongs to the team. At an event, the person is placed in a team when you invite them or when they join through a team’s link.
Lead — runs the team at every event they help at. A lead recruits people into the team, confirms them, plans the team’s shifts and tasks and writes to the team. A lead sees the whole People list and the roster, but changes only their own teams. See Volunteer roles and team leads.
Core — is on every event automatically, and sees the team’s whole picture: on My Volunteering, under Your teams, every task of the team at the events they are confirmed for, and a read-only view of the team’s stock and packing lists. A lead is always core.
The same person can be in several teams. At an event, their main team is a team they lead, otherwise the first team they are core in.
Add a team
Open Teams and click Add a team.
Type the Team name ①. Each name can be used once.
Under Leads get access to ② choose what a lead of this team may open at every event they help at, for example Box office for the Registration leads. Nothing extra leaves them with their volunteer tools only.
Under Members get access to ③ choose the same for ordinary members, for example Door / check-in. Members get it only at events where this is their team.
Click Create team ④.
1234The Add a team form with the two access dropdowns
The choices are the roles you can give volunteers at an event — Volunteer coordinator, Box office, Door / check-in, Venue manager, Marketing, Finance — and any custom role you have made. What each opens is explained in Volunteer roles and team leads. The access works only at the events a person helps at, and for 30 days after they end.
Put people in a team
Each team has its own card with its people. Leads come first. On a person’s row, a Lead badge ① and a Core badge show their standing. Tick Lead ② or Core ③ and click Save to change it, or click the cross ④ to take them out of the team. At the top of the card are Add people from the roster ⑤ and Edit ⑥, which renames the team and changes its access.
123456The Registration team card with its leads and core members
Click Add people from the roster to open the list beside the page.
Use the search box ① to find people by name, email or volunteer number and tick them ②.
Tick as leads ③ if they run the team, or as core team (on every event) ④ if they should be on every event.
Click Add to team ⑤. Up to 500 people can be added at once.
12345The roster list for a team, with the lead and core options
The core team is on every event
Core members and leads are added to every one of your events that has not ended, so you do not invite the same fifty people again each time.
A lead is added as confirmed, because they run the team. They can still step back.
Any other core member is added as invited and answers Yes or No from their email.
Nobody is emailed while the event is a draft. The invitations go out when the event is first published, so a draft you delete never reaches anyone.
When you make somebody core or a lead, they are added to all your upcoming events at once.
Somebody who is already on an event in any status — declined, removed — is never added again. Their answer stands.
What a core member can do
Team tasks — every task you or a lead gave the team, not only their own: they move a task along (Open, In progress, Blocked, Done), tick its checklist and write comments. They cannot add, delete or reassign a task; that stays with you and the team’s leads.
Team inventory — the team’s items with quantity, condition, who holds each one or where it is stored, the low-stock warning, and the team’s packing list for their coming events. They cannot edit items, restock or record purchases.
Only their own team: a core member of Hall management sees nothing of Registration’s tasks or stock. An ordinary member sees only the tasks given to them, their shift or the whole team.
Good to know
Taking a person out of a team, or leaving the core team, does not remove them from events they already agreed to.
Deleting a team keeps its people on your roster and on every event. Only the team goes; the team’s shifts and tasks become “no team”, and its people show no main team at the events.
Only the organizer defines teams. A team’s access reaches every event, so an event coordinator who holds one event cannot set it.
People who opted out of your invitations are skipped when the core team is added.
Each team can also look after its own stock between events; see Team inventory.
Troubleshooting
A core member was not invited to my new event — the event is still a draft (they are invited when you publish), the event is cancelled or over, or the person opted out of your invitations.
A lead cannot open the event — a lead needs a confirmed place on the event, and an account on their roster email address with a confirmed email.
The team name is refused — you already have a team with that name.
The People tab of an event’s volunteers is where you decide who helps at this event: invite people from your roster, accept those who signed up, and see who said yes. Open the event, then Team & Partners → Volunteers; People is the first tab. A person can be on your roster without being on an event; being on the event is what lets them have shifts, tasks, roles and the thank-you ticket.
What you can do here
Invite people from your roster, one by one or everybody who helped at an earlier event.
Add somebody who is not on your roster yet and invite them in one step.
Accept or decline people who applied from the event page or a team link.
Confirm, remind, move to a team, give a role or remove many people at once.
See at a glance how many people each team has against what it needs.
The five statuses
Status
What it means
Applied
The person signed up from the event page or a team’s link. You decide.
Invited
You asked, and they have not answered yet.
Confirmed
Helping at this event. Only confirmed people can be put on shifts, be given tasks or roles, and buy the thank-you ticket.
Declined
They said no, or you declined their application. A person who declined an invitation can still say yes later from the same link.
Removed
You took a confirmed person off the event. Their shift places are freed and their tasks go back to the team.
Invite people from your roster
Click Invite from your roster at the top of the page.
To invite everybody who helped at an earlier event, choose that event under Everybody who helped at ①, choose a team ② if you want them all in one, and click Invite them. Only people who were confirmed there are asked.
To invite particular people, search the list and tick them ③. Select all shown ticks everybody the search currently shows.
Pick the Team ④. A team lead must choose one of their own teams; you may leave it empty.
Click Invite selected ⑤. Each person gets an email asking “Can you help?” with Yes and No. A no is one click. A yes asks them to create a free EventMann account on that address, or to sign in to the one they have; they become Confirmed, and you get the bell notice, only once that is done.
If you have already asked somebody yourself — on the phone, in the group — tick Already confirmed (I asked them myself) before inviting. They are then added as confirmed and get the “You’re on the team” email instead of a question. Somebody without an account on that address is asked in that email to set one up, with a Set up my account button.
Add somebody new
Add somebody new, at the top of the page, adds a person to your roster and invites them to this event in one go. Enter the Name and Email, optionally a phone number and a team, and click Add and invite. If that person is already on this event or opted out of your invitations, nothing is sent and you are told so.
12345Invite from your roster: everybody from an earlier event, or the people you tick
Read and work the list
The chips at the top filter the list by status; Confirmed ① shows only those who said yes. Use the search box ② for a name, email, phone number or volunteer number and the team dropdown to see one team. The bar ③ above the table holds the bulk actions. Each row shows the person’s status ④, their team ⑤ (changeable right there), their roles, how many shifts and hours they have, and the buttons that fit their status: Accept ⑥ and Decline ⑦ for an application. A confirmed person whose email address has no EventMann account carries the amber badge No account yet ⑧ and the button Send sign-up link ⑨. Applications show what the person wrote, and anything they put under “When can you help?” on their own page.
123456789The People list with applications, confirmed volunteers and the bulk bar
Volunteers without an account
A volunteer who says yes to an invitation always has an account — the yes is only recorded once they created one or signed in. People you or a team lead confirm yourselves (Mark as confirmed, Accept, the Already confirmed tick, the bulk Confirm) may not have one. They are on the team, but they cannot see their shifts, tasks or team, check in, or buy the thank-you ticket until they do.
Look for the badge No account yet beside the name. It shows on confirmed people whose roster entry is not linked to an account.
Click Send sign-up link on the row, or tick several people and choose Send sign-up link in the bulk bar.
Each of them gets an email “Set up your account for …”. Its button opens their invitation page on the account form; the account is confirmed straight away because the link went to their address. If they already have an account on that address, the page sends them to sign in instead.
The badge disappears once they have set up the account or signed in.
The link goes only to confirmed people without an account; anybody else in a bulk selection is skipped and counted as skipped. Each click sends one email per person.
People who have been asked and have not answered are under the Invited chip. Mark as confirmed ② confirms them without waiting for their answer, Send again ③ mails the invitation once more, and the cross ④ removes them.
1234People who have not answered yet, with Mark as confirmed and Send again
Do something for many people at once
Tick the people, or tick Select all on this page ①. The counter ② shows how many are selected.
Choose the action ③: Confirm, Resend invitation, Send sign-up link, Set team, Give role, Remove role, Decline or Remove from event.
For Set team choose the team ④; for the role actions choose the role beside it.
Click Apply to selected ⑤ and confirm. Confirming and resending send each person an email.
The result tells you how many were done and how many were skipped because the action did not apply to them, for example a confirm on somebody already confirmed. Up to 500 people can be selected at once.
12345Three volunteers ticked, with the bulk action bar above the table
Good to know
Applications from the event page and from a team link stay Applied until you or the team’s lead accept them. Accept sends the volunteer a confirmation email; Decline sends them a short email that they were not taken on this time. Declining an invitation nobody answered yet (for example with the bulk action) sends no email.
Invitation and confirmation emails leave at your hourly sending limit (Settings → Email), so a large invitation is spread over the hours rather than sent at once.
You get a bell notice when someone answers an invitation or applies. For a yes the notice comes once the volunteer has created their account or signed in, so a person still busy with the account form stays Invited on your list. The leads of a team are told when somebody applies to join their team.
A person who is already on this event in any status is skipped when you invite. Removing somebody who has not confirmed deletes their row, so you can invite them again; a confirmed person who was removed cannot be invited again for this event.
Stepping back is the volunteer’s right too: from their invitation link they can change a yes into a no. That frees their shifts and hands their tasks back to the team.
Team leads see the whole list, but act on their own teams’ rows only. They may also claim somebody who has no team yet into one of theirs.
Troubleshooting
“N skipped” after inviting — those people are already on this event, or asked not to be invited.
Send again is missing — it only exists for people who have not answered. Declined and confirmed people have no resend; a confirmed person without an account has Send sign-up link instead.
Somebody told you yes but is still Invited — they have not finished creating their account or signing in. Ask them to open the invitation again, or confirm them yourself and send the sign-up link.
A confirmed volunteer cannot be chosen for a shift or task — check that they are Confirmed, not Invited or Applied.
The invitation never arrived — ask them to check spam, and use Send again. Mail leaves at your hourly sending limit, so a large batch can take hours.
12.5 Recruiting with join links, sign-up and copied setups
This article covers the ways people find their way onto an event without you inviting them one by one: a join link for each team, an open sign-up on the event page, and the option to start from last year’s setup. It also explains every option on an event’s Settings tab. You find all of it under Team & Partners → Volunteers in the event’s Manage menu.
What you can do here
Say how many people each team needs at this event and watch the count fill up.
Give each team a join link that its lead can post in a WhatsApp group.
Open the sign-up on the public event page, with your own text.
Let confirmed volunteers pick their own shifts.
Write the thank-you message volunteers read.
Copy team sizes, shifts, team tasks and packing lists from another event.
Team sizes and join links
On the People tab, the box Teams at this event has one card per team. The team’s name ① opens the list filtered to that team. The figure ② reads confirmed people against what the team needs, for example 10 / 18; it is amber while the team is short and green once it is full, and without a target it shows the confirmed people only. Below it, 10 confirmed · 2 waiting for an answer counts the people who have been asked but have not answered.
Type the number the team needs in Needs ③ and click Save. Leave it empty or zero for no target.
Click Create join link ⑧. The card now shows the Join link ④.
Click Copy ⑤ to put it on your clipboard, or Share on WhatsApp ⑥ to open WhatsApp with a ready-made message such as “Help with Registration at Diwali Gala 2026? Sign up here:”.
To stop the link working, click Switch off ⑦. Anyone who still has it can no longer join. Creating a link again gives a new address.
12345678Three team cards with targets, counts and join links
Whoever opens a join link signs in (or registers), checks their details and joins. They land as Applied in that team, and the team’s leads and you get a bell notice. Nobody becomes a volunteer without your or the lead’s Accept. A join link works even when the public sign-up below is switched off, and stops working when the event is a draft, cancelled or over. Team leads can set targets and links for the teams they lead; the other teams are not shown to them.
Open sign-up on the event page
When Volunteer sign-up on the event page is on and the event is live, the public event page shows “Would you like to help at this event? Volunteer with us”. Signed-in visitors with a confirmed email address can apply.
The banner ① links to a short form with a phone number, skills and a message. It starts with the text you wrote.
1The event page for a visitor, with the Volunteer with us banner
The visitor adds a phone number ①, skills ②, anything the organizer should know ③ and sends the form ④. They are added to your roster if they were not there yet, and appear on People as Applied. You decide with Accept or Decline; nobody is confirmed automatically, and the applicant gets an email either way. A visitor who was already invited and applies is confirmed straight away.
Volunteer sign-up on the event page ① — off by default. Switches the banner and the form on for visitors. It only works while the event is live.
Volunteers choose their own shifts ② — lets confirmed volunteers take open shifts on their own My Volunteering page. They can take shifts of their own team and shifts without a team, never one that overlaps a shift they already have, and never one that has started.
Volunteers can give a shift back until ③ — hours before the shift starts, 0 to 720, 24 unless you change it. After that they have to talk to their lead. Giving a shift back tells the team’s leads and you.
Text on the sign-up page ④ — up to 1,000 characters: what helping involves, when to arrive, who to ask.
Thank-you message ⑤ — up to 300 characters, shown to confirmed volunteers on the event page, at checkout beside the volunteer ticket and in their confirmation email. {name} is replaced by the volunteer’s name. Empty means a standard thank-you in their language. The green line ⑥ previews it with a sample name.
Click Save ⑦. Clearing a text field and saving removes the text.
Further down the Settings tab, Copy setup from another event uses an earlier event as a template.
Choose the event under Copy from ①. It lists your other events, newest first.
Tick what to copy: Team sizes ②, Shifts ③, Team tasks and Packing lists.
Click Copy setup ④ and confirm.
1234The copy setup box with the Navratri night as the source
Times move with the event date: a shift that started two hours before last year’s doors starts two hours before this year’s. Nothing that already exists is replaced and nobody is emailed. People are not copied — the core team arrives by itself and everybody else is invited afresh. Tasks given to one named person, or tied to a shift, are not copied either, because that person may not be helping this time. Packing lines are copied only as far as the stock allows.
Good to know
Every way onto an event as a volunteer ends with an account: a join link and the sign-up need one, and a yes to an invitation creates one or signs in. Only people you confirm yourself can be confirmed without one — see Volunteers without an account.
Visitors need an account with a confirmed email address to sign up or join. Signing up creates a roster entry with the source “signed up” and sets the opt-out of invitations back to off.
The join link is a credential: whoever has it can apply. Posting it in a private group is fine; if it spreads further, switch it off and make a new one.
A team’s target is a goal for you and the leads. It does not stop people joining.
The Settings tab needs the Volunteers permission; a team lead sees the other tabs but not Settings.
Troubleshooting
The banner does not show on the event page — the sign-up setting is off, or the event is not live (a scheduled event has no banner yet; a join link already works).
A join link says the page cannot be found — the link was switched off or replaced, or the event is a draft, cancelled or over.
Copy setup is not offered — you have no other event to copy from.
The copy did not bring any people — by design. Invite them from People.
A volunteer can be given a role for one event: the right to run part of it — the door, the finances, the other volunteers — without ever becoming a member of your organizer team. A role belongs to one event, starts the moment you give it and ends 30 days after the event. Roles are what make it possible for an association whose whole event team is volunteers to share the work. You set them on the People tab under Team & Partners → Volunteers, or for a whole team on the Teams page.
What you can do here
Give a confirmed volunteer one or several roles for this event, and take them away again.
Give a role to many people at once with the bulk bar.
Let every lead or member of a team hold a role automatically (set on the Teams page).
The roles and what they open
Role
What the person can do at this event
Volunteer coordinator
Open the event overview, work with all volunteers (People, Shifts, Tasks, Run sheet, Live, Messages, Roster) and run the event task board. Cannot edit the event itself, see money or change settings other than volunteer settings.
Box office
Scan and check in tickets, see and create orders, answer attendee messages.
Door / check-in
Scan tickets and see the order list.
Venue manager
Edit the event’s details and dates, work with the venue, run the task board, see reports and live check-in figures, and process refunds.
Marketing
Discounts, email campaigns and reports.
Finance
Orders and their export, reports, the payout breakdown and refunds.
Team lead
Not given by hand: it comes from leading a standing team. The volunteer pages, limited to the teams they lead. See below.
These are the same permission sets as the roles of your organizer team, so the person sees the same pages a box office agent or finance manager would, for this event only.
Give a role to one volunteer
Open the People tab and find the confirmed volunteer. The Roles column shows what they hold — for example Volunteer coordinator ① — or Helper if nothing.
Click Change roles ② under it.
Tick the roles you want ③. A role you cannot give is greyed out; see “Who may give what” below.
Click Save ④. The volunteer gets an email “You can now help run …” that names the role and tells them what to do next.
1234Meera Joshi with the Volunteer coordinator role and the Change roles list open
For many people at once, tick them on the People list, choose Give role or Remove role in the bulk bar, choose the role beside it and click Apply to selected. See Inviting volunteers to an event.
Roles from a team
On the Teams page, Leads get access to and Members get access to give a role to everyone in a team, without touching each person. A lead holds the team’s lead role at every event they help at; a member holds the member role at events where this is their team. They also hold anything you gave them by hand for that event.
Team leads
Leading a standing team gives the Team lead role automatically. A lead:
sees the whole People list and the Roster, read-only, to recruit from;
confirms, declines, moves and removes only the people of their own teams, and may claim somebody with no team into one of theirs;
chooses, when recruiting, whether a person is invited by email or already confirmed;
plans their teams’ shifts and tasks, and writes messages to their own teams and those teams’ shifts only;
sees the run sheet and the Live view for their own teams;
sets the target and join link of their own teams;
may give the people of their own teams any role they hold themselves — see “Who may give what”.
For a lead, the People page is narrowed to their own teams. Here the Registration lead sees only the Registration card ① under Teams at this event, can switch the list to My teams ②, change the team ③ of the rows that are theirs and remove people ④ from their own team.
1234The People page as the Registration team lead sees it
A lead does not see Settings, cannot message everybody and cannot define teams. The page from the lead’s own point of view is described in the Team lead guide.
Who may give what
Nobody can give a role they do not fully hold themselves. As the organizer you can give every role. A Volunteer coordinator can make another coordinator, but cannot give Finance, because they do not hold it. A Registration lead whose team carries Box office can give Box office and Door / check-in to their team, and nothing more. Roles a person may not touch show greyed out with a note, and when they save a person’s roles, any role they could not change is kept as it was.
What the volunteer needs
They must be Confirmed on this event. Taking somebody off the event, or their stepping back, removes their roles.
They need an account on the same email address as on your roster, with the address confirmed. Until they have one, the row shows “Needs an account on this email address to use these roles” and the email offers a button to set it up.
Once they have it, they find the event under My work in their account, with the hat they wear and the one action it is for. See Volunteer roles and My work.
Good to know
A role ends 30 days after the event, so finance work such as the last refunds can still be finished. Nothing stays on afterwards.
Roles are saved per event row. A volunteer who coordinates the gala is not a coordinator of your concert unless you give it there too (or their team does).
Use a custom role to hand out a precise mix, for example volunteers who may see orders and nothing else.
Troubleshooting
The Change roles link is missing — the person is not confirmed, or you do not hold any role you could give.
A volunteer holds a role but cannot open the event — they have no account on the roster email address, the address is not confirmed, or the event ended more than 30 days ago.
A role disappeared after the person stepped back — roles are removed when a volunteer steps back or is taken off the event. Give it again once they are confirmed.
The Shifts tab is the volunteer rota of an event: what has to be done, when, where and by how many people, and who is on it. It is separate from the staff rota under Manage Staff, because volunteers are unpaid and never go through payroll. Open the event, then Team & Partners → Volunteers → Shifts. All times are in the event’s own timezone, which the page names at the top.
What you can do here
Add the slots you need people for, with a place and the number of people needed.
Put confirmed volunteers on a shift, one or many at a time.
Check people in and out from the rota, for the ones who cannot do it themselves.
Let volunteers choose and give back shifts themselves.
See at a glance which shifts are full: 8 of 8 is green, 2 of 3 is amber.
Add a shift
Click Add a shift to open the form.
Type What ① it is, for example “Registration desk”.
Choose the Team ② it belongs to. A team lead has to choose one of their own teams; you may leave it empty, which makes it a shift for anybody.
Set Starts ③ and Ends ④. They start with the event’s start and three hours later; the end must be after the start.
Optionally add Where ⑤ and some Details. Set People needed ⑥, between 1 and 500.
Each shift is a card with its title ① and team badge, how many places are filled ②, and one line per volunteer with their status ③: Not checked in, Checked in 17:02, or the checkout time with the hours worked. Check in ④ marks them present, then the same link reads Check out; a third press says Reopen for the person who was checked out by mistake. Take off ⑤ removes them from the shift. Edit changes the shift or deletes it. Where a shift still has free places, Assign people ⑥ puts more people on it.
123456Three shifts with their people, the check-in links and the Assign people button
Put people on a shift
Under the list of people, Assign people (N places left) ② opens a picker of confirmed volunteers. It only appears while the shift has free places.
Click Assign people ② — the button shows how many places are left.
Search ③ by name, team or skill and tick the people ④. A lead sees only the people of their own teams.
Click Add to shift ⑤.
The page tells you how many were added. Somebody is skipped when they are already on the shift, when they are on another shift of this event at an overlapping time, or when the shift is full by then — two coordinators filling the last places at once can never both succeed. Every person who was added gets an email, and about a day before the shift starts they get a reminder, once.
Only confirmed volunteers can be put on shifts. If the picker says nobody has confirmed yet, confirm people under People first.
Volunteers check themselves in from My Volunteering. Check-in opens an hour before the shift and closes when it ends, so there is no check-in for a shift that is over, and checking out needs a check-in first.
Hours are counted from check-in to check-out. A shift checked into but never out counts nothing until you close it with Check out here.
Putting somebody on the rota emails them. Moving or deleting a shift does not email them again; tell them with a message.
Shifts with a team and tasks with a team are also what a team lead sees on their run sheet and Live view.
Troubleshooting
“Is already on another shift at that time” — each person can hold one shift at a time. Shorten one shift or choose another person.
Nobody to choose from — everybody who is confirmed is already on the shift, or (for a lead) nobody in your teams is confirmed yet.
The count cannot be lowered — the shift already has more people on it; take some off first.
The hours are wrong — check the shift for missing check-outs; use Check out or Reopen on the line.
The Tasks tab is the job list of your volunteer team for one event: things that have to happen, who does them and by when. A task can be for one person, for several named people, for whoever works a given shift, for a whole team, or open to everybody. Volunteers move their tasks on themselves. You find it under Team & Partners → Volunteers → Tasks. For the organizer’s own planning board — deadlines, priorities, dependencies — see The event task board.
What you can do here
Write down what has to happen and give it a start time and a due time.
Give a task to one or several confirmed volunteers, to a shift, to a team or to everybody.
Follow it through four statuses: Open, In progress, Blocked and Done.
Break a task into a checklist, and discuss it in comments.
Add a task
Type what has to be done in the title field ①, for example “Pick up the lanterns from the print shop”.
Under For ② choose one confirmed volunteer, or leave The whole team. People who have only been invited are not listed; the page says how many are still waiting.
Choose the Team ③ the task belongs to. A team lead must choose one of their teams.
Set Starts ④ if it has a time.
Click More details to choose a Shift ⑤ (everybody on that shift gets the task), a Due time ⑥ and a description.
Click Add task ⑦.
1234567The quick-add row of the Tasks tab with More details open
Who gets a task is decided in this order: the named people if there are any, otherwise the shift’s people, otherwise the team, otherwise everybody. People who are named get an email “New volunteer task at …” when they are added. A task that has a start time and is for named people, a shift or a team also sends a single reminder about two hours before it starts; a task for everybody has no reminder.
Work with the list
Open tasks come first, then done ones, each in time order. The line under a title says who it is for, its start and its due time, and when it is done, who ticked it — the volunteer, or “Marked done by the organizer”. The round box ① marks a task done or not done. The status menu ② sets Open, In progress, Blocked or Done; use Blocked for a task that waits on something. A checklist ③ shows how many items are done and lets you tick them. Comments ④ keep the discussion with the task. Edit ⑤ changes everything else.
12345Four tasks: blocked with a comment, in progress with a checklist, open and done
Edit a task
Click Edit beside the task’s title.
Under People ① tick everybody it is for. Ticking nobody means the shift, the team or everybody.
Change the Shift ②, the Starts ③ and Due ④ times and the details.
Under Checklist ⑤ write one item per line. Items you keep as they were keep their tick, so rewording item three does not untick items one and two.
Click Save ⑥. Delete task removes it.
123456The edit form of a task with people, shift, times and a checklist
Good to know
Times are the event’s own wall-clock times, the same as on shifts.
Volunteers see their tasks on My Volunteering. They can change the status, tick checklist items and add comments themselves; the organizer and the team’s lead see it here at once.
Giving a person a task who is not confirmed is refused. If somebody steps back or is taken off the event, their tasks go back to the team.
Tasks with a start or due time show on the Run sheet; Blocked and overdue ones show on Live.
A team lead sees and changes only the tasks of their own teams.
Marking a task done sets it to Done; marking it not done sets it back to Open.
Troubleshooting
The person I want is not in the list — only confirmed volunteers can be given tasks. Confirm them on People.
“That volunteer is no longer confirmed for this event” — the person was removed or stepped back after you opened the form. Choose somebody else.
Nobody got the email for my task — emails go to people who are named, at the moment they are added. A task for a shift or a team is not mailed when it is created; it appears on their My Volunteering page, and the reminder before its start time reaches them.
The task board is the organizer’s planning list for one event: everything that has to be done before, on and after the day, with a priority, a deadline, a start time, an owner and, where it matters, another task it has to wait for. Open the event and choose Task Management at the bottom of the Manage menu. It is separate from the volunteer tasks, which are the jobs of the volunteer team; the board is where you plan, and you can hand a board task to a team member or to a confirmed volunteer.
What you can do here
Add tasks with a title, a category, a priority, a due date and a start time.
Apply ready-made tasks from the template library and let the deadlines fall into place.
Assign a task to yourself, to a team member or to a confirmed volunteer.
Make a task wait for another one, and keep a checklist and comments on it.
Watch the six counters — total, pending, in progress, completed, blocked and overdue — and the overall progress bar.
Add a task
The row near the top is a quick add: a title is enough.
Type the title ④, for example “Confirm catering order”.
Optionally set Starts ⑤ — the date and time the work begins. A task with a start time shows on the volunteer Run sheet, and a volunteer it is assigned to gets a reminder about two hours before.
Choose the Category: Venue & Logistics, Marketing & Promotion, Production & Technical, Vendor Management, Communication, Finance & Budget, Risk Management or Post-Event.
Click More details to set a priority (High, Medium, Low), a due date and a description.
Click Create Task ⑥. The task starts as Pending, with priority Medium unless you chose another.
The cards at the top count the tasks by status; click one, such as Blocked ③, to see only those tasks, and the chips under them filter by category. The Template Library tab ① opens the ready-made tasks and Add Task ② jumps to the quick add.
123456The Task Management page with the counters, the filters and the quick add
Work with a task card
Each card shows its priority, its category, its start time, its due date and its status. The round box ① marks it complete. A grey Waiting for badge ② appears while the task it depends on is not completed. A green badge ③ with a volunteer’s name shows who it is given to. The first dropdown ④ assigns it, the second ⑤ changes its status between Pending, In Progress and Blocked, and the pencil ⑥ opens the edit form. A due date in the past turns the card red and marks it Overdue.
123456Three task cards: blocked, in progress with a checklist and a volunteer, and one waiting for another task
Edit a task
Click the pencil on the card.
Change the Task Title ①, the Category ②, the Priority ③, the Due Date ④ and Starts ⑤.
Under Waits for ⑥ choose another task of this event that has to be completed first. The card then shows Waiting for that task until it is done. A task cannot wait for itself, and two tasks cannot wait for each other.
Under Checklist ⑦ write one item per line; items you leave unchanged keep their tick.
Add a description and click Save.
1234567The inline edit form of a task with Waits for and a checklist
Assign a task
The first dropdown on each card has two groups. Team lists you (Me (owner)) and the members of your organizer team. Volunteers lists the volunteers who are confirmed on this event.
A team member can take a task only if their role covers it: a venue manager takes Venue and Risk tasks, a finance manager Finance, marketing Marketing and Communication, and the catch-all staff role anything. A task from the template library may name its own role. Otherwise you are told which role to assign instead. You as the owner can take anything.
A team member who is assigned a task gets a notification.
A volunteer gets the same “New volunteer task” email as for a volunteer task and sees the task on My Volunteering, where they can move its status, tick the checklist and comment. A task has one person at a time; choosing somebody else replaces the first.
Choose Unassigned to clear it.
Use the template library
Click Template Library.
Tick the tasks you want ②, one by one or a whole category at a time with Select all ①.
Click Apply Selected Templates ③. The tasks are created for this event.
123The Template Library with the Venue and Logistics templates
The library holds ready-made tasks in the eight categories, each with a priority and a typical lead time such as “30 days before”. Due dates are worked out from the event date. If your event is closer than the template’s own lead time, the deadlines are compressed so that none lands in the past, and keep their order. Post-event tasks stay after the event. Templates you already applied show a tick and cannot be applied twice.
Good to know
Who may use the board is decided by the Tasks permission: the organizer, venue managers and volunteer coordinators have it, and you can tick it in a custom role. It is a separate permission from editing the event.
A completed task shows when it was done. Unticking it sets it back to Pending.
Deleting a task asks for confirmation first.
Board tasks with a start time appear on the Run sheet, for people who hold the Tasks permission.
If volunteers have been invited but nobody has confirmed, the page says so and links to People; only confirmed volunteers appear in the list.
Troubleshooting
“… cannot take a … task” — the team member’s role does not cover the category. Choose a member with the right role, a staff member or a volunteer.
The volunteer is not in the list — they are not confirmed for this event yet.
“That task cannot be waited for” — the task is on another event, or choosing it would make two tasks wait for each other.
The deadlines of applied templates look too close together — the event is near, so the lead times were compressed to fit.
Two tabs of an event’s volunteers are made for the days around the event. Run sheet puts every shift and every task with a time into one list, in order, so everybody works from the same plan, on paper if you like. Live shows what is happening right now: who is on shift, who has not turned up, and what is overdue. Open the event, then Team & Partners → Volunteers, and choose the tab. Both are open to the organizer, volunteer coordinators and — for their own teams — team leads.
What you can do here
See the whole event as one timeline, per day, with who is doing what and where.
Print the run sheet, or open it on a phone at the door.
Narrow the plan to one team.
On the day, see how many volunteers are checked in, call or message the ones who are missing, and check them in yourself.
Spot tasks that are blocked or overdue before they cost you the evening.
The run sheet
The run sheet has one block per day, each starting with the date ③. Every line shows the time ④, a coloured label for what it is ⑤ and the title, and below it who is doing it and where ⑥. There are three kinds of line:
Shift — the volunteer shifts with their time span, their people (or “Nobody yet (3 needed)”), their team and their place.
Task — volunteer tasks that have a start or a due time, for their named people or “The whole team”. Done tasks are greyed out and struck through.
Task board — tasks of the event task board that have a start time, with their owner. These are shown only to people who hold the Tasks permission.
The dropdown ① narrows the list to one team. Print ② opens a clean version in a new tab without the menus; click its Print button, or use your browser’s print command. Times are the event’s own clock times.
123456The run sheet for the gala day with shifts and tasks in time order
The Live view
The Live tab refreshes itself every minute, and Refresh ① does it on demand. The cards at the top count the shifts on now, the people checked in, the people Not checked in ②, the tasks overdue or blocked, and the items missing from the packing lists of your teams. Below them:
Shift started, not checked in ③ lists people whose shift began more than 15 minutes ago and who have not checked in. Each line has Call ④ (opens the phone dialler), Share on WhatsApp when the number is in international form (starting with + or 00), and Check in ⑤ to mark them present.
Two lists of shifts: the ones that are on right now and the ones that start within the next three hours, each with how many are checked in against how many are on the shift and how many it needs ⑥. Amber means the shift is not full.
Tasks that need attention ⑦ lists tasks that are Blocked, or whose due time has passed without being done, with who they are for.
1234567The Live view during the Autumn Fair with three people not yet checked in
Good to know
The Live view is for the moment. Before the event it shows “Nothing right now” until the first shift starts; use the Run sheet for planning.
Checking in from here is the same as Check in on the Shifts tab. Hours are counted from that moment.
A team lead sees their own teams’ shifts and tasks, and those without a team. They can check in only the people of their own teams.
The page only asks the server for fresh figures in the background. It does not keep you signed in: an unattended screen still signs itself out after your idle timeout.
Items missing comes from the team packing lists; see Team inventory.
Troubleshooting
A person is missing from the run sheet — shifts always show; tasks only when they have a start or a due time.
Share on WhatsApp is missing — the phone number has no international prefix. Edit the number on the roster, for example +49 …, and it appears.
Everybody shows as not checked in — volunteers check in from My Volunteering up to an hour before their shift. Check them in here if they cannot.
The run sheet is empty — add shifts and tasks with times first.
The Messages tab writes to the people who help at one event: everybody who is confirmed, one team, the people on one shift, or the people who have not answered yet. The same words can be copied for your WhatsApp group. Open the event, then Team & Partners → Volunteers → Messages.
What you can do here
Send one email to a chosen group of volunteers, with a subject and a message.
Copy the same text, ready to paste into WhatsApp.
Read what was sent before, to whom and by whom.
Send a message
Under To ① choose who receives it:
Everyone confirmed — every confirmed volunteer of this event. Only the organizer and volunteer coordinators can pick this.
One team — the confirmed people of the team you choose next.
One shift — the confirmed people on the shift you choose next.
People who have not answered yet — everyone who was invited or applied and is still waiting.
Type a Subject ② of up to 200 characters.
Write the Message ③, up to 5,000 characters. Plain text with line breaks is best.
Click Send ⑤ and confirm that the message goes to everyone in the chosen group. The page tells you how many people it was sent to.
To post the same words in a WhatsApp group, click Copy for WhatsApp ④ before or after sending. It copies the subject in bold followed by the message, ready to paste.
123456The Messages tab with a message written and the history of earlier ones
Read what was sent
Under Sent messages ⑥ the latest messages are listed with their subject, who they went to, how many people, when and by whom. Click a line to read the message.
Good to know
Emails are sent at your own hourly sending limit (Settings → Email), the same limit as invitations and reminders, and they are spread so the last one leaves before the event ends. A large message can therefore take some hours to reach everybody.
If nobody is in the chosen group — a team with no confirmed people, a shift that is empty — nothing is sent, and you are told so.
A team lead can write only to their own teams and the shifts of those teams, and to people of their teams who have not answered. They do not see Everyone confirmed, and their history shows only their own messages and those to their teams.
Messages go to the address on your roster. They are about helping at the event; for tickets and orders use Attendee Messages and Attendee Announcements instead.
The message cannot be taken back once it is sent. Read it through before you confirm.
Troubleshooting
“Nobody is in that group yet” — the group is empty. Confirm people under People or choose another group.
“You can only write to your own teams” — you are a team lead and chose a group outside your teams.
Somebody says nothing arrived — the email may still be waiting for your hourly limit, or be in spam. Send them the WhatsApp copy.
I cannot choose Everyone confirmed — only people who manage all volunteers (organizer, volunteer coordinator) can write to everybody.
A volunteer’s roster entry holds what you need to work with them: name, email address, phone number, skills, your own notes, and the hours they worked on your shifts. This article explains who sees what, how the hours statement works and how to delete a volunteer’s data. You find the roster under Grow → Volunteers.
What you can do here
Check who on your team sees which details.
Download a volunteer’s hours statement as a PDF.
Delete a volunteer and everything recorded about them.
Who sees what
You and volunteer coordinators see each person’s contact details on the People tab, and everything in the roster.
Team leads see the roster to recruit from, but not your notes.
The Export CSV of the roster contains contact details, skills, notes and hours. Keep that file safe, and delete it when you are done.
Hours and the statement
Hours are the time between check-in and check-out on a shift. Only shifts that were checked out count, and only for events where the person was confirmed. On the roster the Hours column adds them up. The download icon in a person’s row gives a PDF Volunteer hours statement for a school, an employer or a scholarship application. It lists each event with its date, the number of shifts and the hours, a total, and the date it was issued, and says it is based on the check-ins recorded by you. It is not a snapshot: it states the record on the day it is printed.
Good to know
A volunteer can ask not to be invited again with the link in any invitation. They then show as No invitations wanted, and you cannot invite them.
Delete from roster removes the person and, with them, their invitations, shifts and hours on every one of your events. This is what a request to delete their data asks for, so it is not softened and cannot be undone.
When somebody signs up from the event page they are told that their name, email, phone and skills are shared with you to organise the volunteer team.
Troubleshooting
The hours statement is empty — no shift of the person has been checked out yet, or they are not confirmed on any event.
The statement shows fewer hours than expected — a shift that was checked into but never out counts nothing. Close it with Check out on the Shifts tab and download the statement again.
A thank-you ticket lets your volunteers attend the event they help at, free or at a reduced price. It is an ordinary ticket type with Volunteers only switched on. Everybody can see it on the event page, but only people who are confirmed volunteers of that event can buy it. You create it under Tickets & Pricing → Ticket Types in the event’s Manage menu; the volunteer Settings tab tells you whether the event has one.
What you can do here
Offer your volunteers a ticket at no cost, or at a price of your choosing.
Limit it to one per volunteer, or allow a plus-one.
Show volunteers your own thank-you where they buy it.
Create the ticket
Open Tickets & Pricing → Ticket Types and click Add ticket type, or click Edit on an existing one.
Give it a name such as “Volunteer thank-you” and set the Price ①. Zero makes it free.
Set the Capacity ② to about as many tickets as you have volunteers.
Tick Volunteers only ③: “Shown to everybody; only this event’s confirmed volunteers can buy it (one each)”.
Under Max per person ④ leave the field empty for one ticket per volunteer, or enter a higher number to allow a plus-one.
Click Save Changes, or add the ticket type.
1234The edit form of the Volunteer thank-you ticket type with Volunteers only ticked
What visitors and volunteers see
On the public event page the ticket sits in the list with a green Volunteers only label ①, the way members-only tickets show. A visitor who is not signed in reads “For this event’s volunteers — sign in to get it”; a signed-in person who is not a confirmed volunteer reads “For this event’s confirmed volunteers”, with a link to volunteer if you have switched on the sign-up. A confirmed volunteer finds the ticket unlocked, with your thank-you message above the list.
1The event page for a visitor, with the locked Volunteers only ticket
The volunteer buys it like any other ticket, signed in, through the normal checkout. For a free ticket no payment is taken. Your thank-you message also appears beside the ticket at checkout and in the confirmation email.
Settings explained
Price — zero for a free ticket, or any price for a reduced one.
Max per person — counted across all their orders. Empty means one per volunteer.
The ticket does not change the price your event advertises. It is left out of listings, search results, price ranges and feeds, so a free volunteer ticket cannot make a paid event look free.
Only confirmed volunteers can buy it. Somebody who was only invited, or who stepped back, cannot. The volunteer must be signed in with the email address on your roster; the invitation email lets them create that account.
The ticket is the same as any ticket afterwards: it has a QR code and is scanned at the door.
Volunteers also find a Get my ticket button on their My Volunteering page when you have one for them.
The ticket counts against the event’s capacity like every other ticket.
Troubleshooting
A volunteer cannot see or buy the ticket — they must be Confirmed on this event and signed in with the email address you invited. Accounts are linked to roster entries only on a confirmed email address.
The Settings tab says there is no volunteer ticket — no ticket type of this event has Volunteers only ticked. Use Go to tickets to make one.
A volunteer needs two tickets — raise Max per person on the ticket type.
Inventory is the list of everything your association owns, borrows or buys for its events: chairs, speakers, a dhol, lanyards, rice, plates. It lives under Inventory in the Work group of your organizer sidebar. Every item belongs to one volunteer team that looks after it, or to the Shared pool that you and your volunteer coordinators run yourselves.
What you can do here
Keep one list for every team. You see all items. Each row shows the team badge, whether the item is Equipment or a Consumable, its category, how many are available out of the total, where it is, and its condition.
See who has it. Between events an item is either held by a person from your volunteer roster or kept at a place you name, such as “Kulturhalle store room B”. Borrowed items also say who lent them.
Know what to buy. Items that run low show in red and appear on the Shopping list.
Print QR labels to stick on the items — see QR labels.
Read the Inventory page
The three tiles at the top show Total Items (active items only), Low Stock and Total Value, which is unit cost times total quantity. Click the Low Stock tile to open the shopping list.
The tabs under the title open the Shopping list ① and Purchases; beside the title are QR labels, which opens a print sheet, and Add Item ④.
Narrow the list with the filters: search by name, SKU or barcode, Team ② (a team, or Shared pool), Type (Equipment or Consumable), Category, Low stock only and Show inactive items. Clear removes them again.
1234The Inventory page with the totals, the filters and one row per item
Under Low stock only ① you see what has fallen to its minimum. The available count ② turns red and says “minimum 20”. An item is low when it has a minimum above zero and the number available is at or below it.
12The list narrowed to items at or below their minimum stock
Teams, the shared pool and who can see what
You see and change every item, including the Shared pool, and you are the only one who manages categories (the Manage Categories button).
A team lead sees and changes only the items of the team they lead, from their own page: Your team’s inventory. They never see another team’s stock, and they cannot put an item in the Shared pool.
A coordinator or event manager works with the packing lists of an event from Manage → Event Inventory. The Shared pool has no lead, so it is looked after by you and the coordinators.
Borrowing between teams is not a function of the platform: teams ask each other outside the system.
Good to know
Equipment comes back after an event. Consumables get used up and are bought again; when you record the return of an event you say how many were used up.
An item that is checked out to an event cannot be deleted until it is back.
Used-up and missing quantities leave the stock for good. Damaged items stay counted in the total but are not available.
Items you switch off with the Active checkbox on the item page disappear from the list and from the packing list picker. Tick Show inactive items in the filters to list them again, marked Inactive; open one and tick Active to bring it back.
Categories (for example Sound & lighting, Furniture, Catering) are shared by all teams. Add one under Manage Categories.
Troubleshooting
An item is missing from the list — check the Team filter, and tick Show inactive items in case the item was switched off. A lead’s own page lists only their team.
The Low Stock tile shows zero although something is nearly out — the item has no minimum set. Open it and enter a Min. Stock Threshold.
The available count is lower than what is on the shelf — the rest is planned on an event’s packing list or still out. Open the item: the Booked at events panel shows where.
12.15 Items: adding, finding and looking after them
An item is one kind of thing you keep, with a quantity: “Folding chairs, 420”. This article covers adding an item, saying where it is, borrowed items, and the other things you can do on an item’s page. Open Inventory in the Work group and click Add Item, or Edit on an existing row.
Add an item
Click Add Item on the Inventory page and type the Item Name. It is the only text that is required, together with the quantity, condition and ownership.
Choose the Team ② that looks after it. Leave it on Shared pool if nobody in particular does. A team lead adding an item on their own page cannot choose: it is always their team.
Choose the Type ③: Equipment comes back after an event, a Consumable gets used up and is bought again.
Enter the Total Quantity ④ and, if you like, a Unit ⑤ such as pcs, kg or rolls. Put a Min. Stock Threshold ⑥ on anything you buy again; when the stock falls to that number the item appears on the shopping list.
Say where it is under Who has it ⑦ (a person from your volunteer roster) or Storage Location.
Choose the Condition (New, Good, Fair, Poor, Damaged, Retired) and the Ownership ⑧. For Borrowed items a field Lent by ① appears: write whose it is, for example the Patel family. Rented and Owned have no such field.
Optionally add a category, SKU, description, barcode, picture and the Unit Cost (used for the total value), then click Create Item.
12345678The Add Item form, filled in for borrowed folding tables
Settings explained
SKU — your own code. It must be unique among your items.
Min. Stock Threshold — zero means “do not warn me”. Above zero, the item is low stock when the available number is at or below it.
Active (on an existing item) — switch it off for something you no longer keep. It leaves the list, the shopping list, the labels and the packing list picker. Show inactive items on the Inventory page finds it again.
Image — JPG, PNG or WebP, up to 2 MB.
Where is it?
Open an item with Edit. The Where is it panel ① tells you in a sentence: “With Ravi Patel”, “At Association office”, or that nobody has noted where it is, plus who lent it. Change it with the person list ② and the place field ③, then click Save. You can use both: a person and a place.
1234An item page with the Where is it panel beside Record a purchase
Booked at events — appears when the item is on the packing list of a current or coming event. It has quick buttons for Taken and All back; see QR labels.
Restock — adds a quantity with an optional note, without a purchase. Use it for stock that was found, donated or counted again.
Maintenance — log a Service, Repair or Inspection with a date, a cost and the date of the next service.
Transaction history — the latest movements: taken to an event, returned, used up, restocked.
Delete — asks for confirmation. It is refused while any quantity is still checked out to an event.
Good to know
Changing the team of an item moves it to that team’s list, and its lead can then manage it.
Quantities are whole numbers. The available figure is the total minus what is planned or out on event packing lists, minus damaged, used-up and missing items.
The per-unit cost is only for the Total Value tile. The money you actually spend is recorded as purchases.
Troubleshooting
The SKU is refused — another of your items already uses it.
Lent by does not appear — choose Borrowed under Ownership first.
I cannot choose a person under Who has it — the list shows your volunteer roster. Add the person under Volunteers first.
When a team buys something for the inventory, you record it as a purchase: the quantity goes onto the stock, the receipt is kept, and the money appears among the event’s expenses. If a volunteer paid out of their own pocket, the purchase stays open until you mark it paid back. Find the list under Inventory → Purchases, and what to buy under Inventory → Shopping list.
Record a purchase
Open the item you bought on the Inventory page (Edit).
In Record a purchase enter the Quantity bought, the Amount paid, and the Date.
Under Paid by choose The association, or the volunteer who paid. A volunteer’s purchase is marked To pay back until you settle it.
Optionally choose For event and attach the Receipt (PDF, JPG, PNG or WebP, up to 10 MB).
Click Record a purchase. The quantity is added to the item’s stock straight away.
The Purchases page
Every purchase from every team is listed, newest first, with its date, the item, the team, who paid and the amount. A team lead sees the purchases of their own team only.
The yellow notice ① gives the total still to pay back to volunteers. Click Show to list only the open ones.
The Paid by column ② shows the volunteer and To pay back or Paid back. Purchases paid by the association carry no badge.
Click Receipt ③ to open the file you attached. Receipts are private: only you and the team’s lead can open them.
When you have paid the volunteer, click Mark paid back ④. Mark not paid back undoes it. Only you, the organizer, can do this; a lead sees the status but has no button.
1234The Purchases page with one volunteer purchase still to be paid back
The shopping list
The shopping list shows every active item at or below its minimum stock, grouped by team. Teams without items do not appear, and the Shared pool is a group like any other.
Each team group ① lists its items; the line on the right ② says how many are left and the minimum.
The box Share the list ③ holds the same list as plain text, with the team name in bold for WhatsApp.
Click Copy ④ and paste it into your team’s group.
1234The shopping list per team, with the text ready to copy into a WhatsApp group
Good to know
A purchase is an ordinary expense. It shows in the event’s expenses and its profit and loss; the title reads “40 × Basmati rice”. Equipment is filed under the category equipment, consumables under other. The currency is the item’s, or euro if it has none.
If you pick no event, the purchase belongs to your organization rather than to one event.
The money is only recorded. The platform does not pay anyone back; you do that yourself and then mark it.
Use Restock on the item page instead of a purchase when nothing was bought.
Troubleshooting
The item is not on the shopping list — it has no minimum set, or its available quantity is still above it. Quantities planned for an event count as not available.
A receipt link says not found — the purchase was recorded without a file.
The volunteer is missing under Paid by — only people on your volunteer roster are offered.
A packing list says which items each team takes to an event, how many, and what came back. Each event has its own lists, one per team plus the Shared pool. Open the event and choose Manage → Day-of Operations → Event Inventory. Event editors and volunteer managers see every team’s list; a team lead sees only the lists of the teams they lead.
Plan what goes to the event
Click Allocate Item at the top of the page and choose the Item ①. The list is grouped by team and shows how many are available. Items that are already on this event’s list, or that have none left, are not offered.
Enter the Quantity ② and optionally a note, then click Allocate ③. You cannot plan more than what is available.
The line appears in its team’s box ④ with the status Allocated: “Planned 420 · taken 0 · back 0”, and a button Taken to the event ⑤ for the day.
12345The packing lists of the Diwali Gala, with the Allocate Item panel open
On the day: taken, then back
When the items leave the store, enter the number on the line and click Taken to the event. The status becomes Checked Out.
When they come back, fill in the return form on the same line: Returned ①, Damaged (equipment) or Used up ② (consumables), Missing ③, and a note. Click Save ④. The numbers together cannot exceed what is still out.
When everything is accounted for the line reads Returned.
1234The return form of a consumable: returned, used up and missing
Quantities used up or missing leave the stock for good. A missing item that turns up later can be added again with Restock on its item page.
What is still missing
Once recorded, anything missing — and, after the event has ended, anything still out — is collected in a yellow box Not back yet ①. It lists the team and the items. Click Create a task for the team ② to add one task for that team, “Find missing items”, due in seven days and listing each line. It shows on the members’ My Volunteering page and with their lead.
The return forms ③ ④ sit on every line that still has items out. Lines in the Shared pool have no task button, because the Shared pool has no team to give the task to.
1234The Not back yet box of the Navratri Garba Night, with a button per team
Good to know
Allocating does not move anything: the available figure on the item drops so nobody else plans the same chairs, and recovers when they are returned.
You can remove a line (Remove from list) only while nothing has been taken, or once everything is back.
On an item’s page the panel Booked at events shows the same line with one-tap buttons Taken and All back — made for use after scanning a label. All back counts everything as returned, not used up.
Copying setup from an earlier event (Manage → Volunteers) can carry packing lists over when enough stock is available.
Troubleshooting
Only X units available — the rest is planned for another event or still out. Lower the quantity or return the other event’s items first.
The item is not in the list — it is already on this event’s list (change the line instead), inactive, or has nothing available.
A lead sees an empty page — they see only the teams they lead.
A QR label on an item lets someone open it with a phone: scan it and the item page opens, with its location, its place on the packing list and the buttons to mark it taken or back. Print the labels from Inventory → QR labels.
Print labels
On the Inventory page, optionally filter by Team; the QR labels button keeps your filter, so you print one team’s labels at a time.
Click QR labels. A plain sheet opens with one label per active item: the QR code, the name, the team (or Shared pool) and the SKU.
Click Print ①. The button and the header do not print, only the labels ②.
Cut along the dashed lines and stick each label on its item or box.
Point a phone camera at the code and open the link. You need to be signed in.
If you are the organizer, the item opens on your Inventory page. If you lead the team the item belongs to, it opens on your own team inventory page.
If the item is on the packing list of a current or coming event, the top panel Booked at events shows the figures and two buttons: Taken marks all that are still to be taken, All back marks all that are out as returned. Use the full packing list for used-up, damaged or missing items.
The panel heading ① introduces the events; Taken ② records the whole planned quantity as taken, and Packing list ③ opens the event’s list. Events that ended more than seven days ago are no longer shown.
123An item page with the Booked at events panel and its one-tap buttons
Good to know
The code contains a random token, never an id, and nothing about the item itself. Anyone who finds a label without permission is refused, and sees nothing about the item or who holds it.
Shared pool items open only for the organizer, because they have no team lead.
The label of an item you deactivate is no longer printed. Printing again never changes an existing code, so old labels keep working.
Troubleshooting
The scan says access denied — you are signed in with an account that neither owns the inventory nor leads that team.
The scan asks me to sign in — that is expected; sign in and open the label again.
The sheet is empty — the chosen team has no active items.
EventMann is a platform for finding and booking event tickets, and for the organizers, vendors, sponsors, staff and venues that make those events happen. This page is the map: read it first, then follow the link that fits what you want to do. If you only want to look at events, you do not need an account at all.
Create an account
123The registration page with Google, Facebook and LinkedIn buttons and the email form
Open Register at the top right.
Press Google ①, Facebook or LinkedIn to sign up with that account, which skips choosing a password. Or fill in the form: Name ②, Email, Password and Confirm Password.
Press Create account ③.
The ordinary registration page creates an attendee account, the one for browsing and buying tickets. Organizer, vendor, sponsor and venue accounts are created from their own sign-up pages, linked from the footer.
You are signed in straight away. We send you an email with a link to verify your address; it is valid for 72 hours. Some things, such as buying a membership, publishing as an organizer or accepting a ticket transfer, need a verified address.
A password needs at least 8 characters with an uppercase letter, a lowercase letter, a number and a special character.
Sign in
123The sign-in page with social sign-in, email and password, Remember me and Forgot your password?
Open Sign In and enter your email and password, or use one of the social buttons you registered with.
Tick Remember me ③ if you want to stay signed in on this device.
If you turned on two-factor authentication, enter the 6-digit code from your authenticator app (or a recovery code).
Forgot your password? Press Forgot your password? ② and follow the emailed link, valid for 60 minutes. An account you do not use is signed out after a period of inactivity.
Find your way around
The avatar menu with links to profile, notification preferences, tickets, memberships, messages, dashboard and sign out
The top bar — the search box, the language flag, a light/dark switch, the ? button that opens help for the page you are on, a messages icon, the notification bell and your avatar. Under it: Categories, Locations, Organizers, Vendors, Venues, Sponsors, Staff / Helpers and All Events.
Your avatar menu — My Profile, Notification Preferences, My Tickets, My Memberships, My Messages, your Dashboard and Sign Out. If your account has more than one role, a role switcher appears here.
Your account sidebar — the same places and more, shown on every attendee page, with a Search menu box (press Ctrl+K) that jumps to any page of your account.
One account, several roles. You can ask for another role without a second account. An organizer role is granted at once on a verified email; vendor, sponsor and venue requests are reviewed first. Staff members are added by an organizer. Switch between roles you hold from the avatar menu.
You can browse and search without an account. A checkout asks you to sign in only if that event’s organizer requires it.
EventMann is operated by ChetsApp UG in Fellbach, Germany, and is available in several languages: choose one with the flag in the top bar or in your profile.
I signed up but do not see my dashboard — check your email for the verification message, including spam. The Dashboard link opens the dashboard for your current role.
I want to become an organizer, vendor, sponsor or venue owner — use the Become an Organizer or Become a Vendor style links in the footer while signed in; you do not need a new account.
I was hired to help at someone’s event — the organizer adds you to their team; the invitation email gives you access to that event.
I cannot sign in — use Forgot your password?; if you registered with Google, Facebook or LinkedIn, use that button instead.
The Events page lists everything currently on sale, soonest first. Use it when you want to look through a category or a time window rather than search for something specific. Open it with All Events at the right end of the top bar, or from the footer. You do not need an account.
12The Events page filtered to the Music category, with the category and date lists above the results
What you can do here
Filter by category ① — the Category list contains the categories that have at least one upcoming event.
Filter by date ② — Today, This Weekend, This Week or This Month narrows the list to events that start in that window.
Search within the list — the search box matches the event name, the city and the venue name, not the description. For a fuller search with prices and dates, use Search.
Combine them — category, date and words work together. When any filter is active, a link next to the search bar clears it.
Open an event — click a card or Get Tickets. Each card shows the date, venue, the organizer and the lowest ticket price.
How results are ordered
Soonest start date first.
Twelve events per page, with page links under the list.
Which events are listed
Only events that are Live and public and have not started yet. A draft, a paused event or an event set to private is not listed. A private event still opens for people who have its link.
The list is narrowed to the country your connection appears to be in, because events elsewhere are rarely useful for a purchase. If there are no events for your country, you see all events. This also applies to the home page, Locations and the organizer and vendor directories. It does not apply to Search, and any event link opens from anywhere.
If an organizer pauses a live event, it disappears from the list at once, but the direct link still works for people who have it.
Good to know
Browsing never needs an account. Signing in adds Save on event pages so that you can keep a shortlist (see Saved Events).
The Locations link in the top bar opens a map with popular cities and countries, and a page for each place that has events.
Troubleshooting
An event I expected is missing — it may not be live yet, may be paused or private, or its date may fall outside the date window you chose. Clear all filters first. Try Search too, which is not limited to your country.
A category I know is missing — categories without upcoming public events are left out of the list.
There are no results — broaden the date window or remove the category. The empty page offers a link back to the full list.
Search is the finder to use when you know roughly what you want: a word, a city, a date range or a budget. It lives at /search: open it with Advanced search next to the result count on the Events page, which carries your search words along. It puts every filter in one place. No account is needed. The search box in the top bar is a lighter tool: it opens the Events page filtered by your words, which match the event name, city and venue only.
123Search results for “concert” with the extra filters open: dates and price range
What you can filter by
Keyword ① — matches the event title, description, venue and city.
Categories and City — two lists that only offer values that currently have upcoming events, with the number of events next to each category.
Free ③ and Online — check boxes. Free keeps events that have at least one free ticket type on sale; Online keeps online events.
More filters — a From and To date, and a Min price and Max price. The price range keeps events with at least one ticket type on sale inside it.
Sort ② — Soonest first, Latest first, Title A–Z, Price: low to high and Price: high to low. Price sorting goes by the cheapest ticket type on sale for each event.
How to search
Type a keyword in the box ① and press Search, or leave it empty and use only the filters.
Set any filters. Press + More filters for dates and prices.
The page shows how many events were found, twelve to a page. Use Clear filters to start again.
Good to know
Only events that are live, public and not yet started are found. A private event (direct link only), a draft or a paused event never appears.
Search is not narrowed to your country, unlike the Events page. See Browse Events.
The filters are kept in the page address, so you can bookmark a search or send it to someone.
When a search finds nothing, the page shows a short list of events that have been booked a lot in the last seven days, so you are not left with a blank page.
Members-only and volunteer-only ticket types do not influence the price shown or the price filters, so an event is never listed as free only because of a thank-you ticket for volunteers.
Troubleshooting
I get no results for a word I know exists — a filter from an earlier search may still be set (price, dates, Free, Online). Press Clear filters.
The price filter seems odd for an event with several tiers — an event matches when any ticket type on sale falls in your range; the card then shows its lowest price.
An event I can open directly is missing — it is private, not live or already started.
The category list lacks a category — categories without upcoming public events are left out.
The event page is where a listing turns into a decision: it has everything you need to know about the event, the organizer’s rules and every ticket type on offer. You get there from any list, a search result, a shared link or the organizer’s page.
12345A whole event page: summary, description, location, organizer, ticket conditions, reviews and the ticket panel
What is on the page
Header — the cover picture (a generated picture for the category when the organizer uploaded none), the category, a Featured badge, an age badge when there is a minimum age, the title, the date and time and the venue address. Times are shown in the event’s own time zone, with the zone shown next to them. An online event says that the link is shared after you book.
Save and share ① — Save adds the event to My Saved Events (signed in only). The round buttons share it by Facebook, X, LinkedIn, WhatsApp, email or copy its link.
About this event — the organizer’s description, and, where they added one, an agenda by day.
Location — the venue and a map with Open in Maps for directions.
Organized by ② — the organizer’s name and logo, how many followers they have, Follow or Following and Contact. The organizer’s email address is never printed; Contact opens a form (see How to Contact the Organizer). A Payments verified badge means they finished setting up payments.
Ticket conditions ③ — what you may do with a ticket after buying: cancel, what you get back (the cancellation terms), change the attendee details and transfer it. Read this before you buy; see How to Get a Refund.
Sponsors — sponsors the organizer chose to show.
Reviews ④ — the average score, how many people gave each star count, and written reviews with the organizer’s reply under them. Only confirmed attendees can leave a review after the event.
The ticket panel ⑤ — Ticket Types with a quantity chooser, described below.
More events like this — other events in the same category. Report this event at the bottom opens the contact page with the event already filled in.
The ticket panel
The panel lists every ticket type you may see, with its price and a status: Available, Selling Fast, Filling Up, Only 3 left! or Sold Out. A price struck through with a smaller one beside it is a discount that applies now, for example a time-limited sale, and the price shown is the price you pay.
Set a quantity with + and −. When you choose something, the order total appears; fees are only listed when the organizer passes them on to you.
The button under the panel reads Select Tickets until you choose something, then Book Now with the total. It takes you to checkout with your quantities (see Checkout Process).
Some rows are locked for you: Members only tickets, and Volunteers only thank-you tickets. See Member Benefits.
If members may book earlier than everybody else, the panel says when you can start.
For a seated event you choose seats on the checkout page, not here.
Where the event has a waitlist and a type is sold out, you can join it at checkout.
Write a review
After the event has started, open Reviews from the event page, or Leave a review from your order or your dashboard.
12The review page with the rating summary, the Write a Review form and the sort options
Choose the stars under Write a Review ①.
Add a Title and a Comment if you like (both optional) and press Submit Review ②.
You can write one review per event, and only if you hold a confirmed booking for it. Reviews can be sorted by Newest, Highest, Lowest and Most Helpful, and the organizer may reply under yours.
Good to know
If the ticket button is greyed out or missing, sales have not opened yet or have closed, or everything is sold out. The page tells you which.
Prices already include the active discounts. A free ticket for volunteers does not make an event look free in lists or search.
You can follow the organizer and write to them without buying anything.
You can write a review once the event has started and you hold a confirmed booking for it. You can write one review per event, with a star rating and an optional title and comment, under Reviews or from your order in My Tickets.
Troubleshooting
All ticket types say Sold Out — the booking button stays disabled. Check whether the organizer offers a waitlist.
The price changed since my last visit — prices follow the organizer’s rules and time-limited sales, and the panel always shows the current price.
I cannot find where to review — the form only appears after the event has started and only for people with a confirmed booking.
I want to report a problem with the listing — use Report this event.
The vendor marketplace is where organizers find the businesses that help run an event — catering, photography, sound and lighting, décor, entertainment, rentals, security and marketing — and where those businesses get discovered. It is not a place to buy or sell tickets: tickets are sold by the organizers on their own event pages. You reach the marketplace with Vendors in the top bar, which opens the vendor page; the marketplace is the section Browse our vendor marketplace lower down.
123The vendor marketplace with featured vendors, search and filters, and a list of vendors
Who it is for
Vendors build a public profile once: services with prices, specializations and a bio. Organizers find them through search and filters instead of the vendor pitching to each organizer.
Organizers (and admins) browse the profiles and send a quote request from a vendor’s page.
Anyone can browse. Visitors from other roles see the same listing but not the quote button.
What you can do here
See featured vendors ① — up to six vendors highlighted by EventMann appear at the top while no filter is active.
Search and filter — by keyword, Category, Specializations tag, Price range and minimum star rating (the rating list’s first entry, Any, is the unfiltered option).
Sort ② — Newest, Highest Rated, Name A-Z, Price: Low to High or Price: High to Low. Press Apply Filters ③ to run it, or Clear Filters to reset.
Switch the view — the toggle above the results shows vendors as a grid or as a list.
Compare — tick the box on up to three vendors, then open Compare Selected to see them side by side: rating, number of reviews and price range.
Open a profile with View Profile.
A vendor profile
12A vendor profile with its services and prices and the Request Quote button
The company name, a Featured badge where it applies, the average rating and review count, the bio and the specializations.
Services ① — each with its price and how it is charged: fixed, hourly, daily, or on request. “Starting from” on a vendor card is the lowest active service price, not a quote.
Reviews — ratings from organizers the vendor worked for, with comments.
Request Quote ② — for signed-in organizers and admins. Write what you need (up to 2,000 characters), optionally name one of your events, and send it. The vendor gets a notification with your message. Pricing, scope and booking are then agreed directly between you; there is no quote or contract workflow on this page.
Good to know
Only approved vendors are listed. A new vendor profile appears after it has been reviewed.
Like the event lists, the marketplace shows vendors in your country when there are any; a vendor page opens from any link.
Signed out, the quote section asks you to sign in. A signed-in attendee does not get a quote button, because quotes are for organizers.
If you are a vendor yourself, your profile and services are managed in the vendor portal, not here (see Getting Started as a Vendor).
Troubleshooting
I do not see Request Quote — you are signed out or not signed in as an organizer or admin.
A vendor I know is missing — the profile may still be waiting for approval, it may be in another country, or your filters (price, rating, specialization) exclude it.
The compare box is disabled — three vendors is the limit; untick one first.
Every account on EventMann, whatever roles it holds, keeps the same core details on one page: My Profile. Open it from your avatar menu in the top right corner, or from My Profile in the sidebar of your portal. This article covers what lives there for everybody. Attendee-specific details are in Account Settings & Password.
1234The profile form with photo, name, email, language and Save Changes
What you can do here
Profile photo ① — upload a JPG or PNG up to 2 MB, or remove your photo to go back to your initial. The old file is deleted when you replace or remove it; there is no undo beyond uploading again.
Full Name — required. It appears on your bookings and, for organizers, may appear with the events you publish.
Email Address ② — required. Changing it makes your address unverified until you confirm the new one with the emailed link (valid 72 hours); messages and features that need a verified address pause until then.
Phone Number and Bio — optional. For organizer accounts the bio may be shown publicly.
Preferred Timezone — the zone in which event times are shown to you. It never changes an event’s actual schedule, which always runs on the venue’s own time.
Language ③ — the language for the site, the emails and notifications we send you and your ticket PDFs. The flag in the top bar changes the language for the page you are on without saving anything.
Save Changes ④ stores the form. The light/dark switch (the moon icon in the top bar) is separate: it saves at once.
What else the page shows depends on your role: an attendee sees a ticket count, the total spent and recent tickets; an organizer sees event totals; an admin sees platform figures.
A card invites attendees to become an organizer. Its Start hosting events button turns your account into an organizer account at once, with no approval, as soon as your email address is verified (see Getting Started).
Your password protects your account, and the settings in this article add layers on top of it. It explains each one: what it does, where to find it and what happens if you lose access. Most of it is on My Profile, reached from your avatar menu.
Password
123On My Profile: the Change Password form, the two-factor button and the Danger Zone
Change it under Change Password ① on your profile. You enter your current password and the new one twice; the new one needs at least 8 characters with an uppercase letter, a lowercase letter, a number and a special character. If you registered with Google, Facebook or LinkedIn, you never chose a password, so the form does not ask for the current one.
If you are locked out, press Forgot your password? on the sign-in page. The emailed reset link is valid for 60 minutes; ask for a new one if it ran out.
Email verification
New accounts start unverified. Click the link in the verification email, valid for 72 hours, to confirm your address. It works on any device because it does not need you to be signed in there. Some features need a verified address, for example buying a membership, accepting a ticket transfer or publishing an event. If the link expired or never came, ask for another from the notice on the site or from your profile. Changing your email address makes it unverified again.
Two-factor authentication (2FA)
2FA adds a second step at sign-in: after your password you enter a 6-digit code from an authenticator app such as Google Authenticator or Authy.
12The two-factor setup page with the QR code, the manual secret and the verification code field
On your profile press Enable Two-Factor ②. The setup page opens with a QR code.
Scan the code with your app. If you cannot scan it, type the secret shown under Can’t scan? Enter this secret manually ① into the app.
Enter the 6-digit code that your app now shows in the Verification code field ② and press Verify.
You are given 8 recovery codes, shown once. Save them somewhere other than the phone with your authenticator app, such as a password manager or a printout.
From then on every sign-in asks for a code, after your password. At that screen, Use recovery code lets you enter a recovery code instead. Each recovery code works once and is then removed.
After 5 wrong codes in a row, 2FA sign-in is locked for 15 minutes.
To turn 2FA off, use the same section of your profile and confirm with your current password. The secret and the remaining recovery codes are deleted.
If you lose both your authenticator app and your recovery codes, there is no way to get back in yourself: that is the point of a second factor. Contact Support and be ready to prove who you are in another way.
Active sessions
12Active Sessions: this browser marked as current and two other devices with a Sign out all others button
Open Active Sessions from the Sign-in & access card on your profile page (or go to /profile/sessions) to see every browser or device signed in to your account, with its IP address, browser and how long ago it was last active. Your current one is marked Current ①. Use the sign-out icon on a row to end that session, or Sign out all others ② to end every session except the one you are using. An account can hold at most 5 sessions; signing in on a sixth device signs out the least recently used one.
New device alerts
The first device you sign in with is trusted automatically. When you later sign in from a device we have not seen, we email you a New sign-in to your EventMann account message with the device and, when available, the location. Press Yes, this was me to confirm it. If it was not you, use the link in the email to secure your account and change your password at once.
Automatic sign-out
A session that has been idle for 30 minutes (the default) is signed out, so an unattended browser does not stay signed in. Background activity such as the notification bell does not count as activity.
Restrictions an administrator can apply
IP allow-listing — an administrator can limit an account to certain IP addresses. From another address you get an access-denied message instead of the sign-in screen. Ask whoever manages the account.
Suspension — a suspended account is signed out the next time it makes a request and cannot sign in until the suspension is lifted. Contact Support if you think it is a mistake.
Good to know
2FA and your password are independent: changing your password does not turn 2FA off, and 2FA does not change the password rules.
Your 2FA secret and recovery codes can only be changed by the enable, confirm and disable steps above.
Deleting your account (Danger Zone) asks for your password and cannot be undone; see Privacy & Data.
Troubleshooting
My authenticator code is rejected — codes are time based. Set your phone’s clock to automatic and use the next code.
I lost my phone — sign in with a saved recovery code, then set 2FA up again on the new phone.
I used all my recovery codes and lost my app — contact Support.
I get no verification or reset email — check spam and the address on your account, then ask for a new link; old ones expire.
I was signed out on one device after signing in on another — you reached the limit of 5 sessions.
EventMann has four settings you can adjust for yourself, and a set of accessibility features that are built into the pages. This article says what is there today and how to report something that does not work for you. The settings page is linked as Accessibility Settings from the Sign-in & access card on your profile page, and is also at /accessibility/settings, which works without signing in.
1234Accessibility Settings with High Contrast Mode, Reduce Animations, Screen Reader Optimised, a font size slider and Save Settings
The settings
High Contrast Mode ① — increases the contrast between text and background colours.
Reduce Animations ② — minimises motion effects and transitions. Nothing stops working; only the movement around it is removed.
Screen Reader Optimised — shows clearer focus outlines and keeps the skip links visible when they get keyboard focus.
Font Size ③ — a slider from Small to Extra Large (the default is Medium) that changes the text size across the platform.
Open Accessibility Settings from your profile page, or go to /accessibility/settings.
Switch on what you need and move the slider.
Press Save Settings ④. The page confirms and the setting applies on every page.
When you are signed in, your choices are saved to your account and follow you to other devices. When you are signed out, they are kept for your current browser session only. They are separate from the light and dark theme, so you can combine both.
Built into the platform
Keyboard use — interactive elements can be reached and used without a mouse, and focus is visible.
Structure — semantic page structure and landmarks so screen readers can move through a page.
Forms — inputs have labels, and errors are described in text next to the field, not only in colour.
Accessible seating — organizers can mark seats and whole sections as wheelchair-accessible. Those seats carry a wheelchair symbol on the seat map and in the seat list, and you can filter to show only accessible seats. The organizer enters this information, so ask them if it matters for your booking.
Keyboard seat choice — every seat map has a seat list of real buttons that announce section, row, price, accessibility and availability. The picture of the map itself is pointer-only; the list is the full equivalent.
Known limitations
Images and descriptions added by organizers may lack alternative text or structure; that depends on the organizer.
PDF tickets contain text but are not optimised for every screen reader. The ticket page in the browser shows the same information.
Content from other providers, such as maps and payment forms, is outside our direct control.
Our aim is to conform to the Web Content Accessibility Guidelines (WCAG) 2.1 at level AA. The page Accessibility Statement, linked from the settings page, describes our approach and these limits.
Report a problem
If you meet a barrier, such as a control you cannot reach by keyboard, text that does not resize or something a screen reader mishandles, open a support ticket or use the contact details on the Accessibility Statement. Name the page and describe what happened. Accessibility reports are treated as faults, not as feature requests.
Good to know
The settings page works signed out as well, so you can adjust the site before you create an account.
Your browser’s own zoom works as usual; the settings here are in addition to it.
Troubleshooting
I cannot find the accessibility menu — it is not in the top menu; open it from the Sign-in & access card on your profile page, or go to /accessibility/settings directly.
My font size did not stick — press Save Settings. When signed out, the choice lasts only for the browser session.
The seat map cannot be used with my keyboard — use the seat list beside it.
EventMann is a web application built for current browsers, so how well it runs depends mostly on how up to date your browser is. This article says what to expect, what must be switched on, and a limit that matters if you check people in with an iPhone.
Recommended browsers
Chrome, Firefox, Safari and Edge — the latest version of each is recommended.
The site uses modern web features, and the interactive parts (ticket quantities, menus, the payment form) rely on JavaScript, which must be enabled. An old browser is far more likely to cause trouble than any particular version number. Updating is the most reliable fix for layout or button problems.
Devices
The site adapts to desktop, tablet and phone screens. There is no EventMann app for attendees: you buy tickets, show them and manage your account in a browser on any device. Your tickets are web pages and PDFs, so a phone with a browser is enough at the door. A separate scanner app and an installable scanner web page exist for the people who check tickets (see below).
What has to be on
JavaScript — without it most pages cannot work.
Cookies — signing in and checkout use the site’s own cookies. The cookie banner lets you choose what else is allowed; refusing optional cookies does not stop you from buying.
Access to Stripe’s payment form — the card and payment form is loaded from our payment provider. If an ad blocker or a strict network prevents it, the page says The payment form could not load. Please disable any ad blocker for this page, or reload it.
Location (optional) — only if you ask for events near you on the For You page.
Organizers and door staff can install the check-in page as a home-screen web app from the check-in page itself. There is no App Store listing, because iOS offers no install prompt for web apps. In Safari press the Share button and choose Add to Home Screen. This needs iOS 16.4 or later: on earlier versions the installed app cannot use the camera, so scan from the Safari tab instead. Android and desktop Chrome show a normal install button.
The installed scanner contains only the scanner. Signing in again, if your session ended, opens in your normal browser.
An Android scanner app is also offered as a direct download, linked as Scanner App in the site footer.
Good to know
Attendees do not need to install anything to show a ticket: open the ticket page or the PDF.
The light and dark appearance follows the switch in the top bar; text size and contrast are in the accessibility settings.
Troubleshooting
The scanner cannot use the camera after I installed it on my iPhone — check that iOS is 16.4 or later. Otherwise use the Safari tab version.
A button does nothing or the layout looks broken — update your browser, then reload. Also try without extensions that block scripts.
No page shows interactive content — check that JavaScript is enabled.
The payment form does not appear — disable the ad blocker for the page or try another network.
Use Support for anything about the platform itself: your account, a payment, a technical error, or a problem that the organizer cannot solve. Questions about a specific event, such as directions, the programme or what is included, are faster to answer if you ask the organizer (see How to Contact the Organizer). Open Support Tickets in your account sidebar. You need to be signed in; guests can use the Help & Contact page.
12Support tickets with a status filter, a New ticket button and one open ticket
Raise a ticket
Open Support Tickets and press New ticket ①.
1234The new support ticket form with subject, category, priority and description
Write a short Subject ①.
Choose a Category ②: Billing, Technical, Event, Refund or General.
Choose a Priority ③: Low (no rush), Medium (within a few days), High (needs attention) or Urgent (blocking issue). Pick honestly: it helps the right things get looked at first.
Describe the problem in the Description (up to 5,000 characters). The tips beside the form suggest what to include: your booking reference, the steps to reproduce the problem, and your browser and device.
Press Submit ticket ④.
Always give the booking reference (it starts with BK-) for anything about a purchase: it is how we find your order. You find it on your confirmation email and on the order in My Tickets.
Follow a ticket
12A support ticket with the question, a Close ticket button and a reply box
The list shows each ticket’s number, subject, status, priority and last reply. Filter it with All, Open, In progress, Waiting, Resolved or Closed.
Open a ticket to read the conversation. Type under Add reply ② and press Send reply. New answers appear in the thread without reloading the page.
Close ticket ① ends the conversation when you no longer need help.
You are notified of a reply and when a ticket is marked resolved, in the bell and by email, according to your Notification Preferences (Support reply and Ticket resolved).
What the statuses mean
Status
Meaning
Open
Your ticket is in the queue and has not been answered yet.
In progress
The support team has replied and is working on it.
Waiting
On hold while the ticket waits for further information.
Resolved
The team believes the issue is dealt with. If you reply, the ticket reopens automatically.
Closed
Finished; no more replies are expected.
Good to know
Only you, the person handling the ticket and administrators can see a ticket. It is not public.
Replying to a resolved ticket reopens it; you do not need to open a new one.
There is no fixed response time. A correct priority and a clear description speed things up.
Support cannot decide a refund for an organizer’s event: the organizer decides, under their cancellation terms. See How to Get a Refund.
Troubleshooting
My ticket has been Open for a while — it moves to In progress when someone replies. Until then it is waiting in the queue.
I forgot something — open the ticket and add a reply with the missing information.
It says Resolved but it is not — reply on the same ticket and it reopens.
I cannot reach the support form — sign in first. If you cannot sign in, use the contact page.