




Door Passes
Help articles may not be fully accurate — they can lag behind the app due to frequent updates and automated translation. If in doubt, please contact support.
On this page
- 1. What you can do here
- 2. How to set up the door
- 3. Good to know
- 4. Troubleshooting
- 5. Related
A door pass lets people check guests in at one of your events from their own phone, without an EventMann account. You create a pass, show its QR code or send its link to your door helpers, and each helper types their name once. From then on they have the door screen for that event and nothing else: no organizer panel, no other events, no money. Every ticket they scan shows the name they gave.
What you can do here
- Create a door pass — give it a name, such as Main entrance volunteers, and choose until when it works. Leave the time empty and it keeps working until six hours after the event ends.
- Share it — helpers scan the QR code with their phone camera or open the link. Helpers with the EventMann Scanner app can tap Join with a door pass on its sign-in screen and scan the same code.
- See who joined — each pass lists its helpers with the time they joined, when they were last active and how many tickets they scanned.
- Remove one helper — their phone stops being able to scan at once; everybody else on the pass carries on. Anyone who still has the link can join again, so to shut somebody out for good, revoke the pass and give the rest a new one.
- Revoke the pass — every helper using it stops at once. Create a new pass if you need one again.
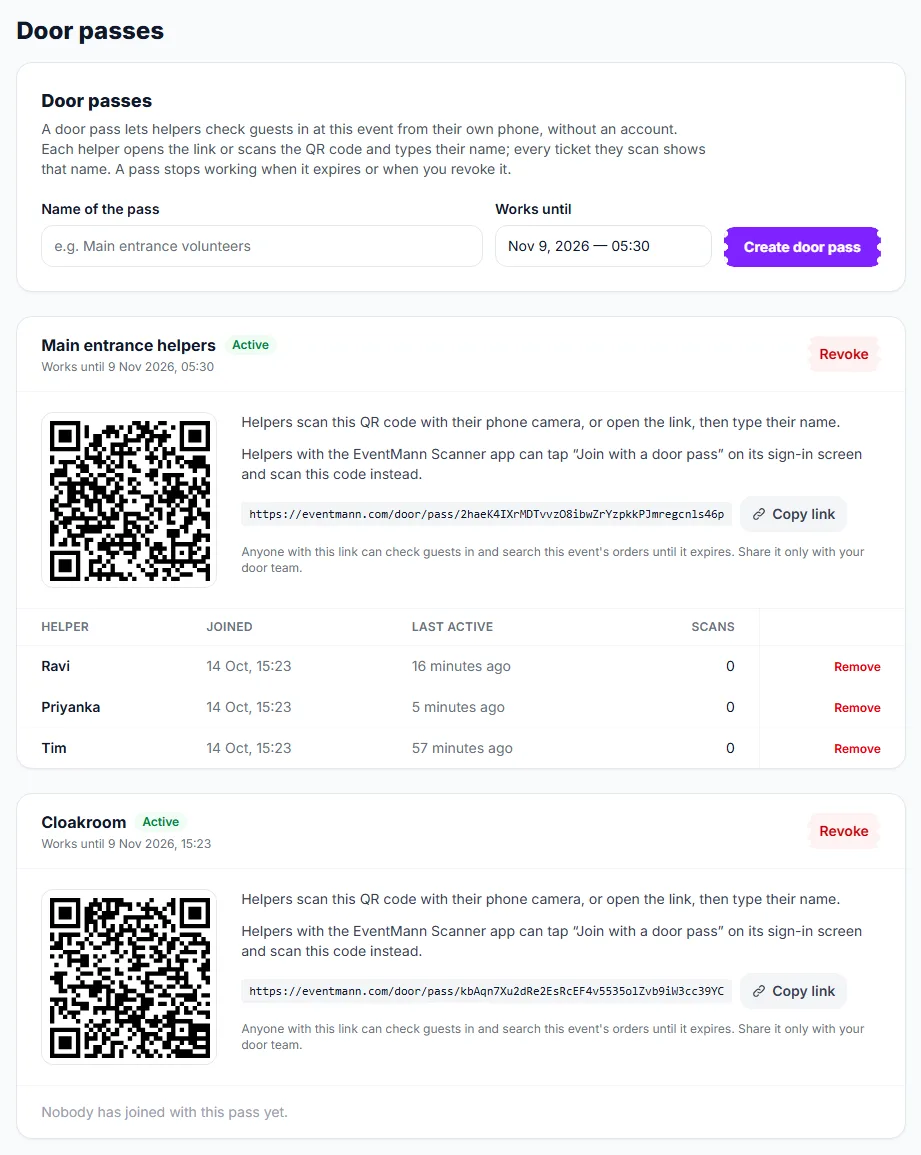
Name the pass ① and choose when it ends, then click Create door pass ②. Each pass is shown with its QR code ③ and a Copy link button, then a table of helpers with Joined, Last active and Scans. Revoke ④ ends the whole pass; Remove ends one helper.
How to set up the door
- Open the event and go to Day-of Operations → Door passes. (The default end time is six hours after the event ends, and never less than 12 hours from now.)
- Enter a name for the pass, check the end time, and click Create door pass.
- Show the QR code to your helpers before doors open, or copy the link into your team chat.
- Each helper opens it, enters their name and taps Start scanning. They see the same door screen as your team: scan, search the event’s orders, undo a check-in, and keep scanning offline.
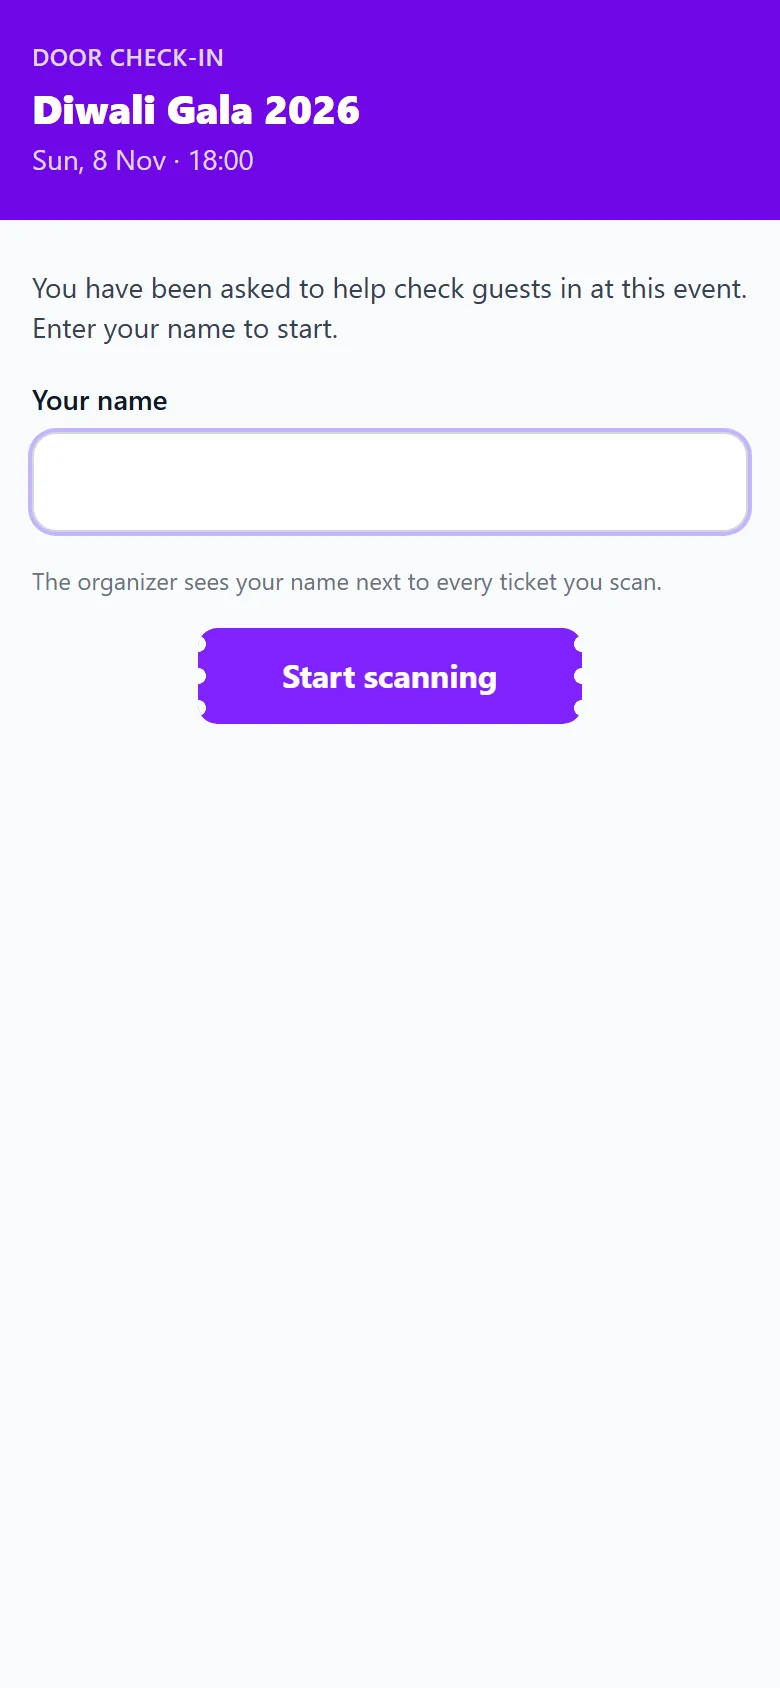
A helper sees this page. They type their name ① and tap Start scanning ②. The organizer sees that name next to every ticket they scan.
Good to know
- A pass works for one event only. Helpers cannot open the organizer panel, see sales figures or change anything about the event.
- Helpers can search this event’s orders, so they see attendee names. Share a pass only with people you chose for the door.
- Every scan made with a pass carries the helper’s name, so you can always see who let somebody in.
- Team members with the Box Office or Staff role do not need a pass; they scan with their own account. A pass is for helpers who are not on your team, such as volunteers on the night.
Troubleshooting
- A helper sees “This door pass has ended” — the pass expired or was revoked. Create a new one and share that.
- A helper can no longer scan — check whether they were removed from the pass. If that was a mistake, they open the link again and enter their name.
- I cannot see Door passes in the menu — creating passes needs permission to edit the event.