




Email Campaigns
Help articles may not be fully accurate — they can lag behind the app due to frequent updates and automated translation. If in doubt, please contact support.
On this page
An email campaign is a marketing email you write once and send to a group of your customers. You can write campaigns in two places: Grow → Marketing → Campaigns (for the whole account, owner only) and Manage → Marketing → Campaigns inside an event (for that event’s customers, also open to team members with the Marketing role). Both send through the same engine, so the delivery rules in Sending, progress and unsubscribes apply to both.
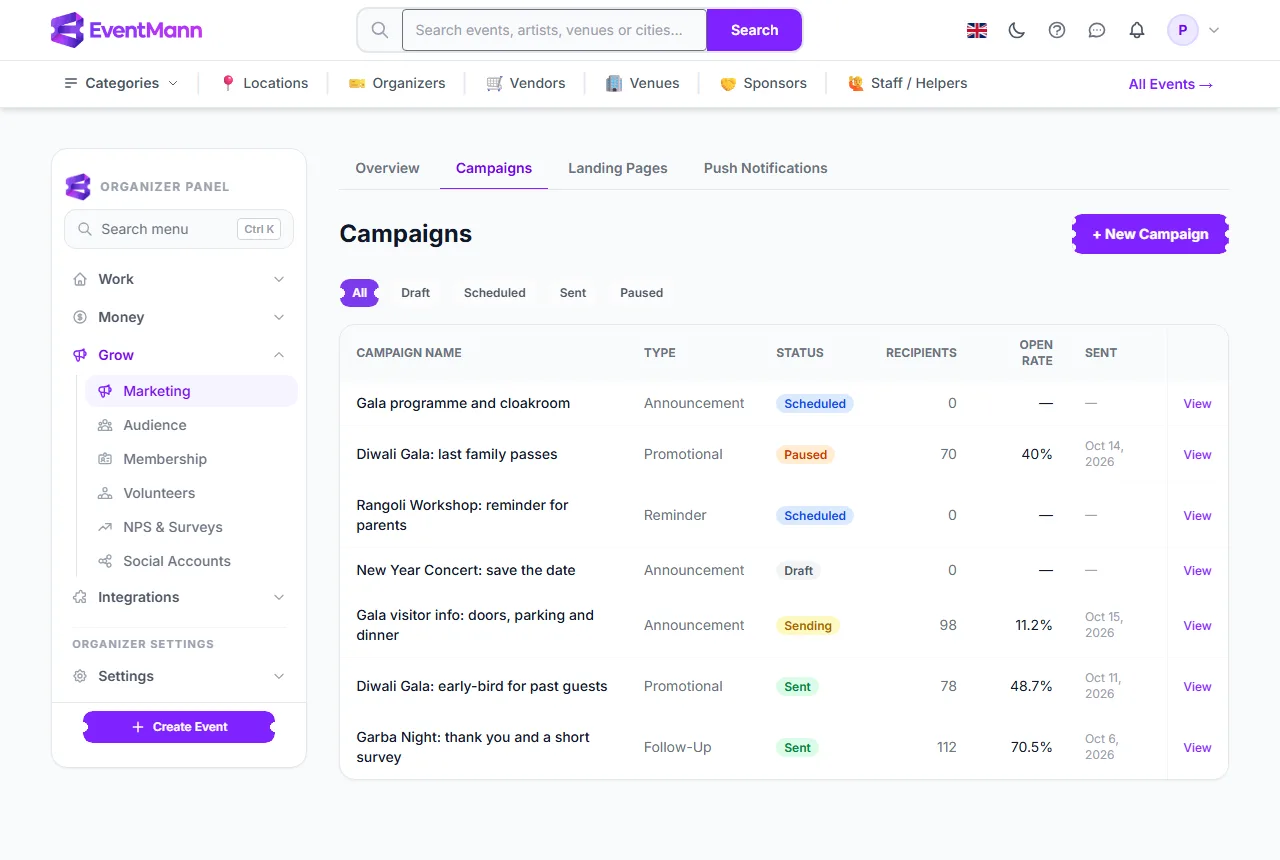
- Open Grow → Marketing → Campaigns. Click + New Campaign ① to write one.
- Use the filter chips ② (All, Draft, Scheduled, Sent, Paused) to narrow the list.
- The status badge ③ tells you where a campaign stands: Draft, Scheduled, Sending, Sent, Paused or Cancelled.
- Click View ④ to open a campaign, send it, edit it or read its figures.
Write a campaign for the whole account
The form has three tabs: Audience, Content and Schedule.
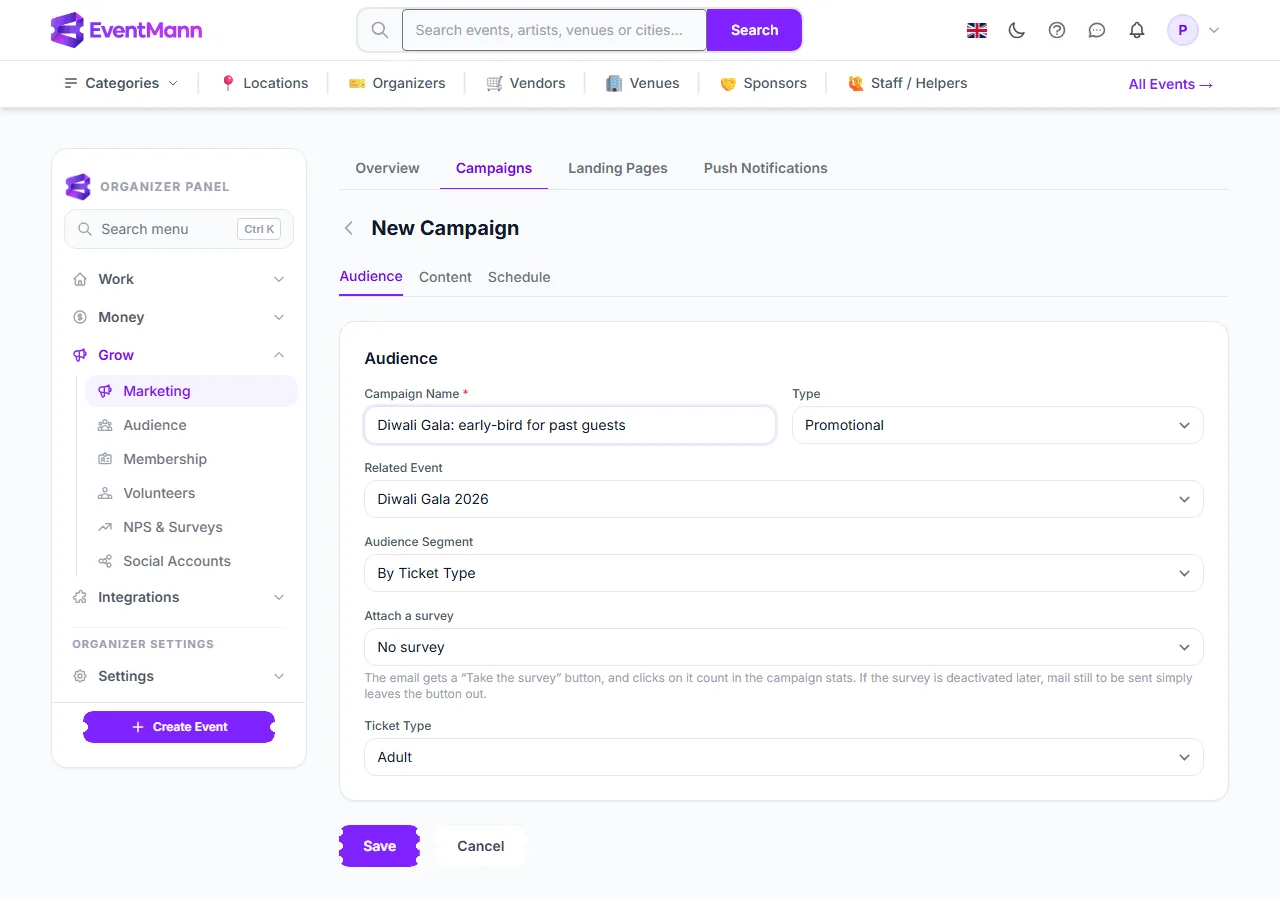
- Give the campaign a Campaign Name ①. Only you see it.
- Pick a Type ②: Announcement, Reminder, Promotional or Follow-Up. The type is a label for your own records; it does not change how the email is sent.
- Optionally choose a Related Event ③. Several segments need it (see below).
- Choose the Audience Segment ④.
- If you chose By Ticket Type, a Ticket Type picker ⑤ appears with the ticket types of the related event. Choose the event first, or the list stays empty.
- Optionally Attach a survey ⑥. The picker only appears once one of your events has an active survey; see “Add a survey button” below.
The audience segments
Everyone below must have a confirmed booking with you (an abandoned or unpaid checkout does not make someone your customer). Buyers who checked out without an account are included, because EventMann keeps the email address they gave you. Everyone who switched off marketing email is removed from every segment.
| Segment | Who receives it |
|---|---|
| All Users | Everyone with a confirmed booking at any of your events, plus your active members. Despite the label, this is your customers, not every EventMann user. |
| Event Attendees | Customers with a confirmed booking at the Related Event. With no related event it reaches every customer with a confirmed booking. |
| By Ticket Type | Customers who hold the chosen ticket type at the related event. With no ticket type chosen it reaches nobody. |
| Past Attendees | Customers with a confirmed booking at any of your events other than the related event — for example people who came to last year’s event but have not booked this one. |
| Customers not opted out of marketing | Customers with an account who have not switched marketing email off. Guest buyers are left out because they never subscribed to anything. |
| Members | People with an active membership of yours, whether or not they ever bought a ticket. Members always have an account. |
Write the email
Open the Content tab.
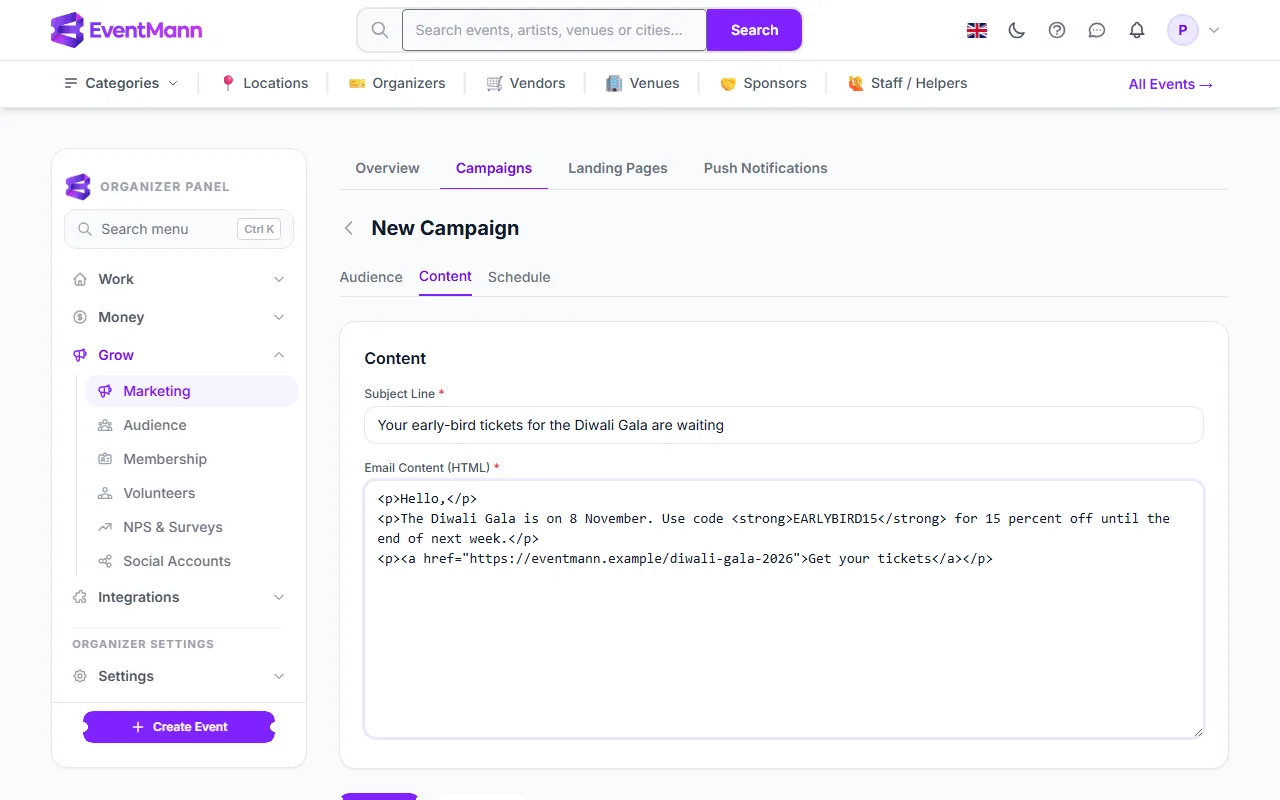
- Type the Subject Line ①.
- Write the message in Email Content (HTML) ②. It is a plain HTML field, not a visual editor: use simple tags such as
<p>,<strong>and<a href=...>. Scripts and other unsafe markup are removed before the mail is built.
EventMann wraps your text in its branded email layout and adds an unsubscribe link at the bottom. You do not add either yourself.
Send now or schedule
Open the Schedule tab.
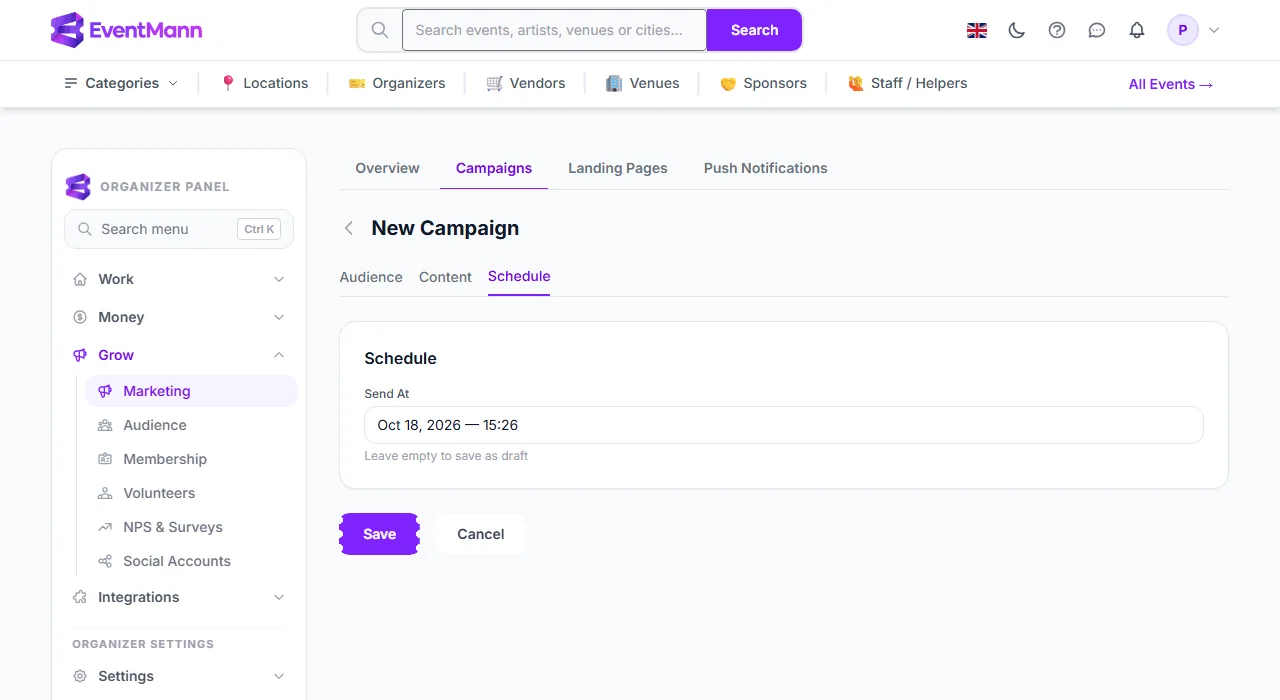
- Leave Send At ① empty to save a draft that you send by hand, or choose a date and time in the future to schedule it.
- Click Save ②.
A scheduled campaign is picked up by a job that runs every minute and sent as soon as its time has passed. The time you pick is read in the platform time zone (Europe/Berlin by default), not necessarily your own. If your sending hours are limited (Sending, progress and unsubscribes), the send waits for the next opening.
Send a draft
Open the campaign and click Send Now. EventMann first asks you to confirm and tells you exactly how many people the send will attempt.
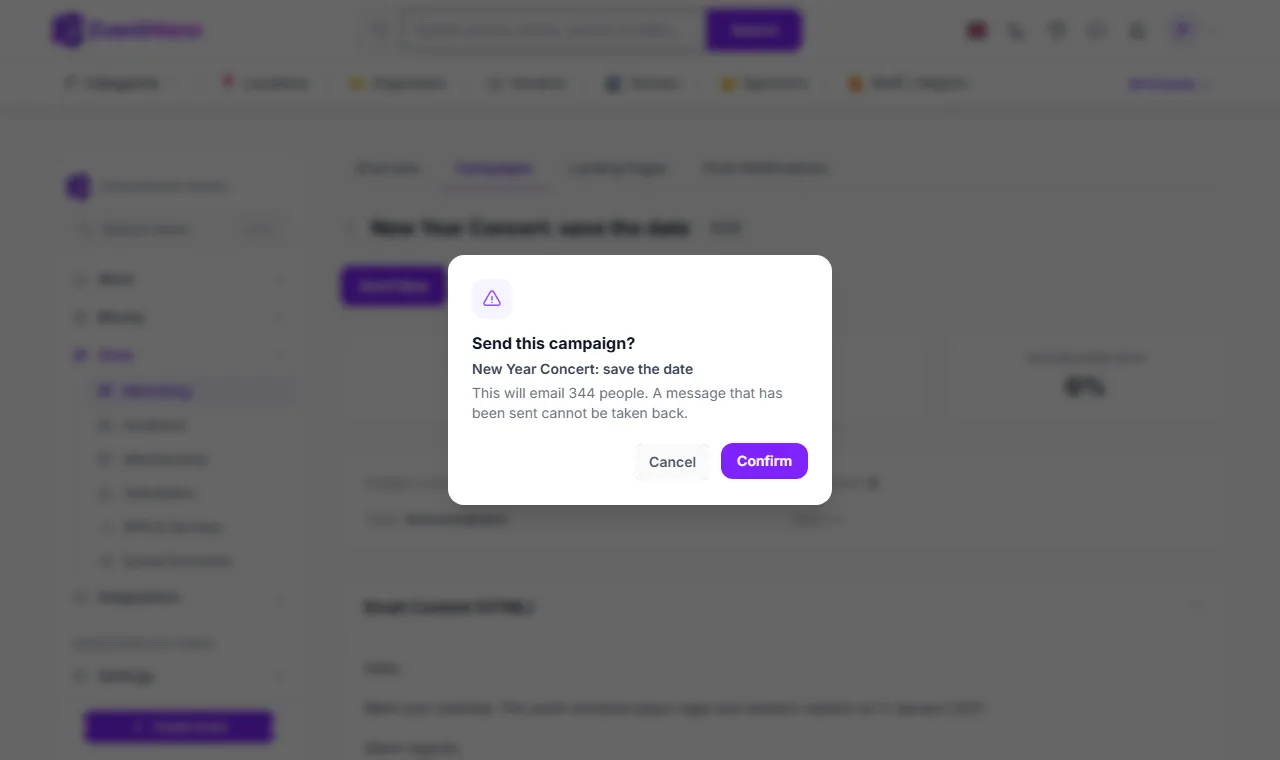
- Read the number ①. It is the same count the send itself uses, after opt-outs and unsubscribes have been removed.
- Click Confirm ②. The send starts in the background; the status changes to Sending.
A message that has been sent cannot be taken back. You can stop a send in progress, but mail already handed to the mail server stays sent.
After the send: the figures
The campaign page shows how the email performed.
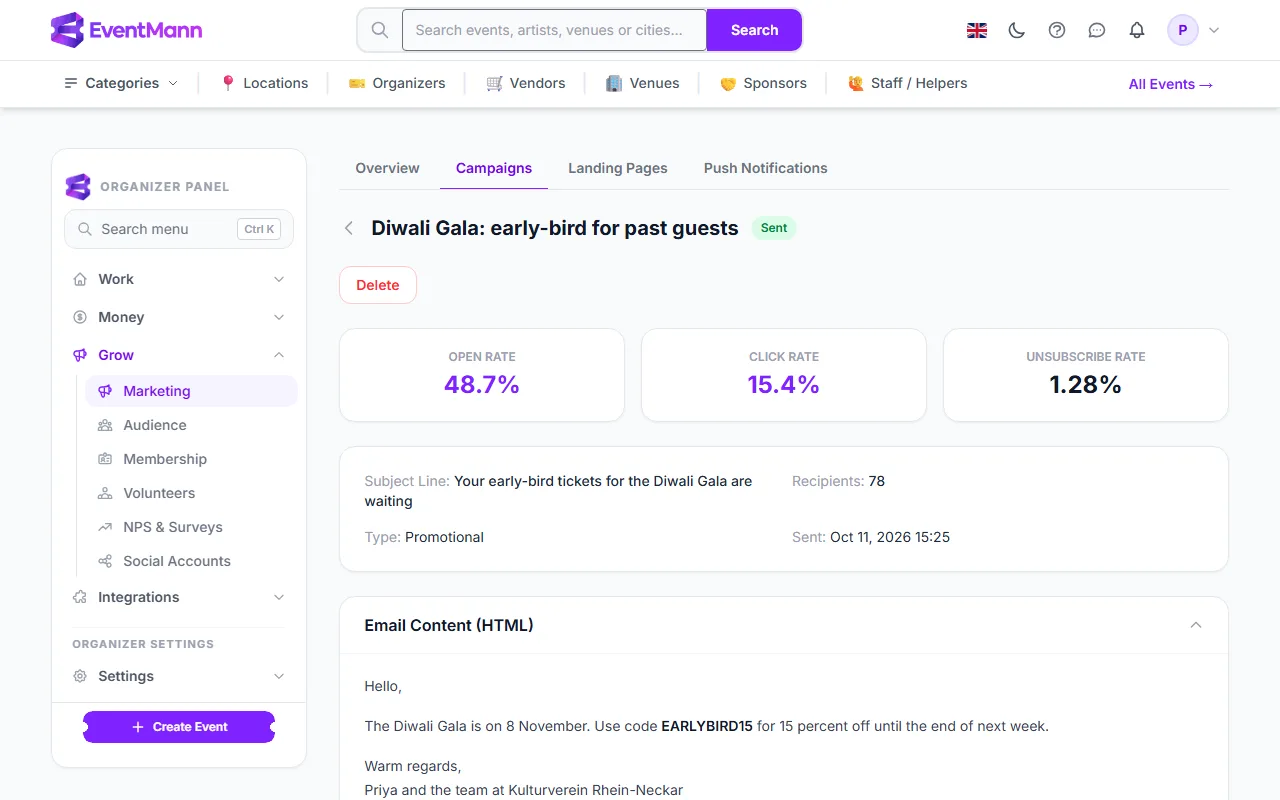
- Open Rate ① — opens divided by recipients.
- Click Rate ② — people who clicked a link divided by recipients. A click also counts as an open, because many mail apps block the tracking image.
- Unsubscribe Rate ③ — people who used the unsubscribe link, divided by recipients.
- Recipients ④ — how many people the mail was handed over for.
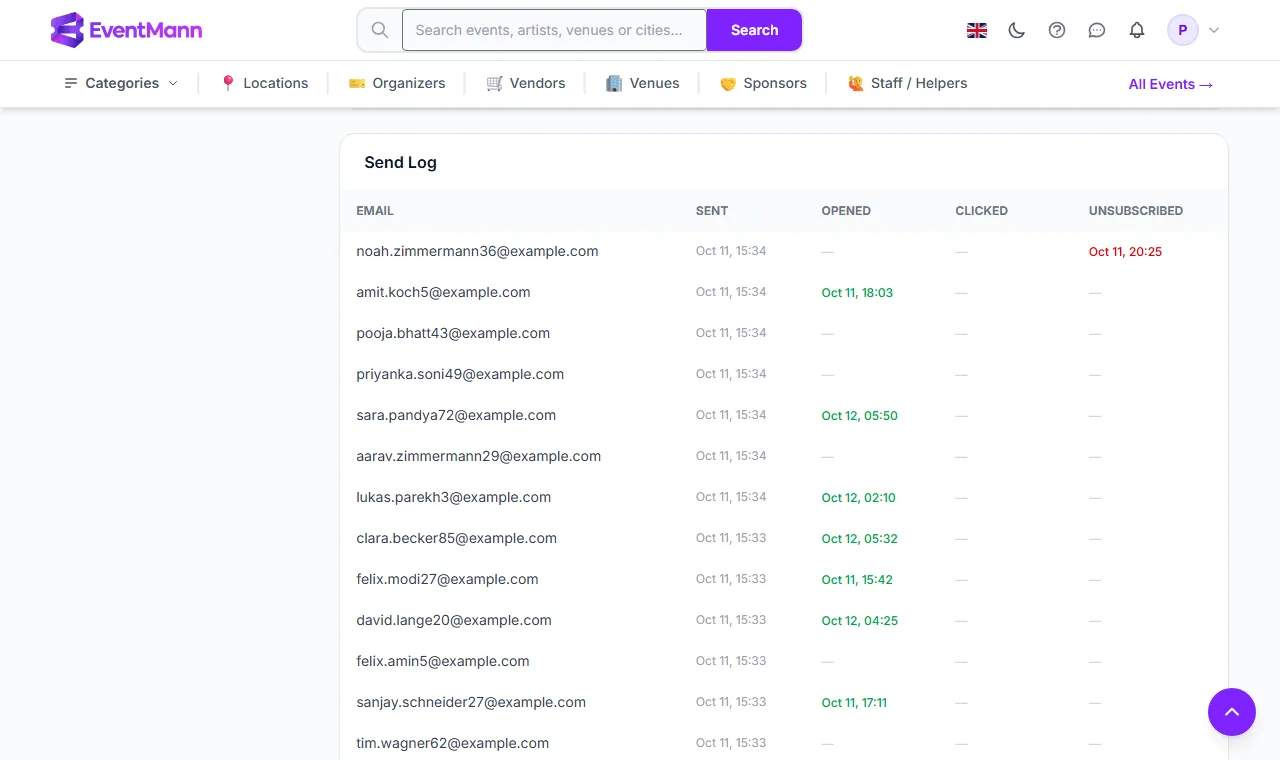
Below the figures, the Send Log lists every recipient: Email ①, when it was sent, Opened ②, Clicked ③ and Unsubscribed ④. A dash means it has not happened (yet).
Write a campaign for one event
Inside an event, Manage → Marketing → Campaigns lists only that event’s campaigns. Team members need the campaign permissions of their role (view, create, edit, delete) to see and use it.
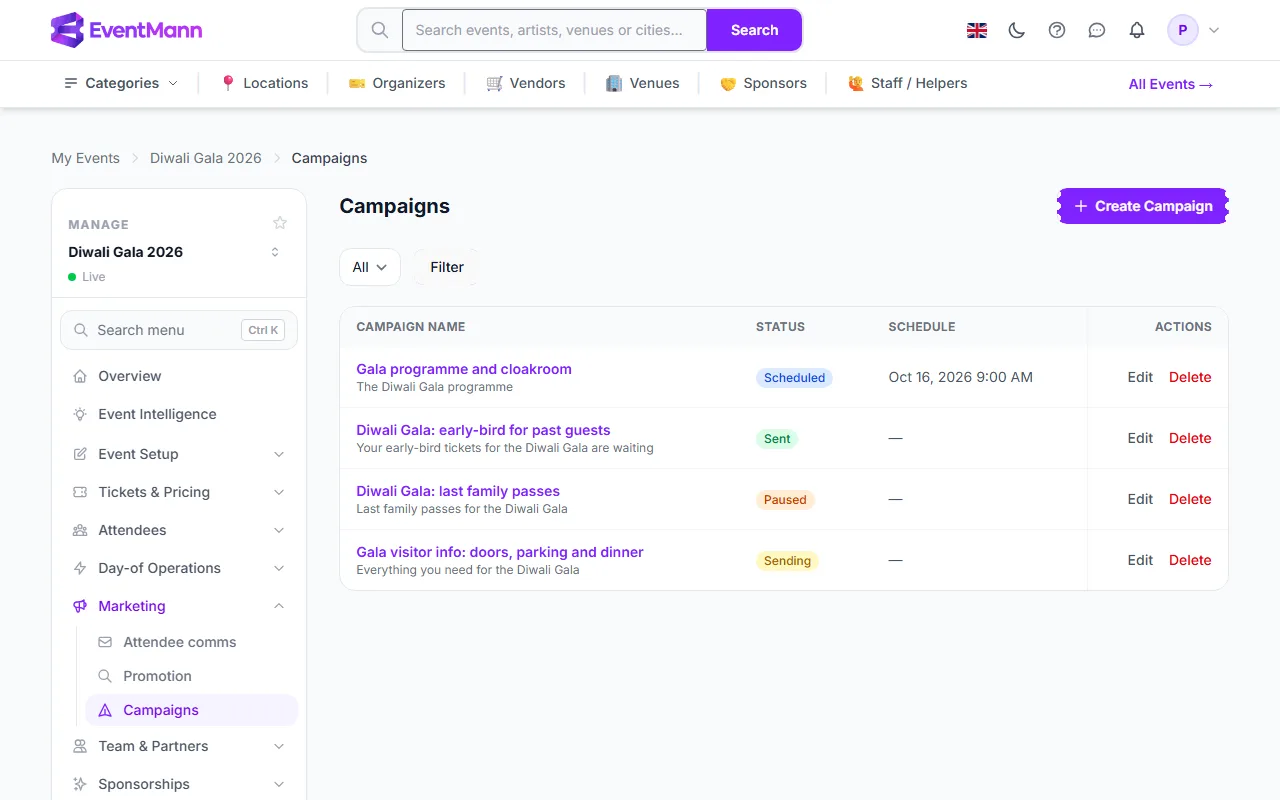
- Open Marketing → Campaigns in the event sidebar ①.
- Click Create Campaign ②.
- Filter the list by status ③, or Edit ④ a draft.
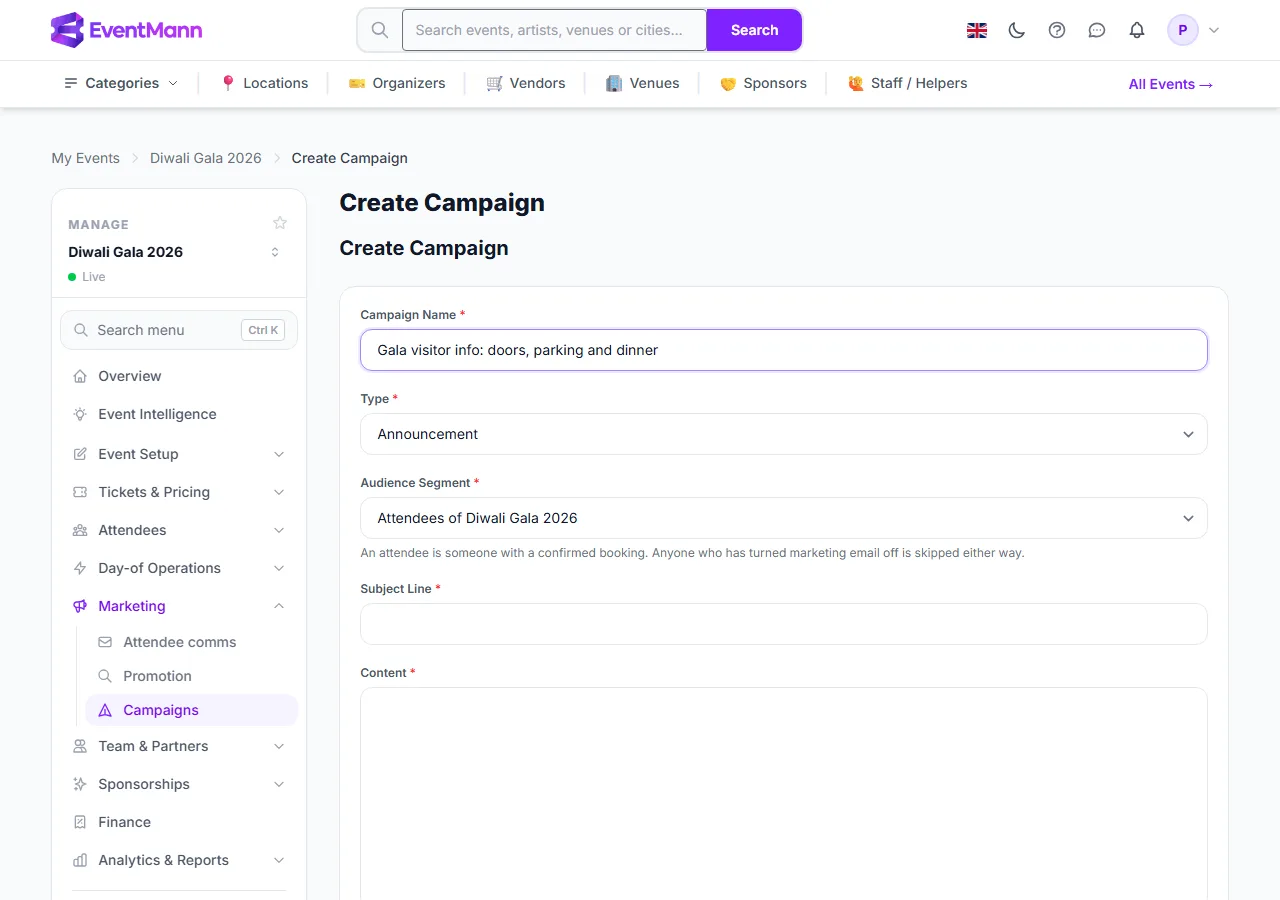
This form is a single page: Campaign Name ①, Type ②, Audience Segment ③, Subject Line ④, Content ⑤ and Schedule ⑥. The campaign is always tied to this event; the event cannot be changed from the form. The audience choices are the event’s own attendees, all your attendees (everyone who booked any of your events) or your active members.
Check it first: Send a test
On an event campaign’s page, Send a test mails one copy to you so you can read it in a real inbox. It is not counted in the campaign and no customer receives it; the subject starts with [TEST]. A test can only go to your own address or to someone on your team, so that the test cannot be used to mail strangers. The organizer-wide campaign page has no test button; write the campaign from an event if you need one.
Add a survey button
Choose a survey under Attach a survey and the email gets a “Take the survey” button. Clicks on it count in the campaign’s click figures. Only active surveys can be attached, and a campaign tied to an event can only use that event’s surveys. If you switch the survey off before the mail goes out, mail that has not yet been sent leaves the button out. Guests without an account can answer too: the button carries a personal link that is created for their confirmed booking. See NPS & Surveys.
Good to know
- A campaign can be sent once. Once its status is Sent or Cancelled the send buttons are gone and a second attempt is refused with a message. To mail the same people again, write a new campaign.
- Change or remove the send time while editing. Giving a draft a Send At and saving schedules it; clearing the time on a scheduled campaign turns it back into a draft that you send by hand.
- Scheduled and paused campaigns can still be sent early. The button then reads Resume sending.
- Subject and text are screened for blocked terms when you save.
- A campaign is one email, sent once to its audience. To follow up, write a new campaign.
Troubleshooting
- The confirm dialog says 0 people — the segment is empty for the event you chose (for example By Ticket Type with no ticket type, or Past Attendees when nobody else booked). Go back and adjust the audience.
- The campaign will not save — the subject or the text contains a blocked term. Reread it, change it and save again.
- Send Now is missing — the campaign has already been sent or cancelled. Duplicate the text into a new campaign.
- A customer says they never got it — look them up in the Send Log. A recipient who had switched marketing email off, or had unsubscribed from you earlier, is not in the list at all.