




Event status: publishing, pausing, cancelling
Help articles may not be fully accurate — they can lag behind the app due to frequent updates and automated translation. If in doubt, please contact support.
On this page
Every event has a status that says whether it is being prepared, on sale, paused, finished or called off. This article explains how to move an event between statuses, what can stop you from publishing, and what happens when you cancel, complete or delete an event. The irreversible moves, Cancel and Mark Complete, live on the Event status tab of Details & dates.
The statuses
| Status | What it means | You can move it to |
|---|---|---|
| Draft | Being prepared; nobody else can see it | Scheduled, Live |
| Scheduled | Goes live automatically at the go-live time you set | Live, Cancelled |
| Live | Published and selling | Paused, Cancelled, Completed |
| Paused | Hidden from browse, search and booking; existing tickets stay valid | Live, Cancelled |
| Completed | Over; no more sales; final | — |
| Cancelled | Called off, buyers refunded; final | — |
Completed and Cancelled are final: there is no way back from them in the panel (only a platform administrator can reverse one). A Draft cannot be cancelled; a Draft you no longer want is deleted. There is no way to send a Live event back to Draft: pause it instead.
Where to change the status
- The header of the Event Overview shows the reversible moves — Schedule, Go Live and Pause — and an Event status chip that opens the status tab.
- On Details & dates → Information, the Event Status card lists the reversible moves under Transition to:, with an Event status button for the rest.
- On Details & dates → Event status you cancel or complete an event with the explanations and confirmations they deserve.
All of them need the publish permission for the event. Without it you see the badge but no buttons.
Go live, schedule, pause
- To publish now, click Go Live. The event is public at once (if its visibility is Public it also appears in browse and search).
- To publish later, set a Go-live Date & Time on Details & dates first, then click Schedule. A minute-by-minute job takes the event Live when that time arrives in the event’s own timezone. Schedule is refused until a go-live time is saved, and a Scheduled event’s go-live time can be moved but not cleared.
- To stop sales for a while, click Pause and confirm. Pause hides the event from discovery and booking but keeps every order and ticket. Click Go Live to resume.
What can stop you from publishing
Going live, scheduling and the scheduled job all check the same conditions. If one fails you get a message that names it and the event stays as it was. The checks, in order:
- Verified email. Verify your email address first; the link is in the message you received at sign-up. It applies to free events too, because registrations collect real people’s details.
- Stripe, for paid events. A paid ticket needs a connected, verified Stripe account that can take card payments. See Setting Up Stripe Connect.
- Agreements. Any platform agreement waiting for you has to be accepted. See Agreements.
- Cancellation terms, for paid events. Choose the terms on Details & dates (even “Full refund”). See Cancellation terms.
- Review. When the platform reviews events before they go live, or the automatic risk check flags a paid event (very high ticket prices, large total exposure, a first paid event and similar), the event is submitted for review and you are told “Event submitted for review — you can publish once it is approved.” The Overview and My Events show the state of the review.
A scheduled event that fails these checks when its time comes is held as Scheduled and you are notified; it is not lost. If you later add tickets or raise prices so much that an approved event looks different, it may be reviewed again.
Mark an event complete
- Open Details & dates → Event status and find Mark as complete ②.
- The button is available once the event has ended. Before that the card explains that the event has not finished yet.
- Click Mark Complete and confirm. Completing closes the event: it stops appearing in public listings and no more tickets can be sold.
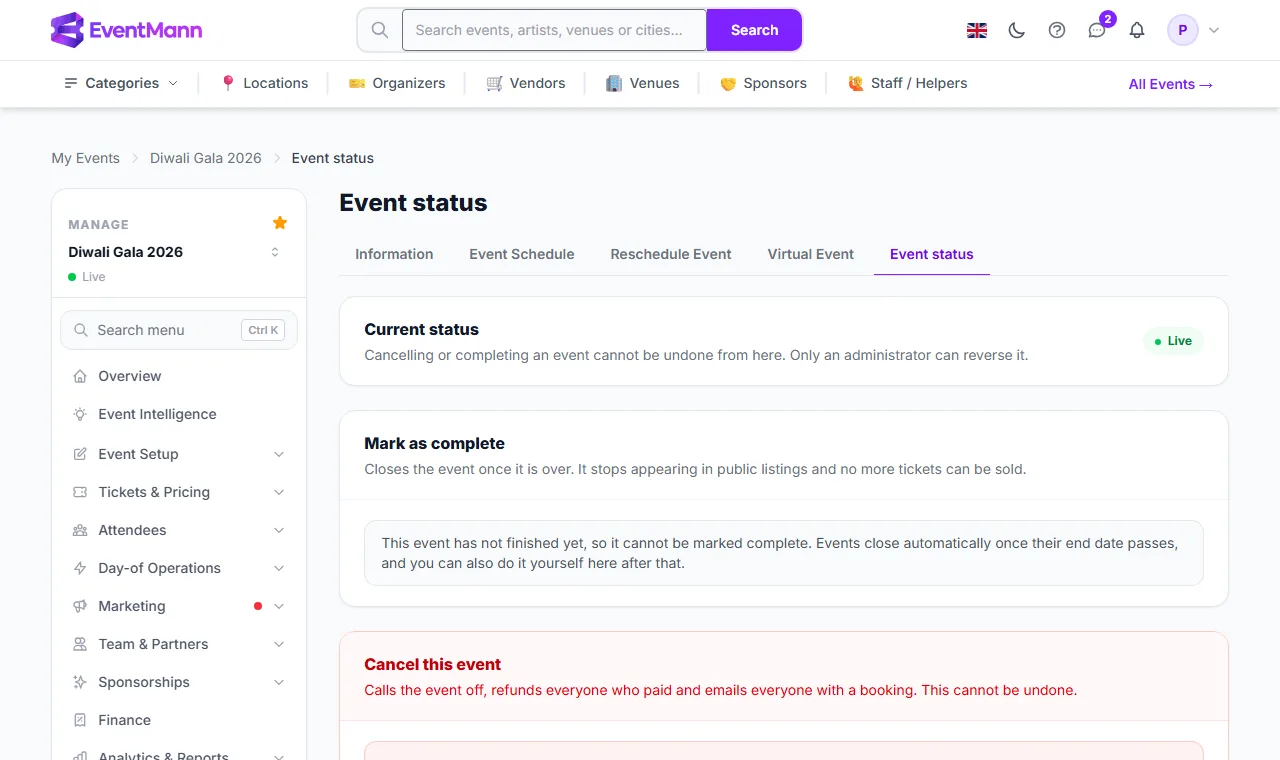
You rarely need this: a Live event is completed automatically about a day after it ends (the job runs every night at 03:00).
Cancel an event
Cancelling calls the event off, refunds everyone who paid and emails everyone with a booking. It cannot be undone. An event that is not going ahead can always be cancelled, even with orders.
- Read the box at the top of Cancel this event. It states how many orders and how much money will be refunded, and reminds you that you fund the refunds: ticket money is paid into your own Stripe account, so refunds come from your Stripe balance, and a shortfall remains your responsibility. If EventMann can read your balance and it will not cover the refunds, the page says so; if it cannot read it, it says nothing rather than guess.
- Write Why are you cancelling? ① (10 to 500 characters). It is required whenever money is going back, and the platform team and your attendees can read it.
- Type the event’s name in Type the event name to confirm ② and click Cancel event ③.
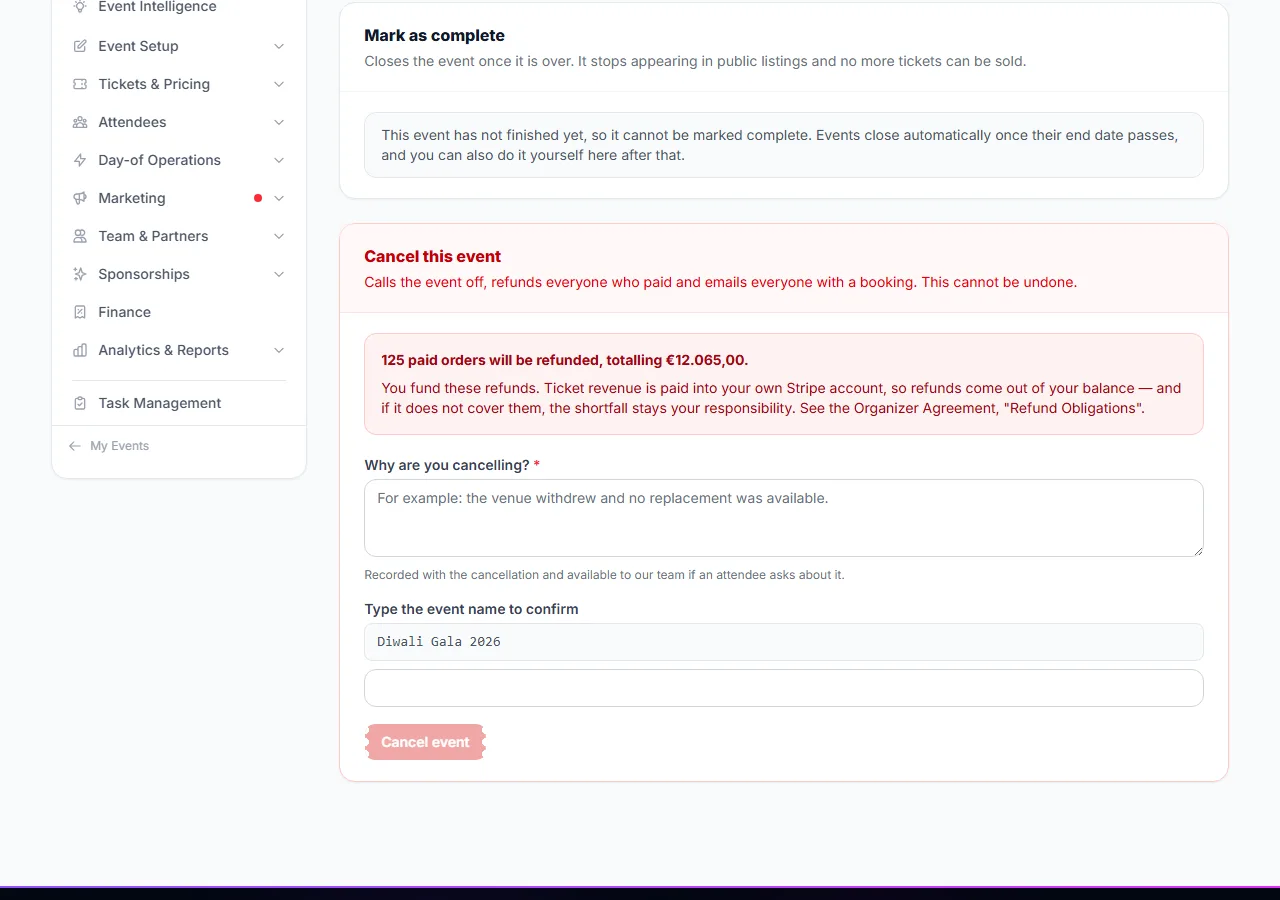
What happens next: the event becomes Cancelled and leaves the public site; the attendees are notified; a background job refunds every confirmed booking; the platform team is notified when paid orders are involved; and a webhook event.cancelled is sent if you use webhooks.
Delete an event
Delete Event in the Manage sidebar removes an event for good. It is only offered when the event is not Live and has no orders. A live event must be paused first. An event with orders cannot be deleted, because the people who bought tickets hold them and may be owed money — cancel it instead. The confirmation page lists what will be removed and asks you to type the event name.
Good to know
- Pausing does not refund anyone and keeps tickets valid. Use it for a pause in sales, not for an event that will not happen.
- Private events (hidden from search) follow the same statuses; visibility and status are independent.
- A Live event that has already ended is closed automatically; you do not need to mark it complete yourself.
- Reaching Live through the wizard, the Overview, the Information tab, the simple edit form, the scheduled job and the Published checkbox all go through the same checks.
Troubleshooting
- “Verify your email address before publishing an event” — confirm your address from the email we sent, then try again.
- “Connect Stripe before publishing a paid event” — finish the connection. Free events do not need it.
- “Choose this event’s cancellation terms” — set them in the Advanced card of Details & dates.
- Schedule says “Set a Go-live Date & Time under Details & dates first”, or my scheduled event did not go live — save a go-live time on Details & dates, then click Schedule again; at that time the event must still pass the checks above, and a held event shows a notice.
- Mark complete says the event has not finished — wait until it has ended.
- The cancel form asks for a reason — money is going back, so a reason of at least 10 characters is required.
- Delete Event is not in the sidebar — the event is Live or has orders; pause it, or cancel it.