




Booking Modes: Pay Now vs Request & Approve
Help articles may not be fully accurate — they can lag behind the app due to frequent updates and automated translation. If in doubt, please contact support.
On this page
- 1. Pay Now
- 2. Request & Approve
- 3. Settings explained
- 4. Good to know
- 5. Troubleshooting
- 6. Related
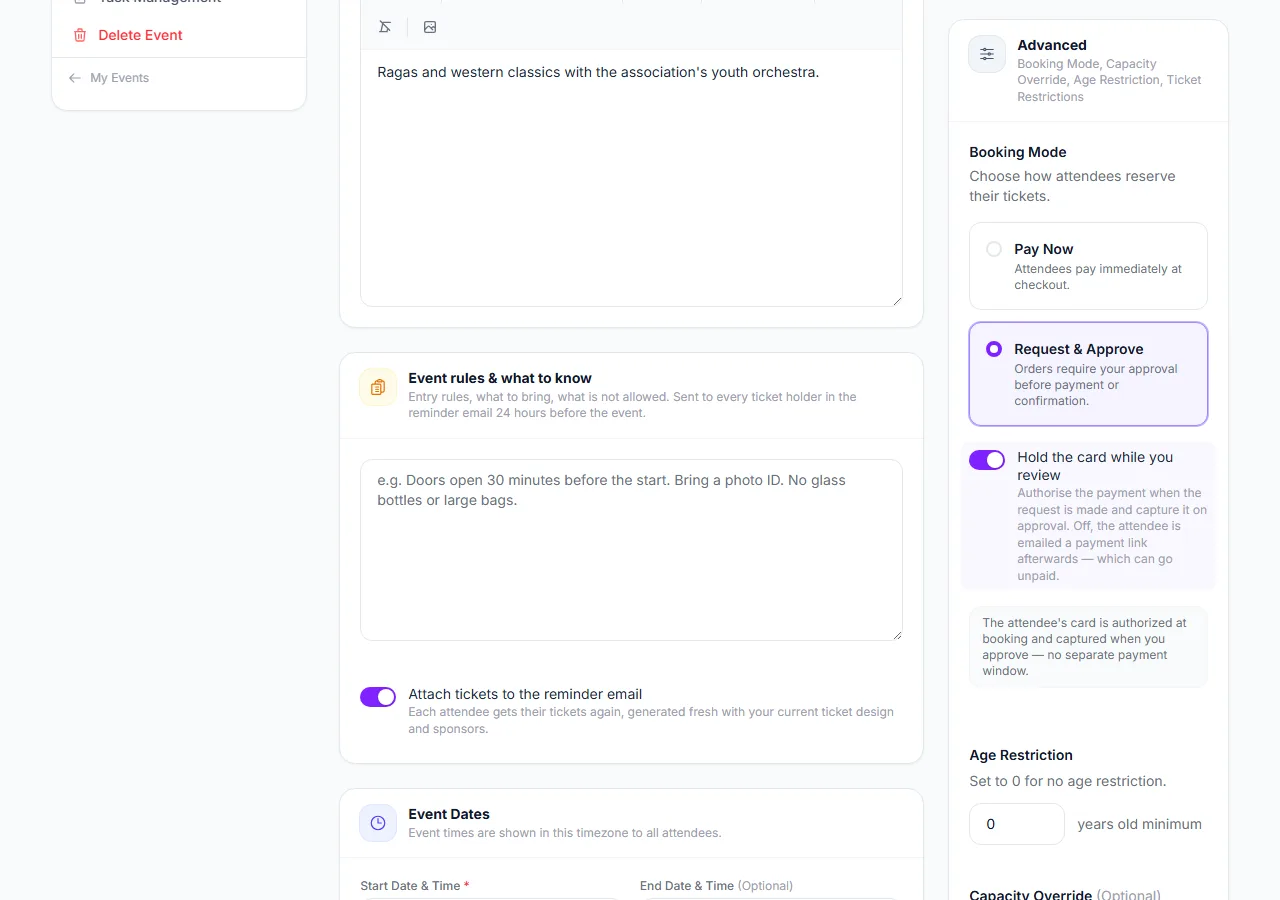
Booking Mode decides whether attendees pay and get their tickets at once, or send a request that you approve first. It is set per event, under Manage → Event Setup → Details & dates → Information, in the Advanced card, and also in the event wizard when you create the event.
Pay Now
The default. An attendee chooses tickets, pays, and is confirmed on the spot.
- The attendee picks tickets and checks out. The seats are reserved while they do.
- They pay through Stripe. The order does not exist until the payment succeeds or is authorized, so an abandoned or declined checkout leaves nothing for you to clean up.
- The order is confirmed and the ticket emails go out immediately.
Tickets only count as sold once payment has succeeded, so two buyers racing for the last ticket are settled by whoever pays first. A payment that is still clearing, such as a bank debit, keeps the order waiting; the ticket is issued when the money arrives.
Request & Approve
The attendee asks for a place and you decide. By default their card is held, not charged, so the money is there the moment you say yes.
- Choose Request & Approve ② in the Advanced card and click Save Changes.
- The attendee picks tickets and enters a card as usual. The amount is authorized — reserved on the card, not taken. Many banks show it as pending.
- The request appears in your approvals queue (Attendees → Approvals in the Manage sidebar, with a number on the row) and on your dashboard under Needs attention. The seats are taken off public sale at once, so a hundred requests cannot oversell the event.
- You decide:
- Approve on a paid event — the held amount is taken, the order is confirmed and tickets are sent. There is no payment link and no waiting for the attendee.
- Approve on a free event — the order is confirmed.
- Reject — the hold is released, the order is cancelled and the attendee is told. You can add a reason of up to 500 characters; it is included in their email.
Decide promptly: if you leave a request too long, the authorization lapses on the bank’s side, the order expires and the seats go back on sale. Nobody is charged before you have reviewed the request.
Settings explained
- Booking Mode ① — Pay Now or Request & Approve, per event.
- Hold the card while you review — on by default under Request & Approve. The card is authorized at checkout and captured when you approve. Switch it off and no card is collected up front: you approve first, and the attendee is then emailed a payment link with a countdown. That older way offers buyers every payment method, but approved requests may never be paid.
- Payment window — only shown when the hold is off: how long an approved attendee has to pay, from 0.5 to 72 hours (default 30 minutes).
Good to know
- Both modes work for free events; the payment step simply disappears. Pay Now confirms at once; Request & Approve confirms when you approve.
- Switching the mode affects only new orders. Orders already confirmed, waiting or approved keep the rules they started under.
- Holding a card narrows the payment methods a buyer is offered, because not every method can be authorized now and taken later. That is Stripe’s rule, not a setting here.
- The waitlist, when you use it, follows the booking mode: with Request & Approve a promoted person goes into your approval queue. See Waitlist.
Troubleshooting
- An approved attendee says their booking disappeared — with the hold off they missed the payment window and it expired. They need to request again.
- An attendee says they were charged before you approved — they were not; the held amount often shows as a pending line and clears on its own if you reject.
- A buyer sees fewer payment methods than on your other events — expected while the hold is on.
- I cannot find the setting — it is in the Advanced card of Details & dates, at the top.