




Setting Up Stripe Connect
Organizer Guide
4 min read
Help articles may not be fully accurate — they can lag behind the app due to frequent updates and automated translation. If in doubt, please contact support.
On this page
Stripe Connect is how ticket money reaches you. You connect your own Stripe account, buyers pay into it, and Stripe pays your bank. You need it for paid tickets and memberships; organizers who only run free events can skip it. Open it from Money → Stripe Connect in the sidebar.
Why it works this way
- Every payment is a direct charge on your own Stripe account. You are the seller on the buyer’s statement, Stripe bills its processing fee to you, and refunds and chargebacks come out of your Stripe balance.
- EventMann takes only its fee, which Stripe collects at the moment of the charge as an application fee. EventMann never holds your ticket money and cannot delay, schedule or release your payouts — see Payouts.
- Stripe collects and checks your identity and business documents. EventMann never sees them and never stores card numbers.
How to connect
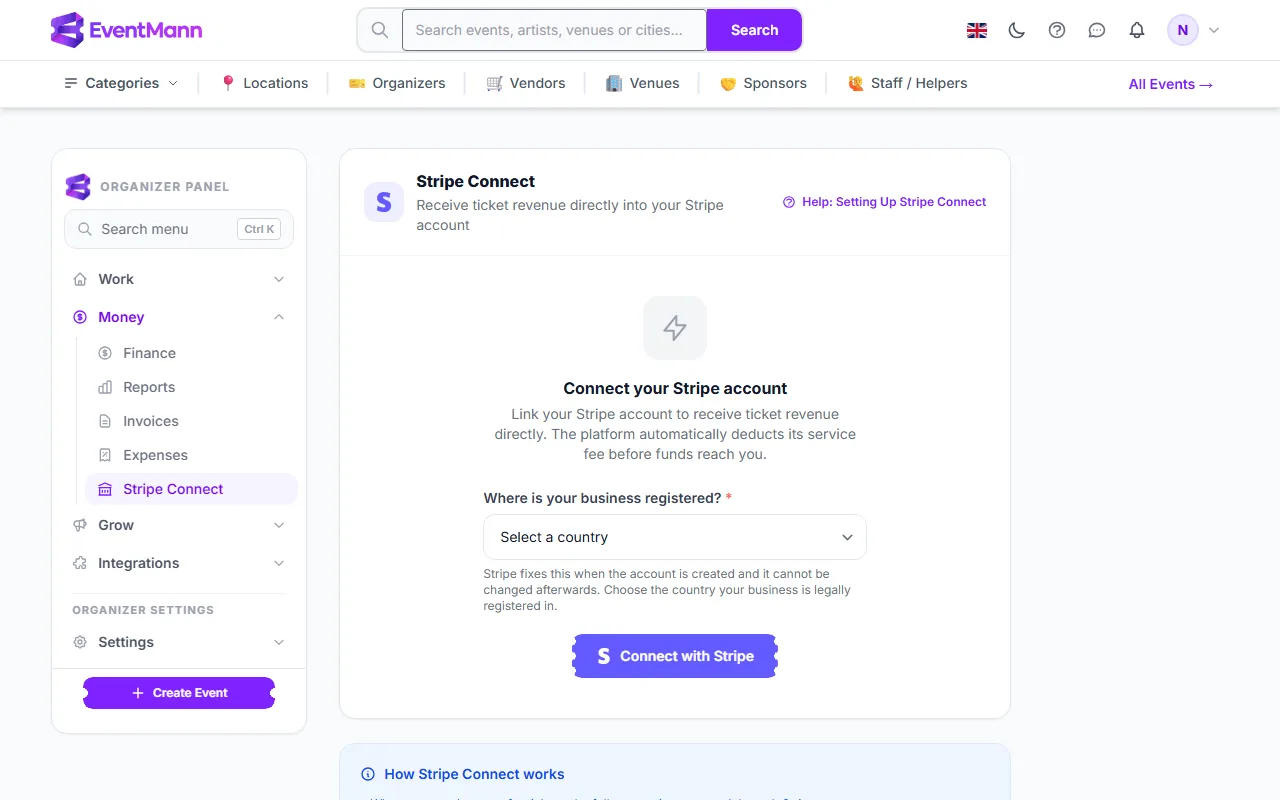
- Open Money → Stripe Connect.
- Choose the country your business is legally registered in ①. Stripe fixes this when the account is created, so pick carefully.
- Click Connect with Stripe ②. EventMann creates a Stripe account for you and sends you to Stripe’s own onboarding pages.
- On Stripe’s pages enter your business type, legal name and address, tax details and the bank account to be paid. Stripe may ask for an ID document.
- When you finish you return to EventMann. If Stripe still needs something, the page says Onboarding incomplete and lists what is missing.
Reading your account page
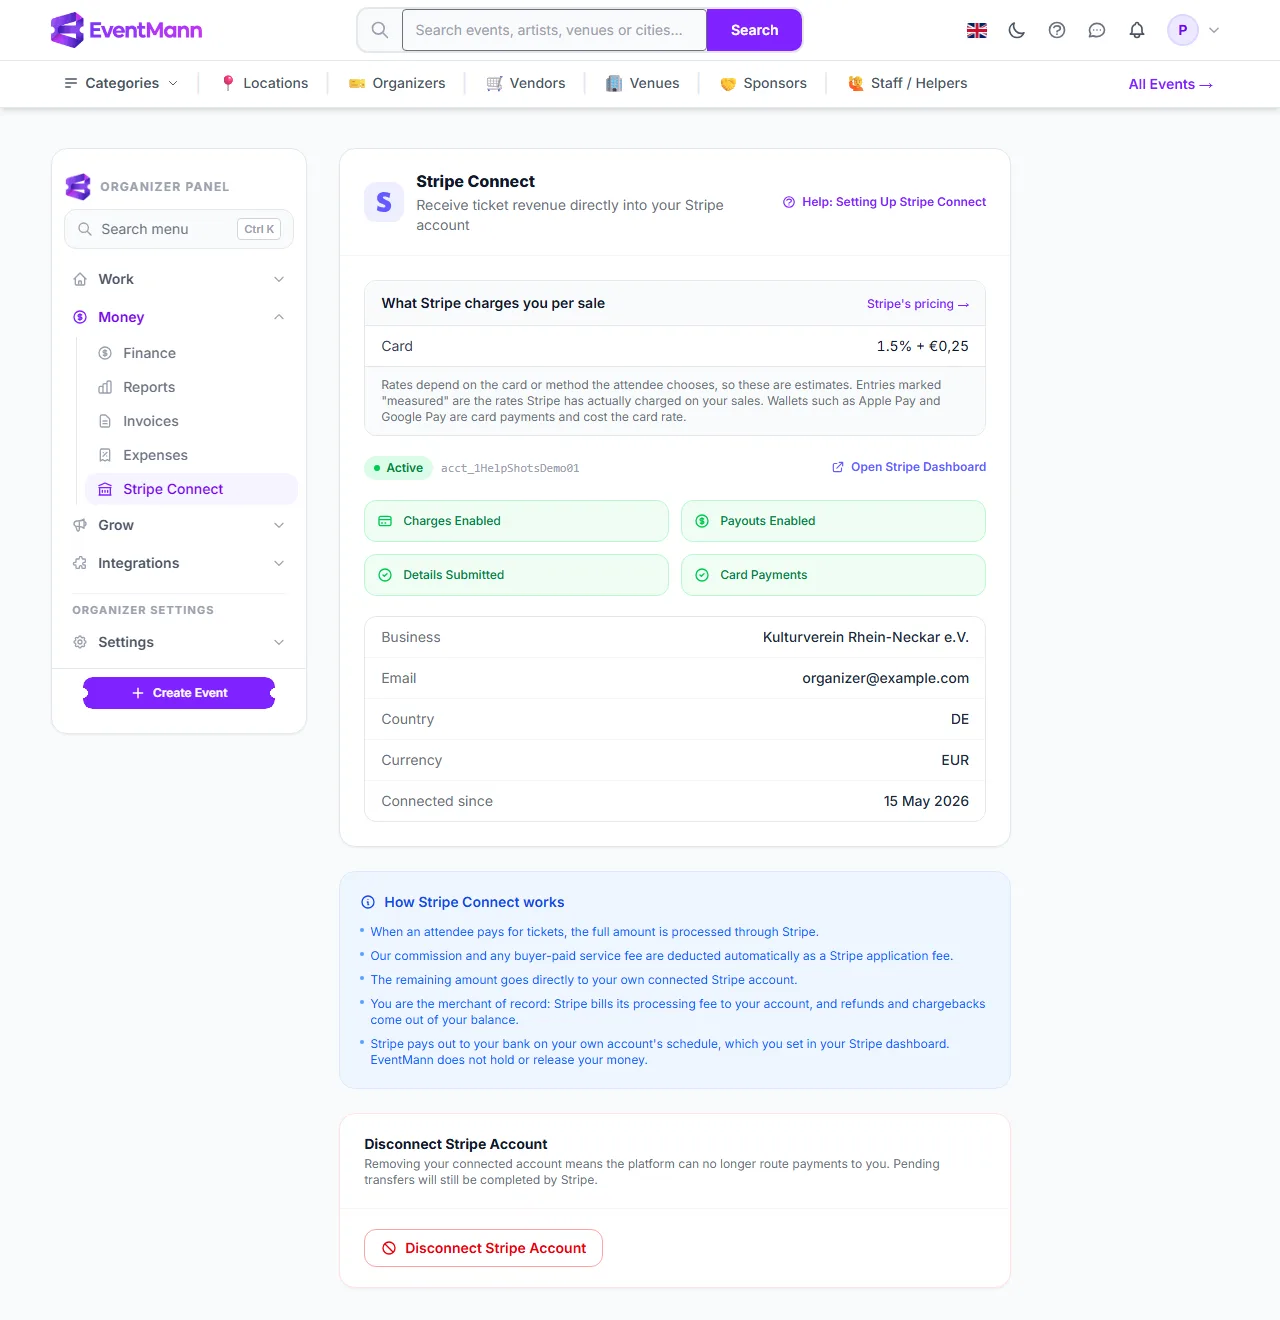
- The Active badge ① and your Stripe account number tell you the account can take payments. Until then you see Onboarding incomplete with a list under “Required before you can accept charges”, and a Continue Stripe Onboarding button that picks up where you stopped.
- Open Stripe Dashboard ② takes you to your own Stripe dashboard. That is where your balance, every payout, the payout schedule and disputes live.
- The four tiles ③ — Charges Enabled, Payouts Enabled, Details Submitted and Card Payments — should all be green. Card Payments is what lets EventMann charge on your account.
- What Stripe charges you per sale ④ lists Stripe’s rate for each payment method your account accepts. Rates depend on the method and country, so these are estimates; a row marked measured was fitted from charges Stripe really made on your sales.
- Disconnect Stripe Account ⑤ removes the link after a confirmation (see below).
Good to know
- Paid events need an active account. A paid event cannot go Live (or be scheduled) until the account can take charges, and checkout refuses a card payment otherwise. Free ticket types do not need Stripe.
- Disconnecting pauses your Live paid events, so they stop advertising a checkout that would fail. You get an email straight away with the time and IP address. Connecting again resumes your existing Stripe account where Stripe still allows it.
- If a banner says your account was set up under an older fee model, or lacks the card-payments capability, use its Reconnect Stripe button. Paid checkout stays off until you do; your old Stripe account remains yours.
- If Stripe has paused payouts to your bank, a banner says so. Selling continues and the money stays in your Stripe balance — fix the open requirements in your Stripe dashboard (Fix in Stripe opens them).
- Event pages show the same status under Checkout → Payments; the Manage link there brings you back here.
Troubleshooting
- “Onboarding incomplete” will not go away. Click Continue Stripe Onboarding again. Stripe’s links expire quickly, and this button asks for a fresh one.
- Verification looks stuck. Stripe tells you directly by email about unreadable or mismatched documents; EventMann does not see them.
- I cannot publish a paid event. The publish check names the reason; usually the account is not active yet, or was disconnected.
- The page offers “Connect your Stripe account” but I connected before. The account was disconnected. Press Connect with Stripe again.