




Import an existing roster
Organizer Guide
4 min read
Help articles may not be fully accurate — they can lag behind the app due to frequent updates and automated translation. If in doubt, please contact support.
On this page
If you already run your association from a spreadsheet, you can load that list instead of asking everyone to buy again. Open Grow → Membership, choose the Members tab and click Import a roster (it is also on the Settings tab). You first see exactly what would happen; nothing is written until you confirm.
Prepare the file
- A CSV file with these columns:
name,email,plan,starts_at,expires_at,member_id. Only name and email are required. - plan must match the name of one of your plans exactly (capitals do not matter). Leave it empty to use the plan you pick on the page.
- starts_at and expires_at are dates such as 2026-01-01. With neither, the member gets the plan’s season if it has one, otherwise one term from today. With only a start, the term runs from it; with only an end date, the term starts now. The end must be after the start.
- member_id is optional. Empty cells take the next number in your sequence; a number you supply must not be in use yet.
- At most 5,000 rows. Use Download the template to start from a correct file.
How to import
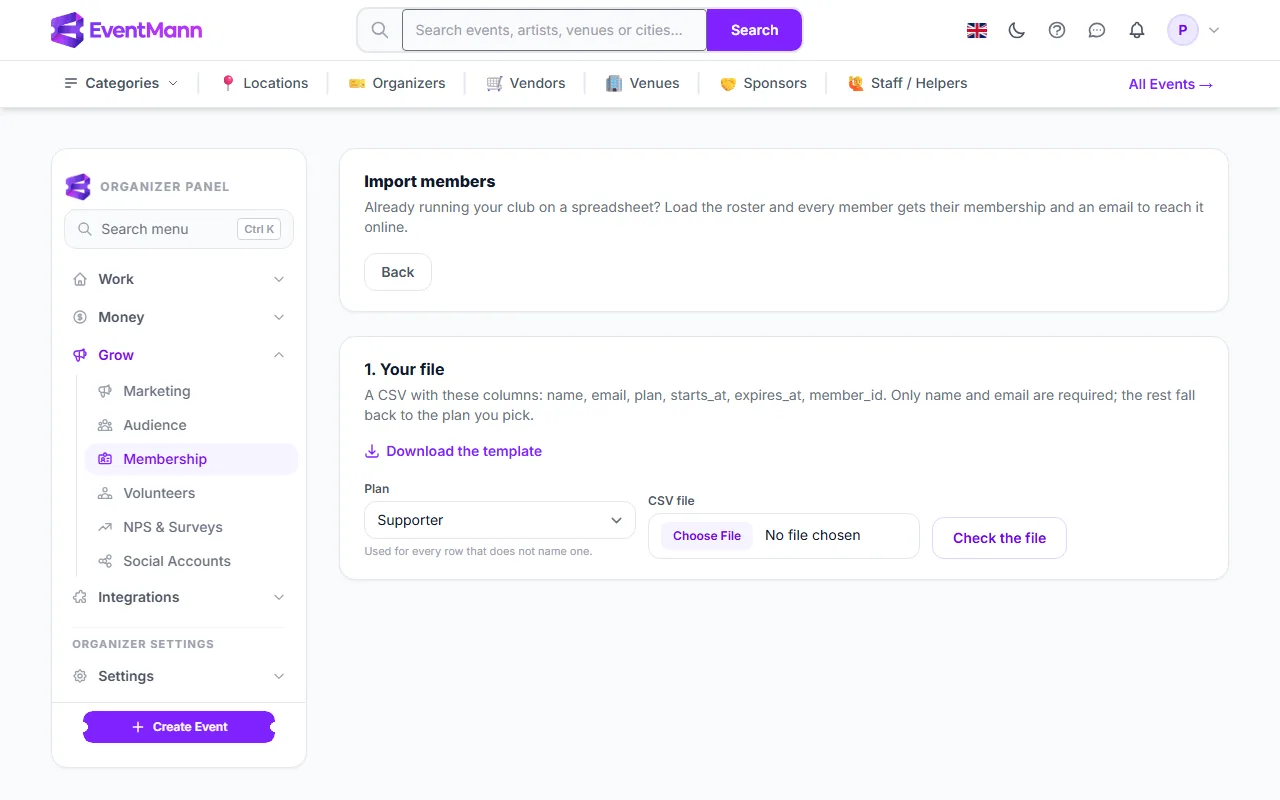
- Open the import page and click Download the template ① if you need it. Create at least one plan first — an imported member has to hold something.
- Choose the Plan ② used for every row that does not name one.
- Choose your CSV file ③.
- Click Check the file ④.
Review before anything is written
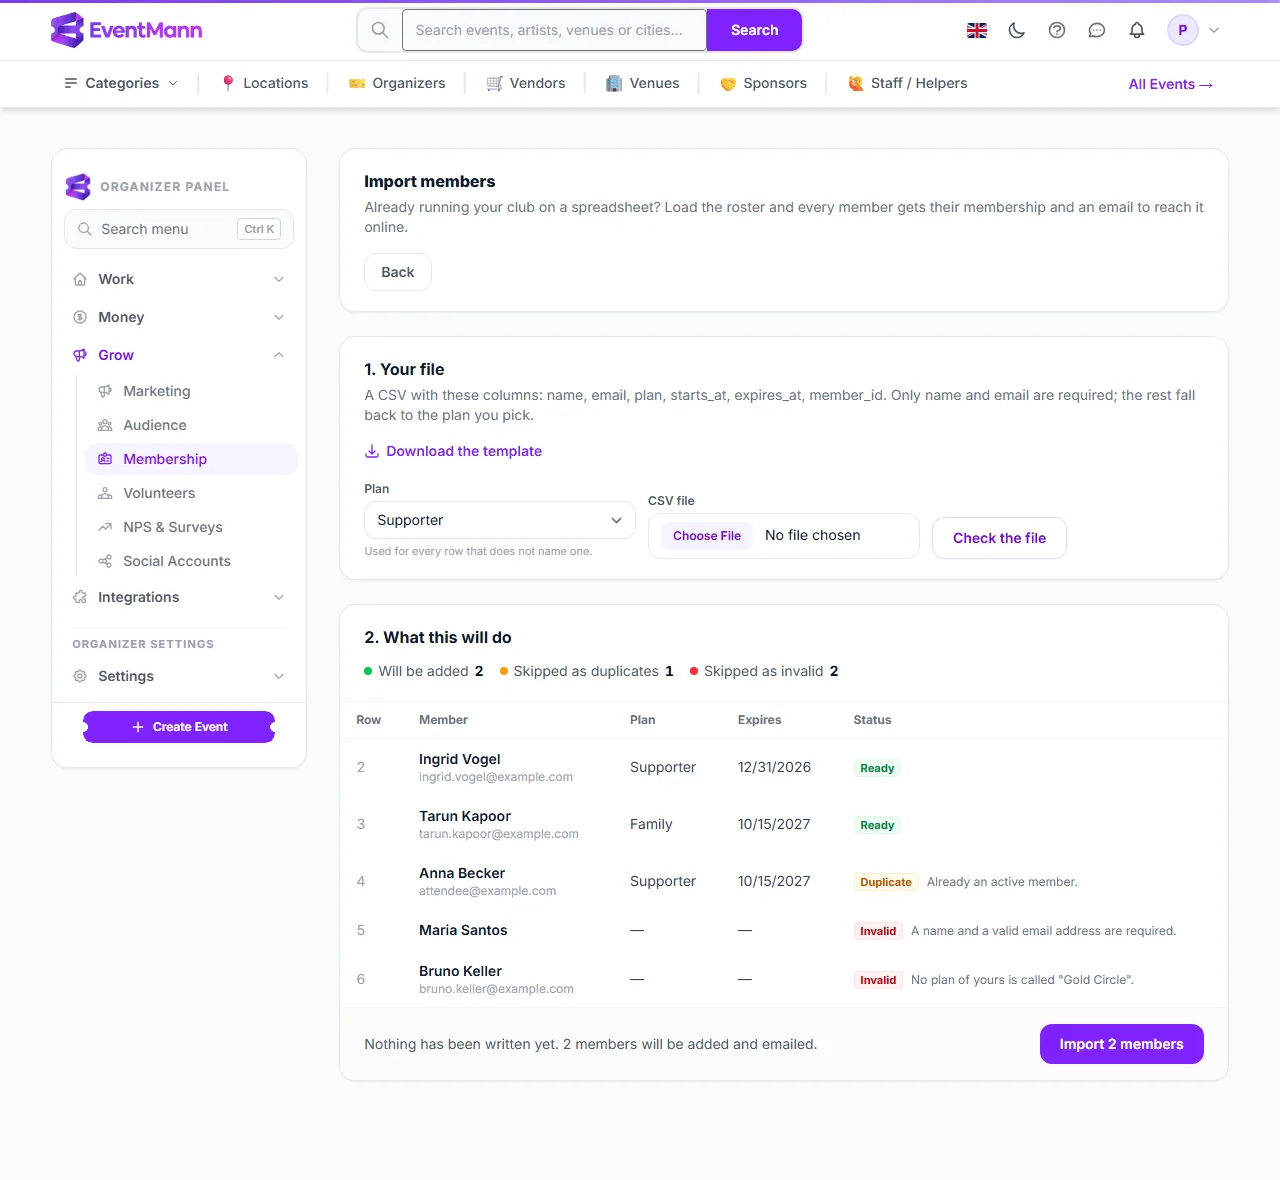
The page now lists every row with the line number, member, plan, end date and a status. The three counters above the list show how many rows will be added, skipped as duplicates and skipped as invalid.
- Choose a file again with ① if you want to correct it and re-check.
- Will be added ② counts the rows marked Ready.
- A Duplicate row ③ is skipped: the same address twice in the file, somebody who is already an active member, or a member ID that is taken. The reason is printed beside it.
- An Invalid row ④ is skipped: no name or no valid email, an unknown plan name, or a date that cannot be read.
- When it looks right, click Import 2 members ⑤ (the button shows the real count).
What happens when you confirm
- The members are active immediately, so the roster, the public count and the benefits are right straight away. They are marked imported, no money changes hands and no invoice is created.
- Every imported member gets an email. Someone with no account gets one made for them, plus a link to choose a password. Someone who already has an account is told to sign in instead; no password link is sent for an existing account.
- The result says how many members were imported and how many were emailed.
- The uploaded file is deleted as soon as it has been used, because a roster is personal data.
Good to know
- If you leave the page between checking and importing, the checked file may no longer be available. Upload it again.
- Importing never mails anybody during the check; only the final confirmation sends emails.
- The same person cannot be imported twice while their membership is active.
Troubleshooting
- “The file has no ‘email’ column.” The header row must contain
nameandemail. Re-export from your spreadsheet as CSV. - “The file could not be read.” Save it as CSV (UTF-8) and try again.
- Everyone is a duplicate. They already hold an active membership with you.
- An imported member cannot sign in. They already had an account, so they were told to sign in with their existing password. They can reset it on the sign-in page.