




Getting Started
Help articles may not be fully accurate — they can lag behind the app due to frequent updates and automated translation. If in doubt, please contact support.
On this page
Getting Started is the checklist that walks a new organizer account from signed-up to selling tickets. It is under Work → Getting started in the organizer sidebar, and its summary also appears as a purple bar across the top of every page and as a Setup progress card on your dashboard until you are done.
The steps
- Complete your organizer profile ② — required. Your name and a short bio must both be filled in (the bio is edited on your account page, Settings → Account).
- Set up your sending email (SMTP) — required. Connect your own mailbox so tickets, reminders and invoices reach attendees from your address. See Who your emails are sent from.
- Connect Stripe (for paid events) — optional. Needed only if you sell paid tickets; skip it if every event is free. See Setting Up Stripe Connect.
- Add your first venue — optional.
- Create your first event ③ — required, through the event wizard.
- Add ticket types — required. It ticks off once any one of your events has at least one ticket type.
- Publish your first event — optional, but nothing sells until you do. Any one of your events being Live is enough.
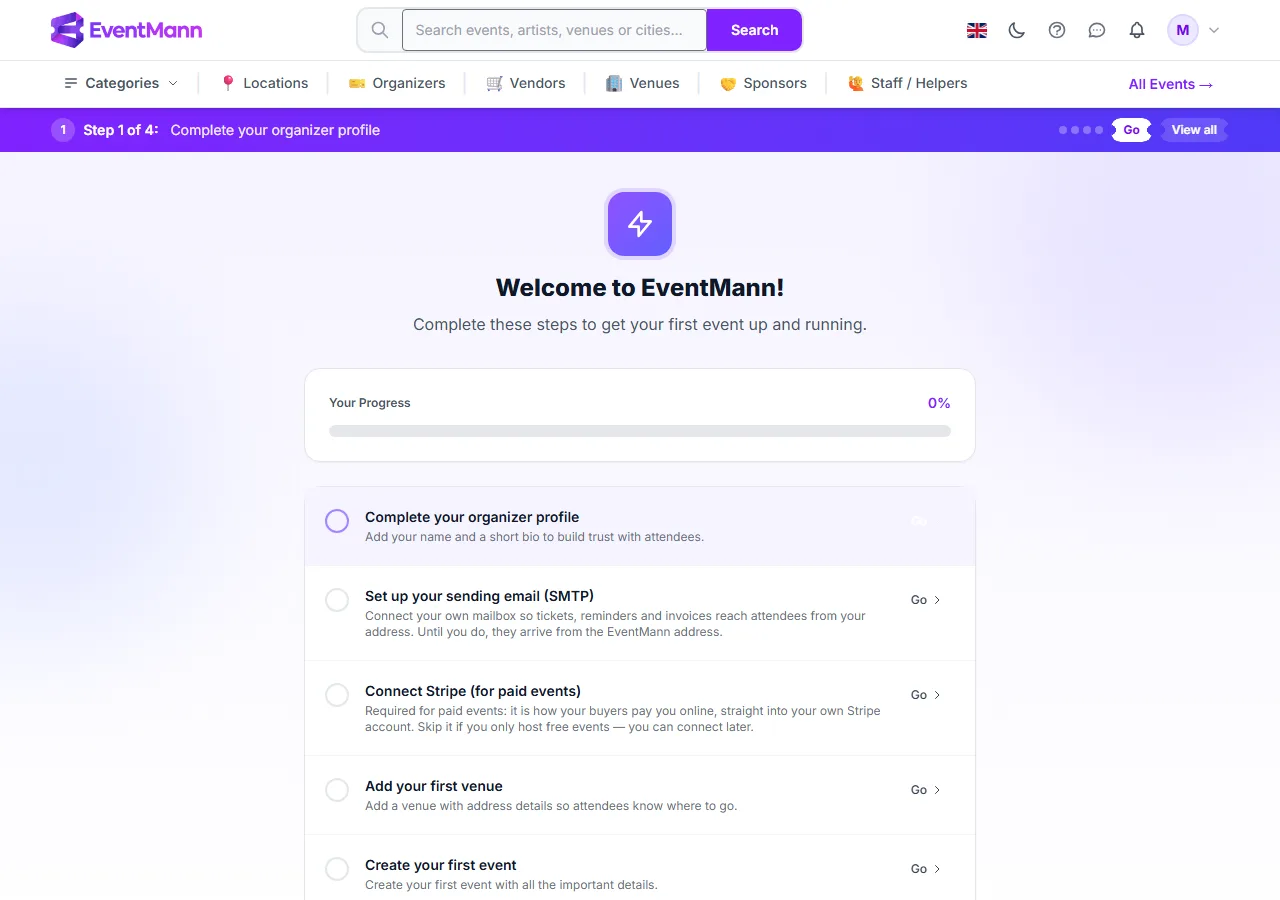
Each unfinished step shows a tip and a Go button that takes you to the right screen. Steps tick themselves off as soon as the matching data exists — there is nothing to tick by hand. Re-check my progress at the bottom runs the check again without reloading the page.
Dismissing the checklist
Use Dismiss Checklist ④ on the checklist page once every required step is done; the bar and the card then go away. Before that, the button does nothing. Skip to Dashboard simply leaves the page and keeps the checklist.
The purple bar and the dashboard card
Until the four required steps are done, the purple bar ① shows the step you are on (“Step 1 of 4”), a Go button for that step and View all, which opens this page. The dashboard shows the same progress as a card.
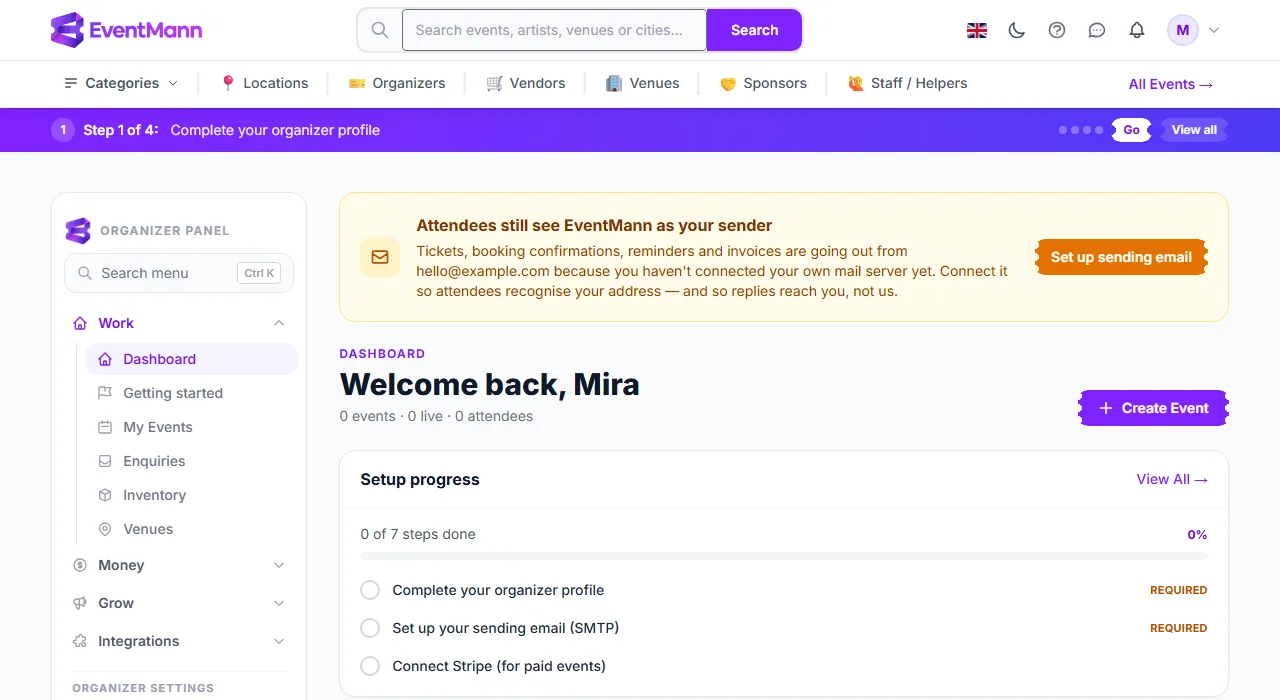
- The purple bar ① stays on every page while a required step is open.
- The Setup progress card ② lists the next three open steps with a Required label where it applies. Click View All for the full list.
Good to know
- A required step can come undone. If your mail connection stops working, “Set up your sending email” unticks, and a checklist you had dismissed comes back — your attendees would otherwise be receiving mail from the platform address without you noticing.
- “Set up your sending email” is the SMTP & Mail screen, not Email Preferences, which only controls which notifications you receive.
- Below the steps the page explains how your attendees pay (Stripe offers each buyer the methods available in their country and you never have to configure that) and lists the countries where organizers, vendors, venues, sponsors and staff can sign up. Attendees can buy from anywhere.
- Publishing has its own conditions — a verified email address, a connected Stripe account for paid events and any platform agreements that are waiting. See Event status: publishing, pausing, cancelling.
Troubleshooting
- I finished a step but it still shows open — the profile step needs a name and a bio; a name alone is not enough. The tickets step needs a ticket type actually attached to one of your events.
- I cannot dismiss the checklist — a required step is still open. The bar tells you which one.
- The purple bar came back — a required step has regressed, usually the mail connection. Open the step with Go.