




Event Overview
Help articles may not be fully accurate — they can lag behind the app due to frequent updates and automated translation. If in doubt, please contact support.
On this page
Event Overview is the page you land on when you press Manage on an event: status controls, the headline numbers, ticket sales and recent orders, and a readiness check. Everything else for the event is reached from the Manage sidebar on its left. Shortcut: g then v.
The header
- The link ① opens the Public page while the event is Live. For any other status it reads Preview and opens a private preview marked “Preview mode”, so the link never ends in a “not found”.
- Next to the status badge are the reversible moves: Schedule and Go Live on a Draft, Go Live on a Paused event, and Pause ② on a Live one. Pausing asks you to confirm.
- The Event status chip ③ opens the page for the irreversible moves, Cancel and Mark Complete. It only appears while one of them is available. See Event status: publishing, pausing, cancelling.
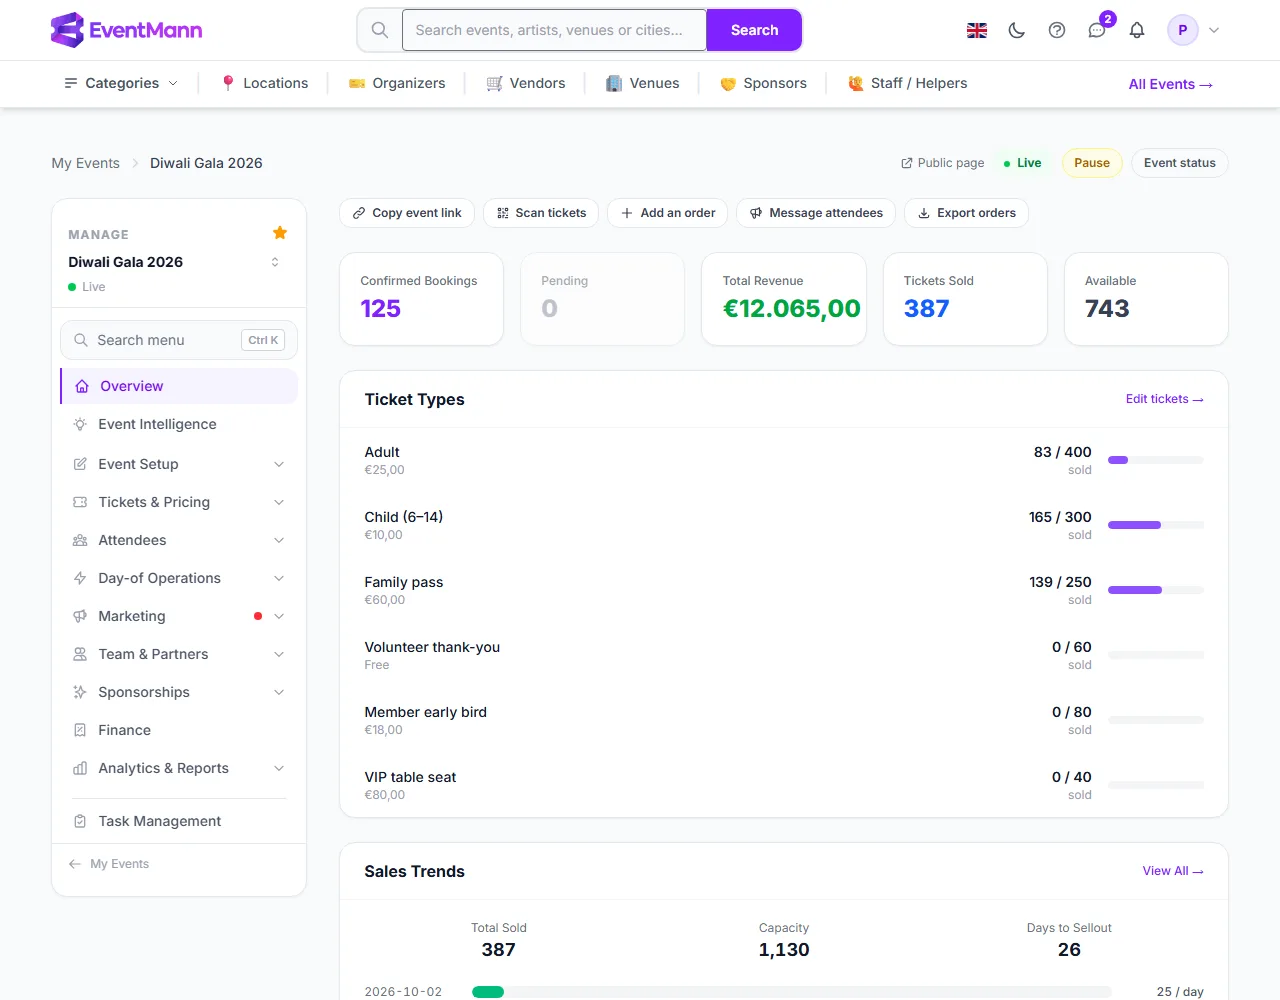
The buttons only show if you hold the publish permission for the event. A draft that cannot be published yet shows a notice above the figures that says why, with a link to the screen that fixes it.
Quick actions and the figures
- The row of quick actions ④ is filtered to what you may do: Copy event link, Scan tickets, Add an order, Message attendees and Export orders.
- The five cards ⑤ show Confirmed Bookings, Pending (greyed at zero), Total Revenue, Tickets Sold and Available. The first three link to the matching Orders view or report.
- Ticket Types ⑥ shows sold against capacity per type, with an Edit tickets link.
Further down: Sales Trends (total sold, capacity, estimated days to sell out and sales per day), Recent Orders with a link to the full list, and, from 24 hours before the doors until the event ends, an event-day panel that leads with the door: tickets admitted and checked in, and buttons for scanning and advanced check-in.
The readiness panel
The Event Intelligence panel is a checklist with a score. It is guidance, not a prediction of sales, and every unticked item links to the screen that fixes it.
- Open command center ① opens the full Event Intelligence page with every check and recommendation.
- The checks ② are Event basics (title, description, cover, dates), Venue & address, Ticket types, Checkout questions, Promo / discount codes, Planning tasks and Published. Basics, venue and tickets are the critical ones: until they are done the Ready to publish button next to the score does not appear.
- Time-sensitive recommendations appear under the score — for example orders waiting for payment, sales running slowly as the date nears, or a ticket type almost sold out — each with a one-click action.
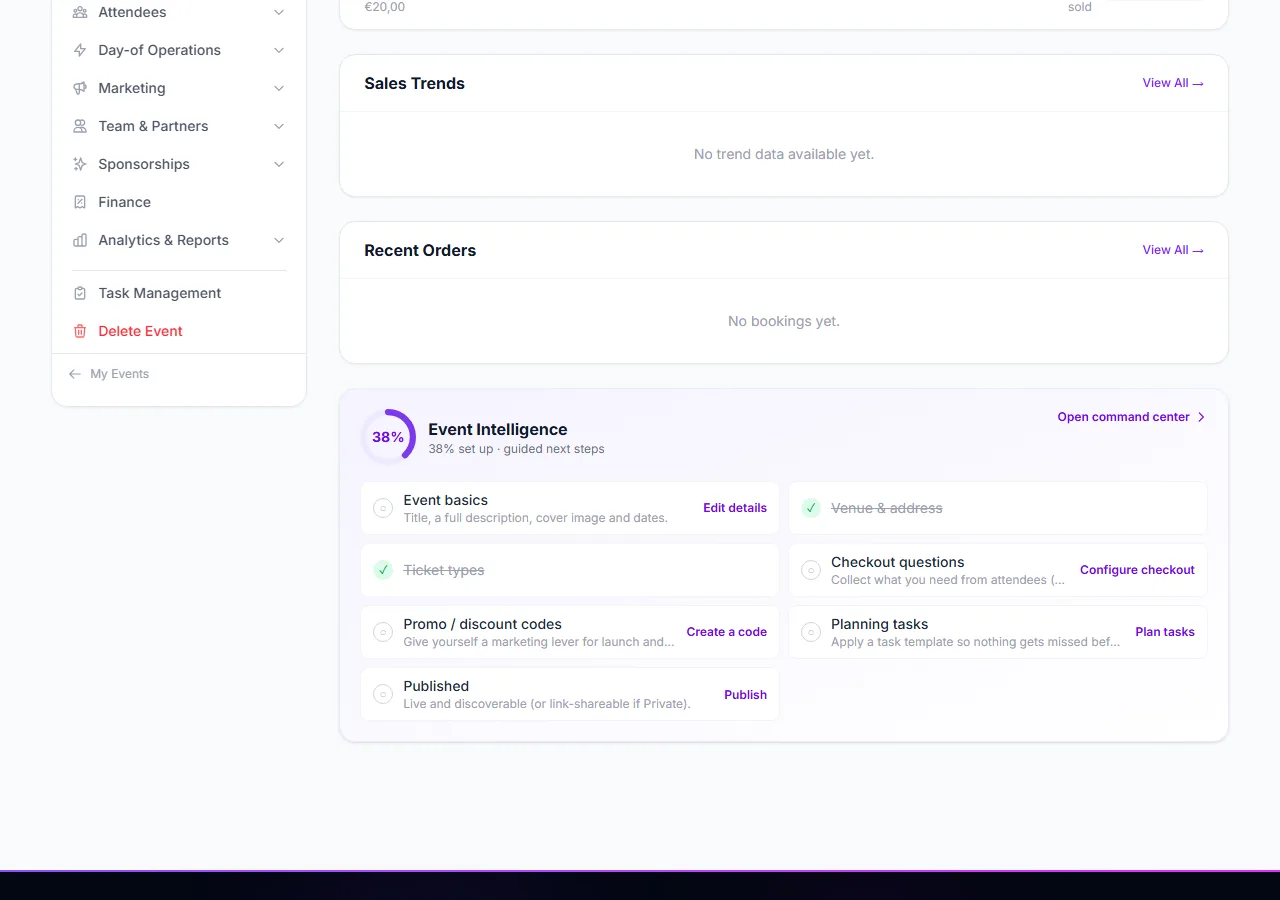
If AI features are switched on for you, an AI assistant is offered at the bottom of the page.
A draft’s Overview
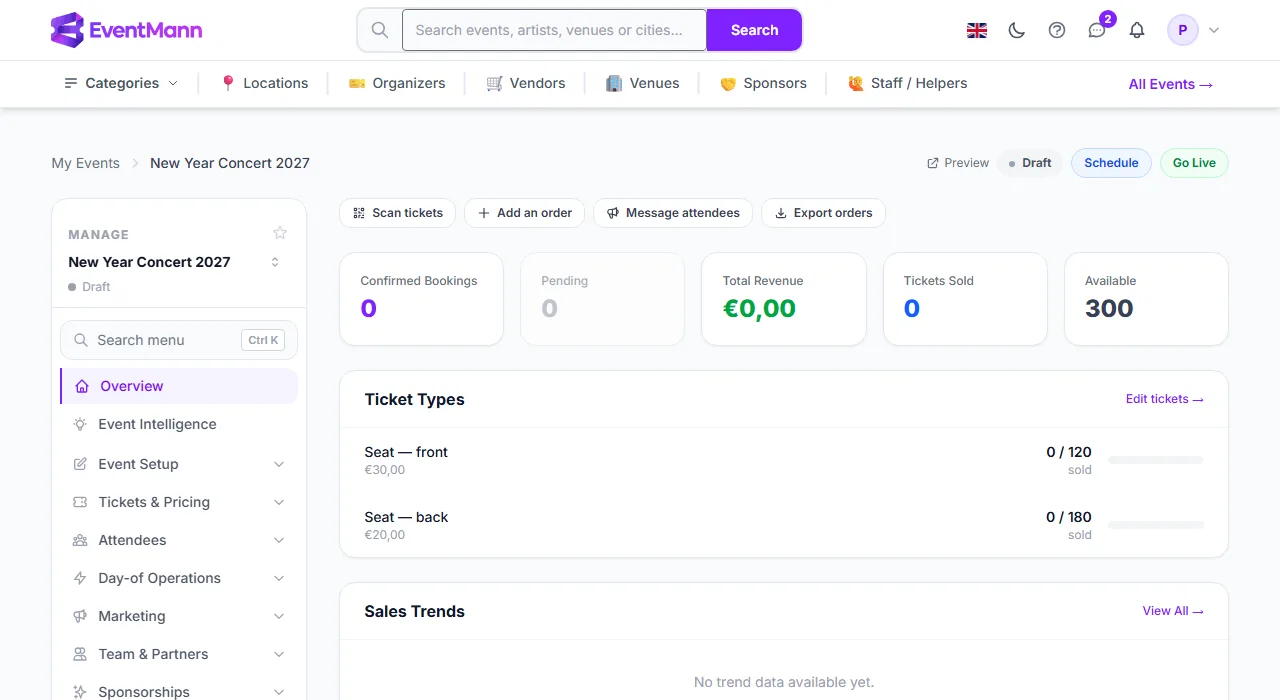
- Schedule ① publishes at a time you set on the Information tab; Go Live ② publishes now.
- Preview ③ shows the event page as attendees will see it, with booking switched off.
The Manage sidebar
The sidebar names the event, with a star to pin it and a switcher to move to another event (see Finding your way around). Its groups are Event Setup (Details & dates, Venue & seating, Translations), Tickets & Pricing, Attendees, Day-of Operations, Marketing, Team & Partners, Sponsorships, Finance, Analytics & Reports and Task Management. Delete Event appears only when the event can be deleted. A red dot or a number on a group means something inside it is waiting for you.
Good to know
- Revenue and bookings count only confirmed orders; pending ones are shown separately.
- Ticket counts agree with the Ticket Types page; sales of a ticket type that has since been removed are shown as their own line so that totals still add up.
- Team members see only the actions and menu rows their role allows.
Troubleshooting
- Go Live shows an error instead of publishing — the message names the cause: unverified email, a paid ticket without a connected Stripe account, cancellation terms not chosen for a paid event, or an agreement waiting.
- There is no lifecycle button, only the badge — your role does not include the publish permission.
- “Ready to publish” does not appear — one of the three critical checks is still open.