




Invoice design
Organizer Guide
3 min read
Help articles may not be fully accurate — they can lag behind the app due to frequent updates and automated translation. If in doubt, please contact support.
On this page
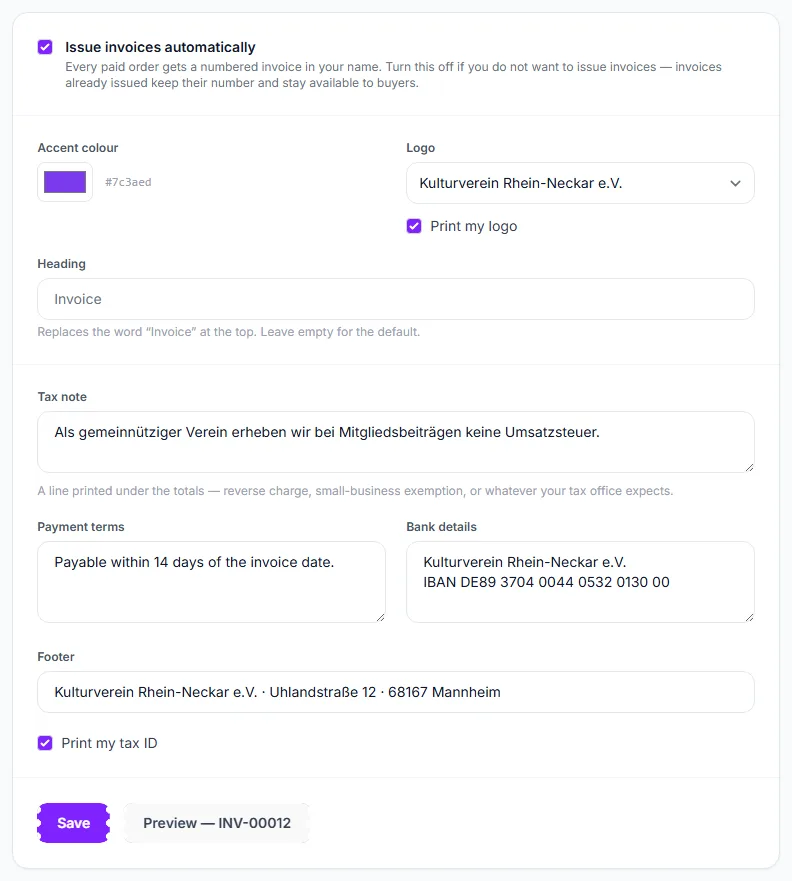
Invoice design decides how the invoices in your name look, and switches automatic invoicing on or off. Open Money → Invoices and choose the Invoice design tab. The amounts on an invoice always come from the order itself; this page only controls the presentation and the legal text around it.
What you can do here
- Turn Issue invoices automatically on or off.
- Choose the accent colour, whether your logo or your name is printed, and the heading.
- Add the legal lines your tax office expects: a tax note, payment terms, bank details and a footer.
- Preview the result on a real invoice.
How to set it up
- Tick Issue invoices automatically ① so that every paid order gets a numbered invoice in your name. Untick it to stop new invoices; ones already issued keep their number and stay available to buyers. Free orders never get one.
- Pick the Accent colour ② used for the heading and rules.
- Under Logo ③, choose between Print my logo (the logo you uploaded on your public profile) and your organization name as plain text. The tick box Print my logo switches the logo off entirely.
- Type a Heading ④ to replace the word “Invoice” at the top, or leave it empty.
- Write a Tax note ⑤ — for example a reverse-charge or small-business statement — printed under the totals.
- Fill in Payment terms ⑥, Bank details and a Footer if you want them printed.
- Tick Print my tax ID to show your tax number (it prints only if you entered one) and press Save ⑦.
Preview
Next to Save a link named Preview — INV-… opens your most recent invoice as a PDF drawn with the design as it is now. Until you have issued at least one invoice there is nothing to preview. Save first, then preview.
Where the other details come from
- Your name or company, address, country and tax ID are taken from Settings → Billing (Billing Information). Fill them in there.
- Everything you type here is printed exactly as written; EventMann does not add or translate legal wording for you. Which lines an invoice must carry differs by country, so check with your tax adviser.
Good to know
- A change to the design restyles how an invoice is drawn but never changes its figures or number. Invoices already emailed are not resent.
- Membership receipts are issued whether or not this switch is on, and use the same design. When the plan has a VAT rate, the invoice shows the VAT included in the price; use the Tax note for any statement your tax office expects on membership fees.
- Colours must be a valid hex colour; the colour picker always gives one.
Troubleshooting
- Buyers get no invoice. Issue invoices automatically is off, or the order was free.
- My logo does not print. The logo option must be set to Print my logo with the tick box on, and a logo must be uploaded on your public profile.
- My tax ID is missing. Add it under Settings → Billing and keep Print my tax ID ticked.